Welcome to your ultimate guide to renovating a bathroom in NZ, where we break down everything you need to know to transform your space smoothly and efficiently. Whether you’re aiming for a modern upgrade, a budget-friendly refresh, or a complete luxury overhaul, a well-planned bathroom renovation can boost your home’s value, improve functionality, and enhance daily comfort. But before you dive in, it’s important to understand costs, design considerations, permits, and whether to DIY or hire professionals. In this guide, we’ll walk you through realistic budgeting, design trends, essential renovation steps, common pitfalls to avoid, and expert tips tailored for Kiwi homeowners. By the end, you’ll have all the knowledge and confidence to create a bathroom that suits your lifestyle, meets NZ building regulations, and stays within your budget—so let’s get started!
Renovating a bathroom in NZ typically costs between $10,000 and $30,000, depending on the size, materials, and labor involved. A basic renovation with essential upgrades starts at around $10,000-$15,000, while a mid-range remodel with better-quality fixtures costs $15,000-$25,000. For a high-end luxury renovation, expect to pay $25,000 or more. Key factors affecting cost include plumbing changes, waterproofing-palmerston-north/”>roofing, tiling, and custom fittings. To save money, consider re-purposing existing fixtures, choosing cost-effective materials, and getting multiple quotes from local contractors.
- How Much Does It Cost To Renovate A Bathroom In NZ?
- Average Cost Breakdown For Small, Mid-Range, And Luxury Renovations
- Cost Variations Depending On Materials, Labor, And Fixtures
- Additional Expenses: Plumbing Upgrades, Waterproofing, And Council Permits
- Money-Saving Tips: Choosing Cost-Effective Materials, Repurposing Fixtures, And Getting Multiple Quotes
- Planning Your Bathroom Renovation
- Choosing A Bathroom Design That Works For You
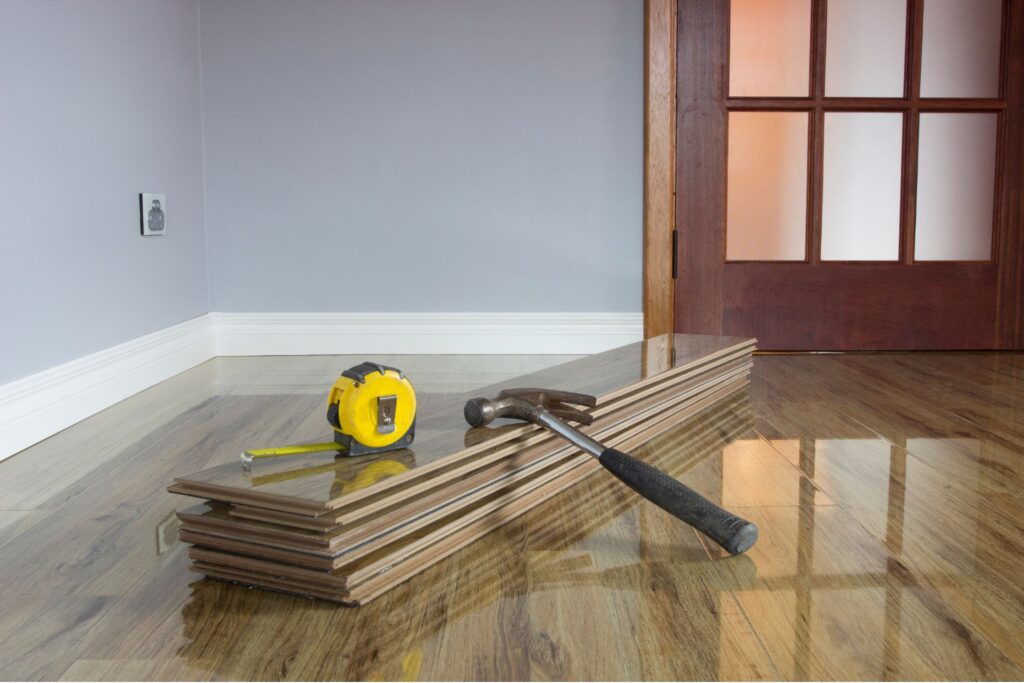
- Key Renovation Steps: From Demolition To Finishing Touches
- Step 1: Demolition & Removal – What To Expect, Safety Tips, And Disposal Rules In NZ
- Step 2: Plumbing & Electrical Updates – Hiring Registered Tradespeople For Compliance
- Step 3: Waterproofing & Tiling – Choosing Materials That Prevent Moisture Damage
- Step 4: Installing Fixtures & Fittings – Choosing The Right Vanity, Toilet, And Shower/Bath
- Step 5: Painting & Final Touches – Best Bathroom Paints And Adding Personality With Decor
- Common Bathroom Renovation Mistakes To Avoid
- Hiring The Right Tradespeople In NZ: Finding Experts You Can Trust
- DIY Bathroom Renovations: What’s Possible?
- How Long Does A Bathroom Renovation Take?
- FAQs: About Renovating A Bathroom In NZ
- Conclusion
- Find A Professional Bathroom Renovators Near You!
How Much Does It Cost To Renovate A Bathroom In NZ?
Renovating a bathroom in New Zealand is an exciting project, but it’s important to understand the costs involved before getting started. Whether you’re aiming for a basic upgrade, a mid-range remodel, or a high-end transformation, the price can vary significantly depending on materials, labor, plumbing, and other essential factors. Below, we break down the expected costs, additional expenses to consider, and practical ways to save money on your renovation.
Average Cost Breakdown For Small, Mid-Range, And Luxury Renovations
The cost of renovating a bathroom in NZ typically falls into three main categories.
1. Basic Bathroom Renovation ($10,000 – $15,000)
If you’re looking for an affordable way to refresh your bathroom without major structural changes, a basic renovation might be the best option. This price range usually includes.
- Replacing old fixtures with standard models (e.g., toilet, vanity, shower, or bath)
- Updating flooring and wall tiles with cost-effective materials
- A fresh coat of moisture-resistant paint
- Basic plumbing and electrical work if necessary
- Best for: Small bathrooms, rental properties, or homeowners on a tight budget who want to improve aesthetics and functionality without overspending.
2. Mid-Range Bathroom Renovation ($15,000 – $25,000)
A mid-range renovation provides a balance between affordability and quality, offering more design flexibility and durability. Expect to spend in this range if you want.
- High-quality fixtures and fittings (e.g., modern vanities, frameless shower screens)
- Upgraded plumbing and electrical work
- Stylish tiling and improved waterproofing
- Better ventilation and lighting
- Custom-built storage solutions
- Best for: Homeowners wanting a long-term upgrade with modern and durable features without breaking the bank.
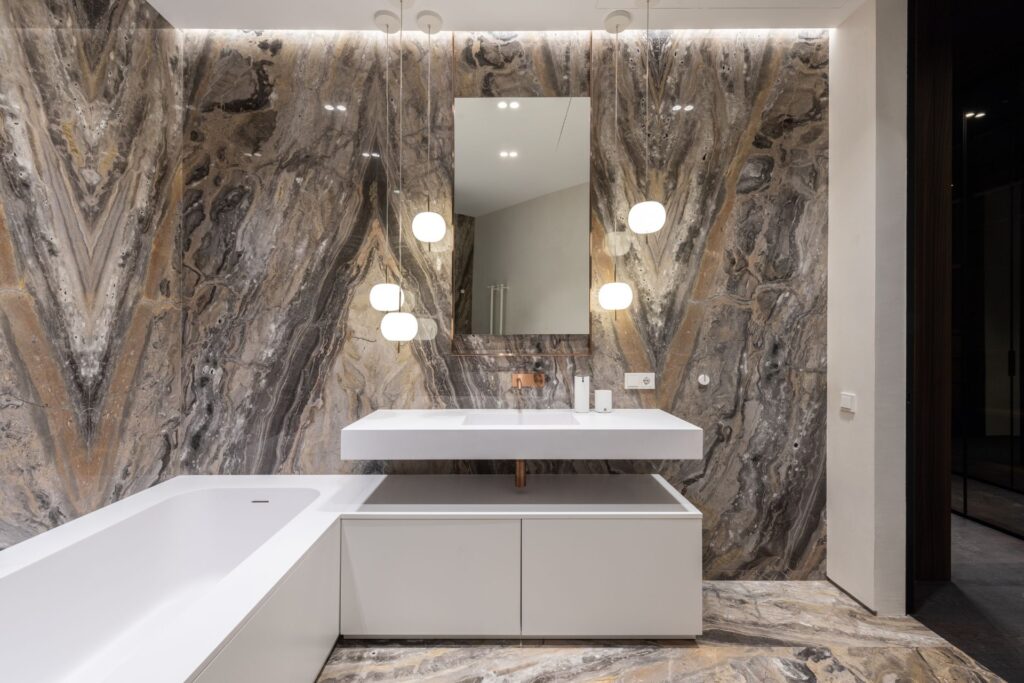
3. Luxury Bathroom Renovation ($25,000 – $40,000+)
For those who want a spa-like experience, a high-end renovation comes with premium materials, custom fittings, and the latest technology. This budget allows for.
- Designer fixtures, such as freestanding bathtubs and rainfall showers
- High-end materials like marble or stone tiles
- Smart bathroom technology (e.g., underfloor heating, digital shower controls)
- Bespoke cabinetry and custom lighting
- Complete structural changes, including reconfiguring layout and plumbing
- Best for: Homeowners investing in their forever home or looking to add significant value to their property with a high-end, fully customized bathroom.
Cost Variations Depending On Materials, Labor, And Fixtures
The final cost of your bathroom renovation can fluctuate based on several factors.
- Materials: The price of tiles, vanities, and shower screens varies depending on quality. For example, ceramic tiles are more affordable than natural stone, and acrylic showers are cheaper than glass enclosures.
- Labor: Tradespeople in NZ charge different rates based on experience and location. Plumbing and electrical work typically cost between $80 and $120 per hour, while tilers and builders may charge more for complex projects.
- Fixtures & Fittings: Opting for imported or designer brands can push up costs, while standard or local options tend to be more budget-friendly.
- Structural Changes: If you need to relocate plumbing or demolish walls, expect higher costs due to additional labor and compliance requirements.
Additional Expenses: Plumbing Upgrades, Waterproofing, And Council Permits
Beyond the core renovation costs, there are several hidden expenses that homeowners often overlook.
- Plumbing Upgrades: If your pipes are old or corroded, replacing them can add an extra $2,000 – $5,000 to your budget.
- Waterproofing: Essential for preventing leaks and moisture damage, waterproofing can cost between $1,000 – $3,000, depending on bathroom size.
- Council Permits & Compliance
- Minor cosmetic updates generally don’t require permits, but if you’re making structural changes or altering plumbing and drainage, you may need building consent, which can cost anywhere from $500 to $2,000.
- You must ensure your renovation meets the NZ Building Code to avoid future issues when selling your property.
Money-Saving Tips: Choosing Cost-Effective Materials, Repurposing Fixtures, And Getting Multiple Quotes
Renovating a bathroom doesn’t have to drain your wallet! Here are some smart ways to cut costs while still achieving a stylish and functional space.
1. Choose Cost-Effective Materials: Instead of expensive natural stone, opt for ceramic or porcelain tiles, which offer a similar look at a fraction of the price. Likewise, acrylic shower enclosures are more affordable than glass.
2. Repurpose Existing Fixtures: If your vanity, bathtub, or taps are still in good condition, consider refinishing or repainting them instead of buying new ones. This can save you hundreds or even thousands of dollars.
3. Keep The Existing Layout: Moving plumbing fixtures like the toilet or shower requires additional work and permits, significantly increasing costs. If possible, keep your bathroom layout the same to avoid unnecessary expenses.
4. Get Multiple Quotes From Professionals: Always compare prices by getting at least three quotes from licensed tradespeople. This ensures you’re getting the best deal without compromising quality.
5. Shop Around For Discounts: Check for sales, clearance items, or second-hand fixtures in online marketplaces and local suppliers. Many retailers offer bulk discounts on tiles and fittings, which can help reduce overall costs.
Bathroom renovations in NZ vary widely in cost, depending on your design goals, materials, and whether you hire professionals or do some tasks yourself. Whether you’re looking for a budget-friendly refresh or a high-end transformation, careful planning and smart spending can help you achieve your dream bathroom without overspending.
By understanding the cost breakdown, hidden expenses, and money-saving tips, you can renovate your bathroom with confidence, knowing exactly what to expect. If you’re ready to get started, start researching trusted tradespeople, compare quotes, and create a realistic budget that suits your needs.
Planning Your Bathroom Renovation
Renovating a bathroom is an exciting project, but proper planning is essential to avoid unexpected costs, delays, and compliance issues. From setting a realistic budget to understanding NZ building regulations, a well-thought-out plan ensures a smooth renovation process. Below, we’ll break down the key steps to help you create a functional, stylish, and compliant bathroom in New Zealand.
Setting A Realistic Budget And Planning Around It
Before starting any renovation, it’s crucial to establish a realistic budget that aligns with your goals and financial situation. Bathroom renovations in NZ typically range from $10,000 to $30,000, depending on factors like materials, labor, and design complexity.
Key Cost Factors To Consider
- Materials & Fixtures: Tiles, vanities, toilets, showers, and bathtubs significantly impact costs. Choosing mid-range or second-hand options can help cut expenses.
- Labour & Professional Fees: Hiring plumbers, electricians, tilers, and builders adds to the total cost, but ensures compliance with NZ building standards.
- Waterproofing & Plumbing: Essential for longevity and mold prevention, waterproofing and plumbing upgrades can cost between $2,000 and $5,000.
- Council Permits & Inspections: Depending on the extent of your renovation, you may need to factor in permit fees and compliance costs.
- Budget Tip: Always set aside at least 10-15% of your budget for unexpected costs, such as hidden water damage or structural repairs.
DIY Vs. Hiring Professionals: When To Save Money And When To Call The Experts
Many homeowners consider DIY renovations to save money, but not all tasks should be tackled without expert help. Here’s when you can DIY and when it’s best to hire professionals in NZ.
Tasks You Can DIY
- Painting & Decorating: Painting your bathroom walls and adding décor is an easy and cost-effective way to refresh the space.
- Installing Shelves & Storage: Adding floating shelves or vanity storage is a simple project that doesn’t require special skills.
- Replacing Fixtures: Changing taps, showerheads, or mirrors can be done with minimal plumbing knowledge.
- Minor Tiling Work: If you’re experienced, small tiling jobs like a backsplash or decorative accents can be a DIY project.
Tasks That Require A Professional
- Plumbing & Drainage Work: NZ law requires licensed plumbers for major plumbing modifications to ensure safety and compliance.
- Electrical Work: All electrical tasks, including installing heated flooring or new lighting, must be done by a licensed electrician.
- Waterproofing & Tiling: Waterproofing is regulated in NZ, and incorrect application can lead to leaks, mold, and expensive repairs.
- Structural Changes: Removing walls or changing the layout may require building consent and professional expertise.
- Expert Tip: If your renovation involves extensive plumbing, wiring, or waterproofing, hiring a professional will save time, ensure compliance, and prevent costly mistakes.
Importance Of Measuring Your Space And Planning For Plumbing & Electrical Work
One of the most overlooked aspects of bathroom renovations is proper measurement and layout planning. A well-thought-out layout ensures that fixtures fit correctly, plumbing connections align, and electrical points are in the right places.
Key Considerations When Measuring Your Space
- Bathroom Size & Layout: Take accurate measurements of walls, floors, and existing plumbing/electrical outlets to avoid costly design errors.
- Fixture Placement: Ensure your toilet, vanity, and shower/bath fit comfortably without crowding the space.
- Door & Ventilation Clearance: Plan for door swings, shower enclosures, and ventilation ducts to prevent future issues.
- Plumbing & Drainage Alignment: If keeping the same plumbing layout, you can save thousands on renovation costs.
- Planning Tip: Use graph paper or digital design tools to map out your bathroom layout before making any purchases.
Checking NZ Building Regulations And Council Permits
In New Zealand, bathroom renovations must comply with building codes and council regulations to ensure safety, waterproofing, and structural integrity. Before starting any major renovations, it’s important to check whether you need council approval or permits.
When Do You Need A Permit In NZ?
- If you’re making structural changes (e.g., moving walls, windows, or doors)
- If you’re altering plumbing or drainage systems
- If you’re adding or upgrading electrical wiring
- If you’re installing waterproofing systems
For official information, visit the New Zealand Building Code website or check with your local council to ensure compliance.
- Pro Tip: Hiring a licensed builder or plumber familiar with NZ regulations can help navigate the permit process smoothly and efficiently.
Planning your bathroom renovation in NZ requires careful budgeting, design decisions, and compliance with building regulations. Whether you’re handling small DIY tasks or hiring professionals for plumbing, electrical work, or waterproofing, ensuring everything is planned properly will save you time, money, and stress in the long run.
By taking the time to measure your space, research costs, and check NZ regulations, you’ll set yourself up for a successful, hassle-free bathroom renovation that enhances both functionality and home value.
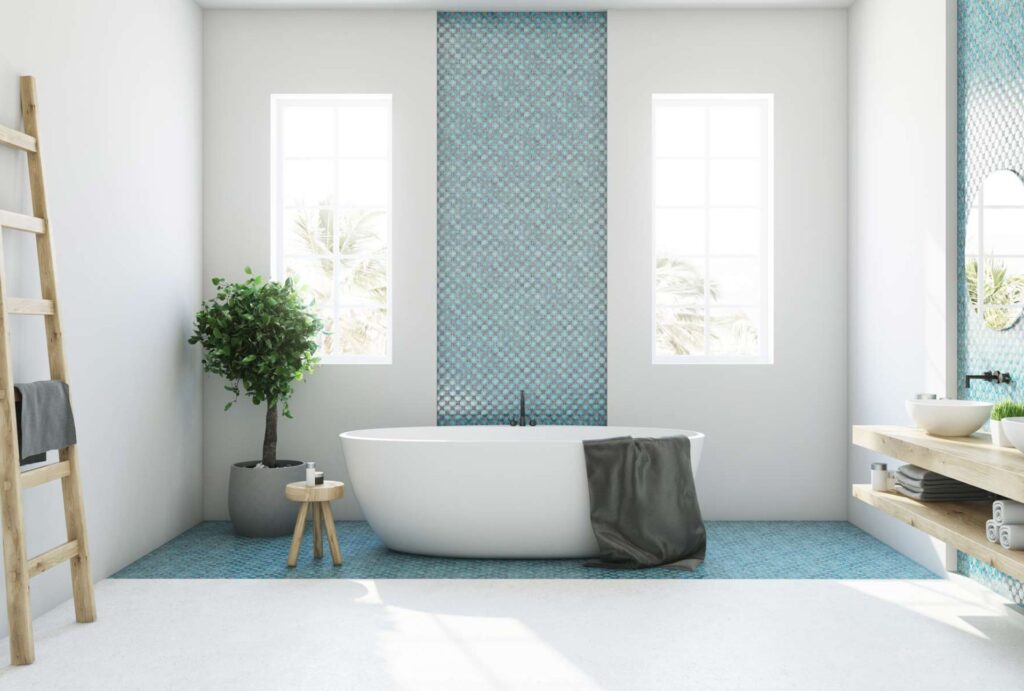
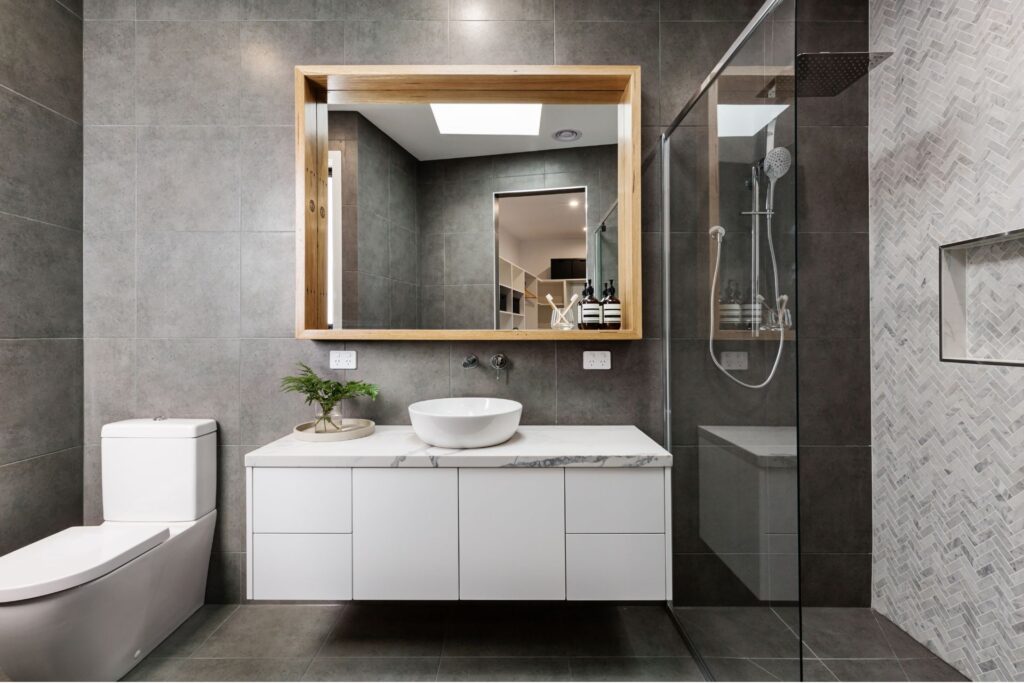
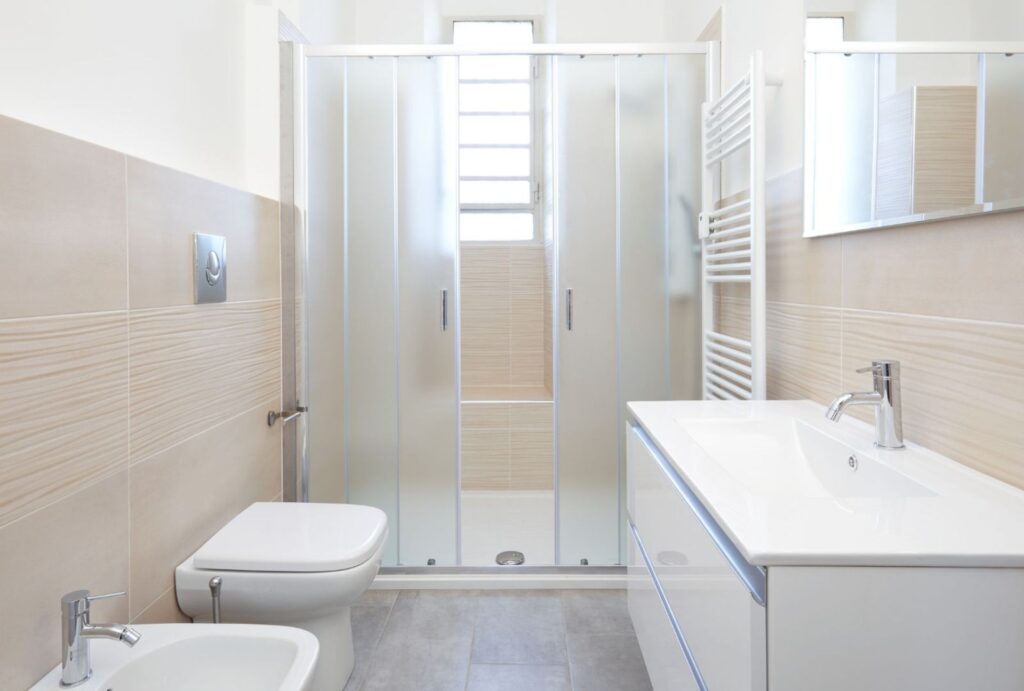
Choosing A Bathroom Design That Works For You
Renovating a bathroom is an exciting project, but selecting the right design is crucial to ensure both functionality and aesthetics. Your bathroom should reflect your personal style, cater to your daily needs, and be built with durable materials suited for New Zealand’s climate. Whether you’re working with a spacious ensuite or a compact bathroom, making smart design choices can help you maximize space, efficiency, and long-term value.
Popular Bathroom Styles In NZ
When it comes to bathroom renovations in New Zealand, homeowners are increasingly leaning towards modern, minimalist, classic, and coastal-inspired designs. Each style has its unique charm and functionality, catering to different tastes and lifestyles.
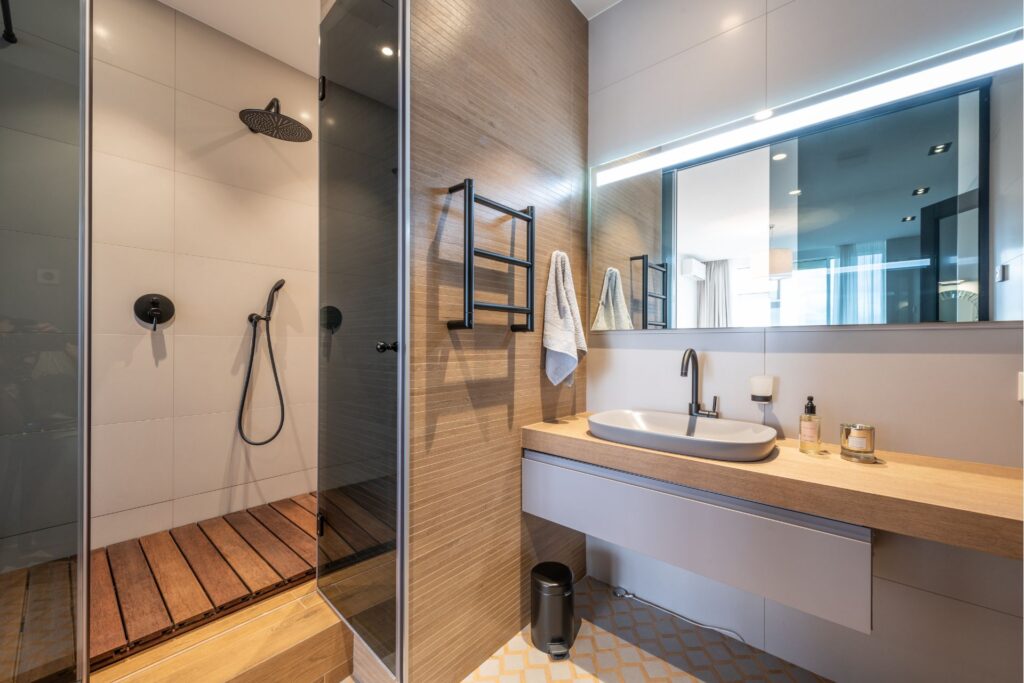
- Modern Bathrooms: Clean lines, sleek fixtures, and neutral color palettes define modern bathrooms. Think frameless glass showers, floating vanities, and matte black tapware for a contemporary, high-end look.
- Minimalist Bathrooms: Less is more in minimalist bathrooms. With hidden storage, soft tones, and uncluttered surfaces, this design maximizes space and creates a calming retreat.
- Classic Bathrooms: Traditional bathrooms often feature vintage elements, freestanding bathtubs, and elegant tile patterns. White subway tiles, wooden vanities, and gold or bronze tapware add timeless elegance.
- Coastal Vibes: Perfect for beachside homes, coastal bathrooms incorporate light tones, natural textures, and soft blues or greens. Whitewashed wood, open shelving, and stone accents enhance the relaxed feel.
Choosing the right style depends on your personal taste, home aesthetic, and budget. If you’re unsure, consider working with a bathroom designer to create a layout that suits your space and lifestyle.
Optimizing Small Spaces With Clever Storage, Mirrors, And Lighting
If you have a small bathroom, strategic planning can make it feel more open, functional, and stylish. Here are some expert tips to maximize space without sacrificing design.
- Smart Storage Solutions: Utilize floating shelves, wall-mounted cabinets, or built-in niches to store essentials without cluttering the space. Consider installing a vanity with drawers instead of doors for easier access.
- Use Mirrors To Create Depth: A large mirror or mirrored cabinets can visually expand the room and reflect light, making it feel brighter and more spacious.
- Opt For A Walk-In Shower: Swapping a traditional bathtub for a walk-in shower with clear glass doors can create the illusion of more space.
- Maximize Vertical Space: Install towel racks, hanging plants, or tall storage units to make use of the walls.
- Layer Your Lighting: A combination of ceiling lights, vanity lighting, and LED strips can enhance the ambiance and make the room appear larger.
A well-planned small bathroom can feel just as luxurious and functional as a larger one—it’s all about smart design choices.
Best Flooring And Wall Materials For NZ’s Humidity And Climate
New Zealand’s climate, with its varying humidity levels, requires moisture-resistant materials to prevent mold, mildew, and water damage. When selecting flooring and wall materials, durability should be a top priority.
Best Flooring Options
- Porcelain Or Ceramic Tiles: Highly durable, water-resistant, and available in a variety of styles.
- Vinyl Flooring: A budget-friendly alternative that is waterproof and comfortable underfoot.
- Natural Stone: Adds a luxurious touch but requires sealing to prevent water absorption.
Best Wall Materials
- Waterproof Paint: Ideal for high-humidity areas; opt for mold-resistant formulas.
- Large-Format Tiles: Reduces grout lines and minimizes water penetration.
- Acrylic Wall Panels: A low-maintenance, seamless option that is easy to clean.
By investing in the right materials, your bathroom will remain stylish and durable for years to come.
Tips For Eco-Friendly Renovations: Water-Saving Fixtures, LED Lighting, And Sustainable Materials
Sustainability is becoming a major priority for NZ homeowners. An eco-friendly bathroom renovation not only helps reduce water and energy consumption but also lowers utility bills in the long run. Here’s how you can create a greener bathroom.
- Install Water-Saving Fixtures: Look for WELS-rated taps, dual-flush toilets, and low-flow showerheads to minimize water waste.
- Opt For LED Lighting: LED bulbs use up to 80% less energy than traditional lighting and last significantly longer.
- Choose Sustainable Materials: Bamboo vanities, recycled glass tiles, and reclaimed wood are excellent eco-conscious choices.
- Improve Ventilation: Proper airflow reduces mold growth and excess moisture, promoting a healthier indoor environment.
Eco-friendly bathrooms not only contribute to a sustainable future but also create a healthier, more energy-efficient home.
Choosing the right bathroom design in New Zealand requires balancing style, functionality, and durability. Whether you prefer a modern, classic, or coastal vibe, incorporating smart storage, high-quality materials, and sustainable solutions will ensure your bathroom is both visually appealing and practical. By planning ahead and selecting the best fixtures, lighting, and layout, you can create a space that adds long-term value and enhances your daily routine. Ready to start your bathroom renovation journey? Let’s make your dream bathroom a reality.
Key Renovation Steps: From Demolition To Finishing Touches
Renovating a bathroom in NZ is an exciting but detailed process that requires careful planning and execution. From tearing out old fixtures to adding the finishing decor, each step plays a crucial role in achieving a functional and aesthetically pleasing space. Below, we’ll walk you through the five key renovation steps, offering expert insights, safety tips, and best practices to ensure your project runs smoothly.
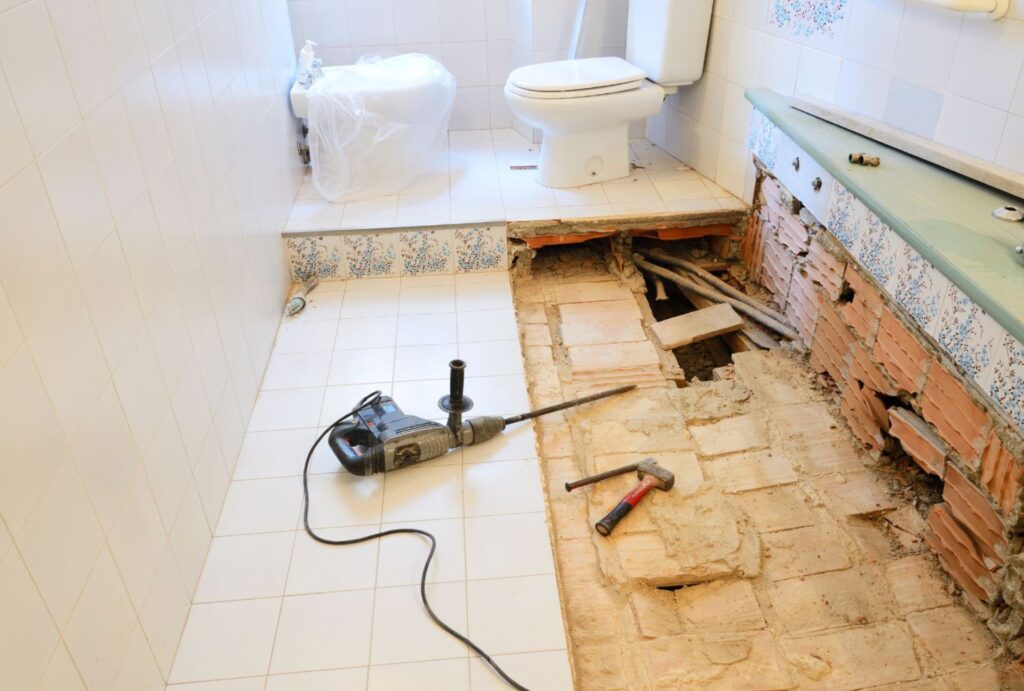
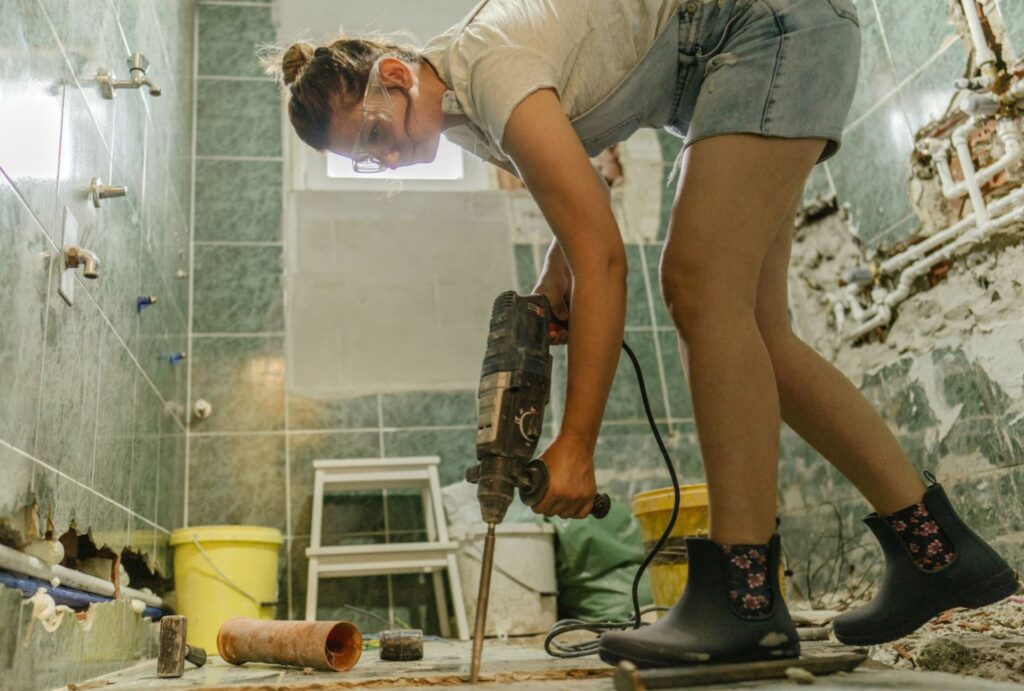
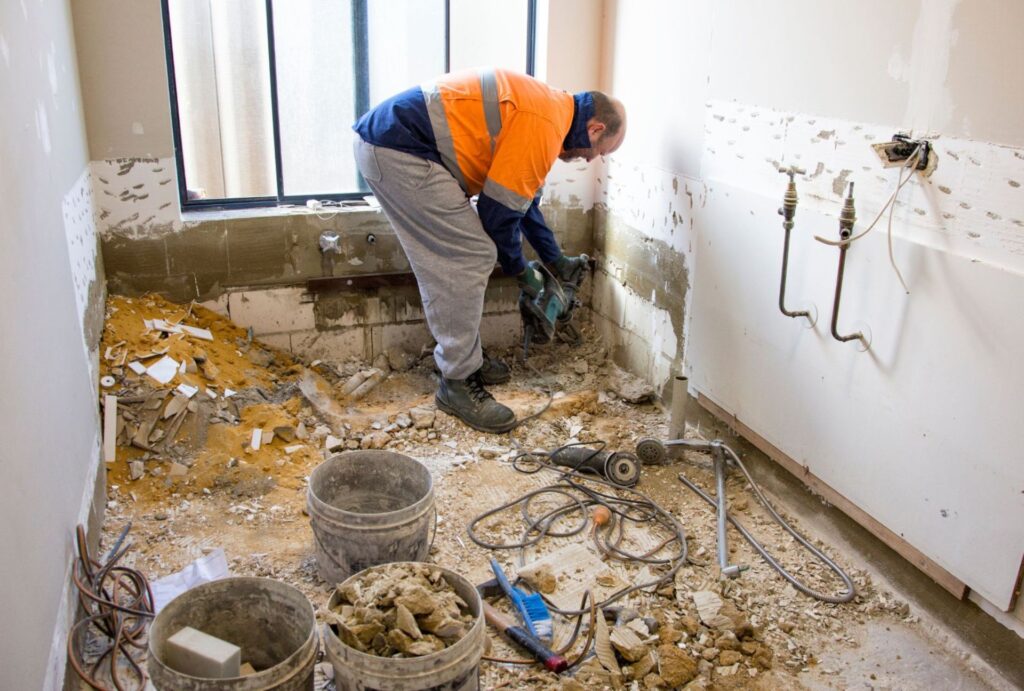
Step 1: Demolition & Removal – What To Expect, Safety Tips, And Disposal Rules In NZ
The first step in any bathroom renovation is demolition, which involves removing old fixtures, tiles, and potentially even walls. Before you start knocking things down, here’s what you need to know.
What To Expect
- Depending on the complexity, demolition can take a few days to a week.
- Removing tiles, sinks, showers, and cabinetry requires careful handling to prevent damage to plumbing and electrical systems.
- If structural changes are involved, a licensed builder may be required.
Safety Tips
- Wear protective gear such as gloves, safety goggles, and a dust mask.
- Turn off the water and electricity before removing any fixtures.
- Use the right tools, such as a sledgehammer, crowbar, and power drill, for efficient removal.
- Be mindful of asbestos, especially in older homes, and get professional testing if needed.
Disposal Rules In NZ
- Waste disposal regulations vary by local council, so check their guidelines before dumping renovation debris.
- Many materials, like old tiles and wood, can be recycled at specialized facilities.
- Consider hiring a skip bin for larger renovations to ensure responsible waste management.
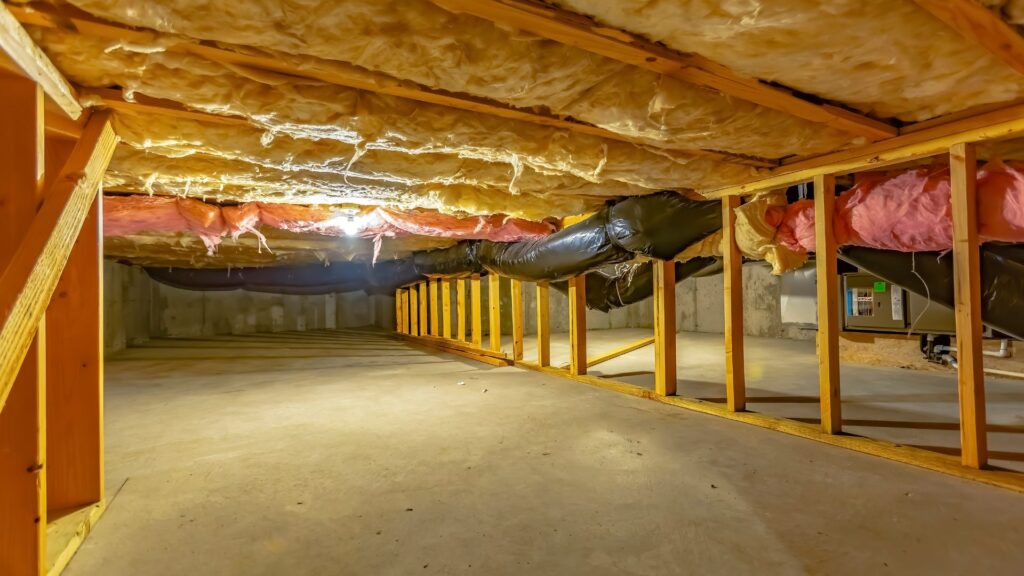
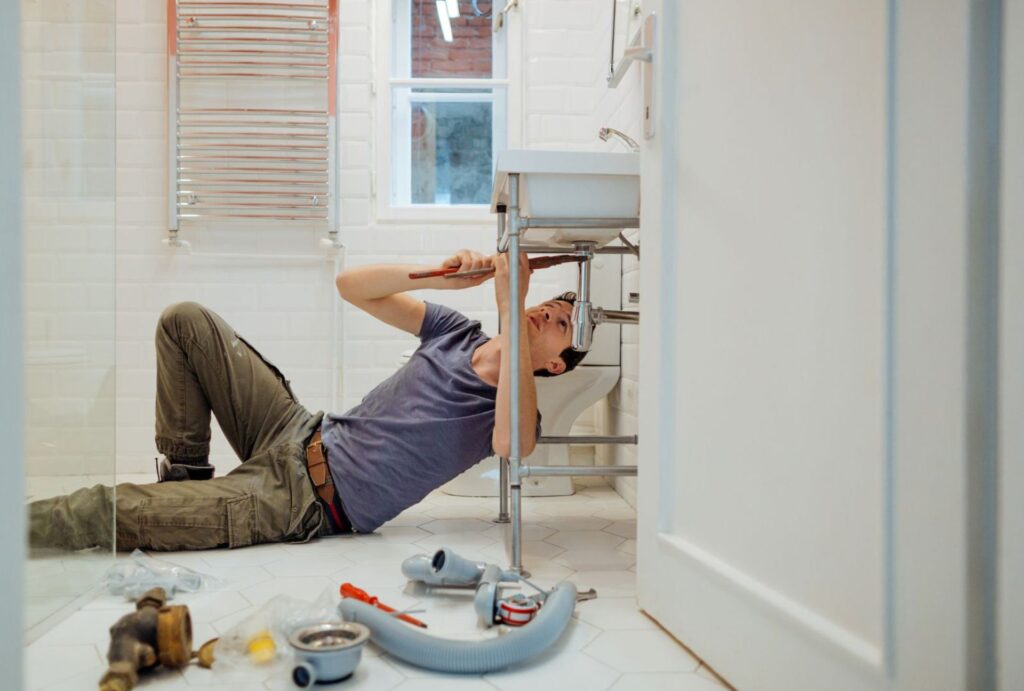
Step 2: Plumbing & Electrical Updates – Hiring Registered Tradespeople For Compliance
Once the old fixtures are removed, it’s time to update plumbing and electrical systems. In New Zealand, these tasks must be performed by licensed professionals to comply with building codes and safety standards.
Plumbing Updates
- If you’re moving sinks, toilets, or showers, the plumbing layout will need to be modified.
- Installing high-quality pipes and fittings prevents leaks and future maintenance issues.
- Consider upgrading to water-efficient taps and showerheads to save on water bills.
Electrical Updates
- If you’re adding new lighting, heated towel rails, or power outlets, an electrician is required.
- Bathrooms require moisture-proof and RCD-protected electrical outlets for safety.
- Good lighting is key—consider LED downlights or vanity lights for a bright, functional space.
Hiring Professionals
- Always choose registered plumbers and electricians to ensure compliance with NZ safety standards.
- Get multiple quotes to compare pricing and services.
- Request a Certificate of Compliance after work is completed.
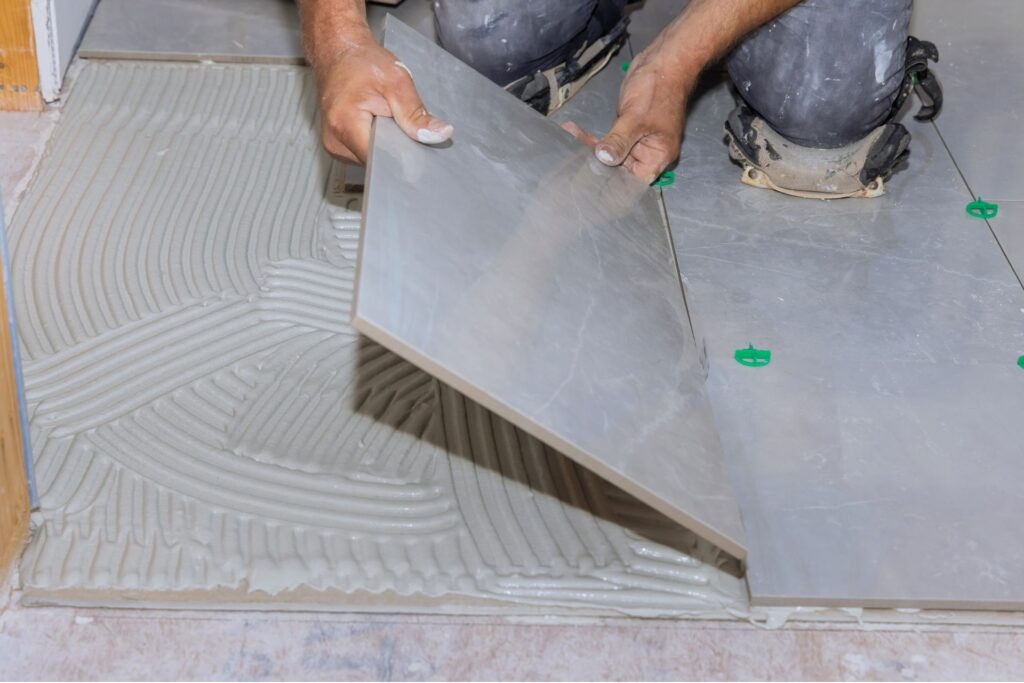
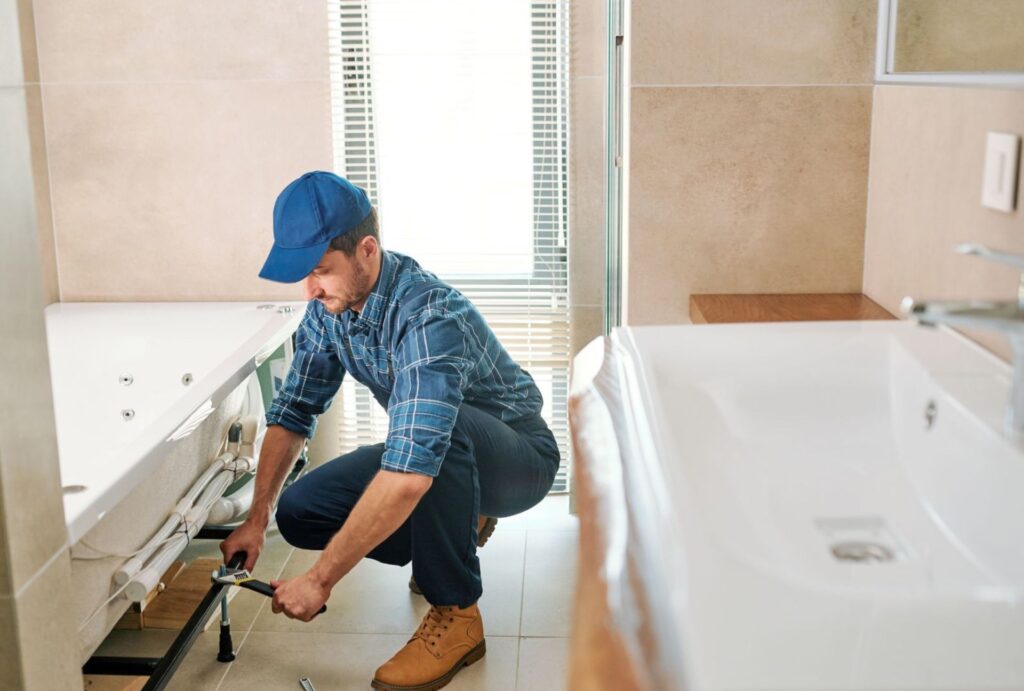
Step 3: Waterproofing & Tiling – Choosing Materials That Prevent Moisture Damage
Waterproofing is one of the most important steps in a bathroom renovation. Poor waterproofing can lead to mold, leaks, and structural damage.
Waterproofing Essentials
- In NZ, waterproofing must meet Building Code requirements and be performed by a certified professional.
- A waterproof membrane is applied under tiles to prevent moisture penetration.
- Showers, floors, and wall junctions require extra sealing to ensure long-term durability.
Choosing The Right Tiles
- Porcelain tiles are ideal for wet areas as they are water-resistant and durable.
- Matte-finish tiles provide better grip, reducing the risk of slipping.
- Large tiles create a modern look and require fewer grout lines, making cleaning easier.
- Consider using epoxy grout, which is resistant to water and stains.
Pro Tip
- Opt for neutral colors for a timeless look, or add texture and patterns for a stylish statement.
Step 4: Installing Fixtures & Fittings – Choosing The Right Vanity, Toilet, And Shower/Bath
Once the waterproofing and tiling are complete, it’s time to install the core bathroom fixtures.
Selecting The Right Vanity
- Choose a floating vanity for a sleek look and easy floor cleaning.
- Opt for soft-close drawers to enhance durability.
- Consider custom-built vanities for small or uniquely shaped bathrooms.
Picking The Best Toilet
- Wall-mounted or concealed cistern toilets save space and look modern.
- Dual-flush systems help conserve water.
- Ensure the toilet placement aligns with existing plumbing to avoid extra costs.
Choosing A Shower Or Bath
- Walk-in showers with frameless glass panels create a modern, spacious feel.
- Freestanding baths add a luxurious touch but require sufficient space.
- If opting for a combo bath/shower, make sure it’s practical for your household needs.
Pro Tip
- Install water-saving fixtures to reduce your water bill and environmental impact.
Step 5: Painting & Final Touches – Best Bathroom Paints And Adding Personality With Decor
Painting and decorating bring the entire renovation together, adding a fresh, polished look to your bathroom.
Choosing The Best Paint For Bathrooms
- Use mold-resistant, moisture-proof paint to prevent peeling and damage.
- Satin or semi-gloss finishes work best as they resist moisture and are easy to clean.
- Light colors like white, soft greys, or pastel tones make small bathrooms feel bigger.
Final Touches To Enhance Your Bathroom
- Mirrors: A large mirror can make the space feel more open and bright.
- Storage Solutions: Floating shelves, recessed cabinets, and stylish baskets keep things tidy.
- Greenery: Adding plants like fern or peace lilies can improve air quality and aesthetics.
- Lighting: Install LED strip lighting or backlit mirrors for a modern, sophisticated feel.
Pro Tip
- Choose quality paint designed for bathrooms to extend the life of your renovation.
Renovating a bathroom in NZ requires careful planning, expert execution, and attention to detail. From demolition to finishing touches, each step plays a crucial role in creating a space that is functional, stylish, and built to last. By working with licensed professionals, selecting high-quality materials, and making smart design choices, you can achieve a stunning bathroom that enhances your home’s value and your daily life.
Common Bathroom Renovation Mistakes To Avoid
Renovating a bathroom in NZ is an exciting but complex project that requires careful planning. While a well-executed renovation can transform your space into a stylish and functional retreat, certain mistakes can lead to unexpected costs, safety hazards, and long-term maintenance issues. To help you achieve a smooth and successful renovation, here are some of the most common bathroom renovation mistakes to avoid—and how to fix them.
Underestimating Costs And Timeline
One of the biggest pitfalls homeowners face when renovating a bathroom is underestimating both the budget and time required to complete the project. Many assume that a renovation will only take a couple of weeks and cost less than anticipated, only to be caught off guard by unexpected expenses and delays.
Why This Happens
- Hidden Costs: Structural repairs, plumbing upgrades, or electrical rewiring may be needed once the project begins.
- Material Delays: Custom fixtures or imported tiles may take longer to arrive, causing setbacks.
- Labour Costs: Hiring licensed tradespeople (plumbers, electricians, tilers) can add up quickly.
- Unrealistic Expectations: DIY renovation shows often make bathroom remodels seem faster and cheaper than they really are.
How To Avoid It
- Set A Realistic Budget: Get multiple quotes from contractors and factor in at least 10-20% extra for unforeseen costs.
- Plan A Detailed Timeline: Work with professionals to set a realistic schedule and consider material availability.
- Prioritize Essentials First: Invest in quality plumbing and waterproofing before splurging on luxury fixtures.
By planning ahead and budgeting wisely, you’ll avoid costly surprises and ensure your renovation stays on track.
Choosing The Wrong Materials
Your choice of materials can make or break your bathroom renovation. Selecting the wrong flooring, tiles, or fixtures can lead to slippery surfaces, frequent repairs, and unnecessary expenses in the long run.
Common Material Mistakes
- Slippery Tiles: Glossy ceramic or polished stone tiles may look stunning but can become hazardous when wet.
- Cheap Plumbing Fixtures: Low-quality taps, showerheads, and pipes may corrode or leak over time, leading to costly repairs.
- Non-Moisture-Resistant Paint: Standard interior paint won’t withstand bathroom humidity and may start peeling or growing mould.
How To Avoid It
- Opt For Slip-Resistant Tiles: Look for matte, textured, or non-slip tiles to improve safety, especially in wet areas.
- Invest In High-Quality Fixtures: Choose reputable brands known for durability, and ensure all fittings comply with NZ standards.
- Use Mould-Resistant Paint & Materials: Opt for moisture-resistant wall paint and waterproof grout to prevent damage.
Quality materials not only enhance aesthetics but also improve safety and longevity, saving you money on future repairs.
Poor Ventilation Leading To Mould Issues
Bathrooms naturally produce a lot of moisture, and if not properly ventilated, this can lead to mould growth, musty odors, and even structural damage over time. Many homeowners overlook ventilation, leading to a damp and unhealthy environment.
Why Ventilation Is Essential
- Prevents Mould & Mildew: Excess moisture creates the perfect breeding ground for mould, which can damage surfaces and impact air quality.
- Protects Your Fixtures & Paint: Moisture buildup can cause peeling paint, warped cabinetry, and corroded metal fittings.
- Improves Air Circulation: Proper ventilation helps remove humidity, keeping your bathroom fresh and dry.
How To Avoid It
- Install An Extractor Fan: Ensure your bathroom has a high-quality exhaust fan that vents outside, not into the ceiling space.
- Add Windows Or Skylights: Natural ventilation can significantly reduce moisture buildup.
- Use A Dehumidifier: If your bathroom lacks ventilation, a small dehumidifier can help control excess moisture.
By prioritizing proper airflow, you’ll create a healthier, longer-lasting bathroom that remains fresh and mold-free.
Ignoring Lighting And Storage Needs
A beautiful bathroom isn’t just about aesthetics—it also needs to be practical and functional. Many homeowners make the mistake of not planning enough lighting or storage space, leading to a dim, cluttered, and inconvenient layout.
Lighting Mistakes To Avoid
- Relying On A Single Ceiling Light: Overhead lighting alone creates shadows, making grooming tasks difficult.
- Ignoring Task Lighting: Insufficient lighting around the mirror can make daily routines like shaving or makeup application frustrating.
- Choosing The Wrong Bulbs: Harsh white light can feel sterile, while dim lighting can make the space feel dull and uninviting.
Storage Mistakes To Avoid
- Lack Of Shelving & Cabinets: Insufficient storage leads to countertop clutter and an unorganized space.
- No Consideration For Small Spaces: In compact bathrooms, every inch of storage should be maximized.
- Skipping Built-In Storage: Recessed shelves or niches in the shower can save space and improve accessibility.
How To Avoid It
- Layer Your Lighting: Combine overhead lighting, task lighting near mirrors, and accent lighting for a balanced ambiance.
- Choose Space-Saving Storage Solutions: Floating vanities, recessed shelves, and mirrored cabinets add storage without taking up extra space.
- Think About Functionality: Plan storage for towels, toiletries, and cleaning supplies to keep the bathroom organized.
Proper lighting and smart storage choices ensure your bathroom is both stylish and highly functional for everyday use.
Avoiding these common bathroom renovation mistakes can save you time, money, and future headaches. By planning carefully, choosing the right materials, ensuring good ventilation, and optimizing lighting and storage, you can create a bathroom that is safe, beautiful, and built to last. Whether you’re tackling a small upgrade or a full-scale remodel, a well-thought-out approach will increase your home’s value and enhance your daily routine.

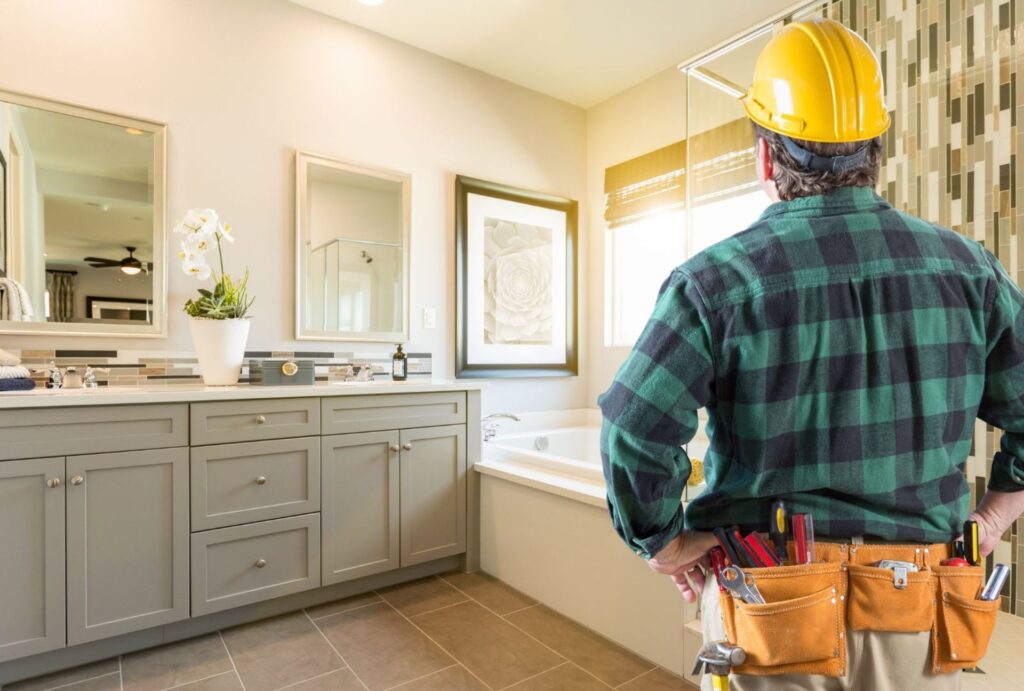
Hiring The Right Tradespeople In NZ: Finding Experts You Can Trust
Renovating your bathroom in New Zealand is an exciting project, but ensuring it’s done right means hiring skilled professionals. From plumbing and tiling to electrical work and waterproofing, having qualified tradespeople is essential to guarantee safety, compliance, and a high-quality finish. In this guide, we’ll walk you through the key tradespeople you’ll need, how to find reliable experts, and what to look for when hiring professionals for your bathroom renovation.
Who Do You Need? Key Tradespeople For A Bathroom Renovation
A successful bathroom renovation requires a team of skilled experts, each playing a crucial role in transforming your space. Here’s who you’ll need.
- Builders: If you’re making structural changes, moving walls, or installing new framing, a licensed builder is necessary. Builders also ensure that everything complies with the NZ Building Code.
- Plumbers: Since bathrooms rely heavily on water supply and drainage, you’ll need a certified plumber to install or move pipes, fit new toilets, showers, baths, and sinks. A poor plumbing job can lead to leaks, mold, and long-term damage.
- Electricians: Any wiring for lighting, power outlets, heated towel rails, and underfloor heating must be handled by a registered electrician to meet NZ safety regulations. DIY electrical work is illegal and dangerous.
- Tilers: Quality tiling is critical for both durability and aesthetics. A professional tiler ensures that tiles are properly waterproofed, leveled, and sealed, preventing moisture-related issues like mold and water damage.
- Waterproofing Specialists: Waterproofing is one of the most important steps in a bathroom renovation. A certified specialist applies waterproof membranes to prevent water leaks, ensuring long-term protection.
Choosing the right tradespeople ensures a high standard of work and protects your investment, reducing the risk of costly repairs down the track.
How To Find Reliable Professionals In NZ
Finding skilled and trustworthy tradespeople in New Zealand requires careful research. Here are some proven ways to locate the best professionals for your bathroom renovation.
1. Check NZ Trade Directories
Several online platforms list licensed and reviewed tradespeople in New Zealand. Some reputable sites include.
- Registered Master Builders: Great for finding qualified builders who meet NZ building standards.
- Plumbers, Gasfitters, and Drainlayers Board: Helps verify registered plumbers and gasfitters.
- Licensed Building Practitioners (LBP): A directory of licensed builders and waterproofing experts.
- NoCowboys.co.nz: A review-based platform where homeowners share experiences with tradespeople.
2. Ask For Recommendations
Word of mouth is one of the most reliable ways to find good tradespeople. Ask friends, family, or colleagues if they have worked with a trustworthy plumber, builder, or electrician. You can also check local Facebook community groups where homeowners often recommend professionals based on personal experience.
3. Read Online Reviews
Before hiring, read Google Reviews, Facebook Reviews, and testimonials on platforms like NoCowboys or TradeMe Services. Pay attention to feedback on.
- Punctuality and professionalism
- Quality of work
- Fair pricing and honesty
- Cleanliness and respect for the home
A few bad reviews aren’t necessarily a deal-breaker, but if multiple people mention the same issues, consider looking elsewhere.
Checking For Licenses And Warranties
In New Zealand, certain trades require official licenses and qualifications to perform regulated work. Before hiring, always check.
- Builder Licensing: Any structural work must be done by a Licensed Building Practitioner (LBP).
- Plumbing & Electrical Compliance: Plumbers and electricians must be registered with their respective governing bodies. Ensure they provide a Certificate of Compliance (CoC) after completing work.
- Workmanship Warranties: Reputable tradespeople stand behind their work and often offer warranties on workmanship for 1-5 years. Builders working under the Master Builders Guarantee provide additional protection.
- Public Liability Insurance: This ensures the tradesperson is insured against damage or accidents that may occur during the renovation.
Always ask for proof of licensing and insurance before hiring to protect yourself from liability and ensure high-quality work.
Getting Multiple Quotes And Avoiding Renovation Scams
Before committing to a contractor, get at least three quotes to compare pricing and services. Here’s what to keep in mind.
1. What To Look For In A Quote
A professional quote should include.
- A detailed breakdown of costs (labor, materials, and additional fees)
- Estimated timeline for completion
- Any warranty or guarantees offered
- Payment terms (avoid large upfront payments)
Avoid vague quotes that lack specific details—this could lead to unexpected costs later.
2. Watch Out For Red Flags
Unfortunately, some renovation scams exist. Avoid tradespeople who.
- Ask for full payment upfront before any work begins
- Refuse to provide licenses, references, or previous work examples
- Offer prices that seem too good to be true
- Pressure you to make immediate decisions
If something feels off, trust your instincts and look for another professional.
A bathroom renovation is a big investment, and hiring the right professionals ensures the process runs smoothly. Take the time to research, compare quotes, and check credentials before making a decision. By working with licensed, experienced, and well-reviewed tradespeople, you’ll have peace of mind knowing your new bathroom is built to last, compliant with NZ regulations, and finished to the highest standard.
DIY Bathroom Renovations: What’s Possible?
Renovating a bathroom in New Zealand can be an exciting yet challenging project. While hiring professionals ensures quality and compliance with building regulations, many homeowners choose to tackle certain renovation tasks themselves to save money and add a personal touch. But how much can you realistically handle on your own? Let’s break down what’s possible with DIY bathroom renovations, what tasks require a professional, and the pros and cons of going the DIY route.
Tasks You Can Do Yourself
If you’re comfortable with basic tools and have a bit of patience, there are several bathroom renovation tasks you can take on without hiring a professional. These tasks are low-risk, require minimal technical expertise, and can still make a huge impact on the final look of your bathroom.
1. Painting Walls and Ceilings
One of the easiest ways to refresh a bathroom is with a fresh coat of paint. Choosing a moisture-resistant paint is crucial to prevent mold and peeling over time. Lighter colors can make a small bathroom feel larger and brighter, while darker shades can add a luxurious touch.
- Pro Tip: Always use mold-resistant primers and ensure proper ventilation when painting in a high-moisture environment like a bathroom.
2. Installing Shelves and Storage Units
Adding floating shelves, towel racks, or cabinets can improve storage and organization without requiring a full remodel. These installations typically involve basic drilling and measuring, making them perfect for DIYers.
- Pro Tip: Use wall anchors when attaching shelves to drywall to ensure they can support weight without pulling out.
3. Replacing or Installing Fixtures
Upgrading simple fixtures like faucets, showerheads, towel bars, and cabinet handles can instantly modernize your bathroom. Many of these replacements involve unscrewing old fixtures and securing new ones with basic tools.
- Pro Tip: When installing a new faucet or showerhead, use plumber’s tape to prevent leaks at connection points.
4. Grouting and Caulking
Over time, grout between tiles can become discolored or cracked, leading to water damage. Reapplying grout or caulking around the bathtub and sink is a simple DIY task that can enhance the bathroom’s appearance and prevent leaks.
- Pro Tip: Use waterproof silicone caulk around wet areas like showers and sinks to prevent mold buildup.
Tasks That Require a Professional
While some aspects of bathroom renovations are DIY-friendly, other tasks involve plumbing, electrical work, and waterproofing, which require specialized skills and certifications. In New Zealand, certain renovation work must legally be carried out by a licensed professional to ensure safety and compliance with building regulations.
1. Electrical Work (Lighting, Heated Towel Rails, Power Outlets)
Electrical work in wet areas is high-risk and strictly regulated. Whether you’re installing new light fixtures, underfloor heating, or additional power outlets, a licensed electrician is required to ensure the work meets NZ safety standards.
Why Hire a Professional?
- Legal compliance: In NZ, unlicensed electrical work is illegal.
- Safety: Improper wiring can cause electrical fires or shocks.
- Insurance coverage: DIY electrical work may void home insurance.
2. Plumbing Changes (Moving Pipes, Installing Toilets & Showers)
Major plumbing changes, such as moving sink or shower pipes, installing a new toilet, or connecting a new bath, require a registered plumber. Mistakes in plumbing can lead to water damage, leaks, and costly repairs.
Why Hire a Professional?
- Prevents costly water leaks that can damage floors and walls.
- Ensures correct drainage and water pressure.
- Meets NZ building codes for safety and compliance.
3. Waterproofing and Tiling
Bathrooms require proper waterproofing to prevent mold, leaks, and structural damage. In New Zealand, waterproofing must be done by a certified professional to comply with Building Code requirements. Poorly done waterproofing can result in expensive repairs down the line.
Why Hire a Professional?
- Certified waterproofing ensures durability and leak prevention.
- Professional tilers achieve better alignment, spacing, and sealing.
- Mistakes in tiling can be hard to fix without removing the entire surface.
Pros & Cons of DIY vs. Hiring Experts
Deciding whether to DIY or hire professionals depends on your skills, budget, and project scope. Below is a breakdown of the advantages and disadvantages of each approach.
Pros of DIY Bathroom Renovation
- Saves money on labor costs, which can be 30-50% of the total budget.
- Gives you creative control over the design and process.
- A rewarding experience if you enjoy hands-on work.
- You can work at your own pace instead of relying on a contractor’s schedule.
Cons of DIY Bathroom Renovation
- High risk of costly mistakes, especially with plumbing and electrical work.
- Time-consuming, especially for beginners.
- Limited to minor upgrades, as major renovations require licensed professionals.
- Mistakes can lead to water damage, leaks, or non-compliance with NZ regulations.
Pros of Hiring Professionals
- Ensures high-quality craftsmanship and compliance with NZ regulations.
- Reduces stress and saves time compared to DIY.
- Professionals have access to better tools, materials, and industry discounts.
- Work is covered by warranties and insurance.
Cons of Hiring Professionals
- Higher cost due to labor charges.
- Less flexibility if working with a contractor’s schedule.
- Finding the right tradespeople can be challenging.
When it comes to renovating a bathroom in NZ, the best approach is often a mix of both DIY and professional work. If you’re on a budget, consider DYing cosmetic updates like painting, shelving, and minor fixture replacements, while leaving plumbing, electrical, and waterproofing to licensed professionals. This way, you can save money without compromising quality and safety.
Before starting any project, assess your skills, budget, and the scope of work to decide whether DIY or professional help is the right choice. A well-planned bathroom renovation can enhance comfort, improve home value, and create a space you’ll love for years to come.
How Long Does A Bathroom Renovation Take?
When planning a bathroom renovation in NZ, one of the most common questions homeowners ask is: How long will it take? While every project is unique, the general timeline for a full bathroom renovation typically ranges between 2 to 6 weeks, depending on the size, complexity, and scope of work.
A simple renovation with minimal changes, such as replacing fixtures, repainting, and updating tiles, can be completed in 2-3 weeks. However, if your project involves structural changes, major plumbing adjustments, waterproofing, or custom designs, it can take up to 6 weeks or longer.
Let’s break down the factors that affect your renovation timeline and how you can keep your project on track.
What Causes Delays in a Bathroom Renovation?
Even the best-planned bathroom renovations can face unexpected delays. Here are the most common factors that can slow down your timeline.
1. Permit Approvals & Compliance Checks
In New Zealand, some bathroom renovations require council permits or inspections, particularly if they involve.
- Plumbing or electrical modifications
- Structural changes, such as moving walls
- Waterproofing updates
Permit approvals can take anywhere from a few days to several weeks, depending on the council’s workload. To avoid unnecessary delays, check with your local council and apply for any required permits well in advance.
2. Material Availability & Delivery Issues
If you’re opting for custom cabinetry, imported tiles, or special-order fixtures, material delivery can take weeks or even months. Supply chain disruptions, particularly after COVID-19, have also led to longer lead times for certain materials.
How to prevent delays
- Order materials early: As soon as you finalize your design, place your orders.
- Choose readily available options: If time is tight, opt for locally stocked products instead of custom imports.
- Have backup choices: In case of shortages, select alternative materials to keep the project moving.
3. Weather Conditions (For Outdoor-Connected Work)
If your bathroom renovation involves exterior modifications, such as extending plumbing through outdoor walls or roofing adjustments, bad weather can stall the work. Wet or stormy conditions make it difficult to install waterproofing, paint, or work with tiles that require dry surfaces.
- Tip: Plan major external renovations during drier months to minimize weather-related delays.
4. Unexpected Structural Issues
Many homeowners discover hidden issues once demolition begins. Common problems include.
- Water damage or leaks inside walls
- Mould and mildew buildup
- Outdated or non-compliant plumbing/electrical systems
These problems must be fixed before proceeding, which can extend the timeline by several days or weeks.
- Solution: Factor in extra buffer time in your schedule to handle any surprises.
Tips For Staying On Schedule
While delays are sometimes unavoidable, proactive planning can help you keep your bathroom renovation on track. Here’s how.
1. Create a Detailed Renovation Plan
A clear, step-by-step renovation plan ensures that all tasks are coordinated efficiently. This includes.
- A structured timeline with start and finish dates
- A checklist of required materials (ordered in advance)
- A schedule for tradespeople to avoid overlaps or waiting periods
2. Hire Experienced Professionals
Working with licensed and experienced contractors helps speed up the renovation process. Skilled tradespeople anticipate issues, work efficiently, and ensure that work meets NZ building code standards.
Before hiring, ask for.
- References & reviews from past clients
- Written contracts outlining the timeline and responsibilities
- Project management services (if hiring a full-service renovation company)
3. Order All Materials Before Work Begins
One of the biggest time-wasters in renovations is waiting for materials to arrive. Instead of ordering as you go, make sure you have everything on-site before the project starts.
4. Allow a Buffer Time for Unexpected Issues
Even with the best planning, surprises can happen. Set aside an extra 1-2 weeks in your timeline for unexpected repairs or adjustments. This prevents stress and ensures a smoother renovation process.
A bathroom renovation in NZ can take anywhere from 2 to 6 weeks, depending on factors like the complexity of the work, permit approvals, material availability, and unexpected structural issues. By planning ahead, hiring experienced professionals, and preparing for potential delays, you can keep your project on schedule and enjoy a beautifully renovated bathroom without unnecessary stress.
FAQs: About Renovating A Bathroom In NZ
Conclusion
Renovating a bathroom in NZ is an exciting yet complex process that requires careful planning, realistic budgeting, and informed decision-making to achieve the best results. Whether you’re updating a small ensuite or transforming a full-sized family bathroom, taking the time to research costs, choose quality materials, and hire the right professionals will make all the difference in both functionality and long-term value. A well-executed renovation not only enhances daily comfort and usability but can also significantly increase your home’s resale value, making it a worthwhile investment. As you move forward, set clear goals, consider your lifestyle needs, and don’t rush the process—great design takes time! If you’re ready to bring your vision to life, start by creating a renovation checklist, setting a budget, and consulting with trusted local experts to guide you through the journey.
Find A Professional Bathroom Renovators Near You!
- Bathroom Renovations Alexandra
- Bathroom Renovations Alexandra, Clyde & Cromwell
- Bathroom Renovations Auckland
- Bathroom Renovations Cambridge
- Bathroom Renovations Central Otago
- Bathroom Renovations Christchurch
- Bathroom Renovations Clyde
- Bathroom Renovations Cromwell
- Bathroom Renovations East Auckland
- Bathroom Renovations Hamilton
- Bathroom Renovations Hastings
- Bathroom Renovations Hawkes Bay
- Bathroom Renovations Invercargill
- Bathroom Renovations Kapiti Coast
- Bathroom Renovations Levin
- Bathroom Renovations Lower Hutt
- Bathroom Renovations Napier
- Bathroom Renovations Nelson
- Bathroom Renovations New Plymouth
- Bathroom Renovations North Shore
- Bathroom Renovations Palmerston North
- Bathroom Renovations Porirua
- Bathroom Renovations Queenstown
- Bathroom Renovations South Auckland
- Bathroom Renovations Te Awamutu
- Bathroom Renovations Upper Hutt
- Bathroom Renovations Wanaka
- Bathroom Renovations Warkworth
- Bathroom Renovations Wellington
- Bathroom Renovations West Auckland
- Bathroom Renovations Kerikeri
- Bathroom Renovations Paihia
- Bathroom Renovations Tauranga
About the Author:
Mike Veail is a recognized digital marketing expert with over 6 years of experience in helping tradespeople and small businesses thrive online. A former quantity surveyor, Mike combines deep industry knowledge with hands-on expertise in SEO and Google Ads. His marketing strategies are tailored to the specific needs of the trades sector, helping businesses increase visibility and generate more leads through proven, ethical methods.
Mike has successfully partnered with numerous companies, establishing a track record of delivering measurable results. His work has been featured across various platforms that showcase his expertise in lead generation and online marketing for the trades sector.
Learn more about Mike's experience and services at https://theleadguy.online or follow him on social media: