Welcome to our comprehensive guide on how to strip stain from your deck, perfect for homeowners in New Zealand looking to restore their outdoor spaces. Whether your deck is suffering from the effects of harsh sun, rain, or simply years of wear and tear, stripping away old stain is a crucial first step in giving it a fresh new look. In this guide, we’ll walk you through the entire process, from gathering the right tools to ensuring your deck is prepped and ready for a new stain, all while keeping things simple and straightforward. Let’s dive in and help you get your deck looking its best again! For professional help, contact experienced fencing contractors in your area.
To strip stain from a deck in New Zealand, start by applying a deck stain stripper evenly across the surface and let it sit for 15-30 minutes. Use a scrub brush or pressure washer to remove the old stain, then sand the deck to smooth the surface. Rinse thoroughly and let the deck dry for at least 48 hours before applying new stain. This process ensures a clean, fresh base for re-staining, allowing for better adhesion and a more even finish.
- Understanding Why Stripping Stain Is Important
- Essential Tools And Materials For The Job
- Prepping Your Deck For Stripping
- Step-By-Step Guide To Stripping Stain From Your Deck
- Sanding And Smoothing The Deck
- Post-Stripping Deck Care
- Eco-Friendly Tips For Deck Stripping
- Common Mistakes To Avoid When Stripping Stain From Your Deck
- Preparing For A New Stain Application
- FAQs: About How To Strip Stain From Deck NZ
- Conclusion
- Find A Professional Decking Company Near You!
Understanding Why Stripping Stain Is Important
When it comes to maintaining your deck in New Zealand, stripping the old stain is a crucial step that shouldn’t be overlooked. Over time, the elements can take a toll on your deck’s finish, leading to fading, peeling, or an overall dull appearance. By understanding the impact of New Zealand’s unique climate and knowing the signs that your deck needs a refresh, you’ll be better equipped to keep your outdoor space looking its best.
Deck Wear and Tear in NZ Climate
New Zealand’s climate is as diverse as its landscapes, but one thing is certain—outdoor decks take a beating from the weather. The harsh UV rays from the sun can quickly degrade a deck’s stain, causing it to fade or break down. Combine that with regular rainfall, especially in coastal or humid areas, and your deck may begin to show signs of wear far quicker than you expect. Even seasonal shifts, such as the cool, wet winters followed by warm, dry summers, can cause wood to expand and contract, contributing to the breakdown of the stain. Over time, this leads to cracks, peeling, and areas where the wood is exposed to moisture, making it more susceptible to damage and decay.
When You Should Strip Stain
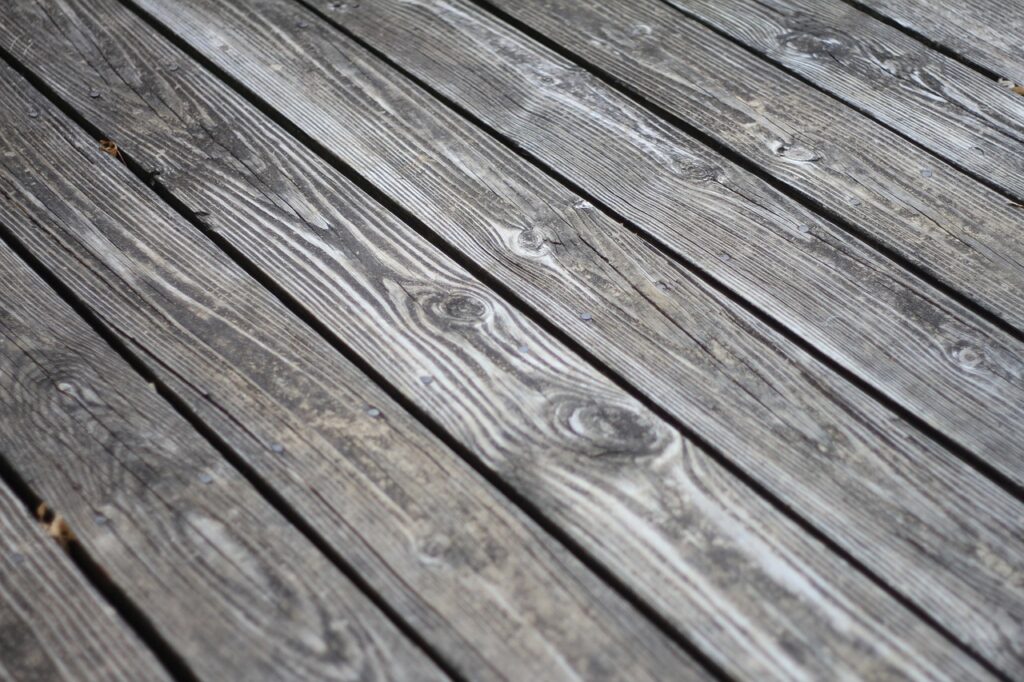
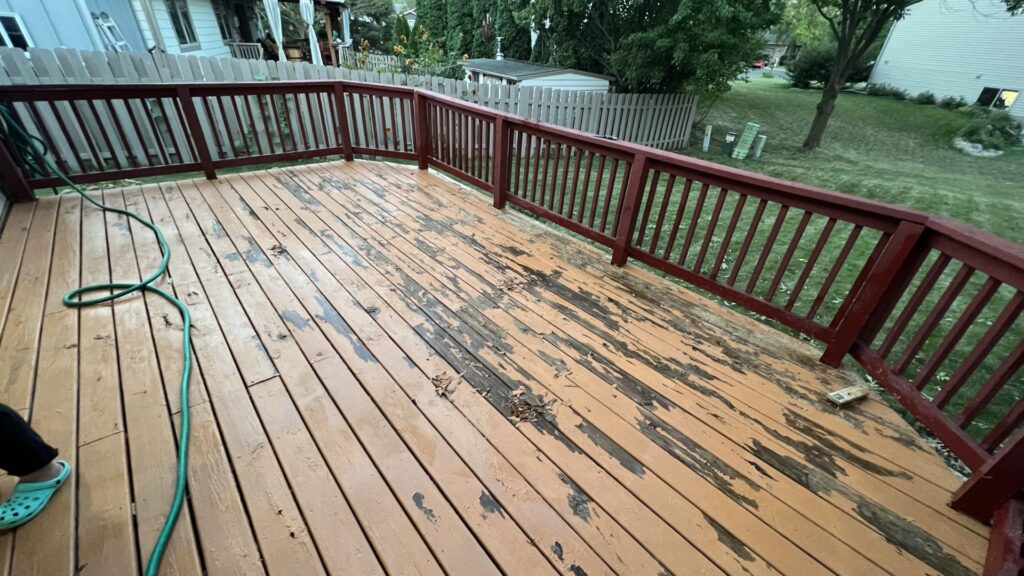
It’s important to recognize when your deck is due for maintenance, and one of the first steps is knowing when to strip the old stain. Some telltale signs include uneven coloring—where some areas of the deck appear more worn than others—or visible peeling of the stain itself. If you notice that the water no longer beads up on the surface, but instead absorbs into the wood, it’s a clear indication that the protective layer of stain has worn away. This not only affects the look of your deck but also compromises its longevity, as exposed wood is more vulnerable to weather damage, mold, and rot.
If your deck appears dull, worn, or is showing patches where the stain has lifted or faded, it’s time to consider stripping the old stain before applying a fresh coat. Staining over an already deteriorating layer won’t solve these issues and may even make them worse in the long run.
Why Not Skip This Step?
Skipping the stripping process might seem like an easy way to save time, but it can lead to long-term problems. For one, applying a new stain over an old, peeling layer means the new stain won’t adhere properly. Instead of penetrating the wood, the new layer will likely sit on top of the old one, leading to uneven coverage and a finish that will quickly begin to peel again. This also makes future maintenance more difficult, as multiple layers of stain will build up, creating a rough, uneven surface that’s harder to clean and refinish.
Additionally, skipping this step comprises the overall durability of your deck. Without properly removing the old stain, any new stain you apply may not provide adequate protection against moisture, UV rays, or everyday wear. Over time, this can result in premature damage to the wood, leading to costly repairs or even the need to replace parts of your deck. Simply put, taking the time to strip the old stain sets the foundation for a longer-lasting and better-looking finish, helping to protect your investment in the long run.
By understanding why stripping stain is so important, you’re ensuring that your deck not only looks great but can withstand the challenges of New Zealand’s climate for years to come.
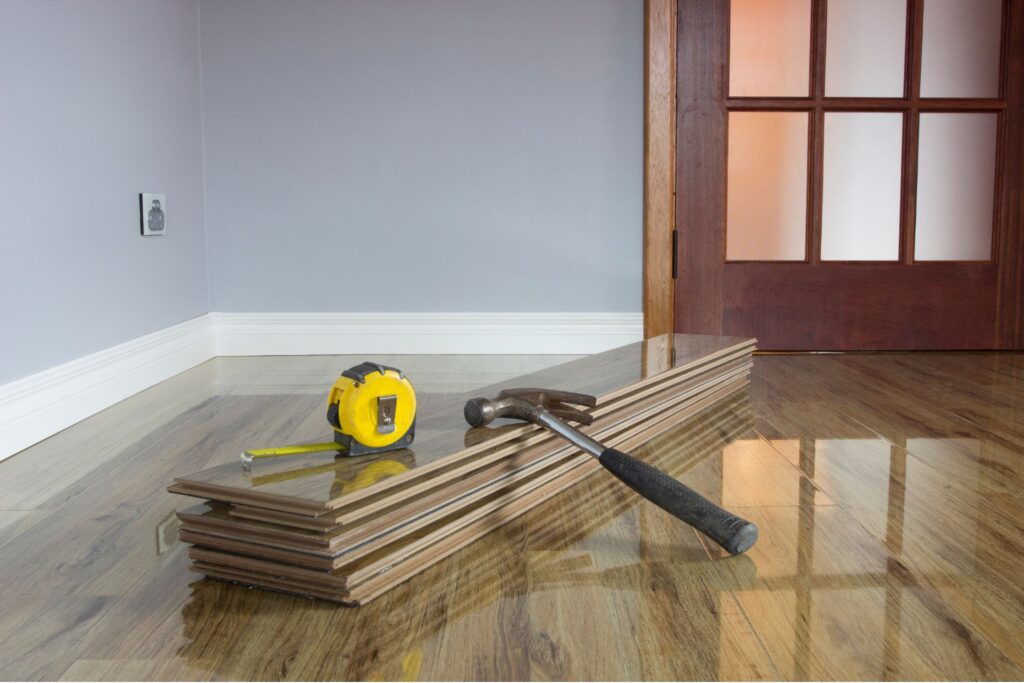
Essential Tools And Materials For The Job
When it comes to stripping the stain from your deck, having the right tools and materials on hand is crucial for a successful and efficient job. Using the proper equipment not only makes the process smoother but also ensures that the deck is prepped correctly for re-staining, giving you a professional, long-lasting finish. Below is a detailed breakdown of the essential tools and supplies you’ll need, along with suggestions for where you can find them in New Zealand.
List of Tools and Supplies
1. Deck Stain Stripper
A high-quality deck stain stripper is the key to breaking down the old stain on your deck’s surface. These chemical solutions are formulated to penetrate the wood and loosen the stain, making it easier to remove. When selecting a deck stain stripper, it’s important to choose one that’s designed for exterior wood and is safe for the type of wood used in your deck. In New Zealand, there are several trusted brands available, such as Cabot’s Deck Clean or Resene Timber and Deck Wash. These products are effective and designed to handle the varying weather conditions typical of New Zealand homes.
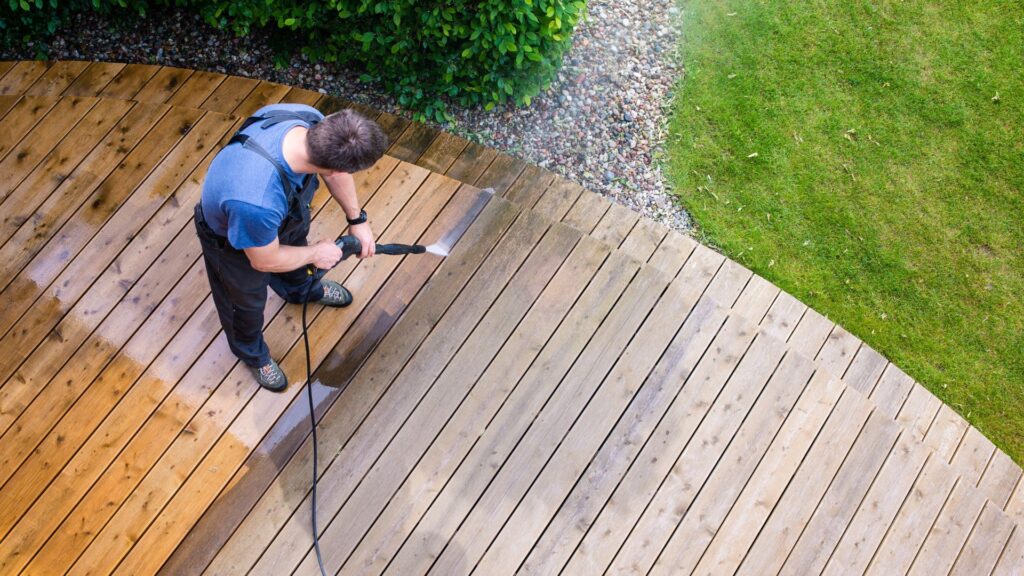
2. Pressure Washer
After applying the deck stain stripper, a pressure washer helps rinse away the loosened stain and residue. The pressure washer ensures a deep clean that scrubbing alone can’t achieve. However, it’s essential to use the pressure washer correctly—too much pressure can damage the wood fibers. Aim for a setting between 500 and 1,200 PSI (pounds per square inch) for softwoods like pine, and slightly higher for hardwoods. If you don’t own a pressure washer, you can rent one from most hardware stores across New Zealand.
3. Scrub Brush
While a pressure washer can handle most of the heavy lifting, there will still be areas that need some manual scrubbing. A stiff-bristle scrub brush will help you work the stain stripper into grooves and corners where the pressure washer may not reach effectively. It’s also useful for spots where the stain is especially stubborn. Opt for a long-handled brush to avoid bending over too much, saving your back from strain during the process.
4. Safety Gear (Gloves, Eye Protection)
Working with chemicals like deck stain stripper means safety should always come first. Protective gear, including rubber gloves and safety goggles, is non-negotiable. The stain stripper can be harsh on skin and eyes, so make sure you’re fully protected before starting the job. A face mask or respirator is also recommended, especially if you’re working with strong chemicals or sanding, as inhaling wood particles or fumes can be hazardous.
5. Sandpaper or Orbital Sander
After the deck has been stripped and cleaned, sanding is the next step to ensure a smooth surface before applying the new stain. For smaller decks, sandpaper (start with 60-80 grit, then finish with 120 grit) may suffice, but for larger areas, an orbital sander will save you time and effort. Sanding helps to remove any stubborn leftover stain and smooths out rough patches, allowing the new stain to absorb evenly.
6. Water Source and Buckets
A simple yet essential component, having a steady water source nearby is important for rinsing off the stripper and cleaning your deck. Buckets of clean water will also come in handy, especially for scrubbing and rinsing areas that a pressure washer can’t easily reach. Keep these within arm’s reach to save time during the process.
Where to Buy in New Zealand
Finding these materials is straightforward, as New Zealand is home to several reputable hardware stores where you can source everything you need. Popular stores like Mitre 10 and Bunnings Warehouse carry a wide range of deck stain strippers, pressure washers, and other essential tools. They also offer rental services for items like pressure washers if you don’t want to invest in one. For safety gear and sanding equipment, these stores also stock everything from gloves and goggles to orbital sanders, making them a one-stop shop for your deck maintenance needs. Be sure to ask staff for advice on which products work best for your specific type of wood and project size—they are usually knowledgeable and happy to help.
By ensuring you have all the essential tools and materials on hand before starting the project, you’ll set yourself up for a smooth and efficient deck stripping process. This preparation will make the difference between a job that feels manageable and one that becomes frustrating due to missing tools or improper products. So, before you begin, take a trip to your local Mitre 10 or Bunnings, and gather everything you need for a successful deck restoration.
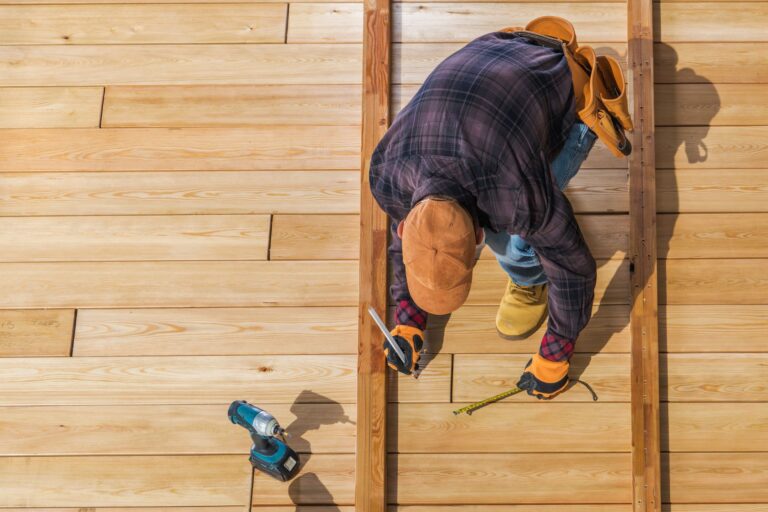
Prepping Your Deck For Stripping
Before you begin the process of stripping stain from your deck, it’s essential to take the proper steps to prepare the surface. This ensures that not only will the stain remover work effectively, but the entire process will be smoother, safer, and more efficient. Prepping your deck for stripping involves a few simple but critical steps that will make a huge difference in the outcome. Let’s break it down.
Clear the Area
The first step in preparing your deck is to remove any obstacles that might get in the way. This includes outdoor furniture, potted plants, barbecue grills, and any other items sitting on your deck. Not only will clearing the space make it easier to work, but it also prevents any accidental damage to your belongings. Plus, you’ll need a clean, unobstructed surface to ensure even stripping and staining later. This is a great time to tidy up your outdoor space, and you might even find some items that need cleaning or maintenance themselves.
Inspect for Damage
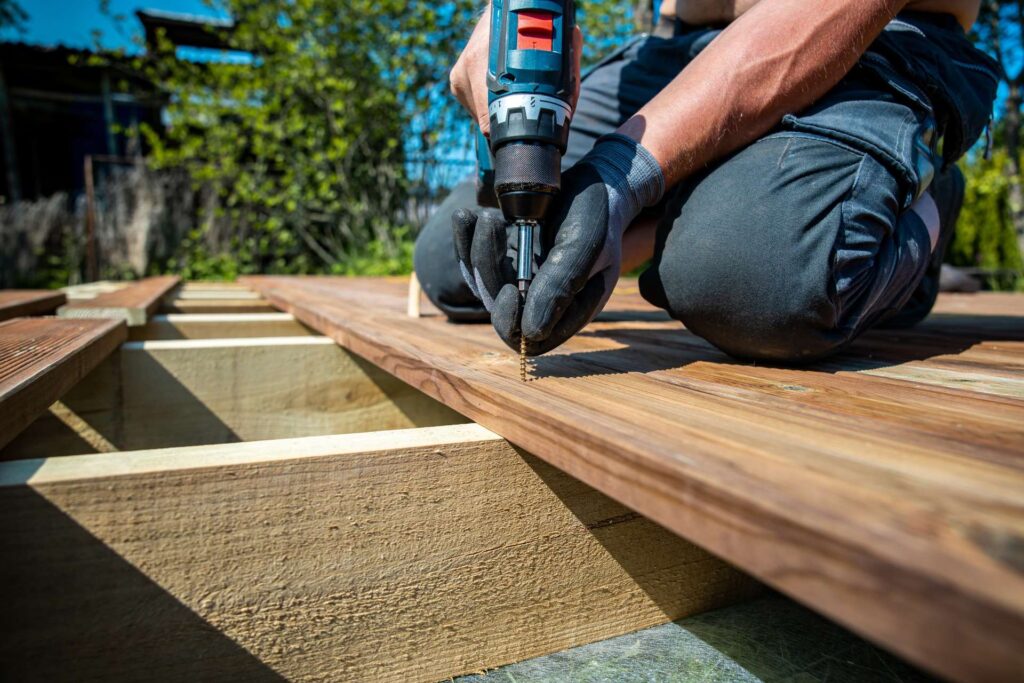
Once the deck is clear, take a close look at the wood’s condition. Over time, decks can suffer from a variety of issues due to exposure to the elements, especially in New Zealand’s harsh outdoor environment. You’re looking for things like loose nails, splintered or cracked boards, and signs of rot. Loose nails should be hammered back in place, or better yet, replaced with deck screws for a more secure hold. If you notice any rotting wood, it’s crucial to replace those boards before proceeding. Trying to strip and stain over damaged wood won’t yield good results and could even make the damage worse. Taking the time to fix these issues now will extend the life of your deck and ensure the new stain has a solid, healthy surface to adhere to.
Cleaning the Surface
Now that your deck is clear and repaired, the next step is to clean the surface thoroughly. Decks can accumulate dirt, mildew, and grime over time, and these substances can interfere with the effectiveness of the stain stripper. For a thorough clean, you can use a dedicated deck cleaner, which is specifically formulated to remove stubborn dirt, mildew, and old grime. If you don’t have a deck cleaner on hand, a simple solution of warm water and mild soap will do the trick. Apply the cleaner with a stiff-bristled brush, scrubbing in the direction of the wood grain to lift and remove dirt. Rinse the deck well with water, either from a hose or a pressure washer on a low setting.
This cleaning step is vital because any debris left on the deck will act as a barrier between the wood and the stripper. It also allows you to better see the areas where the old stain might be peeling or fading, which can help you focus your stripping efforts. A clean deck also provides a better canvas for the new stain to adhere to once the stripping process is complete.
By properly prepping your deck for stripping, you’re setting yourself up for success. These steps—clearing the area, inspecting for damage, and cleaning the surface—may seem simple, but they are crucial in achieving a smooth, even, and long-lasting result. Taking the time to get this part of the process right ensures that your deck will look great and be ready to withstand the elements for years to come.
Step-By-Step Guide To Stripping Stain From Your Deck
Stripping stain from your deck is an essential part of maintaining its appearance and durability, especially in climates like New Zealand, where outdoor spaces are frequently exposed to varying weather conditions. To achieve the best results, it’s important to follow a systematic approach. In this guide, we’ll take you through each step of the process, ensuring your deck is properly prepped for a fresh coat of stain.
Step 1: Apply the Stain Stripper
The first step in stripping stain from your deck is applying the stain stripper. This product is designed to break down the old stain, making it easier to remove and creating a clean surface for the new finish. Here’s how to do it effectively:
Read the Manufacturer’s Instructions
Before applying any stain stripper, carefully read the product’s label. Different brands and types of strippers may have specific instructions regarding application methods, waiting times, and safety precautions. Make sure you understand these guidelines to avoid potential mishaps.
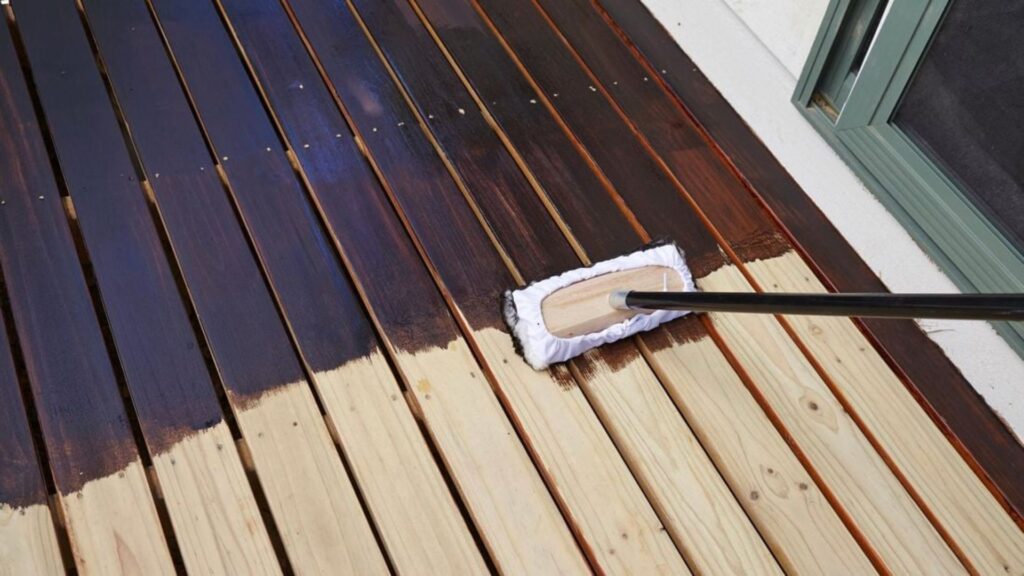
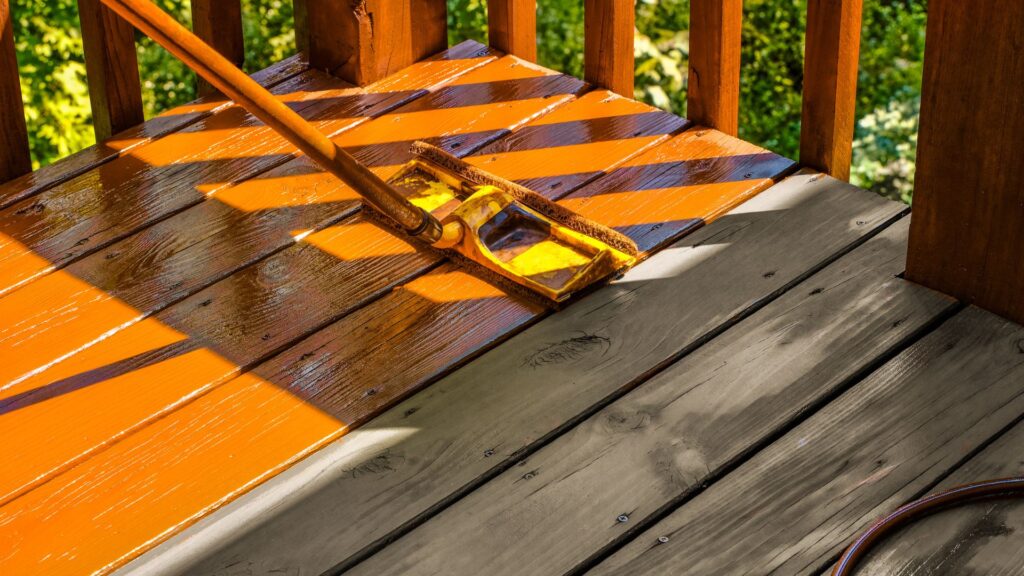
Applying the Stain Stripper
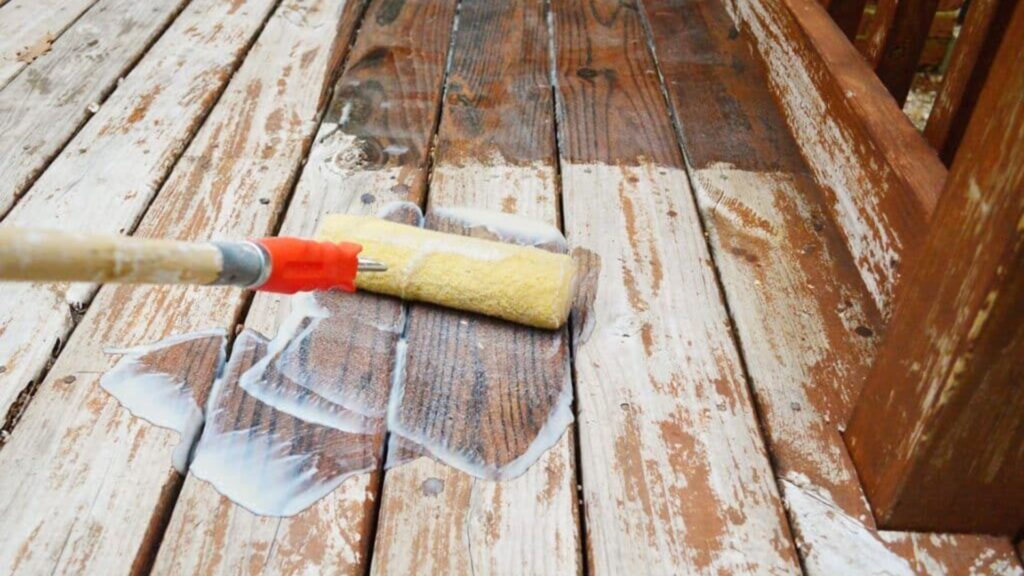
Once you’ve familiarized yourself with the product, it’s time to apply it. Use a high-quality brush, roller, or even a garden sprayer to apply an even layer of stain stripper across the deck surface. Start from one end of the deck and work your way systematically, ensuring that no area is missed. Uneven application can lead to patchy results, so be meticulous in covering every plank and corner.
Key Tip
Work in manageable sections, especially if you have a large deck, so you can maintain control over the process and prevent the stripper from drying out too quickly.
Step 2: Allow the Stripper to Work
Once the stripper is applied, it’s important to allow it time to do its job. The product needs to break down the old stain before you can scrub it away, so patience is key here.
Timing is Crucial
Most deck stain strippers need about 15 to 30 minutes to fully penetrate and break down the stain, but this can vary depending on the type of product you’re using. Check the manufacturer’s recommended waiting time, and don’t rush this step. The longer the stripper has to work (within the suggested time frame), the easier it will be to remove the old stain.
Avoid Letting It Dry Out
One common mistake is letting the stripper dry on the deck. This can actually make the stain harder to remove and cause uneven results. Keep an eye on the deck during this phase, and if it looks like certain areas are drying too quickly, lightly mist them with water to keep the surface moist.
Step 3: Scrub and Rinse
Now that the stain stripper has had time to break down the old stain, it’s time to remove it. This step requires some elbow grease but is crucial for getting the deck completely clean and prepped for its new finish.
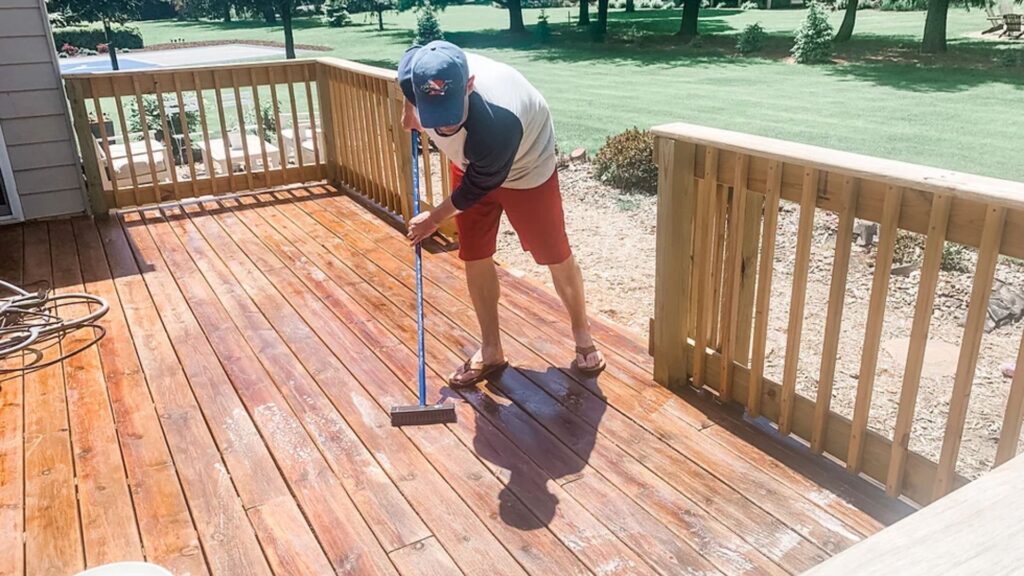
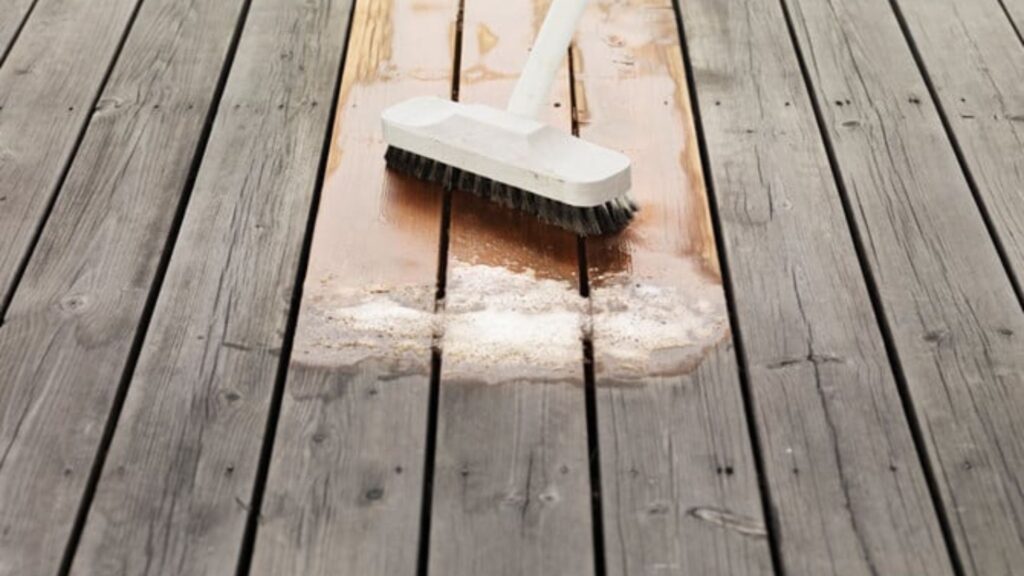
Scrubbing the Deck
Using a stiff-bristled scrub brush, begin scrubbing the deck in the direction of the wood grain. This helps lift the old stain and ensures you won’t damage the wood. For particularly stubborn areas, you may need to apply a bit more pressure, but be careful not to gouge or scratch the surface.
Using a Pressure Washer for Rinsing (Optional)
If you have access to a pressure washer, this can make the rinsing process much easier. Set the pressure washer to a lower setting (around 500-600 PSI) to avoid damaging the wood, and use it to thoroughly rinse away the stripper and old stain residue. Always move the nozzle in smooth, even motions, and avoid holding it too close to the deck, as excessive pressure can splinter or erode the wood fibers.
Safety Note
When using a pressure washer, be sure to wear protective gear like safety goggles and gloves, as the high-pressure spray can be dangerous. Additionally, be mindful of any nearby plants or structures that could be damaged by the water or chemical runoff.
Final Rinse with Water
If you don’t have a pressure washer, no problem! You can simply use a garden hose to rinse off the stripper. Make sure you flush the deck thoroughly, removing all traces of the stripper and loosened stain. Any residue left behind could interfere with the adhesion of the new stain.
By following these steps, you’ll successfully strip the old stain from your deck, leaving it clean and ready for sanding and restaining. Proper preparation is key to achieving a smooth, professional-looking finish that will last for years to come.
Sanding And Smoothing The Deck
Sanding is an essential part of the deck restoration process, and here’s why: after stripping the old stain, there will often be residue left behind that can prevent the new stain from adhering evenly. Sanding helps remove this residue and creates a smooth, even surface, allowing the new stain to penetrate the wood properly. Without this step, you might end up with an uneven finish, which will not only look unappealing but could also lead to premature wear and tear. Sanding also removes any rough patches, splinters, or imperfections, ensuring a smoother, safer deck surface that’s comfortable to walk on.
When it comes to sanding your deck, the choice of tools can make all the difference. For smaller decks or tight spaces, sandpaper can be used, but it can be labor-intensive. For larger decks, an orbital sander is a much more efficient option. Orbital sanders provide a smooth finish while minimizing the risk of leaving sanding marks on the wood. They’re particularly useful for evenly smoothing large surface areas without causing damage to the wood fibers, which can happen if too much pressure is applied.
Now, let’s talk about how to achieve the best results with your sanding. First, it’s important to use the right grit sandpaper. Start with a lower grit, such as 60-80, to remove the remaining stain and any rough patches. This will help level the surface. After the initial sanding, move on to a finer grit, around 120, to smooth the deck further and prepare it for staining. The goal here is to create a surface that’s smooth enough to absorb the stain evenly but not so smooth that the wood becomes sealed, preventing the stain from penetrating.
While sanding, be mindful not to press too hard, as this can gouge the wood or create uneven spots. It’s important to keep the sander moving in even, steady strokes to avoid over-sanding any particular area. Also, remember to sand along the grain of the wood, as sanding against the grain can create scratches that are hard to hide even after staining.
Proper sanding is key to ensuring your deck not only looks great but also holds up well after re-staining. By using the right tools and techniques, you’ll set the foundation for a flawless, long-lasting finish.
Post-Stripping Deck Care
Once you’ve successfully stripped the old stain from your deck, proper care afterward is crucial to ensure a smooth and long-lasting finish when you apply new stain. This stage is often overlooked, but it can make a significant difference in how well the new stain adheres and the final look of your deck. Below, we’ll walk you through the necessary steps to prepare your deck for the next phase.
Rinse and Dry the Deck
After applying the stain stripper and removing the old stain, you must thoroughly rinse your deck to remove any remaining stripper and residue. Skipping this step can lead to complications during staining, as leftover chemicals can interfere with the new stain’s absorption, resulting in an uneven finish.
Using a garden hose or pressure washer (on a low setting to avoid damaging the wood), rinse every inch of the deck. Focus on areas where the stripper may have pooled, such as between boards or in any cracks. Make sure the deck is free of all residues before moving on. After rinsing, allow the deck to dry completely—this usually takes at least 48 hours, depending on the weather. A dry deck ensures that the wood is ready to absorb the new stain evenly and effectively. In New Zealand’s often humid climate, it’s essential to choose a few clear days in a row for this drying process to ensure no moisture is trapped in the wood, which could cause peeling or patchy staining later.
Inspect for Leftover Stain
Once your deck is fully dry, it’s time to inspect for any leftover stain or areas that may need extra attention. Even after thorough stripping, some stubborn areas may still hold onto bits of old stain, particularly in corners, crevices, or around knots in the wood. Walk around your deck and carefully check for any spots where the old stain hasn’t been completely removed.
These areas will often look darker or slightly more glossy than the freshly stripped wood. If you find any, don’t panic—this is normal, and there’s an easy fix. Use medium-grit sandpaper or an orbital sander to gently sand away these remaining patches. Make sure to blend the sanded areas with the rest of the deck to avoid creating uneven surfaces. This step is essential because any leftover stain could prevent the new stain from penetrating properly, which would result in uneven coloration or patches that wear down faster over time.
By thoroughly rinsing and inspecting your deck after stripping, you’re laying the groundwork for a smooth and even stain application, ensuring that your deck not only looks great but is also well-protected against the elements for years to come.
Eco-Friendly Tips For Deck Stripping
When stripping stain from your deck, it’s important to consider the environmental impact of the products and methods you use. Deck stain strippers often contain chemicals that can harm the environment if not handled correctly. In this section, we’ll cover two key aspects: safely disposing of chemicals and choosing eco-friendly products that are readily available in New Zealand.
Safe Disposal of Chemicals
Once you’ve finished stripping the stain from your deck, it’s crucial to dispose of the used chemicals and wastewater responsibly. In New Zealand, improper disposal of toxic substances can lead to environmental damage, particularly to waterways and soil. Here are some steps to safely manage the disposal process.
1. Collect and Contain Wastewater: When using a deck stain stripper, it’s essential to capture the runoff rather than letting it seep into the ground or storm drains. This is especially important if the stripper contains harmful chemicals. Consider using tarps or plastic sheeting beneath your deck to collect the liquid waste.
2. Avoid Pouring Chemicals Down the Drain: Never pour used stripper or wastewater down household drains, as this can lead to water contamination. Most household plumbing is not equipped to handle harsh chemicals, and wastewater can end up in local water supplies.
3. Check Local Disposal Regulations: In New Zealand, the disposal of hazardous waste is regulated, and each region may have specific rules for handling such materials. Contact your local council to find out where you can safely dispose of chemicals. Many councils offer hazardous waste collection services or provide drop-off points for toxic materials.
4. Use Hazardous Waste Facilities: If you have leftover deck stripper or contaminated wastewater, take it to a designated hazardous waste disposal facility. These centers are equipped to handle chemicals safely, ensuring that they don’t harm the environment.
5. Minimize Waste: Wherever possible, try to minimize the amount of chemical waste you create. Measure the amount of stripper you need accurately to avoid having excess, and consider using eco-friendly products that are less harmful if spilled.
By following these steps, you can ensure that the chemicals used in the deck stripping process don’t negatively impact New Zealand’s natural environment.
Choose Environmentally Friendly Products
Using eco-friendly stain strippers not only reduces your environmental footprint but also minimizes the risks to your health and your deck. Many traditional strippers contain volatile organic compounds (VOCs), which can release harmful fumes and contaminate the surrounding area. Fortunately, there are several environmentally friendly alternatives available in New Zealand that offer the same level of performance without the harsh chemicals.
1. Biodegradable Stain Strippers: Biodegradable deck strippers break down naturally over time and are less harmful to the environment. These products are formulated with plant-based ingredients or less toxic chemicals that won’t persist in the soil or water. Brands like EcoSolve or Resene offer biodegradable options that are effective and safer for use around homes, gardens, and water sources.
2. Low-VOC Strippers: Strippers with low levels of VOCs produce fewer harmful fumes, making them safer for you and the environment. Low-VOC products are less likely to cause respiratory issues and are generally more pleasant to work with, especially for DIY projects. You can find low-VOC options from local suppliers such as Bunnings or Mitre 10 that are designed for New Zealand’s climate.
3. Citrus-Based Strippers: One of the most popular eco-friendly options is citrus-based stain strippers. These products use natural citrus solvents to break down the stain without the need for harsh chemicals. They are often biodegradable and leave behind a pleasant scent rather than harsh chemical odors. Citrus-based strippers are effective at removing old stains while being gentler on the wood, and they’re available from brands like Orange Solv.
4. Water-Based Strippers: Unlike solvent-based alternatives, water-based stain strippers use water as the primary solvent, reducing their environmental impact. These products are easier to clean up and often contain fewer toxic chemicals. Water-based strippers can be just as effective as traditional chemical strippers, particularly when used in combination with proper scrubbing and sanding techniques.
5. Benefits of Eco-Friendly Strippers: Choosing environmentally friendly products not only helps protect the environment but also offers several practical benefits. Eco-friendly strippers are typically safer to handle, reducing the need for protective gear like masks and gloves. They also tend to be less corrosive, which means they are gentler on the wood, helping to preserve the integrity of your deck for longer.
By opting for eco-friendly deck strippers, you contribute to a healthier environment while ensuring that your deck is free from harmful chemicals. These products are widely available in New Zealand, making it easy to make a more sustainable choice without sacrificing the quality of your deck maintenance.
Taking an eco-friendly approach to stripping stain from your deck is not only good for the environment but also helps you avoid exposure to toxic substances. Safe disposal of chemicals and choosing environmentally responsible products are key steps in making sure your deck looks great while minimizing harm to the planet. By following these tips, you’ll protect your outdoor space and help preserve New Zealand’s beautiful environment for future generations.
Common Mistakes To Avoid When Stripping Stain From Your Deck
When stripping stain from a deck, it’s important to be mindful of certain common mistakes that can lead to poor results or even damage to your deck. By avoiding these errors, you can ensure a successful outcome that leaves your deck looking great and ready for a fresh coat of stain. Let’s dive deeper into these key mistakes and why it’s important to avoid them.
Rushing the Process
One of the biggest mistakes DIYers make is rushing through the stain-stripping process. Stripping stain from a deck is not a quick job, and trying to speed through it can lead to disappointing results. First, the deck stain stripper needs enough time to work. Most products require at least 15-30 minutes to break down the old stain, depending on the manufacturer’s instructions and the condition of the deck. If you don’t allow enough time for the stripper to penetrate and soften the old stain, you’ll find yourself scrubbing harder and longer, and possibly missing some areas entirely.
Additionally, once you’ve stripped the stain, it’s crucial to let the deck dry completely before moving on to the next step, whether that’s sanding or applying a new stain. Inadequate drying time can lead to moisture trapped in the wood, which will prevent the new stain from properly absorbing into the surface. This can result in an uneven, blotchy finish, which ultimately shortens the lifespan of the new stain. For the best results, let your deck dry for at least 48 hours after washing or stripping before proceeding.
Using Too Much Pressure with a Pressure Washer
Another common mistake is using excessive pressure when cleaning the deck with a pressure washer. While pressure washers are great for removing grime and lifting old stain, using too much pressure can cause serious damage to the wood. Decks are typically made of soft woods like pine or cedar, which can be gouged or splintered if the pressure is too high.
When using a pressure washer, it’s important to set the machine to a safe level, typically around 500-600 PSI for softer woods. Hold the nozzle at least 8-12 inches away from the surface and move it in smooth, sweeping motions to avoid focusing too much pressure on one spot. This will help prevent any accidental damage to the wood fibers and ensure a clean, smooth surface. Remember, the goal is to remove the stain, not to strip or damage the wood itself. If you’re unsure about using a pressure washer, you can always opt for a scrub brush and some elbow grease to achieve the same results.
Skipping the Sanding
Skipping the sanding step is another mistake that can compromise the final outcome of your project. Sanding may seem like an optional step, especially if your deck looks clean after stripping and washing, but it’s actually critical for achieving a smooth, even finish. Stripping and pressure washing can raise the grain of the wood, leaving the surface slightly rough and uneven. If you skip sanding, the new stain might not absorb evenly, leading to a blotchy or streaky appearance.
Sanding smooths out any rough patches, evens the surface, and removes any remaining bits of the old stain that may still be lingering in the wood grain. It also opens up the pores of the wood, allowing the new stain to penetrate deeply and evenly. This results in a more professional, long-lasting finish that will better withstand the elements over time.
When sanding, start with a coarser grit (60-80) to remove any roughness or leftover stain, and then finish with a finer grit (120-150) to smooth the surface and prep it for staining. Taking the time to properly sand your deck after stripping will pay off when you see the smooth, beautiful results of your new stain.
By avoiding these common mistakes—rushing the process, using too much pressure with a pressure washer, and skipping the sanding step—you’ll set yourself up for success when stripping stains from your deck. Each step is essential to ensuring that your deck looks its best and stays well-protected for years to come. Take your time, be patient, and enjoy the satisfaction of a job well done.
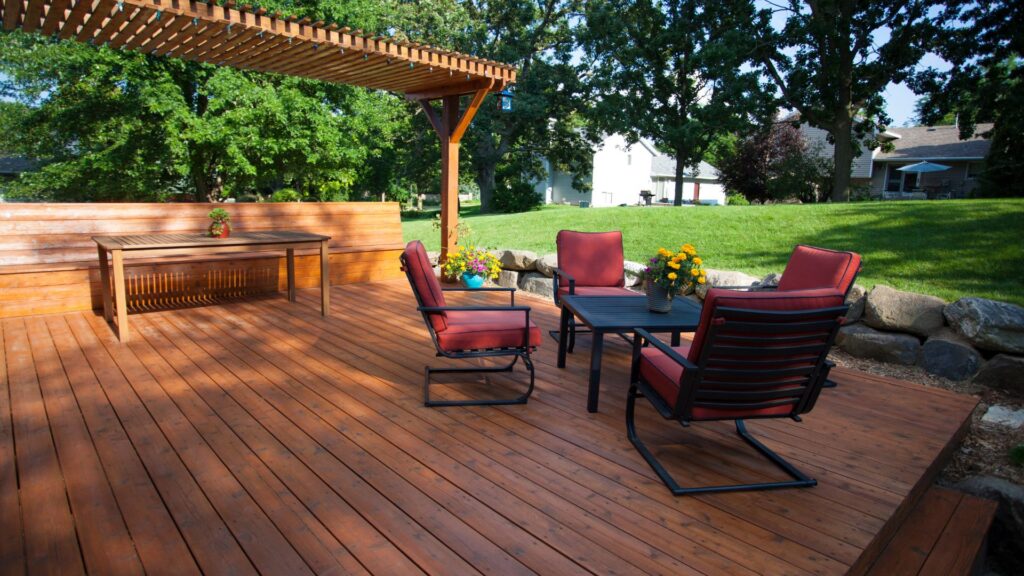
Preparing For A New Stain Application
Once you’ve successfully stripped the old stain from your deck, the next step is preparing for the new stain application. Getting this right is crucial for achieving a smooth, long-lasting finish that not only looks great but also protects your deck from the elements. Let’s dive into the key considerations when preparing for a new stain application.
When to Apply Stain
Timing is everything when it comes to staining your deck, especially in New Zealand’s unique climate. After stripping and sanding your deck, it’s important to let the wood fully dry before applying a new coat of stain. In general, you should wait at least 48 hours to ensure the deck is completely dry. However, keep in mind that weather conditions can affect drying times.
New Zealand’s weather can be unpredictable, so it’s crucial to plan your staining project around dry, moderate weather. Avoid staining your deck if rain is forecasted within the next 48 hours, as moisture can ruin the finish and prevent the stain from adhering properly. Similarly, try not to stain your deck during extreme heat or direct sunlight, as the stain can dry too quickly, leading to uneven application and a blotchy appearance. The ideal conditions for staining are mild temperatures (around 15-25°C) with overcast skies or during the cooler parts of the day, such as early morning or late afternoon.
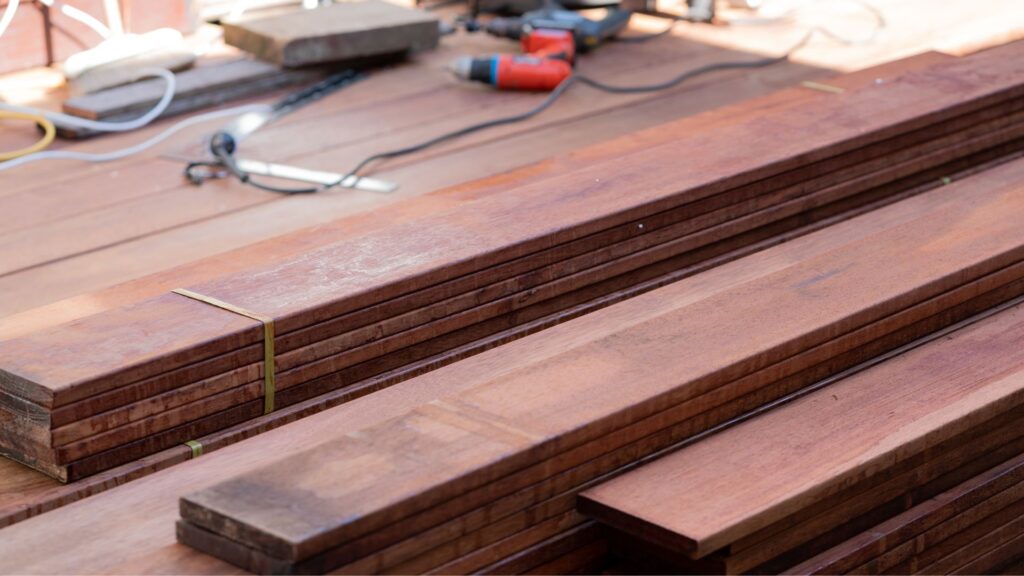
Choosing the Right Stain
Selecting the right stain for your deck is just as important as the preparation process. New Zealand’s outdoor conditions, particularly the intense UV rays and frequent rain, require a high-quality stain that offers excellent protection against the elements. When shopping for a deck stain, look for products specifically designed for outdoor use and capable of withstanding New Zealand’s climate.
Here are the key features to consider when choosing a deck stain.
- UV Protection: New Zealand has some of the highest UV levels in the world, which can cause wood to fade and deteriorate over time. Look for stains with built-in UV blockers to protect your deck from sun damage and keep the color vibrant for longer.
- Water Resistance: Since decks are constantly exposed to moisture, it’s essential to choose a stain that provides excellent water resistance. A quality stain will repel water, preventing mold, mildew, and wood rot.
- Durability: Opt for a stain that’s known for its durability and longevity, especially in high-traffic areas. Oil-based stains are often more durable, but water-based stains are easier to clean up and better for the environment.
- Color Options: While protection is the top priority, the color of your stain is also important for enhancing the aesthetic appeal of your deck. Choose a color that complements your home and outdoor space, whether you prefer a natural wood look or a more modern, tinted finish.
Tips for Staining
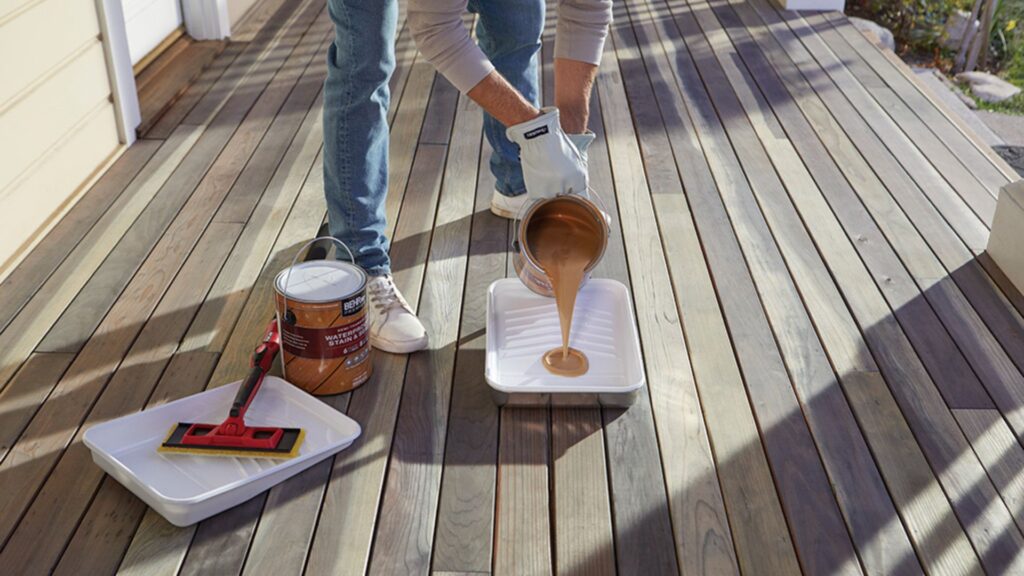
Now that your deck is stripped, sanded, and you’ve chosen the right stain, it’s time to apply the stain for a professional-looking finish. Staining a deck may seem straightforward, but there are a few techniques that can make all the difference.
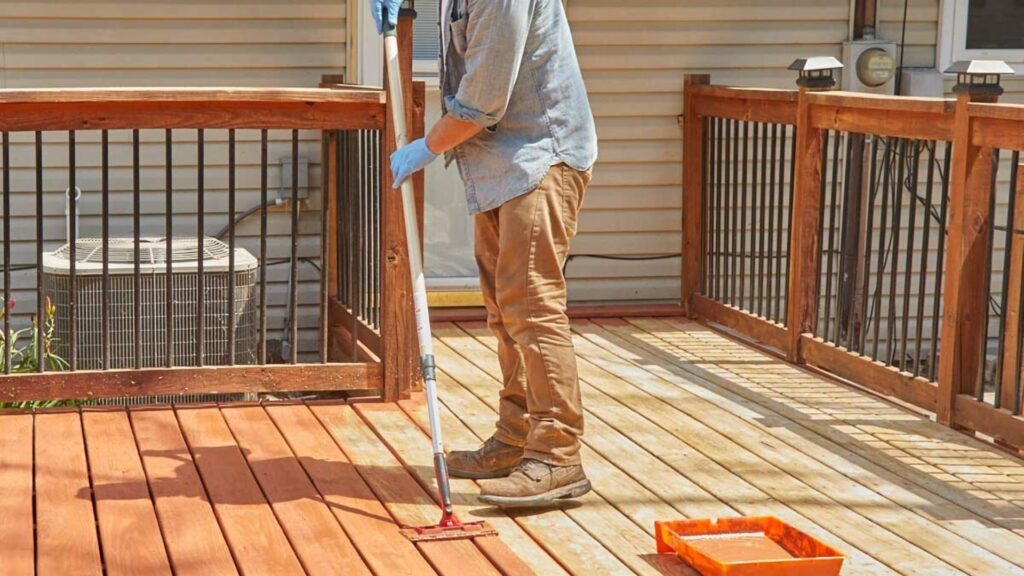
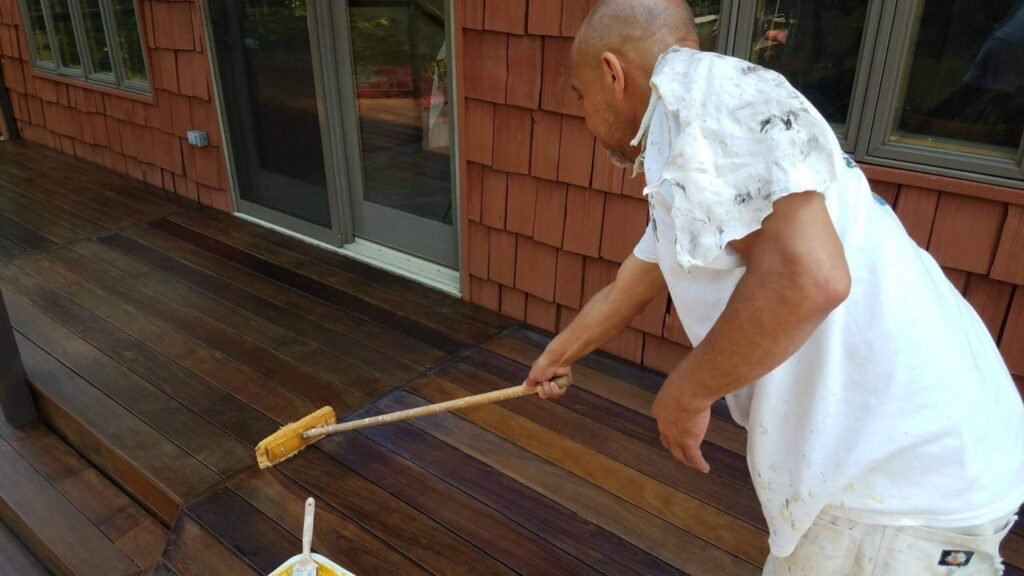
1. Apply Evenly: Use a high-quality brush, roller, or sprayer to apply the stain evenly across the deck boards. Start at one end of the deck and work your way toward the other, ensuring each board is fully covered without missing spots.
2. Work in Small Sections: To avoid lap marks, work in small sections and apply the stain while the previous section is still wet. If using a brush or roller, make long, smooth strokes along the grain of the wood for the best results.
3. Don’t Overapply: More stain isn’t always better. Applying too much can result in a sticky finish that never fully dries. Follow the manufacturer’s recommendations on how many coats to apply, usually one or two is sufficient.
4. Clean as You Go: Keep a clean rag handy to wipe away excess stain or any drips that may occur. It’s easier to deal with these as you work, rather than after the stain has dried.
After completing your staining project, allow the deck to dry completely before placing furniture or walking on it, which can take anywhere from 24 to 48 hours, depending on the type of stain and weather conditions. For more detailed staining techniques, be sure to check out our related article on the best methods for applying deck stain.
By taking your time and preparing your deck properly, you’ll ensure that your new stain looks beautiful and provides long-lasting protection against New Zealand’s tough outdoor conditions.
FAQs: About How To Strip Stain From Deck NZ
Conclusion
In conclusion, stripping the stain from your deck is a crucial process to maintain its beauty and longevity, especially in New Zealand’s challenging climate. By following key steps—applying the stain stripper, allowing it to work, scrubbing or pressure washing, sanding, and rinsing—you ensure that your deck is properly prepped for a fresh coat of stain. This not only enhances the appearance of your outdoor space but also protects the wood from further wear and tear. While the process may take some time and effort, it’s a rewarding DIY project that can save you money and give your deck a professional-looking finish. If you’re ready to get started, don’t hesitate to begin your project and enjoy the transformation. Feel free to reach out if you have any questions, or explore our other articles for more tips on deck maintenance and care!
Find A Professional Decking Company Near You!
- Balcony Construction Christchurch
- Deck Builders Alexandra
- Deck Builders Alexandra, Clyde & Cromwell
- Deck Builders Auckland
- Deck Builders Central Otago
- Deck Builders Christchurch
- Deck Builders Clyde
- Deck Builders Cromwell
- Deck Builders Hamilton
- Deck Builders Hawkes Bay
- Deck Builders Invercargill
- Deck Builders Kapiti Coast
- Deck Builders Kerikeri
- Deck Builders Lower Hutt
- Deck Builders Nelson
- Deck Builders New Plymouth
- Deck Builders Paihia
- Deck Builders Palmerston North
- Deck Builders Porirua
- Deck Builders Queenstown
- Deck Builders Taupo
- Deck Builders Tauranga
- Deck Builders Upper Hutt
- Deck Builders Wanaka
- Deck Builders Warkworth
- Deck Builders Wellington
- Deck Builders West Auckland
- Deck Staining Palmerston North
About the Author:
Mike Veail is a recognized digital marketing expert with over 6 years of experience in helping tradespeople and small businesses thrive online. A former quantity surveyor, Mike combines deep industry knowledge with hands-on expertise in SEO and Google Ads. His marketing strategies are tailored to the specific needs of the trades sector, helping businesses increase visibility and generate more leads through proven, ethical methods.
Mike has successfully partnered with numerous companies, establishing a track record of delivering measurable results. His work has been featured across various platforms that showcase his expertise in lead generation and online marketing for the trades sector.
Learn more about Mike's experience and services at https://theleadguy.online or follow him on social media: