Welcome to your essential guide on tackling one of the more silent yet persistent issues homeowners face in New Zealand: moss on roofs. With our unique climate, characterized by high levels of humidity and rainfall, moss finds a welcoming environment on many of our rooftops, leading to unsightly green patches that can cause significant damage over time. From blocked gutters to compromised roof integrity, the impact of unchecked moss growth is not something to be taken lightly.
However, the good news is that removing moss from your roof with the right knowledge and tools can be a straightforward, if not satisfying, task. In this comprehensive guide, we’ll walk you through everything you need to know about moss removal in NZ, from understanding why moss chooses your roof as its home, to preventive measures, DIY removal techniques, and when to call in the professionals. Our aim is not just to help you reclaim the beauty of your roof but to ensure it stands strong against the elements for years to come. Let’s dive in and get your roof back to its former glory.
Removing moss from your roof in New Zealand involves a few straightforward steps to ensure your roof remains damage-free and looks its best. Begin by wearing appropriate safety gear. Use a soft-bristled brush to gently scrape away the moss, taking care not to damage the roofing materials. For an eco-friendly moss removal solution, mix equal parts water and white vinegar, apply it to the moss-covered areas, and let it sit for at least 15 minutes before rinsing off with water. For prevention, consider trimming overhanging branches to reduce shade and moisture on your roof, which are conducive to moss growth. Regular maintenance and inspections can help prevent moss from returning. Remember, safety is paramount, so consider professional services for steep or high roofs.
- Understanding Moss On Roofs
- Preventative Measures
- Preparing For Moss Removal
- DIY Moss Removal Methods
- Professional Moss Removal Services
- Post-Removal Care And Maintenance
- Legal And Environmental Considerations
- FAQs: About Moss Removal From Roofs In New Zealand
- Conclusion
- Find A Professional Roofing Company Near You!
Understanding Moss On Roofs
When it comes to maintaining a home, the roof often takes center stage in safeguarding against the elements. However, one overlooked adversary that can compromise this shield is moss. This seemingly innocuous green blanket, while adding a touch of whimsy to fairy tales, harbors potential risks to the durability of roofs, especially in climates conducive to its growth, such as the humid conditions found in New Zealand. Understanding moss, its growth triggers, and its impact on roofs is crucial for homeowners looking to preserve the integrity of their abodes.
What is Moss and Why Does It Favor Roofs?
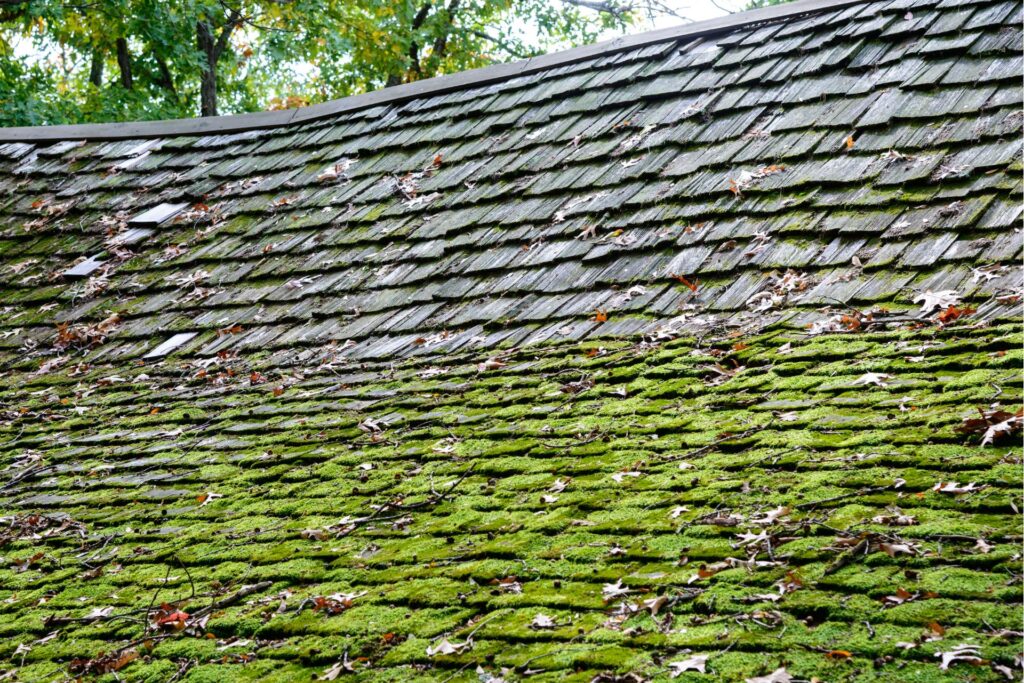
Moss is a simple, non-vascular plant that thrives in moist environments. Unlike typical plants, moss lacks conventional roots, flowers, or seeds and reproduces through spores. It prefers shady, damp areas, making rooftops, especially those shaded by trees and receiving less direct sunlight, an ideal breeding ground. In New Zealand’s climate, characterized by high humidity levels, moss finds a particularly hospitable environment. The country’s abundant natural moisture, combined with its temperate weather patterns, creates a perfect setting for moss to flourish, often on the north-facing or shaded sections of roofs.
The Impact of Moss on Roof Durability
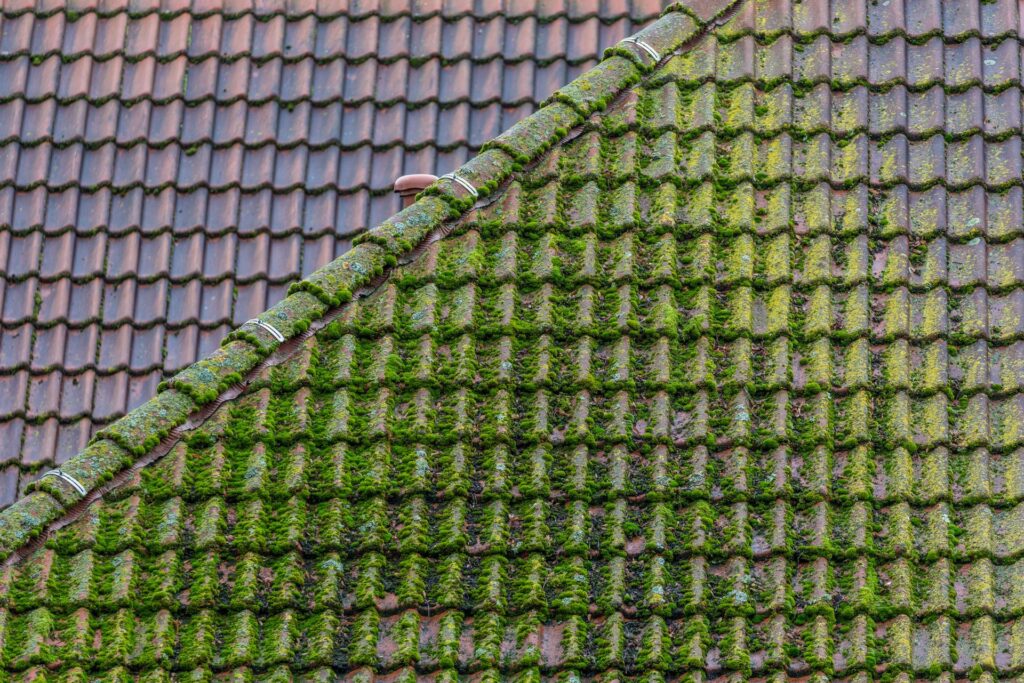
While moss on a roof might create a picturesque, rustic appearance, it spells trouble for roof materials, particularly shingles. The primary concern with moss is its capacity to retain moisture. In a humid climate like New Zealand’s, this can lead to a perpetually damp environment on the roof surface, which is detrimental for several reasons:
Moisture Damage: The trapped moisture can seep underneath shingles and tiles, making its way into the roof deck and potentially into the home itself. Over time, this moisture can rot wood, corrode materials, and lead to leaks, compromising the structural integrity of the roof and the home.
Shingle Degradation: Moss can cause physical damage to shingles. As it grows, it can lift and displace shingles, exposing the roof to further moisture and damage. The roots, or rhizoids, of moss, can also adhere strongly to shingles, leading to surface wear and granule loss upon removal.
Addressing moss growth on roofs is more than an aesthetic concern; it’s a preventative measure to safeguard the home’s overall structure. Regular roof inspections, cleaning, and maintenance are vital steps in controlling moss proliferation. For those living in regions prone to high humidity, like New Zealand, understanding the nature of moss and its potential impacts on roofing materials is the first line of defense in ensuring the longevity and durability of your roof.
Preventative Measures
Maintaining a moss-free roof is not only crucial for the aesthetic appeal of your home but also for extending the life of your roofing materials. Moss growth can cause significant damage over time, leading to costly repairs. In this guide, we will delve into preventative measures you can take to keep your roof in prime condition, emphasizing proper maintenance, the significance of tree trimming, gutter cleaning, adequate sunlight exposure, and the selection of moss-resistant roofing materials.
Roof Maintenance: Your First Line of Defense
Regular roof maintenance is the cornerstone of preventing moss accumulation. Moss thrives in damp, shaded areas, and once it takes hold, it can be challenging to remove. By conducting periodic inspections, especially after severe weather conditions, you can identify and rectify potential issues before moss has a chance to grow. Look for signs of wear and tear, and ensure that any missing or damaged shingles are promptly replaced to prevent water accumulation, which moss loves.
Let the Sunshine In The Role of Tree Trimming and Gutter Cleaning
Moss dislikes sunlight. Therefore, one of the most effective strategies to deter its growth is by ensuring your roof receives ample sunlight. This can be achieved by regularly trimming overhanging branches that cast shadows on your roof, thereby minimizing the shaded areas where moss prefers to grow.
Moreover, gutter cleaning should not be overlooked. Clogged gutters can lead to water overflow and accumulation on your roof, creating an ideal environment for moss. By keeping your gutters clean and functional, you ensure proper water drainage, significantly reducing the chances of moss taking root.
Choosing the Right Roofing Materials: A Moss-Resistant Approach
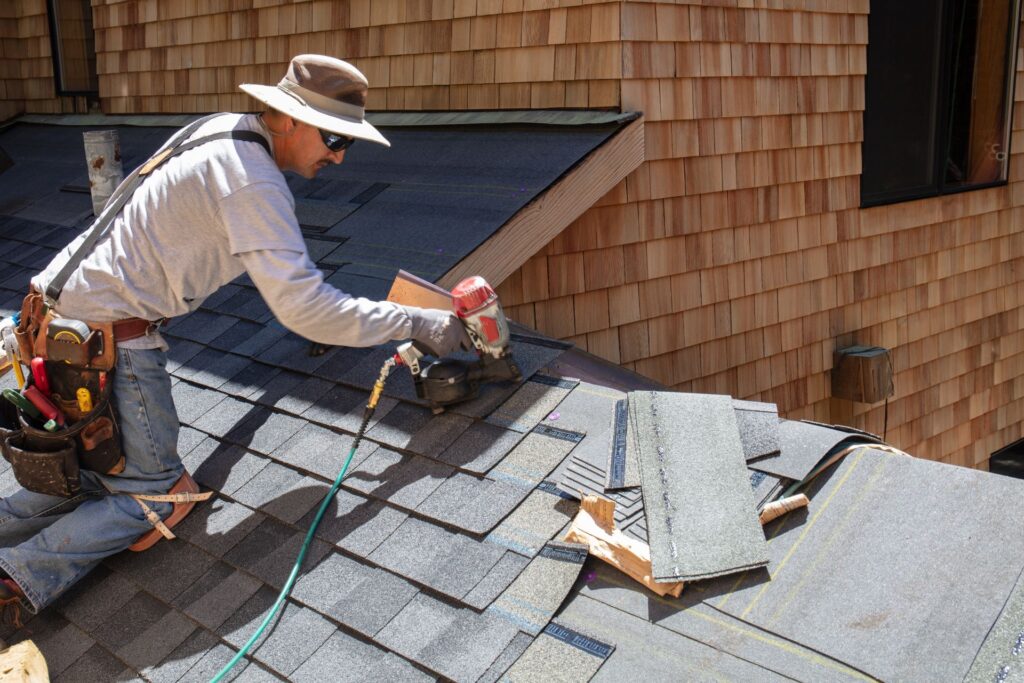
The choice of roofing materials plays a pivotal role in preventing moss growth. Certain materials, such as metal, slate, and asphalt shingles treated with moss-resistant chemicals, offer inherent properties that deter moss accumulation. When considering a roof replacement or new installation, opting for these materials can provide long-term benefits, reducing maintenance requirements and enhancing the overall durability of your roof.
In conclusion, maintaining a moss-free roof requires a proactive approach, focusing on regular maintenance, strategic tree trimming, effective gutter cleaning, and the selection of appropriate roofing materials. By implementing these preventative measures, you can safeguard your home against the damaging effects of moss, ensuring your roof remains in excellent condition for years to come. Remember, a little effort goes a long way in preserving the integrity and appearance of your home’s exterior.

Preparing For Moss Removal
Are you noticing a green blanket of moss covering parts of your home’s exterior? While moss can sometimes add a quaint, fairytale-like charm to garden stones and trees, when it starts to overtake roofs, patios, or sidewalks, it’s time for action. Moss removal not only helps in maintaining the aesthetic appeal of your home but also prevents potential damage. This step-by-step guide focuses on Section 3: Preparing for Moss Removal, ensuring you’re well-equipped and safe throughout the process.
Safety First: The Non-Negotiable Priority
Before diving into the removal process, prioritizing safety is paramount. Dealing with moss often involves working at heights and handling tools and chemicals, which poses risks. Here’s how you can minimize these risks:
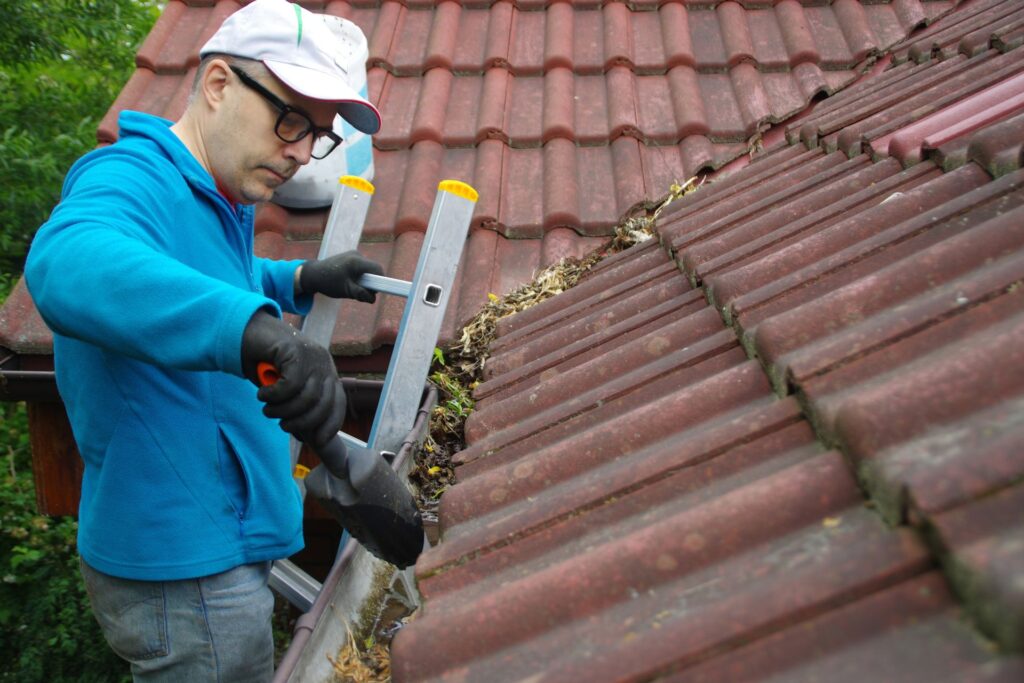
Personal Protective Equipment (PPE): Equip yourself with the necessary safety gear. This includes gloves to protect your hands from scrapes and the chemicals used in moss removal products, non-slip boots to prevent falls, especially when climbing ladders or walking on wet surfaces, and eye protection to shield your eyes from debris and splashes.
Awareness and Caution: If you’re using a ladder, ensure it’s stable and securely positioned. Always be mindful of your surroundings, especially if you’re working on a sloped roof. It’s advisable to have someone with you to steady the ladder and provide assistance if needed.
Gathering Your Tools and Materials
Now that you’re dressed for the job, let’s gather the tools and materials needed for a successful DIY moss removal project:
Ladder: A sturdy ladder is essential for reaching moss growth on roofs or high exterior walls.
Gloves: Durable gloves protect your hands during the removal process, offering a better grip and preventing cuts or irritation from moss and debris.
Soft-bristled Brush: This tool is crucial for gently scrubbing off the moss without damaging the underlying surface. A brush with soft bristles ensures effective moss removal while preserving the integrity of your roof shingles or pavement.
Hose: A garden hose with a spray nozzle will help you wet the mossy area before scrubbing and rinse away the loosened moss and debris afterward.
Protective Clothing: Long sleeves and pants will shield your skin from moss, debris, and the sun. Opt for clothes you don’t mind getting dirty or possibly stained.
Preparing the Area
Pre-cleaning Inspection: Before you start, inspect the area for any damage. Moss often thrives in damp conditions, which can also lead to rot or deterioration. Addressing these issues beforehand ensures a smoother cleaning process.
Wet the Moss: Moisten the moss with your hose. Wet moss is easier to remove, as it becomes heavier and less likely to break into airborne pieces.
Plan Your Cleaning Session: Choose a cloudy day for moss removal. Direct sunlight can cause rapid drying, making it harder to remove the moss and potentially harming your roof or pavement surfaces with harsh chemicals.
With these preparations in place, you’re ready to tackle moss removal safely and efficiently. Remember, the key to successful DIY home maintenance projects lies in taking the proper precautions and using the right tools for the job. Not only does this approach safeguard your well-being, but it also ensures the longevity and beauty of your home’s exterior.
By following these detailed steps in preparing for moss removal, homeowners can confidently approach the task, knowing they’re well-equipped and prioritizing safety above all.

DIY Moss Removal Methods
Moss can be a persistent issue in many gardens and on various surfaces, including roofs, sidewalks, and walls. While it adds a touch of natural beauty to some settings, in others, it can be a nuisance or even cause damage. In this comprehensive guide, we delve into DIY moss removal methods, focusing on practical, eco-friendly solutions that are safe for your home and the environment. Whether you’re facing a mossy roof in New Zealand or a garden path that’s become slippery, we have you covered.
Step-by-Step Guide to Physically Removing Moss with a Soft-Bristled Brush
Removing moss physically is one of the most environmentally friendly methods. It requires minimal tools and no harmful chemicals. Here’s how to do it effectively:
1. Choose the Right Time: Tackle moss removal on a dry, overcast day to prevent the sun from drying out your cleaning solution too quickly.
2. Gather Your Tools: You’ll need a soft-bristled brush or broom and a bucket of water. For larger areas, consider a long-handled brush to save your back.
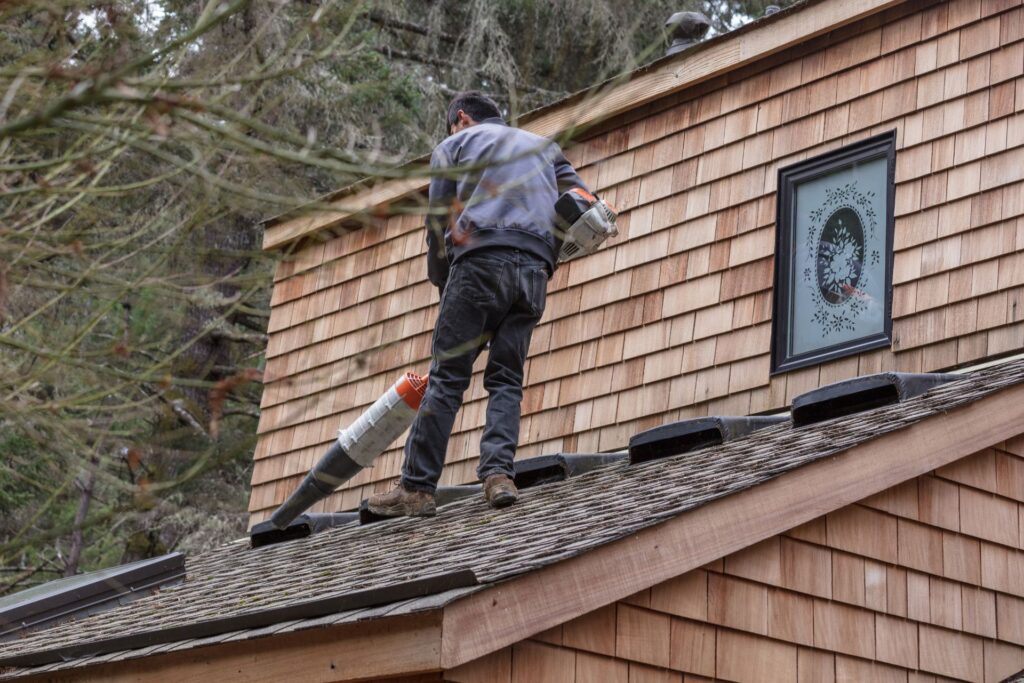
3. Start Brushing: Gently but firmly brush the moss away from the surface. Work in sections to ensure you don’t miss any spots.
4. Rinse the Surface: Once you’ve brushed away the moss, rinse the surface with clean water to wash away any remnants.
This method is particularly effective for small to medium moss infestations and can be a great workout too!
How to Prepare and Apply Eco-friendly Moss Removal Solutions
For more stubborn moss or for those looking for an alternative to physical removal, eco-friendly solutions are a fantastic choice. Here are two simple, safe recipes:
Vinegar Solution: Mix equal parts water and white vinegar in a spray bottle. Spray the solution directly onto the moss and let it sit for 15 minutes before scrubbing with a brush and rinsing with water.
Baking Soda Solution: Dissolve a cup of baking soda in a gallon of water. Apply this solution to the mossy area and let it sit for at least 30 minutes. Afterward, scrub and rinse as described above.
These solutions are safe for pets and plants, making them ideal for garden paths and roofs.
The Pros and Cons of Using Chemical Moss Killers Available in NZ
While eco-friendly options are preferred, sometimes the situation calls for stronger measures. In New Zealand, a variety of chemical moss killers are available, but it’s crucial to choose wisely:
Pros:
Effective on Severe Infestations: Chemical moss killers can handle large, stubborn moss problems more efficiently than manual methods.
Long-lasting Results: These products often prevent moss from returning for extended periods.
Cons:
Environmental Impact: Many chemical moss killers contain substances that can be harmful to wildlife, pets, and even the water supply.
Roof Damage: Certain chemicals can damage roofing materials, leading to costly repairs.
When selecting a chemical moss killer, look for eco-friendly and roof-safe options. Always follow the manufacturer’s instructions carefully to minimize any potential harm.
DIY moss removal doesn’t have to be complicated or harmful to the environment. With the right tools and methods, you can effectively remove moss from various surfaces in a safe, sustainable manner. Whether you opt for physical removal or natural solutions like vinegar and baking soda, or even chemical treatments in severe cases, remember to consider the impact on your surroundings. By following these guidelines, you can maintain your property’s beauty without compromising the health of the planet.
Professional Moss Removal Services
In the lush and varied climate of New Zealand, the beauty of nature is undeniable. However, this very beauty can sometimes pose a challenge to homeowners, especially when it comes to the upkeep of their roofs. Moss, though seemingly harmless, can shorten the lifespan of roofing materials, leading to costly repairs down the line. This is where professional moss removal services come into play. If you’re unsure about when to call in the experts, what to expect from their services, and how to choose the right one, this guide is for you.
When to Consider Hiring a Professional Roof Cleaning Service in New Zealand
Timing is crucial when it comes to addressing moss growth on your roof. If you notice any of the following signs, it’s time to consider professional intervention:
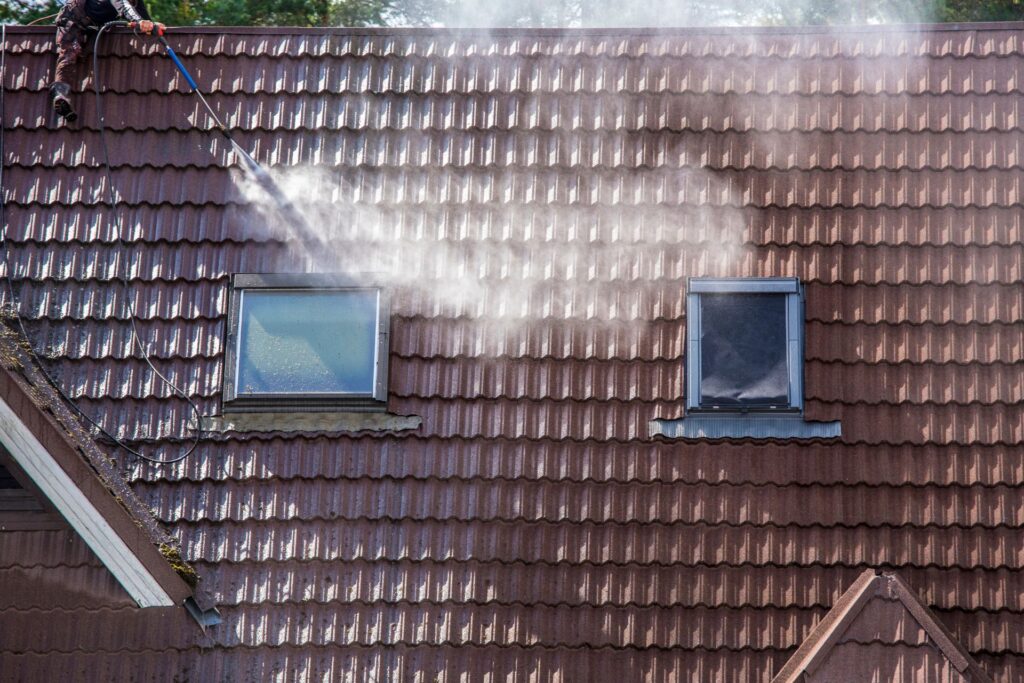
1. Visible Moss Growth: The most obvious indicator is the presence of green, fuzzy patches on your roof tiles or shingles.
2. Damp Areas on the Roof: Moss thrives in moist conditions. If your roof tends to retain moisture or has poor drainage, moss growth is more likely.
3. Discoloration and Stains: Look out for green or black stains, which can be early signs of moss and algae formation.
Acting swiftly not only helps in maintaining the aesthetic appeal of your home but also prevents structural damage, ensuring the longevity of your roof.
What to Expect from Professional Moss Removal Services
Understanding the process involved in professional moss removal can set your expectations and help you make informed decisions. Here’s what a typical service entails:
1. Initial Assessment: Professionals will first inspect your roof to determine the extent of moss growth and any underlying issues that need to be addressed.
2. Customized Treatment Plan: Based on the assessment, they will recommend a treatment plan tailored to your roof’s specific needs.
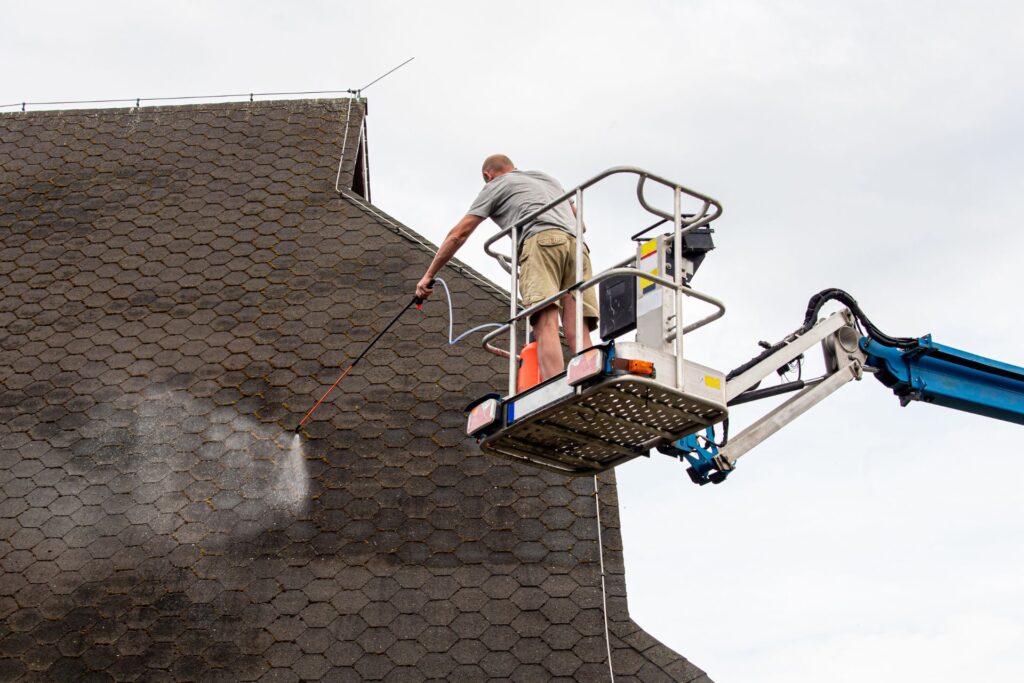
3. Moss Removal Process: Using specialized tools and solutions, the team will carefully remove the moss, ensuring not to damage the roofing materials.
4. Time Frame: The entire process can vary depending on the severity of the moss growth but generally takes a few hours to a day.
5. Safety Measures: Reputable companies adhere to strict safety standards to protect their employees and your property during the cleaning process.
How to Choose a Reliable and Eco-Friendly Professional Service
Selecting the right service provider is pivotal. Here are some tips to help you choose a reliable and eco-friendly moss removal service:
1. Check Credentials: Look for companies with certified professionals who have the necessary training and experience in roof cleaning.
2. Read Reviews: Customer reviews can provide insights into the company’s reliability and quality of service.
3. Eco-Friendly Practices: Inquire about the use of environmentally safe products and methods to ensure that the treatment does not harm your surroundings or the ecosystem.
4. Insurance and Warranty: Ensure the service provider is insured to protect against any potential damages. Also, check if they offer a warranty for their services.
Moss removal is not just about enhancing the curb appeal of your home but also about protecting its structural integrity. By choosing the right professionals for the job, you can rest assured that your roof will remain in pristine condition, free from the damaging effects of moss. With the tips and insights provided in this guide, you’re now well-equipped to make an informed decision when it comes to professional moss removal services in New Zealand. Remember, a little care goes a long way in preserving the beauty and durability of your home.
Post-Removal Care And Maintenance
Roofs are critical components of our homes, providing shelter and safety from the elements. However, the growth of moss can significantly compromise the integrity and longevity of roofing materials. Once you’ve taken the essential step of removing moss from your roof, it’s crucial to engage in proper post-removal care and maintenance. This ensures your roof remains in optimal condition, extending its lifespan while maintaining its aesthetic appeal. Let’s dive into the best practices for roof maintenance post-moss removal, the importance of regular roof inspections and gutter cleaning, and explore long-term solutions to prevent moss regrowth.
Best Practices for Roof Maintenance Post-Moss Removal
After successfully removing moss from your roof, it’s imperative to adopt maintenance strategies that prevent its return. Moss thrives in moist, shaded areas, and its presence can lead to water damage, rot, and the degradation of roofing materials. To safeguard your roof, ensure that you:
Trim Overhanging Tree Branches: Limit the amount of shade on your roof by trimming any overhanging branches. This reduces the moist, shaded environments that moss prefers, thereby discouraging its growth.
Ensure Proper Drainage: Water accumulation can promote moss growth. Make sure your roof is designed to efficiently drain water, especially in valleys and around chimneys and skylights.
The Role of Regular Roof Inspections and Gutter Cleaning
Regular roof inspections and gutter cleaning play pivotal roles in maintaining a moss-free roof. These practices help in identifying and rectifying potential problems before they escalate.
Roof Inspections: Conduct bi-annual roof inspections, preferably in the spring and fall. This helps in spotting early signs of moss regrowth, damaged shingles, or other issues that could lead to moss proliferation. Early detection and repair are key to preventing moss from taking hold.
Gutter Cleaning: Clean your gutters at least twice a year to prevent blockages that can lead to water pooling on your roof. Stagnant water is a breeding ground for moss, so keeping gutters clear is essential for a healthy, moss-free roof.
Long-term Solutions and Treatments
For homeowners seeking to minimize maintenance and ensure a long-term solution against moss growth, several effective treatments can be applied:
Zinc Strips: Installing zinc or copper strips along the ridge of your roof can offer a lasting solution to moss prevention. When rainwater contacts these metal strips, it creates a solution that inhibits moss growth.
Improved Ventilation: Proper attic ventilation ensures that your roof stays dry and prevents the damp conditions that moss needs to thrive. Consider adding or improving roof and soffit vents to enhance airflow.
Chemical Treatments: Post-cleaning, applying moss-inhibiting chemical treatments can significantly reduce the likelihood of regrowth. These treatments should be selected carefully, considering their environmental impact and compatibility with your roofing materials.
Maintaining a moss-free roof is crucial for the health and longevity of your home. By following these best practices for post-removal care, conducting regular inspections, and implementing long-term solutions, you can ensure your roof remains in prime condition for years to come. Remember, prevention is key to avoiding the costly damages that moss can inflict on your roof. With the right care and attention, your roof will continue to protect your home while enhancing its overall curb appeal.
Legal And Environmental Considerations
Creating a comprehensive guide to Section 7: Legal and Environmental Considerations, especially focusing on the context of New Zealand, involves a deep dive into the nuanced aspects of roof cleaning. This entails understanding the legal framework and environmental concerns associated with the use of chemicals in this process. Our goal is to ensure that this explanation not only serves as an informative resource but also resonates with readers and search engines alike, by being rich in detail and engaging in its delivery.
Understanding Legal Framework in New Zealand
New Zealand’s approach to roof cleaning, particularly regarding the legal use of chemicals, is governed by a combination of national regulations and local council bylaws. The Resource Management Act (RMA) 1991 forms the backbone of environmental protection in New Zealand, including aspects related to chemical usage. It emphasizes the sustainable management of natural and physical resources, which directly impacts the choice and disposal of roof cleaning chemicals.
Local councils across New Zealand have the authority to implement specific bylaws that further regulate these activities. These bylaws can vary significantly from one region to another, making it essential for homeowners and roof cleaning professionals to familiarize themselves with the local regulations. For instance, certain councils may have strict guidelines on the types of chemicals that can be used, focusing on their potential impact on local waterways and ecosystems. Non-compliance with these regulations can lead to significant penalties, including fines and legal action.
The Environmental Impact of Roof Cleaning Chemicals
The choice of chemicals for roof cleaning has far-reaching implications for the environment. Traditional cleaning agents, often rich in harsh chemicals like chlorine bleach or sodium hydroxide, can cause damage to plant life, and aquatic ecosystems, and can contribute to soil degradation. When these chemicals are washed off roofs during cleaning, they can make their way into stormwater systems, eventually reaching rivers, lakes, and the ocean, posing a threat to marine life and water quality.
Embracing Eco-friendly Options
In response to these environmental challenges, there’s a growing importance placed on selecting eco-friendly cleaning options. These alternatives, which are biodegradable and less harmful to the ecosystem, aim to minimize the environmental footprint of roof cleaning activities. Products certified as eco-friendly under New Zealand’s environmental standards are designed to break down more quickly than traditional chemicals, reducing the risk of long-term environmental damage.
Moreover, employing eco-friendly methods and products for roof cleaning is not just about adhering to legal requirements. It’s also about taking proactive steps towards sustainability and environmental stewardship. Homeowners and cleaning professionals are increasingly recognizing the value of these practices, not only in compliance with the law but in contributing to a healthier, more sustainable world.
In summary, navigating the legal and environmental considerations of roof cleaning in New Zealand requires a thorough understanding of national regulations and local council bylaws, as well as a commitment to eco-friendly practices. By choosing environmentally responsible cleaning methods and chemicals, individuals and businesses can play a crucial role in protecting New Zealand’s unique natural landscape. It’s a collective effort towards ensuring the sustainability of our environment for future generations, underscoring the importance of making informed, responsible choices in roof maintenance activities.
FAQs: About Moss Removal From Roofs In New Zealand
Conclusion
Concluding our discussion on maintaining a moss-free roof, it’s essential to revisit the importance of regular inspections and cleanings to prevent moss accumulation, which not only enhances your home’s aesthetic but also its longevity. Implementing preventive measures like trimming overhanging branches and ensuring proper drainage, alongside employing effective DIY or commercial cleaning methods, are critical steps. However, when the situation is beyond simple home remedies, seeking professional assistance becomes a prudent decision. We encourage you to take proactive steps towards a healthier roof and invite you to share your experiences or reach out for professional help, enriching our community with your insights and questions. By addressing the issue of moss on your roof with informed actions and engaging with others’ experiences, you contribute to a larger conversation that benefits all homeowners striving to maintain their homes in top condition.
Find A Professional Roofing Company Near You!
- Auckland Roofing Company
- Cambridge Roofing NZ
- Central Otago Roofing Services
- Hamilton Roofing Services
- Hastings Roofing Company
- Hawkes Bay Roofing Company
- Kapiti Coast Roofing Services
- Lower Hutt Roofing Services
- Napier Roofing Company
- Nelson Roofing Company
- New Plymouth Roofing Company Taranaki
- North Shore Roofing Company
- Orewa Roofing Company
- Porirua Roofing Services
- Roof Painting Company Auckland
- Roof Repairs Manukau
- Roof Repairs Takanini
- Roofers Papakura
- Roofing Company Invercargill
- Roofing Contractors Northland
- Roofing Contractors South Auckland
- Roofing Contractors Whangarei
- Roofing Palmerston North
- Roofing Waikato
- Roofing Walkworth
- Roofing Wellington
- Te Awamutu Roofing
- Upper Hutt Roofing Services
- Warkworth Roofing Company
About the Author:
Mike Veail is a recognized digital marketing expert with over 6 years of experience in helping tradespeople and small businesses thrive online. A former quantity surveyor, Mike combines deep industry knowledge with hands-on expertise in SEO and Google Ads. His marketing strategies are tailored to the specific needs of the trades sector, helping businesses increase visibility and generate more leads through proven, ethical methods.
Mike has successfully partnered with numerous companies, establishing a track record of delivering measurable results. His work has been featured across various platforms that showcase his expertise in lead generation and online marketing for the trades sector.
Learn more about Mike's experience and services at https://theleadguy.online or follow him on social media: