Welcome to your ultimate guide on how to build steps for a deck in New Zealand! Whether you’re upgrading your outdoor space or building a new deck from scratch, adding safe and sturdy steps is an essential finishing touch. In this guide, we’ll walk you through the entire process of designing and constructing deck steps, all while following New Zealand’s building regulations to ensure your project is both compliant and durable. From planning and gathering materials to cutting stringers and installing handrails, we’ve got you covered with a stepbystep approach that’s DIYfriendly and easy to follow. Let’s dive in and help you create the perfect deck steps to enhance your home’s outdoor area. For professional help, contact experienced fencing contractors in your area.
To build steps for a deck in New Zealand, start by measuring the height of the deck and dividing it by the ideal riser height (usually around 180mm) to determine the number of steps needed. Next, cut the stringers to support the steps, ensuring they meet NZ building code requirements. Secure the stringers to the deck and ground, then attach the treads and, if necessary, risers. Finish by installing handrails if required, sanding the wood, and applying a weather resistant sealant to protect against the elements.
- Planning and Preparation
- Cutting And Preparing The Stringers
- Installing The Stringers
- Building The Treads And Risers
- Adding Handrails (If Required by Code)
- Finishing Touches
- Maintenance Tips For Deck Steps In NZ
- FAQs: About How To Build Steps For A Deck NZ
- Conclusion
- Find A Professional Decking Company Near You!
Planning and Preparation
Building deck steps for your outdoor space is a rewarding project, but careful planning and preparation are crucial to ensure a safe, durable, and code-compliant result. This section will walk you through understanding the New Zealand building regulations, gathering the necessary tools and materials, and accurately measuring and designing your steps.
Understanding NZ Building Regulations for Deck Steps
Before you begin, it’s essential to familiarize yourself with the relevant New Zealand building regulations. These regulations are in place to ensure that any construction meets safety and quality standards. For deck steps, there are specific requirements you need to follow.
- Height Restrictions: NZ building codes specify maximum riser heights (the vertical part of the step) and minimum tread depths (the horizontal part of the step). Typically, the riser height should be between 150mm to 180mm, while the tread depth should be no less than 280mm. These dimensions are designed to ensure steps are both safe and comfortable for use.
- Handrails: If your deck is more than 1 meter above the ground, the installation of a handrail is mandatory. The handrail must meet specific height and spacing guidelines to provide adequate support. Handrails are not only important for safety but are required by law to prevent accidents.
By following these regulations, you’ll ensure that your deck steps not only look great but also comply with legal standards. For more details, refer to the official New Zealand Building Code [here] (ensure you hyperlink to the specific code resource in your document).
Gathering Tools and Materials
Once you’ve understood the legal requirements, the next step is gathering all the necessary tools and materials. Having the right equipment on hand will make the construction process smoother and more efficient.
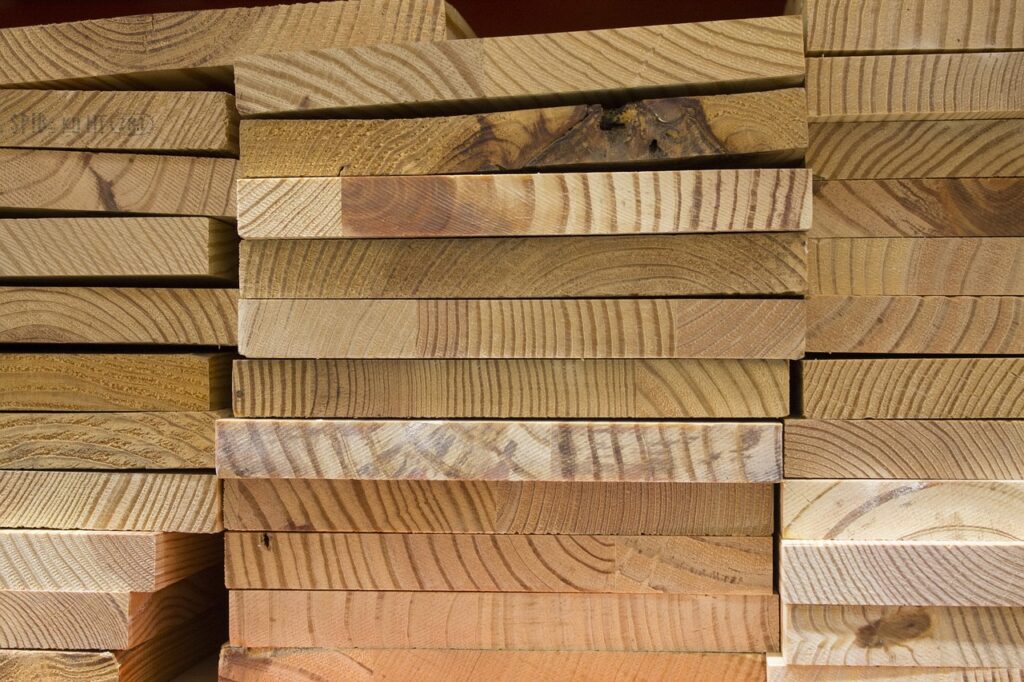
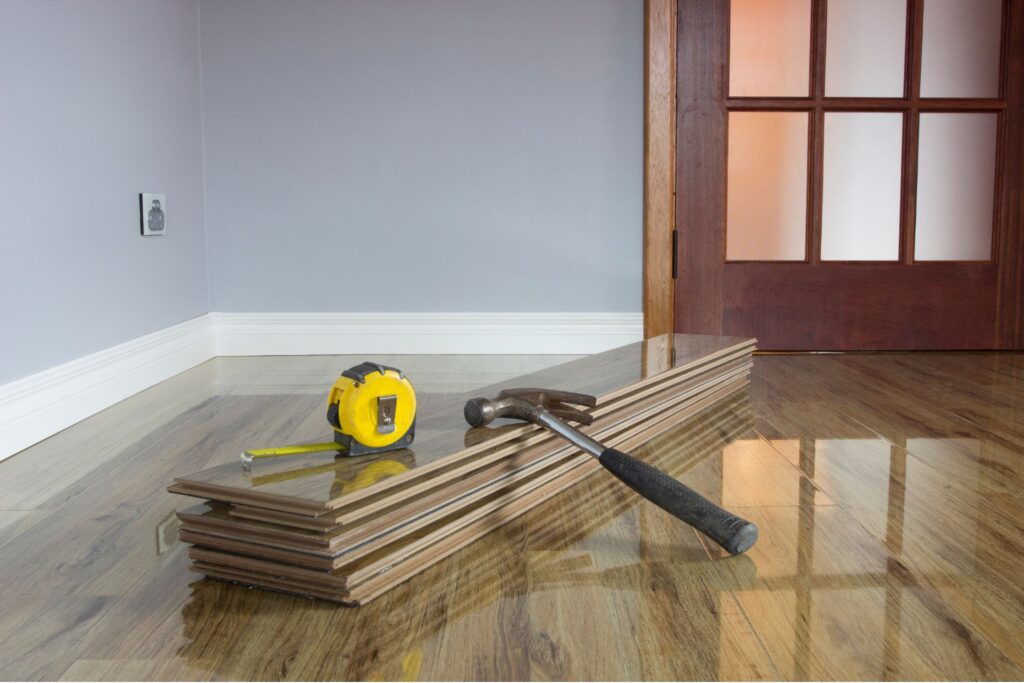
- Materials: You’ll need durable, weather-resistant materials, especially considering New Zealand’s climate. Treated timber is highly recommended for its resistance to rot and insects. In addition to timber for the stringers (the angled boards that support the steps) and treads, you’ll need galvanized nails or screws to prevent rusting, and concrete footings or ground anchors to secure the stringers to the ground. If your design requires risers, make sure to have enough timber for those as well.
- Tools: A few essential tools will make the job easier. At a minimum, you’ll need a handsaw or circular saw for cutting timber, a tape measure for accuracy, a carpenter’s square for marking out your cuts, and a level to ensure your steps are perfectly aligned. A power drill will come in handy for securing the screws, and don’t forget safety gear like gloves and goggles.
Gathering the right tools and materials upfront will save you from unnecessary trips to the hardware store and keep your project on track.
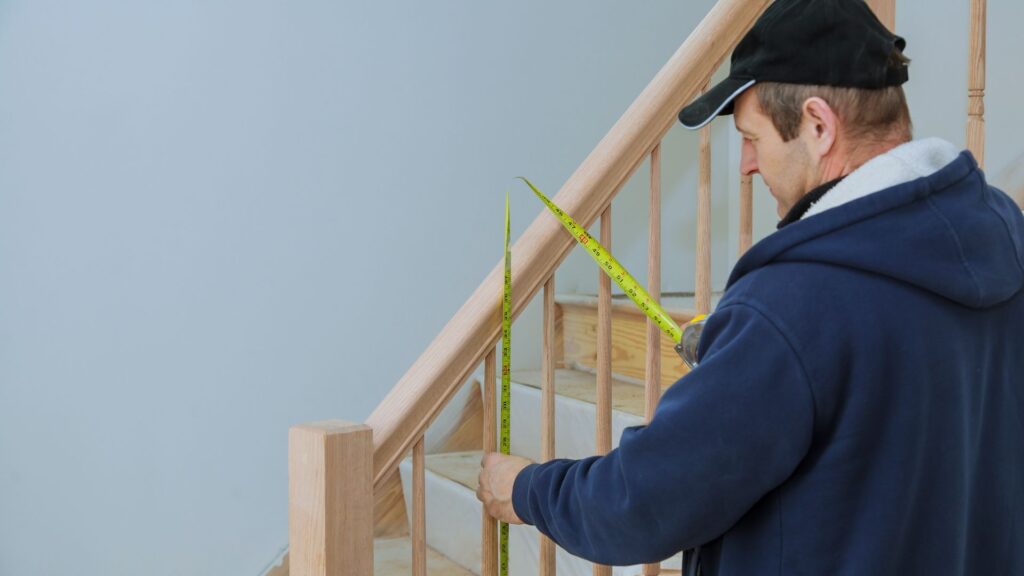
Measuring and Designing the Steps
Accurate measurements are the foundation of any successful deck step project. This section will guide you through calculating the number of steps needed and designing them for both safety and comfort.
- Calculating the Number of Steps: Start by measuring the total height from the top of your deck to the ground, which will help you determine how many steps are needed. Divide the total height by your desired riser height (usually between 150mm to 180mm). For example, if your deck is 900mm high and you choose a riser height of 180mm, you’ll need five steps (900mm ÷ 180mm = 5). It’s important to keep the steps evenly spaced for comfort and aesthetics.
- Designing for Safety and Comfort: Once you’ve calculated the number of steps, you’ll need to determine the tread depth. The tread (where your foot lands) should be wide enough to comfortably step on, typically around 280mm deep. This ensures the steps are not too steep, making them easier to use and reducing the risk of trips and falls.
Also, consider the overall width of the steps. While the width will depend on the design of your deck, a general guideline is to make the steps at least 900mm wide, which provides enough space for safe foot traffic.
By carefully planning your steps and adhering to the recommended rise and run (riser height and tread depth), you’ll ensure that your deck steps are both functional and comfortable to use.
This planning and preparation stage is crucial for setting the foundation for the rest of your project. By understanding New Zealand’s building regulations, gathering the right tools and materials, and taking accurate measurements, you’ll be well on your way to building safe and durable deck steps that complement your outdoor space.
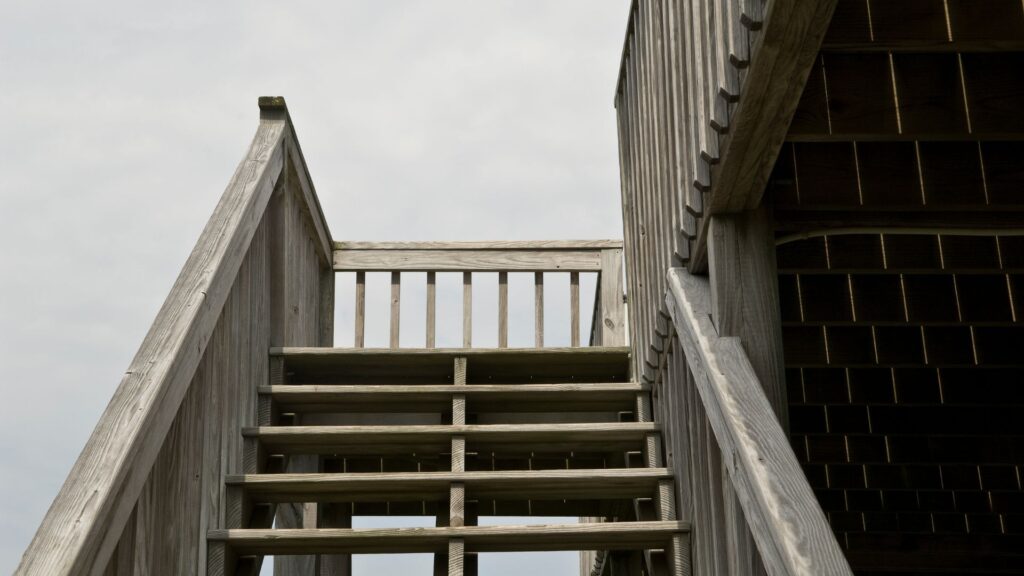
Cutting And Preparing The Stringers
When building steps for your deck, one of the most critical elements is the stringers. These are the diagonal boards that support the weight of each step, making them a crucial structural component. Without well-constructed stringers, your steps could be unstable, unsafe, and unable to support regular foot traffic.
What Are Stringers and Why Are They Important?
Stringers are the backbone of your deck steps, running diagonally from the deck to the ground. They act as the framework that holds the treads (the horizontal part you step on) in place. Each step is essentially “cut into” the stringers, allowing the treads to be securely fastened. In short, if you want your deck steps to be sturdy and long-lasting, you need to focus on building strong, well-cut stringers.
In New Zealand, it’s important to choose the right material for your stringers, especially considering the country’s diverse climate, from humid coastal regions to colder inland areas. Treated timber is the recommended choice for stringers because it’s resistant to moisture, decay, and insect damage. This is essential for outdoor structures that will face constant exposure to the elements. Look for timber that meets the NZ Building Code standards for outdoor construction, ensuring longevity and safety.
Step-by-Step Instructions for Cutting Stringers
Cutting stringers requires precision and careful measurement, but it’s a task that any DIY enthusiast can handle with the right tools and guidance. Here’s a breakdown of how to do it correctly:
1. Measure the Rise and Run
Before you start cutting, you need to calculate the “rise” (the height of each step) and the “run” (the depth of each step). The standard rise for deck steps is around 180mm, and the run is usually 250mm. Once you have these measurements, you’ll know how many steps you need and how long your stringers need to be.
2. Marking the Stringer with a Carpenter’s Square
To ensure accuracy, use a carpenter’s square, which is designed specifically for this task. Start by placing the square on the timber where you want to make your first cut, aligning the rise and run measurements on the square. Carefully mark the spot with a pencil. Repeat this process along the entire length of the stringer until you’ve marked out the position for each step.
3. Making the Cuts
Once you’ve marked the stringer, it’s time to make your cuts. Use a circular saw for the straight cuts, but be sure to stop short of the corners to avoid overcutting. Finish off the cuts with a handsaw for precision. Clean, accurate cuts are essential because any unevenness will lead to unstable steps or uneven treads.
4. Ensure Consistency
It’s important that all the stringers you cut are identical, as any variations will cause your steps to be uneven. After cutting the first stringer, use it as a template to trace and cut the additional stringers. This will ensure consistency and help your steps stay level and safe.
By following these steps carefully, you’ll end up with well-cut, precise stringers that will form a solid foundation for your deck steps. Remember, taking the time to get this right not only ensures the safety of the structure but also increases the overall lifespan of your deck in New Zealand’s varying weather conditions.
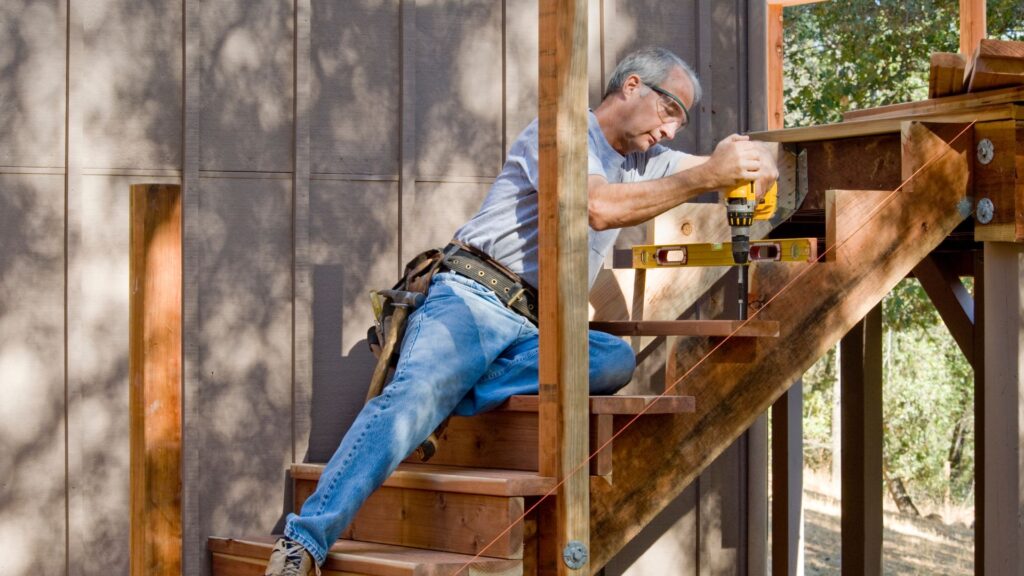
Installing The Stringers
When it comes to building deck steps, installing the stringers is a critical step that forms the backbone of the structure. The stringers are the long, angled pieces of timber that support the treads and risers, and their proper installation ensures your steps are safe, sturdy, and long-lasting. Here’s a detailed guide on how to position, attach, and secure your stringers effectively.
Attaching Stringers to the Deck
The first step in installing stringers is positioning them correctly and securely attaching them to the deck. Begin by marking the location where the top of each stringer will be attached to the deck frame. Make sure that your stringers are evenly spaced and level across their width to ensure uniform step support. For a typical deck, stringers are placed about 300 to 400 mm apart, but this may vary depending on the width of your stairs and the load they will bear.
Once positioned, use galvanized brackets to attach the stringers to the deck frame. Galvanized metal is crucial because it resists corrosion, especially in New Zealand’s often humid climate, where untreated metal can rust and weaken over time. These brackets are secured to the deck joist with heavy-duty galvanized screws or bolts, ensuring a solid connection between the deck and the steps.
For added stability, you can reinforce the connection by installing blocking between the deck joists, creating a sturdy frame that distributes the weight of the stairs evenly. This will also help prevent any wobbling or shifting over time, ensuring that your steps remain secure and safe to use.
Securing the Stringers to the Ground
Properly securing the bottom of the stringers is equally important for long-term stability and safety. Without a solid base, the stringers can shift or settle unevenly, leading to unstable steps. To prevent this, you need to anchor the bottom of the stringers to a stable foundation.
One common method is to use concrete footings. To do this, dig small holes at the base of each stringer, deep enough to hold a concrete footing. Pour concrete into the holes and allow it to set, then rest the bottom of the stringers on the footings. You can further secure the stringers by using galvanized screws or brackets that attach them to the footing, providing both lateral and vertical stability.
Another effective method is using ground anchors. These are metal stakes that are driven into the ground and attached to the bottom of the stringers, preventing them from moving or shifting over time. Ground anchors are especially useful for smaller, low-level decks where concrete footings might not be necessary. They offer a simpler and faster installation process while still providing reliable stability.
Regardless of the method you choose, always ensure that the stringers are level and aligned correctly before fully securing them. Use a level to check both horizontally across the stringers and vertically along their length to avoid any misalignments that could affect the safety or appearance of the steps.
Installing the stringers correctly is crucial for building safe and long-lasting deck steps. By attaching them securely to the deck and anchoring them properly to the ground, you ensure the structural integrity of your steps for years to come. Always use high-quality materials like galvanized metal and follow best practices to protect your work from weather-related damage, especially in New Zealand’s varying climate conditions.
Building The Treads And Risers
When constructing the steps for your deck, the treads and risers are crucial components that not only provide functionality but also enhance the overall appearance and safety of the deck. Let’s break down how to install both elements properly.
Installing the Treads
Choosing the Right Tread Material
When it comes to selecting the material for your treads, there are two primary options: timber and composite decking. Each material comes with its own set of advantages and considerations.
- Timber: Timber is a classic and popular choice in New Zealand for outdoor construction. Treated timber, in particular, is durable and resistant to moisture, rot, and insects, which is essential given New Zealand’s varied climate. Timber treads offer a natural aesthetic and can be stained or painted to match your deck. However, timber does require ongoing maintenance, such as resealing and checking for wear over time.
- Composite Decking: Composite materials, made from a blend of wood fibers and plastic, are becoming increasingly popular for deck treads. They are low-maintenance, resistant to weather and fading, and don’t require sealing or staining. While composite materials often cost more upfront, they can save time and effort in the long term due to their durability and ease of maintenance. One downside is that composite treads may lack the authentic look of real wood, which could be important if you’re aiming for a natural finish.
How to Install Treads Securely
Once you’ve chosen your material, the next step is to ensure your treads are installed correctly for both safety and longevity.
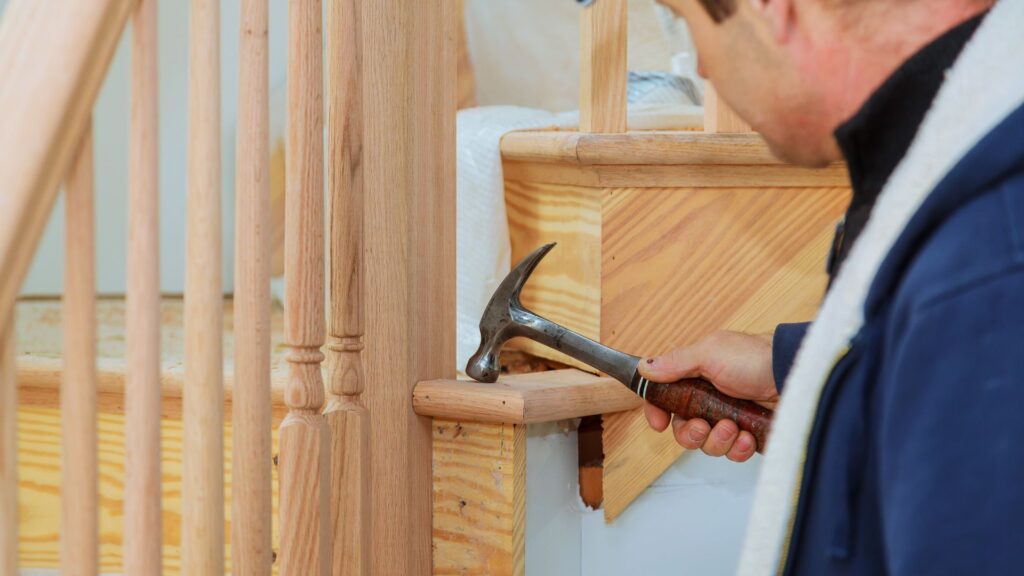
1. Measuring and Cutting the Treads: Accurately measure the width of your deck steps to ensure the treads fit snugly. Each tread should extend slightly beyond the edges of the stringers for a finished look. Cut your treads to the correct size using a circular saw, making sure the cuts are clean and even.
2. Spacing and Alignment: Proper spacing is crucial for both aesthetics and safety. The distance between each tread, known as the “run,” should be consistent, typically between 250-300mm depending on your design. The treads should be level across the width of the step to avoid any tripping hazards. Using a level to check each tread as you go will help ensure perfect alignment.
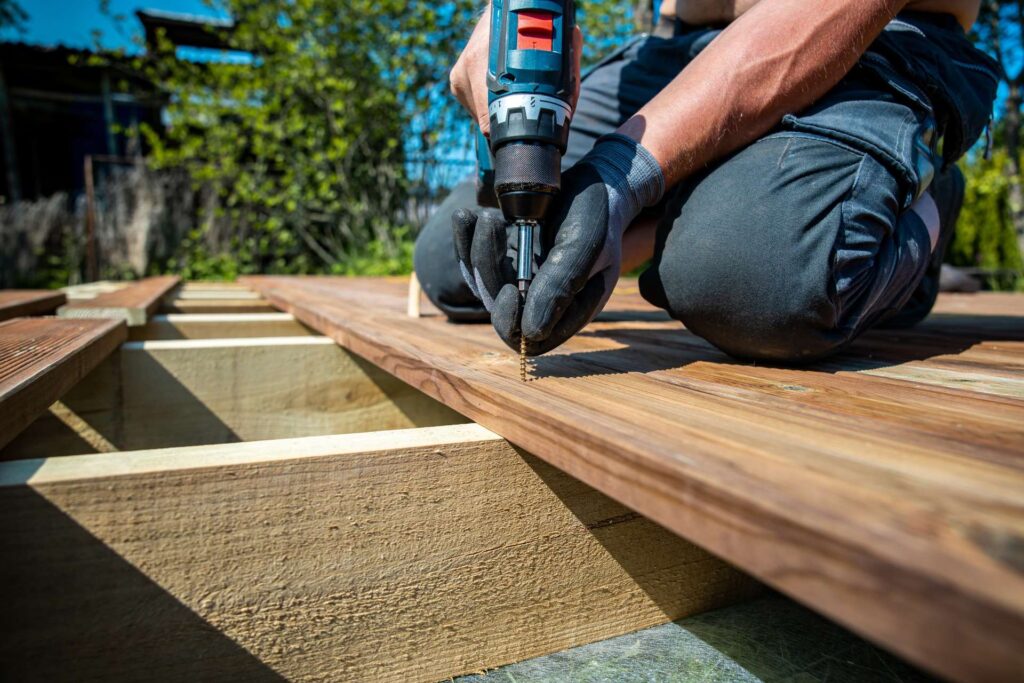
3. Securing the Treads: Attach each tread to the stringers using corrosion-resistant screws or nails (galvanized or stainless steel are ideal for New Zealand’s coastal regions). Ensure the treads are tightly secured, as loose treads can become a safety hazard over time. If you’re using timber, it’s also a good idea to pre-drill holes to prevent the wood from splitting when inserting screws.
By following these steps, your treads will be securely in place, providing a stable surface for people to walk on.
Adding the Risers (If Required)
When and Why Risers Are Needed
Risers are the vertical boards that close the gap between each tread, giving your steps a more finished, enclosed appearance. While not always required, risers are commonly used when.
- Aesthetic Appeal: Risers can give a more polished and professional look to your deck steps by covering the space between the treads. This can help make the overall design feel more solid and cohesive.
- Safety Concerns: In certain situations, particularly when young children or elderly individuals will frequently use the deck, risers can add a layer of safety by preventing feet from getting caught between the treads.
- Building Code Requirements: Depending on the height and design of your deck, New Zealand building codes may recommend or require the installation of risers for added stability and safety.
How to Attach Risers for a Polished, Finished Look
If you choose to install risers, here’s how to do it correctly.
1. Cutting the Risers: Measure the height between each tread to determine the size of the risers. Cut the risers from the same material as your treads, or use a complementary material for a contrasting design. Be sure to cut them to the exact width of the stringers so they fit perfectly.
2. Securing the Risers: Once cut, position the riser between the treads, aligning it flush with the front edge of the tread above. Use corrosion-resistant screws or nails to secure the risers in place. Make sure they are firmly attached to the stringers, ensuring there’s no movement. As with treads, pre-drill holes if using timber to prevent cracking.
3. Finishing Touches: After securing the risers, check for any gaps or uneven edges. Sand down any rough areas to create a smooth surface. Finally, apply a weather-resistant sealant or paint to protect the risers, particularly if they are made from timber, as this will help them withstand New Zealand’s diverse weather conditions.
By following these steps, your deck stairs will not only be functional but also visually appealing, with a professional finish that enhances the overall look of your outdoor space.
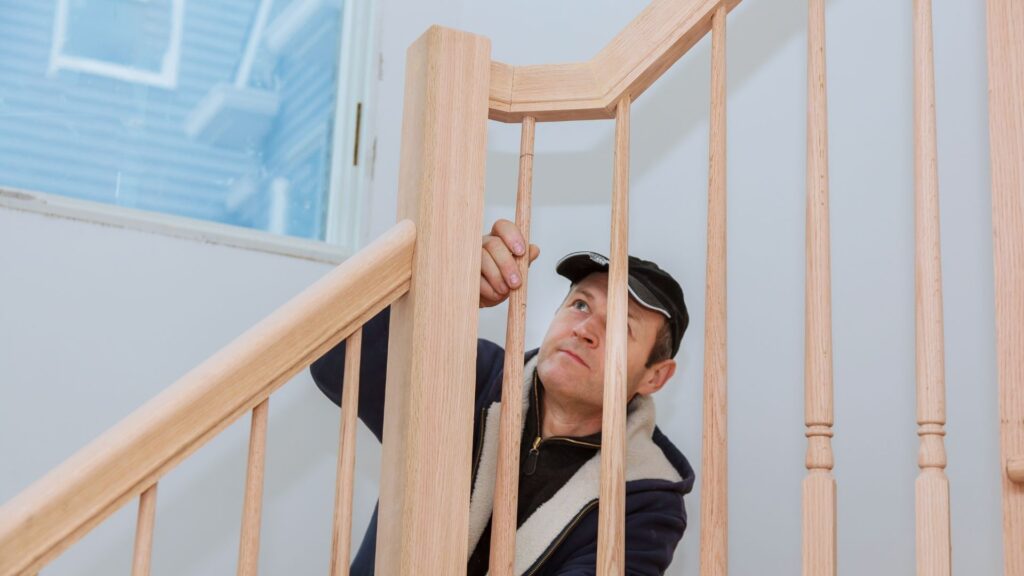
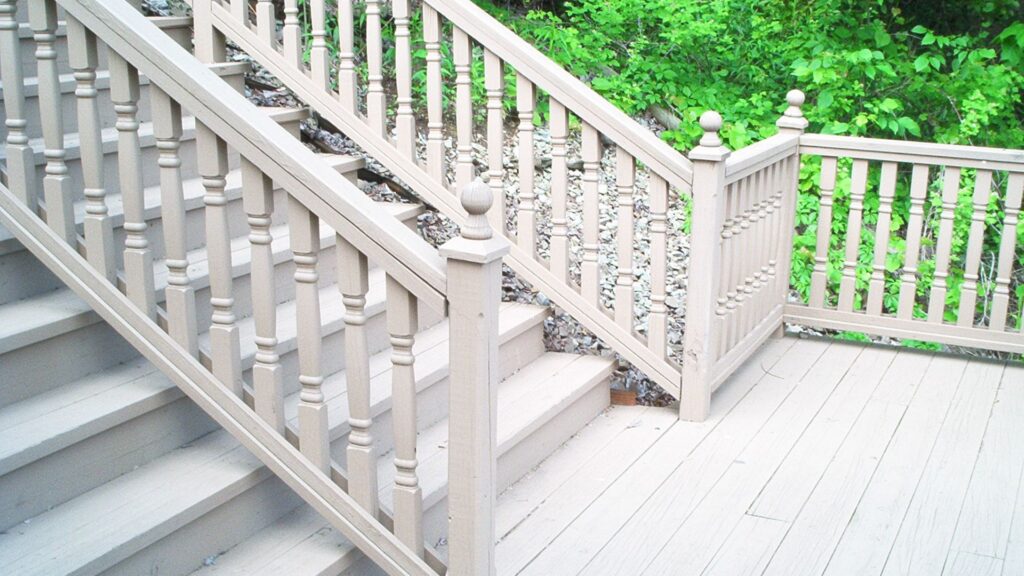
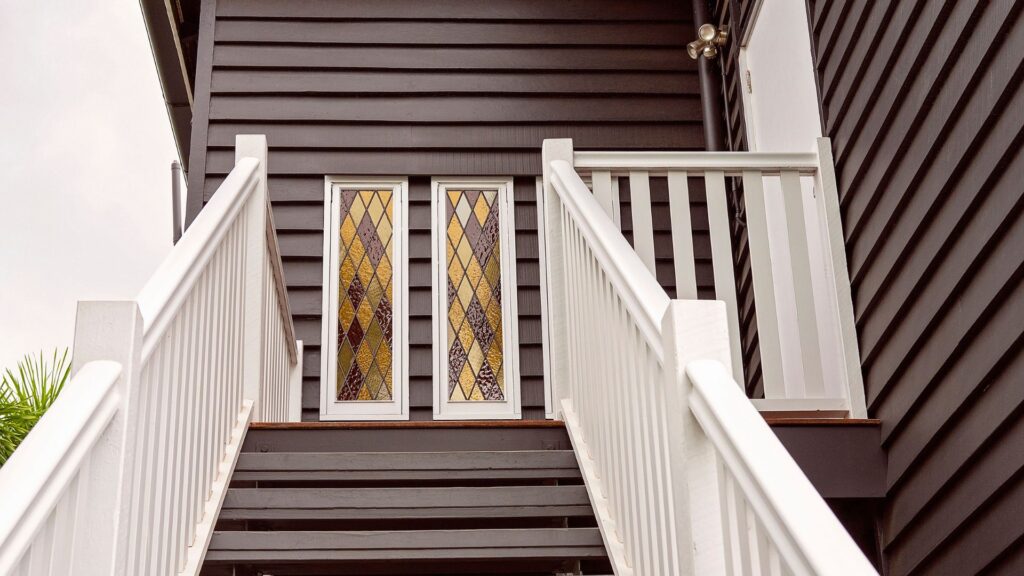
Adding Handrails (If Required by Code)
When building steps for your deck, handrails may be a required safety feature depending on the height of your deck and the number of steps. Handrails provide stability and safety, particularly on decks that are higher off the ground or have a steep incline. In New Zealand, there are specific building regulations that dictate when and how handrails should be installed, so it’s important to understand these rules to ensure your project complies with the law.
When Handrails Are Required
In New Zealand, handrails are typically required for decks that are over 1 meter in height or if the steps exceed certain height or width thresholds. The NZ Building Code stipulates that any set of steps with more than three risers or a deck height greater than 1 meter must have a handrail. This is to protect users from accidental falls, especially on steeper or taller staircases. Always check the specific local regulations or consult with a building inspector to confirm if a handrail is mandatory for your deck project.
Choosing a Handrail Design
Choosing the right handrail design is a key part of the process, balancing both safety and aesthetic appeal. Your handrail needs to be strong enough to support users but also fit in with the overall look and feel of your deck and home exterior.
For safety, the handrail should be at a comfortable height for people to grip as they ascend or descend the steps. According to NZ standards, handrails should be between 900mm and 1000mm above the edge of the step tread, ensuring they are accessible for people of all ages.
When it comes to materials, the most common options are treated timber or metal. Treated timber handrails offer a natural, classic look and are usually used when the deck is also made of timber. This creates a cohesive, rustic aesthetic that blends with the outdoor environment. Timber handrails are durable and can be stained or painted to match your deck, but they do require regular maintenance to protect against weathering and rot.
On the other hand, metal handrails (such as aluminum or stainless steel) are a great choice for those looking for a modern, sleek appearance. They are often more durable and lower-maintenance than timber, as they resist rust and wear from the elements. Metal handrails can also be paired with glass panels for a more contemporary, open design, allowing unobstructed views while still providing the necessary safety.
Installing the Handrail
Once you’ve selected the handrail design, the next step is installation. Proper installation is crucial for ensuring the handrail’s stability and adherence to safety standards. Follow these steps to ensure your handrail is securely attached and meets all the necessary requirements:
1. Measure the Height and Length: Start by measuring the height of the handrail, which should be between 900mm and 1000mm from the edge of each step. Mark the height along the stringers where the handrail will be installed. Ensure the length of the handrail runs the entire length of the steps, and if necessary, extend it slightly beyond the top and bottom steps for added safety.
2. Attach the Handrail Posts: If using timber, you’ll first need to attach the posts that will support the handrail. Posts should be spaced evenly along the steps (typically one at the top, one at the bottom, and one or two along the middle, depending on the length). Use galvanized brackets or screws to secure the posts to the stringers or deck frame, ensuring they are firmly anchored and vertical.
3. Install the Handrail: Once the posts are securely in place, you can attach the handrail itself. For timber rails, pre-drill holes to prevent splitting, then secure the rail to the posts with screws or bolts. Ensure the handrail is level and aligned with your height markings. For metal handrails, follow the manufacturer’s instructions, which may involve bolting the handrail to the posts or using specific brackets for attachment.
4. Check for Stability and Compliance: Once the handrail is installed, test its stability by applying pressure to ensure it doesn’t wobble or shift. The handrail should feel secure and capable of supporting weight. Additionally, check that the spacing between posts and rails complies with local safety regulations, particularly if there are children or pets in your home, as there are rules to prevent large gaps that could pose a risk.
By following these steps, you’ll have a well-installed handrail that not only meets safety standards but also enhances the overall appearance of your deck.
Finishing Touches
Once you’ve built your deck steps, the finishing touches are essential to ensure both the longevity and safety of your project. This final step involves careful attention to detail, as it not only enhances the look of your steps but also protects them from New Zealand’s often unpredictable weather conditions.
Sanding and Sealing the Steps
Sanding is a crucial step for creating a smooth and safe finish on your deck steps. Even if your cuts and assembly are perfect, rough or splintered wood can make the steps uncomfortable or even dangerous to use. Start by inspecting each step surface and edge for any rough spots or splinters. Using a medium-grit sandpaper (around 120-150 grit), carefully sand down any uneven areas, especially along the edges where people are likely to step or hold onto. After sanding, wipe down the steps to remove any dust or debris, ensuring the surface is clean and ready for sealing.
Sealing the steps is equally important, especially given New Zealand’s diverse weather conditions, which can range from harsh sun to heavy rain. A high-quality sealant will protect the wood from moisture, preventing rotting or warping, and also safeguard against UV damage, which can cause fading and weakening of the timber over time. When selecting a sealant or stain, consider whether you want a natural, transparent finish to highlight the wood grain, or a tinted stain for added color and UV protection. Oil-based sealants are typically more durable in NZ’s climate, while water-based options may be easier to apply and clean up. For maximum protection, apply two coats of sealant, ensuring each coat has adequate drying time. Be sure to seal the edges and any exposed wood that may be prone to absorbing moisture.
Checking for Safety and Stability
Once the steps are sanded and sealed, the next critical task is to check for safety and stability. This involves a thorough inspection of all components to ensure the structure is solid and secure. Start by checking each screw and nail to make sure nothing is loose. Over time, especially with weather exposure, fasteners can loosen, so it’s important to confirm that everything is tight. Pay close attention to the stringers, treads, and risers, ensuring that they are firmly in place and do not wobble or shift underweight.
Next, inspect the handrails if you’ve installed them. Wobbly or unstable handrails can be a safety hazard, so make sure they are firmly secured to the deck and posts, with no movement when pressure is applied. If necessary, reinforce any weak points with additional screws or brackets.
Finally, it’s essential to verify that the steps meet all NZ building standards. This includes checking the height of the risers, the depth of the treads, and the spacing of the handrails to ensure they comply with local regulations. You may want to refer back to the building code to ensure all specifications are met. Taking this time to check for stability and compliance will not only make your deck steps safer but will also give you peace of mind knowing your project is completed to a high standard.
By taking these finishing touches seriously, you’ll ensure that your deck steps are not only aesthetically pleasing but also safe, durable, and built to last in New Zealand’s challenging outdoor environment.
Maintenance Tips For Deck Steps In NZ
Maintaining your deck steps is crucial for keeping them in top condition and ensuring their longevity, especially in New Zealand’s diverse weather conditions. Regular maintenance not only helps extend the lifespan of your steps but also keeps them safe for use. Below are some detailed tips to help you maintain your deck steps effectively.
Regular Inspection and Cleaning
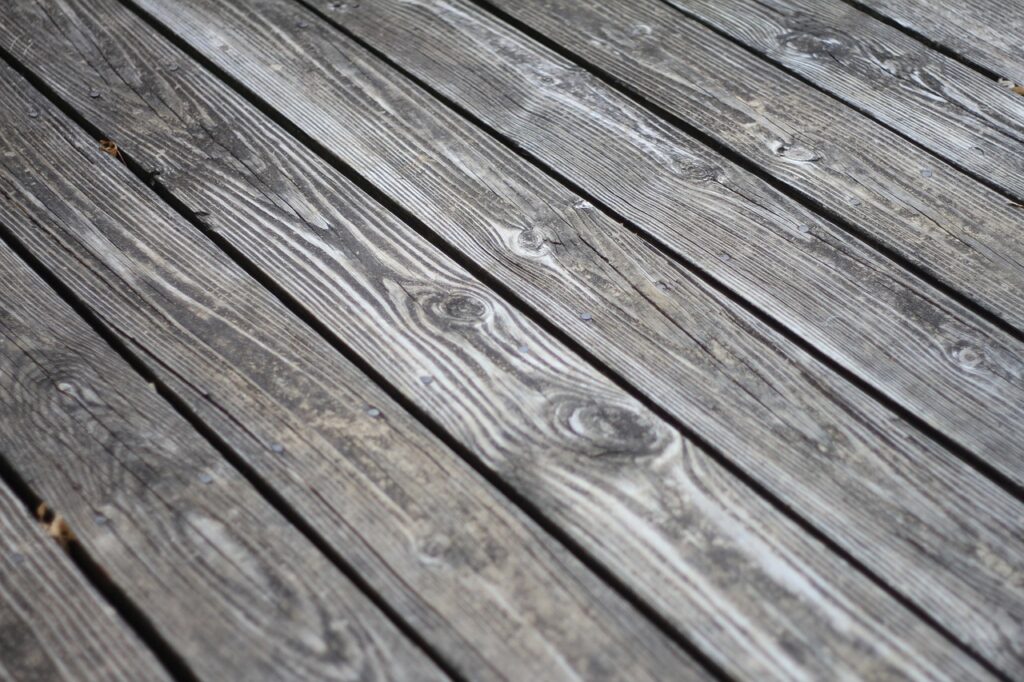
New Zealand’s weather can be tough on outdoor structures like deck steps, so regular inspection is essential. You should aim to inspect your steps every few months, particularly after the harsher winter months or periods of heavy rain. During inspections, look for signs of wear and tear, such as cracks in the wood, splinters, loose nails or screws, and any wobbly sections. Pay special attention to areas where the steps connect to the deck and the ground, as these are common weak points where moisture may accumulate, leading to rot or decay.
Cleaning is equally important in maintaining the appearance and structural integrity of your deck steps. Over time, dirt, moss, and algae can build up, making the steps slippery and dangerous, especially in damp conditions. To clean your deck steps, use a soft-bristle brush and a mild detergent solution. Avoid using harsh chemicals that could damage the wood or any protective coatings. For tough stains or moss, a pressure washer can be used on a low setting, but be careful not to damage the timber. Always clean during dry weather to allow the steps to dry out completely after washing.
When to Re-Stain or Re-Seal
One of the most important aspects of maintaining deck steps in New Zealand is protecting the wood from moisture. Given New Zealand’s frequent rain and varying temperatures, the wood on your steps can easily absorb moisture, leading to swelling, warping, or even rotting. This is why re-staining or re-sealing your deck steps periodically is essential.
A clear sign that your deck steps need to be re-sealed is when the water no longer beads on the surface of the wood. Instead, it soaks into the wood, which indicates that the protective layer has worn off. Additionally, if the wood looks faded, feels rough, or has developed cracks, it’s likely time for a new coat of sealant or stain.
When choosing products to re-seal or restain your deck steps, opt for products that are specifically designed for outdoor use and that can withstand New Zealand’s climate. Look for deck stains or sealants that offer UV protection to prevent sun damage, as well as moisture resistance to protect against rain and humidity. Oil-based stains and sealants tend to penetrate the wood more deeply, offering better protection in the long term, though water-based products are also effective and may be easier to apply. Apply the sealant or stain on a dry, mild day to ensure optimal absorption and avoid any adverse reactions from extreme weather conditions.
By following these maintenance tips, your deck steps will not only look great but will also remain safe and durable for years to come, no matter what the New Zealand weather throws at them.
FAQs: About How To Build Steps For A Deck NZ
Conclusion
In conclusion, building steps for a deck in New Zealand requires careful planning, attention to detail, and adherence to local building regulations. From measuring and cutting the stringers to securely attaching treads and handrails, each step plays a crucial role in ensuring both safety and durability. By using high-quality materials like treated timber and following New Zealand’s Building Code requirements, you can create sturdy, long-lasting deck steps that enhance your outdoor space. By using high-quality materials like treated timber and following proper installation techniques, you can create sturdy, long-lasting deck steps that enhance your outdoor space. It’s essential to take your time and follow the outlined process step by step, and if you’re ever unsure, don’t hesitate to consult a professional for guidance. We encourage you to share your own experiences or ask any questions in the comments section below—your insights could help others with their deck-building projects!
Find A Professional Decking Company Near You!
- Balcony Construction Christchurch
- Deck Builders Alexandra
- Deck Builders Alexandra, Clyde & Cromwell
- Deck Builders Auckland
- Deck Builders Central Otago
- Deck Builders Christchurch
- Deck Builders Clyde
- Deck Builders Cromwell
- Deck Builders Hamilton
- Deck Builders Hawkes Bay
- Deck Builders Invercargill
- Deck Builders Kapiti Coast
- Deck Builders Kerikeri
- Deck Builders Lower Hutt
- Deck Builders Nelson
- Deck Builders New Plymouth
- Deck Builders Paihia
- Deck Builders Palmerston North
- Deck Builders Porirua
- Deck Builders Queenstown
- Deck Builders Taupo
- Deck Builders Tauranga
- Deck Builders Upper Hutt
- Deck Builders Wanaka
- Deck Builders Warkworth
- Deck Builders Wellington
- Deck Builders West Auckland
- Deck Staining Palmerston North
About the Author:
Mike Veail is a recognized digital marketing expert with over 6 years of experience in helping tradespeople and small businesses thrive online. A former quantity surveyor, Mike combines deep industry knowledge with hands-on expertise in SEO and Google Ads. His marketing strategies are tailored to the specific needs of the trades sector, helping businesses increase visibility and generate more leads through proven, ethical methods.
Mike has successfully partnered with numerous companies, establishing a track record of delivering measurable results. His work has been featured across various platforms that showcase his expertise in lead generation and online marketing for the trades sector.
Learn more about Mike's experience and services at https://theleadguy.online or follow him on social media: