Welcome to the Ultimate Epoxy Guide NZ, your go-to resource for everything you need to know about epoxy resin, from choosing the right type to applying it like a pro. Whether you’re a DIY enthusiast looking to create stunning resin art, a homeowner planning to upgrade your floors, or a tradesperson searching for the best epoxy solutions in New Zealand, this guide has got you covered. Epoxy is renowned for its durability, versatility, and sleek finish, making it a top choice for flooring, countertops, boat repairs, and countless other applications. With New Zealand’s unique climate and market, selecting the right epoxy and applying it correctly is essential for long-lasting results. In this guide, we’ll walk you through the different types of epoxy, step-by-step application techniques, common mistakes to avoid, and maintenance tips to keep your epoxy surfaces looking brand new. Whether you’re tackling a small DIY project or a large-scale renovation, this comprehensive guide will help you achieve professional-quality results with confidence.
Epoxy is a durable and versatile resin commonly used in flooring, countertops, marine repairs, and DIY projects across New Zealand. It provides a strong, chemical-resistant, and waterproof finish, making it ideal for garages, industrial spaces, and artistic applications. To apply epoxy, surfaces must be properly prepared, mixed at the correct ratio, and cured under optimal conditions. Whether you’re a homeowner or a professional, choosing the right epoxy for NZ’s climate ensures long-lasting results.
- What Is Epoxy?
- Types Of Epoxy Resins & Their Uses
- Choosing The Right Epoxy In NZ
- Step-By-Step Guide To Applying Epoxy
- Common Mistakes & How To Avoid Them
- Maintenance & Longevity: Keeping Your Epoxy Looking New
- Epoxy Resin Safety & Environmental Considerations In NZ
- FAQs: About Epoxy Guide NZ
- Conclusion
- Find A Professional Flooring Company Near You!
What Is Epoxy?
Epoxy is a durable, adhesive, and highly versatile resin that has gained widespread popularity across various industries, from construction and flooring to art and marine applications. Known for its strong bonding capabilities, chemical resistance, and glossy finish, epoxy resin is used to create long-lasting surfaces that can withstand wear, moisture, and environmental factors. Whether you’re working on a DIY project, home renovation, or industrial-grade application, epoxy provides a reliable and professional finish that enhances both aesthetics and functionality.
How Does Epoxy Resin Work?
Epoxy resin works through a chemical reaction between two main components: the resin and the hardener. When mixed together, these two substances undergo a process called curing, which transforms the liquid mixture into a solid, durable, and highly resistant material. This reaction is known as polymerization, where the molecules bond tightly to create a rigid, non-porous surface.
The curing process depends on several factors, including temperature, humidity, and the specific formulation of the epoxy. Some epoxy resins cure at room temperature, while others require heat to achieve full hardness. The result is a strong, seamless, and often glossy finish that resists chemicals, moisture, and mechanical wear.
Understanding The Chemical Composition Of Epoxy (Simplified Explanation)
Epoxy belongs to a class of synthetic materials known as thermosetting polymers, which means once it hardens, it cannot be melted or reshaped like traditional plastics. The primary components of epoxy resin include.
- Epoxide Groups: These are reactive molecules that allow the resin to bond strongly to various surfaces.
- Polyamines (Hardeners): These act as curing agents that initiate the polymerization process, turning the liquid resin into a solid.
- Fillers & Additives: Some epoxy formulations include UV stabilizers, pigments, or accelerators to enhance durability, flexibility, and resistance to elements like sunlight and heat.
In simple terms, epoxy resin starts as a liquid but, when mixed with a hardener, forms an extremely strong, plastic-like material that adheres to wood, concrete-contractors-nz/concrete-floor-slabs-kapiti-coast/”>concrete-contractors-nz/concrete-layers-lower-hutt/”>concrete, metal, and even glass. This makes it one of the most reliable materials for coatings, adhesives, and repairs.
Why Is Epoxy A Popular Choice For Various Applications?
Epoxy has become a go-to material for countless applications due to its strength, durability, and versatility. Below are some of the key reasons why epoxy is widely used across different industries and DIY projects.
1. Exceptional Durability
Epoxy creates a hard, impact-resistant surface that can withstand heavy traffic, making it ideal for garage floors, warehouses, and industrial spaces. Unlike traditional coatings, epoxy does not easily crack, chip, or wear down over time.
2. Superior Adhesion & Bonding Strength
Epoxy acts as a powerful adhesive, bonding strongly to surfaces like wood, metal, concrete, and plastic. This makes it a preferred choice for construction, automotive repairs, and marine applications.
3. Chemical & Water Resistance
One of epoxy’s biggest advantages is its resistance to chemicals, oils, and moisture. This is why it’s commonly used in kitchen countertops, laboratories, and marine coatings, where exposure to harsh substances is frequent.
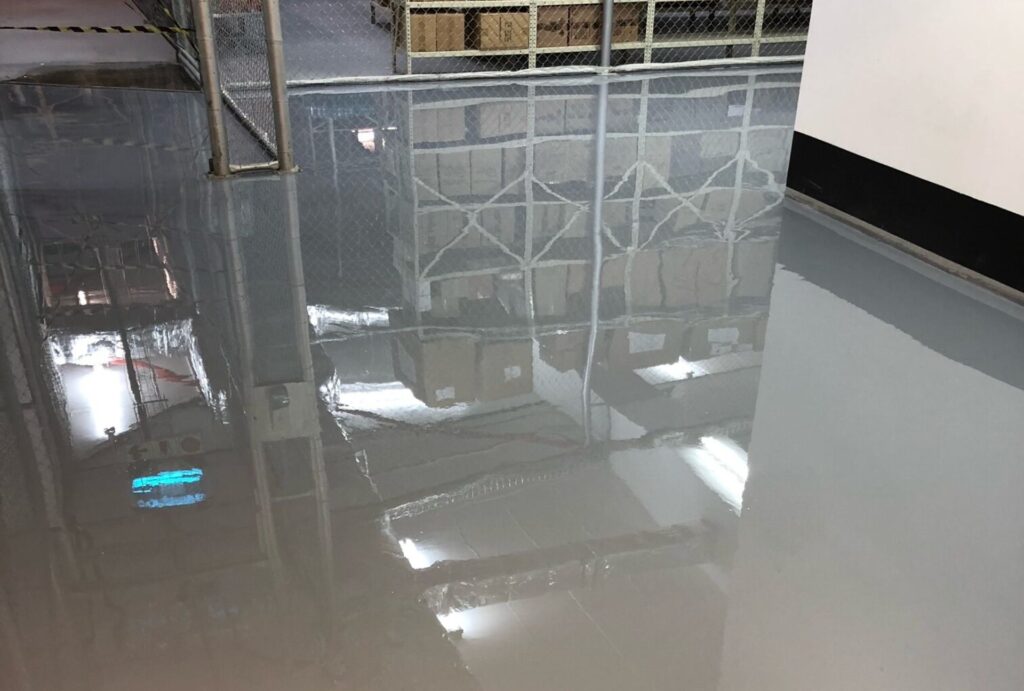
4. Glossy, Aesthetic Finish
Epoxy is known for its high-gloss, seamless finish, which enhances the look of floors, furniture, and artistic creations. Its ability to create a crystal-clear or colored effect makes it a favorite among resin artists and furniture makers.
5. Easy to Clean & Maintain
Once cured, epoxy surfaces are non-porous, meaning they do not absorb liquids or stains. This makes them incredibly easy to clean with just soap and water, making them perfect for homes, hospitals, and commercial spaces.
6. Heat & UV Resistance (With Proper Formulation)
While standard epoxy can yellow under prolonged sun exposure, UV-resistant epoxy formulas are available to maintain clarity and prevent degradation. Some formulations are even designed to withstand high temperatures, making them suitable for industrial settings.
Epoxy resin is much more than just a coating or adhesive—it’s a game-changing material with applications ranging from flooring and furniture to marine and construction projects. Its strength, resistance, and aesthetic appeal make it a must-have for both DIYers and professionals. Whether you’re planning to coat your garage floor, create a stunning epoxy table, or seal a boat deck, epoxy resin offers unmatched performance and longevity.
By understanding how epoxy works, its chemical properties, and why it’s so widely used, you can confidently select the right epoxy for your project and achieve professional results every time.
Types Of Epoxy Resins & Their Uses
Epoxy resins come in different formulations, each designed for specific applications. Whether you’re looking for a glossy finish on countertops, a durable floor coating, or a strong adhesive for structural repairs, choosing the right epoxy is crucial for achieving the best results. Below, we explore the four most common types of epoxy resins and how they can be used effectively in New Zealand.
Clear Epoxy Resin
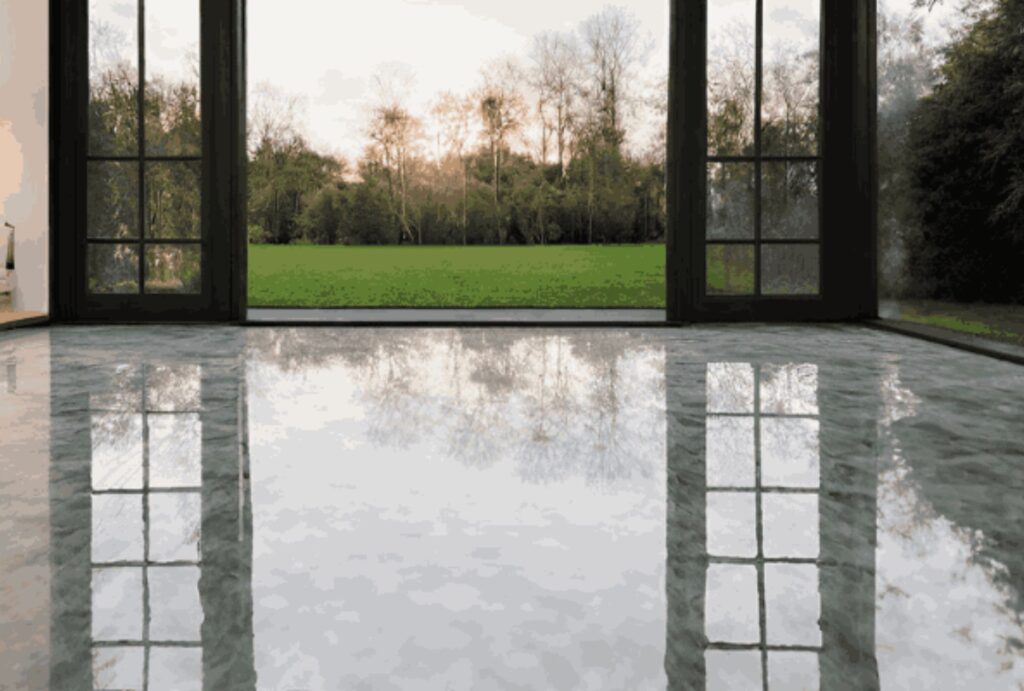
Clear epoxy resin is one of the most versatile options available, making it a popular choice for coatings, countertops, and artistic projects. This type of epoxy is valued for its high-gloss, glass-like finish, which enhances the aesthetic appeal of surfaces while providing durability.
Best Uses Of Clear Epoxy Resin
- Countertops & Tabletops: Perfect for creating sleek, durable kitchen and bathroom surfaces.
- Art & DIY Projects: Commonly used in resin art, jewelry making, and river tables.
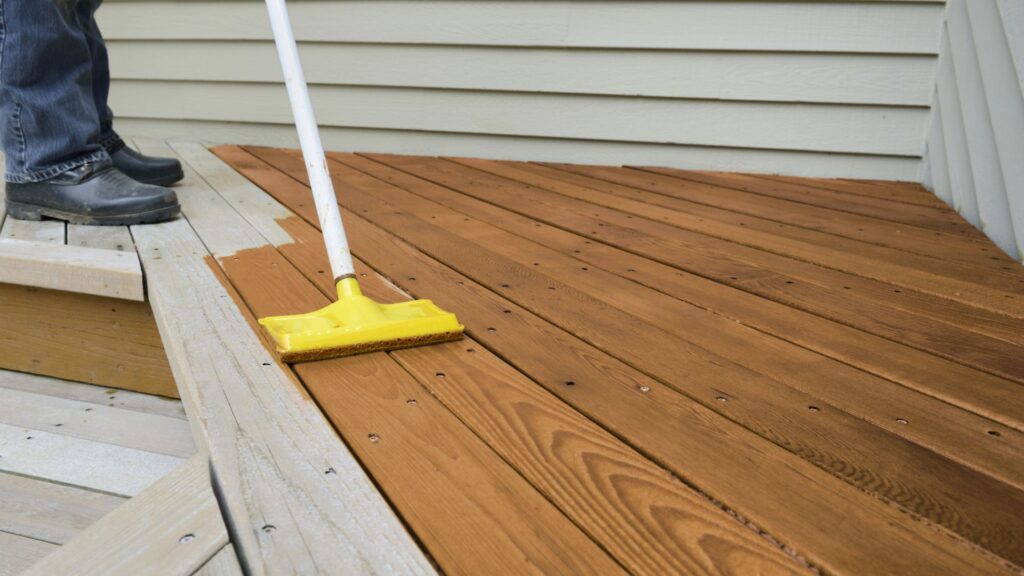
- Protective Coatings: Ideal for sealing wood, concrete, or metal surfaces.
How To Achieve A Glossy, Glass-Like Finish
To get the best finish with clear epoxy resin, follow these expert tips.
- Prepare The Surface: Ensure the surface is clean, dry, and free from dust or oil.
- Mix Properly: Follow the manufacturer’s recommended ratio of resin to hardener to avoid curing issues.
- Remove Air Bubbles: Use a heat gun or torch to eliminate bubbles after pouring.
- Cure In A Dust-Free Environment: Allow sufficient drying time in a well-ventilated, temperature-controlled area.
With the right application, clear epoxy resin creates a stunning, durable surface that resists scratches and stains, making it perfect for both decorative and functional use.
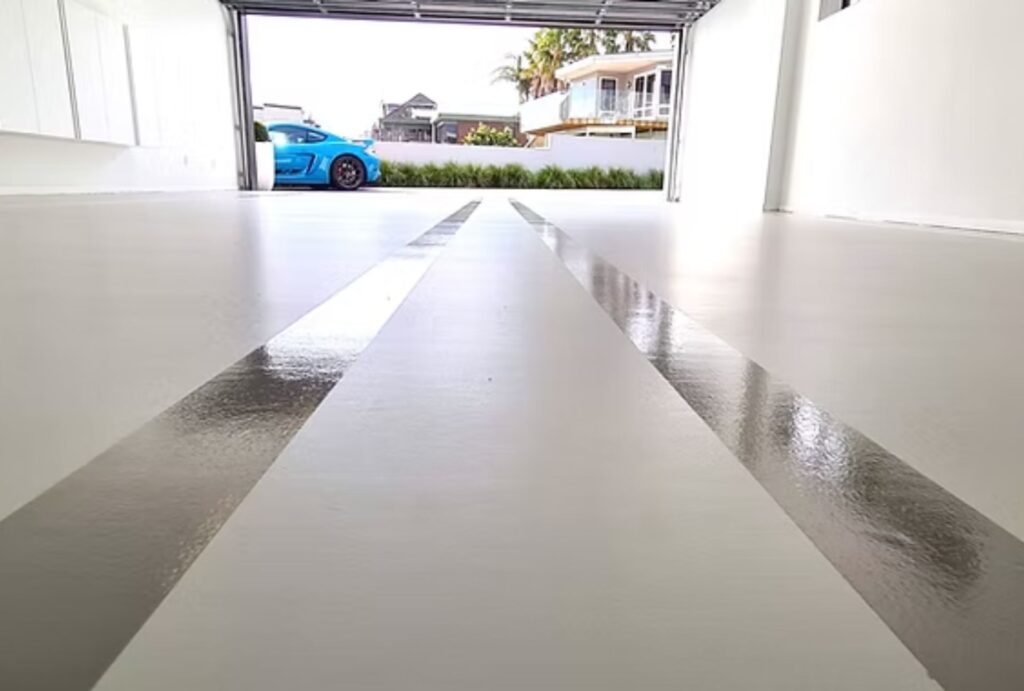
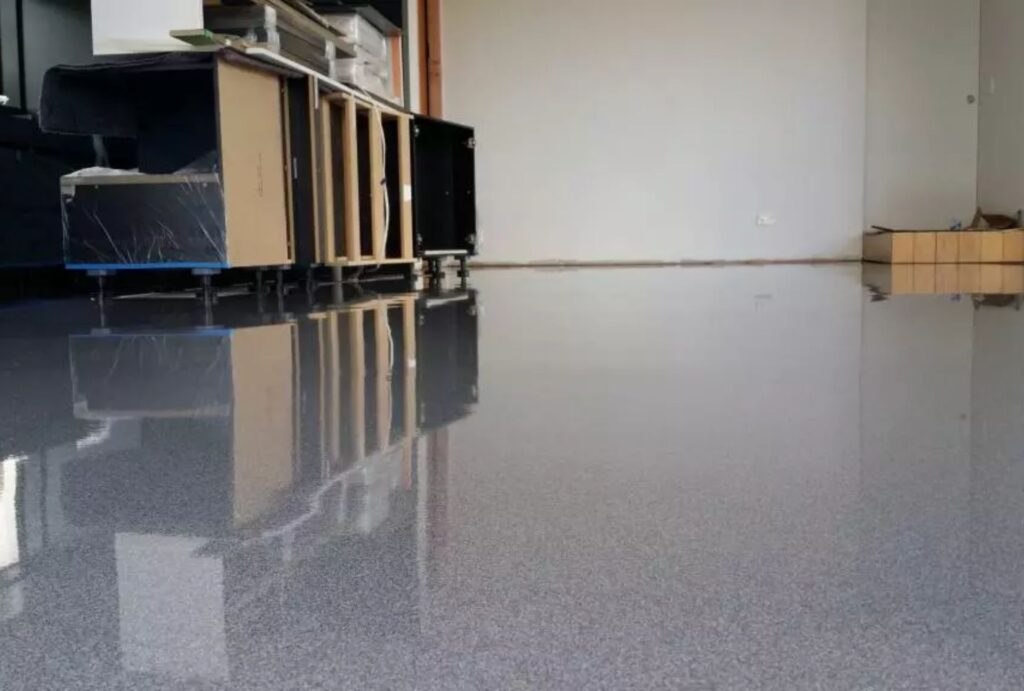
Epoxy Flooring
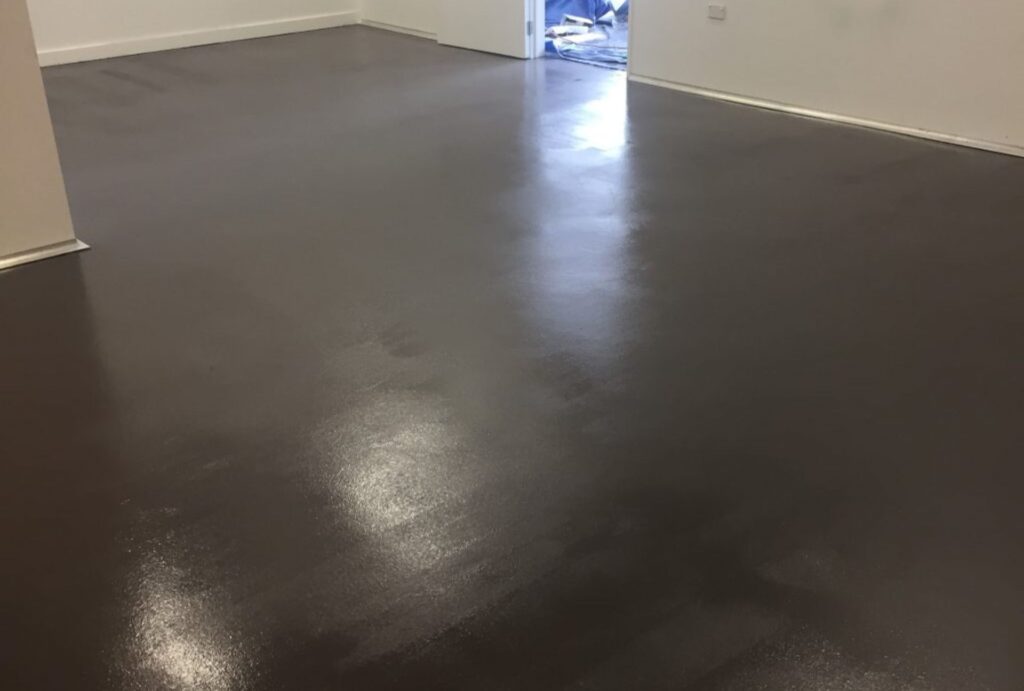
Epoxy flooring is widely used in garages, industrial spaces, and home interiors due to its incredible durability, chemical resistance, and aesthetic appeal. This type of epoxy forms a seamless, high-strength coating that withstands heavy foot traffic and harsh conditions.
Why Choose Epoxy Flooring?
- Extremely Durable: Can last for decades without cracking or peeling.
- Chemical & Stain Resistant: Ideal for garages and workshops where spills are common.
- Aesthetic Appeal: Available in a variety of colors and finishes, including metallic and flake designs.
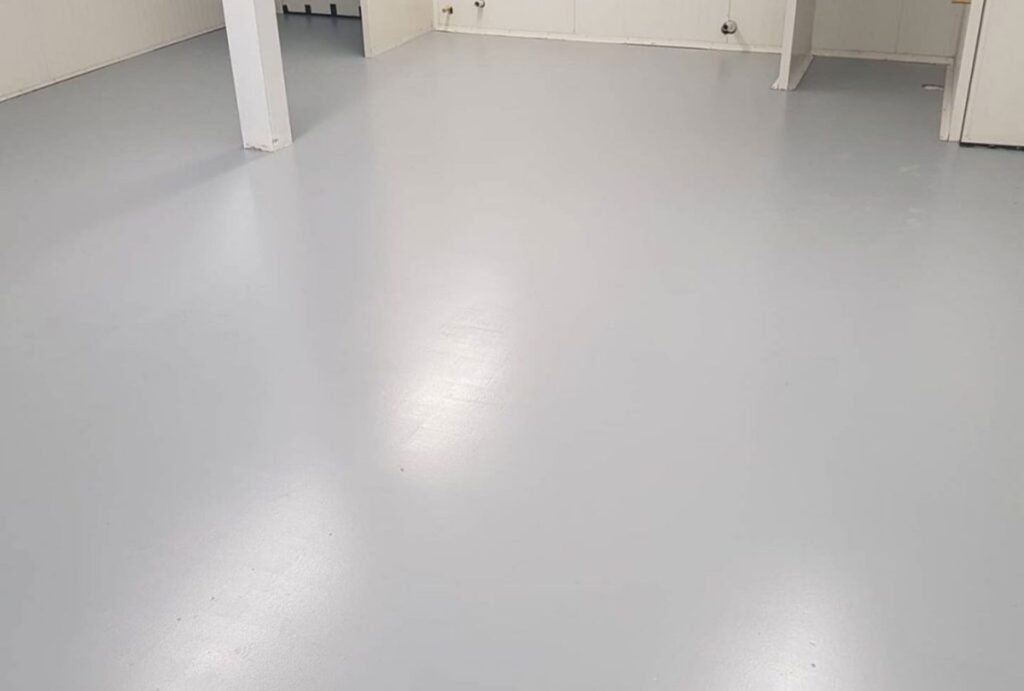
Where Epoxy Flooring Works Best
- Residential Garages: Protects concrete floors from wear and tear.
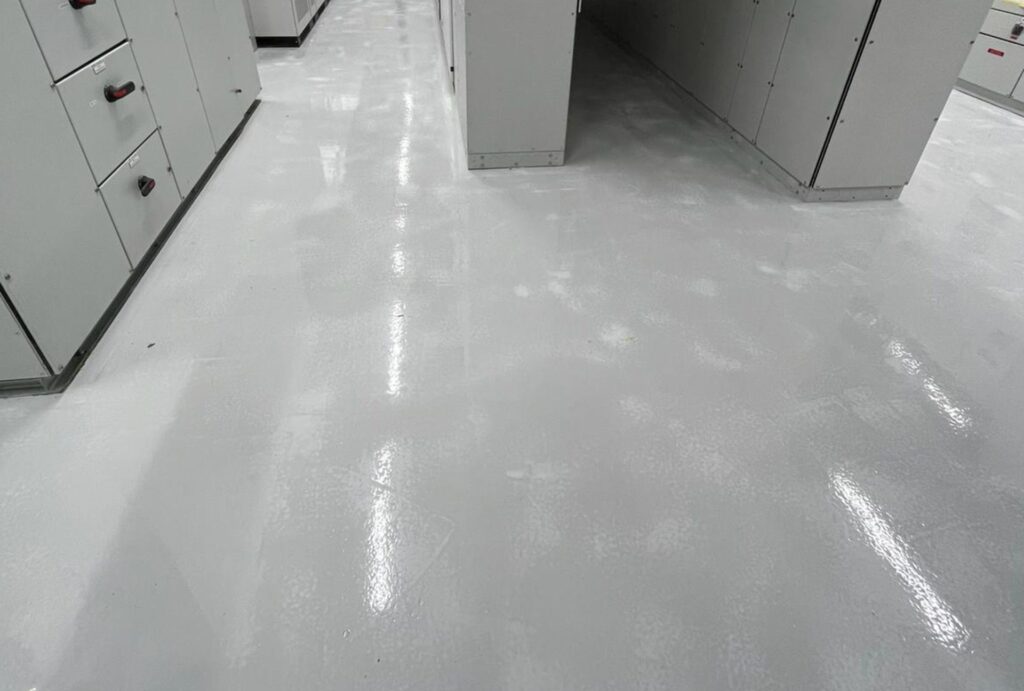
- Industrial & Commercial Spaces: Used in warehouses, factories, and showrooms for its strength and safety.
- Home Interiors: Creates sleek, modern flooring in kitchens, basements, and living areas.
When applied correctly, epoxy flooring provides a high-performance surface that is easy to clean and maintain, making it an excellent long-term investment.
Marine Epoxy
New Zealand’s coastal environment demands strong, waterproof solutions for boat repairs and marine applications. Marine epoxy is specially formulated to withstand saltwater exposure, UV rays, and extreme weather conditions.
Uses Of Marine Epoxy
- Boat Repairs: Used for fixing hull damage, sealing leaks, and reinforcing joints.
- Waterproofing: Provides a strong, moisture-resistant barrier for wooden and fiberglass boats.
- Structural Bonding: Works on a variety of materials, including wood, metal, and composites.
Why Marine Epoxy Is Essential In NZ
Since New Zealand has a large boating and fishing community, marine epoxy is a must-have for boat owners, repair professionals, and DIY enthusiasts. Unlike standard epoxy, marine-grade formulas flex with movement and resist water absorption, preventing cracks and failures over time.
For best results, always choose a UV-resistant marine epoxy to prevent yellowing and degradation in prolonged sun exposure.
Structural Epoxy (For Bonding & Repairs)
Structural epoxy is a high-strength adhesive used for bonding, repairing, and reinforcing materials like concrete, wood, and metal. It is highly resistant to moisture, extreme temperatures, and heavy loads, making it an essential product for construction and industrial applications.
Where Structural Epoxy Is Used
- Concrete Repairs: Fixes cracks in driveways, walls, and foundation slabs.
- Wood Bonding: Strengthens joints in furniture, cabinetry, and wooden structures.
- Metal Repairs: Bonds metal parts in automotive and industrial settings.
Benefits Of Structural Epoxy
- Exceptional Strength: Creates a bond stronger than the material itself.
- Weather-Resistant: Performs well in both indoor and outdoor conditions.
- Long-Lasting Durability: Resistant to impact, stress, and corrosion.
To get the best results, always mix and apply structural epoxy according to the manufacturer’s guidelines and allow proper curing time before putting stress on the repaired area.
Epoxy resins offer a wide range of applications, from artistic projects and flooring to marine and structural repairs. Choosing the right type of epoxy ensures long-lasting results, enhanced durability, and a professional finish. Whether you’re coating a countertop, sealing a boat, or repairing concrete, understanding the differences between clear, flooring, marine, and structural epoxy will help you achieve the best outcome for your project in New Zealand.
Choosing The Right Epoxy In NZ
When selecting the best epoxy resin for your project in New Zealand, it’s essential to consider several key factors, including the type of project, durability requirements, UV resistance, and drying time. With so many options available, choosing the right product ensures long-lasting, high-quality results, whether you’re working on flooring, furniture, marine repairs, or creative DIY projects. Below, we break down what you need to know to make an informed decision.
Factors To Consider When Buying Epoxy In NZ
Not all epoxy resins are created equal, and choosing the wrong one could lead to poor adhesion, cracking, or discoloration over time. Here are the essential factors to keep in mind.
1. Project Type
The first step in selecting the right epoxy is determining its intended use. Different epoxy formulations cater to different applications.
- Epoxy Flooring: Ideal for garages, warehouses, and home interiors due to its high durability and resistance to chemicals and impact.
- Clear Epoxy Resin: Best for countertops, furniture, and artistic projects where a smooth, glossy finish is needed.
- Marine Epoxy: Specifically designed for boat repairs and waterproofing, perfect for New Zealand’s coastal environment.
- Structural Epoxy: Used for concrete repairs, wood bonding, and industrial-strength applications requiring strong adhesion.
2. Durability & Strength
Epoxy is known for its durability, but different types have varying levels of hardness and wear resistance. If your project requires a surface that can withstand heavy foot traffic, spills, and frequent cleaning (such as floors or countertops), opt for a high-performance, industrial-grade epoxy.
3. UV Resistance
New Zealand’s climate is known for its harsh UV exposure, which can cause some epoxies to yellow, degrade, or lose their shine over time. If you’re working on an outdoor project or an area exposed to sunlight, choose a UV-resistant epoxy to maintain its clarity and longevity. UV stabilizers or an additional UV-resistant topcoat can also help prevent discoloration.
4. Drying & Curing Time
Epoxy resin has varying curing times, depending on the brand and formulation. While some fast-drying epoxies set within a few hours, others may take 24-72 hours to fully cure. If you’re working on a time-sensitive project, consider using a quick-curing formula. However, be cautious—faster drying times may compromise strength and adhesion if not applied correctly.
Best Epoxy Brands Available In NZ
New Zealand has several top-quality epoxy brands that cater to both DIYers and professionals. Here are some of the most trusted names in the industry.
- West System Epoxy: A premium choice for marine and structural applications, known for its high strength and water resistance.
- Norski Epoxy Resin: A go-to brand for crafting, clear coating, and DIY projects, widely available across NZ.
- Resene ProSelect Epoxy: A durable option used for flooring and industrial coatings, offering UV stability and chemical resistance.
- Araldite Epoxy Adhesives: Ideal for strong bonding and repair work across a range of materials like wood, metal, and concrete.
- Selleys Liquid Nails Epoxy: A household favorite for general-purpose bonding and small DIY repairs.
When selecting a brand, always read product descriptions and check customer reviews to ensure you’re getting the best epoxy for your specific project needs.
Where To Buy Epoxy Resin In NZ
Epoxy resin is widely available across New Zealand, and you can purchase it from hardware stores, specialty suppliers, and online retailers. Here’s where to find the best options.
1. Hardware Stores
Most general-purpose epoxies and adhesives can be found in well-known hardware chains like.
- Mitre 10: Carries a range of epoxy adhesives, coatings, and marine epoxies.
- Bunnings Warehouse: Stocks popular brands like Selleys, Norski, and Araldite.
- PlaceMakers: Offers a variety of construction-grade epoxy products.
2. Specialty Epoxy Suppliers
For high-performance and professional-grade epoxy, it’s best to purchase from specialized stores, such as.
- NZ Fibreglass: Specializes in marine epoxy and fiberglass resins.
- Permacolour: Provides epoxy flooring solutions and coatings.
- Boat Bits NZ: Great for marine and boat epoxy products.
3. Online Retailers
For convenience and a wider selection, many epoxy products can be ordered online from.
- Trade Me: A marketplace with affordable options for DIY projects.
- Epoxy Resin Supplies NZ: Dedicated to resin art and casting epoxy.
- AliExpress & Amazon NZ: For niche or imported epoxy brands.
When shopping online, always check shipping times, reviews, and return policies to ensure you’re getting a reliable product.
Choosing the right epoxy in NZ depends on your project type, durability needs, UV exposure, and curing time. With a variety of trusted brands and multiple purchasing options across hardware stores and specialty suppliers, you can easily find the perfect epoxy for your needs. Whether you’re sealing a garage floor, repairing a boat, or creating a stunning resin art piece, selecting the right product ensures professional-quality and long-lasting results. Before purchasing, read product reviews, check specifications, and ensure proper application techniques to get the best out of your epoxy project.
Step-By-Step Guide To Applying Epoxy
Applying epoxy correctly is crucial to achieving a smooth, durable, and professional-quality finish. Whether you’re working on a floor, countertop, or DIY project, following the right steps ensures that your epoxy application is seamless and long-lasting. Below is a detailed, easy-to-follow guide that walks you through every stage of the process, from gathering your tools to ensuring a perfect cure.
Tools & Materials Needed
Before you begin, make sure you have all the necessary tools and materials to avoid interruptions during the application. Having the right equipment not only makes the process smoother but also prevents costly mistakes. Here’s what you’ll need.
Essential Epoxy Materials
- Epoxy Resin & Hardener: The two main components that create a strong, glossy, and durable surface. Always check the brand specifications for the correct mixing ratio.
- Measuring Cups & Mixing Sticks: Precise measurement and thorough mixing are crucial for the epoxy to cure correctly.
- Pigments or Dyes (Optional): If you want a colored or artistic finish, select high-quality pigments or dyes designed for epoxy.
Application Tools
- Rollers & Brushes: Ideal for spreading epoxy evenly on large surfaces.
- Notched Squeegee or Trowel: Helps achieve the correct epoxy thickness, especially for flooring applications.
- Heat Gun or Torch: Removes air bubbles that may form during application.
Protective Gear
- Gloves: Protects your hands from resin, which can be sticky and irritating to the skin.
- Safety Glasses: Prevents accidental splashes into your eyes.
- Respirator Mask: Essential if working in poorly ventilated areas to avoid inhaling fumes.
By preparing all these materials in advance, you set yourself up for a successful and stress-free epoxy application.
Preparing The Surface
Proper surface preparation is key to a flawless epoxy finish. If the surface isn’t cleaned and primed correctly, the epoxy may not bond well, leading to peeling, bubbles, or an uneven texture. Follow these steps to ensure the surface is ready for application.
1. Clean The Surface Thoroughly
Dirt, grease, and dust weaken the epoxy’s adhesion, so it’s essential to clean the surface properly. Use a degreaser or mild detergent to remove any contaminants.
2. Sand The Surface (If Needed)
For wood, concrete, or previously coated surfaces, sanding helps create a slightly rough texture, allowing the epoxy to bond better. Use fine to medium-grit sandpaper, then remove all dust with a vacuum or tack cloth.
3. Remove Moisture Or Humidity
Epoxy does not adhere well to damp or humid surfaces, which can cause cloudiness or adhesion failure. If necessary, use a heat gun or dehumidifier to ensure the area is completely dry.
4. Apply A Primer Or Sealant (Optional But Recommended)
Applying a thin primer layer before the main epoxy coat helps seal porous surfaces and prevents air bubbles from forming. This is especially useful for wood and concrete applications.
A well-prepped surface ensures a smooth and long-lasting epoxy application, making it a crucial step you shouldn’t skip.
Mixing & Applying Epoxy
Once your surface is prepped, it’s time to mix and apply the epoxy. This step requires precision, as incorrect mixing can lead to curing issues.
1. Measure The Resin And Hardener Correctly
Epoxy typically requires a 1:1 or 2:1 ratio, depending on the brand. Always follow the manufacturer’s instructions, as incorrect ratios can prevent the epoxy from curing properly.
2. Mix Slowly And Thoroughly
- Use a stir stick or drill mixer to blend the resin and hardener for at least 3-5 minutes.
- Mix slowly to minimize air bubbles.
- Scrape the sides and bottom of the container to ensure even consistency.
3. Pour & Spread The Epoxy
- Pour the epoxy slowly and evenly onto the surface.
- Use a roller, brush, or squeegee to spread it across the area.
- Work in small sections to prevent pooling.
4. Remove Air Bubbles
After application, bubbles may appear on the surface. Use a heat gun or propane torch to gently wave over the epoxy, which will pop the bubbles and create a smooth finish. Avoid holding the heat source too close, as it can burn or overheat the resin.
Applying epoxy correctly and patiently ensures a flawless, professional-looking surface.
Curing & Drying Times
Curing is the process where epoxy hardens and reaches full strength. Several factors affect curing time, so understanding how to optimize the process can help you achieve the best results.
1. Factors That Affect Epoxy Curing
- Temperature: Epoxy cures best in 18-25°C (65-77°F). If it’s too cold, curing slows down, and if it’s too hot, it can set too quickly.
- Humidity: High humidity can cause a cloudy or tacky finish. Keep the workspace as dry as possible.
- Thickness Of The Layer: Thicker layers take longer to cure. If working on a deep pour, consider multiple thin layers rather than one thick layer.
2. How Long Does Epoxy Take To Cure?
- Touch-Dry Time: 4-8 hours (varies based on brand and conditions).
- Full Cure: 24-72 hours (some high-performance epoxies may take up to 7 days for complete hardness).
3. How To Speed Up Epoxy Curing
- Use a heat lamp or infrared heater to maintain an optimal curing temperature.
- Choose fast-curing epoxy formulas if you need a quicker turnaround.
- Increase airflow with fans, but avoid excessive wind that may cause dust contamination.
By following the correct curing process, your epoxy achieves maximum durability and a smooth, professional finish.
Applying epoxy requires patience, precision, and preparation, but by following these steps, you can achieve a flawless, high-quality finish. From gathering the right tools to ensuring proper curing, every stage plays a role in creating a durable and visually stunning epoxy surface. Whether you’re working on a floor, countertop, or artistic project, mastering these techniques will help you achieve professional-grade results every time.
Common Mistakes & How To Avoid Them
Using epoxy can be incredibly rewarding, but small mistakes can lead to big problems in the final finish. Whether you’re working on flooring, countertops, furniture, or artistic projects, understanding common epoxy issues and how to fix them will save you time, money, and frustration. Below, we’ll break down the most frequent epoxy mistakes, why they happen, and how to avoid them for a flawless result.
Mixing Mistakes That Ruin The Final Finish
One of the biggest reasons epoxy projects fail is incorrect mixing. Epoxy consists of two main components: resin and hardener. If these aren’t mixed correctly, you could end up with a sticky, uneven, or weak finish.
Common Mixing Mistakes
- Incorrect Ratios: Every epoxy product has a specific resin-to-hardener ratio. Mixing too much or too little hardener can prevent proper curing, leaving the surface soft or tacky.
- Not Mixing Long Enough: Many people stir for a few seconds and assume it’s ready. However, epoxy needs thorough mixing for 2-5 minutes, scraping the sides and bottom of the container to ensure an even blend.
- Mixing Too Quickly: Stirring too fast traps air bubbles in the resin, leading to a rough or cloudy finish.
- Using The Wrong Mixing Container: Some plastics react with epoxy, leading to contamination. Always use a clean, non-reactive container like silicone or a disposable plastic cup made for resin.
How To Avoid Mixing Mistakes
- Follow Manufacturer Instructions: Always check the label for the correct mixing ratio. A 1:1 ratio isn’t universal; some epoxies require 2:1 or other variations.
- Stir Slowly & Thoroughly: Use a flat stir stick or drill mixer and stir gently to prevent air bubbles.
- Use The Double-Cup Method: Mix your epoxy in one cup, then pour it into a second clean cup and stir again. This ensures any unmixed resin on the sides of the first cup is fully blended.
- Check Room Temperature: Epoxy cures best between 21-27°C (70-80°F). If it’s too cold, it won’t mix or cure properly.
Issues With Bubbles, Cracks, Or Uneven Surfaces
After mixing and pouring epoxy, many DIYers encounter bubbles, cracks, or an uneven finish. These issues can ruin the aesthetic and durability of your project.
Why Do Bubbles Form In Epoxy?
- Improper Mixing: Stirring too aggressively introduces air into the mixture.
- Pouring Too Quickly: Trapping air as the epoxy spreads.
- Moisture In The Surface: Humidity, damp wood, or a wet workspace can cause bubbles or cloudiness.
- Cold Temperatures: If the epoxy is too cold, it becomes thick and traps air.
How To Prevent Bubbles
- Use A Heat Gun Or Torch: After pouring, lightly pass a butane torch or heat gun over the surface to pop bubbles. Keep moving to avoid overheating.
- Seal Porous Surfaces: If applying epoxy to wood, apply a thin seal coat first before pouring the final layer. This prevents air from escaping from the wood and causing bubbles.
- Warm The Epoxy Before Mixing: Place the resin and hardener bottles in warm water (not hot!) for a few minutes to reduce thickness and make air bubbles rise faster.
Why Does Epoxy Crack?
- Pouring Too Thick: Most epoxies have a recommended pour depth (e.g., 1/8 inch). Pouring too thick can create excessive heat, leading to cracks.
- Rapid Temperature Changes: If the curing environment fluctuates (e.g., a cold night after a hot day), the epoxy may expand or contract too fast, causing cracks.
- Poor Surface Prep: A dirty or oily surface can cause poor adhesion, leading to cracks over time.
How To Prevent Cracks
- Pour In Layers: If you need a thick epoxy coat, apply multiple thin layers, letting each cure before adding the next.
- Control The Temperature: Keep the workspace at a stable, warm temperature during curing. Avoid drafts and sudden temperature shifts.
- Sand Between Layers: If applying multiple coats, lightly sand the cured surface with 320-400 grit sandpaper to improve adhesion.
How To Prevent Uneven Surfaces
- Level Your Work Area: Make sure your project is on a flat, even surface before pouring epoxy.
- Don’t Overwork The Resin: Over-spreading the epoxy can lead to inconsistent thickness.
- Use A Self-Leveling Formula: Some epoxy products are designed to naturally spread evenly, reducing manual effort.
Fixing Epoxy Mistakes After It Has Dried
Even with the best preparation, mistakes can still happen. The good news is most epoxy errors can be fixed after curing.
Fixing Sticky Or Tacky Epoxy
If your epoxy didn’t harden properly, it’s likely due to improper mixing or an incorrect ratio. Here’s how to fix it.
- For Slight Stickiness: Lightly sand the surface and apply a thin fresh coat of properly mixed epoxy.
- For Fully Tacky Epoxy: You may need to scrape it off completely using a plastic scraper or heat gun, then reapply a new layer.
Fixing Bubbles In Cured Epoxy
- Small Bubbles: Sand the surface with 320-grit sandpaper, wipe clean, and apply a new thin layer of epoxy.
- Large Bubbles: If deep bubbles formed, drill a small hole to remove trapped air, then recoat.
Fixing Cracks Or Uneven Areas
- For Hairline Cracks: Fill them with a fresh epoxy coat and use a heat gun to smooth it out.
- For Large Cracks Or Uneven Surfaces: Sand down the entire surface with 220-400 grit sandpaper, wipe it clean, and apply a new self-leveling epoxy layer.
Fixing Cloudy Or Dull Epoxy
Cloudiness can result from moisture contamination or improper curing. To restore clarity.
- Use A Polishing Compound: Buff the surface with automotive polishing compound and a soft cloth.
- Apply A Fresh Coat: Lightly sand the surface and pour a new thin, clear epoxy layer.
Epoxy projects can be incredibly rewarding when done right, but small mistakes can impact the final result. By understanding common epoxy issues like mixing errors, bubbles, cracks, and uneven finishes, you can take steps to avoid them and achieve a professional-quality result.
If you do make a mistake, don’t panic! Most epoxy issues can be fixed with a little patience and the right techniques. Whether you’re working on floors, countertops, furniture, or art projects, following these best practices will ensure your epoxy turns out smooth, durable, and beautiful.
Maintenance & Longevity: Keeping Your Epoxy Looking New
Epoxy surfaces are known for their durability, glossy finish, and resistance to stains and wear. However, proper maintenance is essential to keep your epoxy looking new for years to come. Whether you have epoxy flooring, countertops, or furniture, following the right cleaning and repair techniques will ensure its longevity and lasting shine. Below, we’ll explore some easy-to-follow maintenance tips, how to repair minor damages, and when to consider recoating or refinishing your epoxy surface.
Cleaning Tips To Prevent Dullness And Scratches
Keeping your epoxy surface clean is the key to preserving its shine and smooth finish. Here are the best cleaning practices to prevent dullness and scratches.
- Use A Soft Mop Or Microfiber Cloth: Avoid abrasive scrubbing tools that can scratch the surface. Instead, use a soft mop or microfiber cloth for gentle cleaning.
- Stick To Mild Soaps And Warm Water: Harsh chemicals like ammonia, bleach, or acidic cleaners can weaken the epoxy’s protective layer over time. A simple mix of warm water and mild dish soap works best for everyday cleaning.
- Sweep And Dust Regularly: Dirt, sand, and debris can act like sandpaper and cause micro-scratches on epoxy flooring. Sweeping or vacuuming frequently will help prevent this.
- Avoid Dragging Heavy Objects: Epoxy is tough, but dragging heavy furniture or equipment across the surface can cause scratches or scuff marks. Use furniture pads or lift objects instead of dragging them.
- Apply A Gentle Wax Or Polish: For high-traffic epoxy surfaces, applying a non-abrasive epoxy-safe wax can enhance shine and add an extra layer of protection. This is particularly useful for epoxy countertops and floors.
By following these cleaning tips, you can maintain the clarity and gloss of your epoxy surface while reducing the risk of wear and tear over time.
How To Repair Small Damages In Epoxy Surfaces
Despite its durability, epoxy can occasionally suffer from minor cracks, chips, or scratches due to heavy impact or improper maintenance. Fortunately, most small damages can be easily repaired without the need for professional help.
- For Light Scratches: Buffing out light scratches with a fine-grit sandpaper (e.g., 1000-2000 grit) and applying a thin layer of epoxy topcoat will restore the surface’s smoothness.
- For Small Chips Or Cracks: Mix a small amount of clear epoxy resin and carefully fill the damaged area. Use a plastic scraper to level the surface and allow it to cure completely.
- For Dull Or Cloudy Spots: Sometimes, epoxy can lose its shine due to moisture exposure or improper curing. Buffing with polishing compound or reapplying a thin epoxy coating can restore its clarity.
- Fixing Air Bubbles: If air bubbles appear on the surface after application, they can be removed by gently sanding the area and reapplying a fresh layer of epoxy.
By addressing small issues promptly, you can extend the lifespan of your epoxy surface and keep it looking as good as new without the need for costly replacements.
When To Recoat Or Refinish For A Fresh Look
Even with regular maintenance, epoxy surfaces may eventually lose their shine, develop wear patterns, or suffer from surface degradation over time. When this happens, recoating or refinishing is the best way to restore the original beauty and durability of your epoxy surface.
Signs You Need A Recoat
- The surface looks dull or faded, even after cleaning.
- You notice multiple scratches, stains, or discoloration.
- The epoxy has started to wear thin in high-traffic areas.
How To Recoat Epoxy Properly
- Clean & Sand The Surface: Lightly sand the epoxy with 220-400 grit sandpaper to help the new coat adhere better.
- Wipe Away Dust & Debris: Use isopropyl alcohol or a damp microfiber cloth to remove any dust before applying the new layer.
- Apply A Fresh Epoxy Coating: Pour a thin, even layer of epoxy over the surface and use a roller or squeegee to spread it evenly.
- Allow Proper Curing Time: Let the new layer cure according to the manufacturer’s instructions before using the surface again.
When To Completely Refinish Epoxy
If the existing epoxy is severely damaged, peeling, or has deep cracks, a full refinishing job may be needed. This involves removing the old epoxy layer completely and reapplying a new coat.
Regular recoating can prolong the life of your epoxy surface, giving it a fresh, polished look without the need for a full replacement.
Taking care of your epoxy surfaces doesn’t have to be complicated. By following simple cleaning practices, addressing minor damages quickly, and recoating when necessary, you can maintain a glossy, professional-looking finish for years to come. Whether you have epoxy floors, countertops, or resin furniture, these maintenance tips will help keep your surfaces strong, durable, and visually appealing.
Epoxy Resin Safety & Environmental Considerations In NZ
Epoxy resin is a highly versatile material used in countless applications across New Zealand, from flooring and furniture to marine repairs and artistic projects. However, while it offers incredible durability and aesthetic appeal, it is essential to handle epoxy safely and consider its environmental impact. Understanding proper safety practices, disposal methods, and eco-friendly alternatives will help ensure a responsible approach to working with epoxy resin.
Safe Handling And Protective Gear Recommendations
When working with epoxy resin, safety should always come first. While modern epoxy formulations are designed to be user-friendly, improper handling can still pose health risks. Here are some key safety guidelines to follow.
- Wear Protective Gear: Always use gloves, safety goggles, and a respirator mask to prevent skin irritation, eye exposure, or inhalation of fumes. Some epoxies release strong odors and volatile organic compounds (VOCs) that can be harmful when inhaled over time.
- Work In A Well-Ventilated Area: Whether you’re applying epoxy indoors or outdoors, ensure there is proper airflow. Open windows, use exhaust fans, or work in an open space to minimize inhalation risks.
- Avoid Direct Skin Contact: Epoxy can cause skin irritation and allergies with prolonged exposure. If it comes in contact with your skin, wash the area immediately with soap and warm water. For hardened epoxy, use vinegar or citrus-based cleaners instead of harsh solvents.
- Use The Right Mixing Techniques: Follow the manufacturer’s instructions for mixing ratios. Incorrect ratios can lead to incomplete curing, releasing hazardous chemicals and weakening the final product.
- Keep Away From Children And Pets: Epoxy resin is not child-safe and should always be stored in sealed containers, away from reach. Accidental ingestion or exposure to uncured resin can be dangerous.
By taking these safety precautions, you can minimize health risks and work with epoxy confidently while maintaining a safe workspace.
Disposal Methods Following NZ Regulations
Epoxy resin is a chemical-based material, meaning it must be disposed of responsibly to avoid harming the environment. New Zealand has strict environmental regulations regarding the disposal of hazardous substances, including resins and hardeners. Here’s how you can safely dispose of epoxy waste in compliance with NZ laws.
- Let Unused Epoxy Fully Cure: Never dispose of liquid epoxy in drains, soil, or regular trash. Instead, mix any leftover resin and hardener to let it fully cure, turning it into an inert solid that can be disposed of as regular waste.
- Use Approved Disposal Sites: Uncured epoxy is classified as hazardous waste and must be taken to a local hazardous waste facility. Contact your local council to find drop-off points or collection services that handle chemical waste.
- Recycle Containers Properly: Epoxy resin containers should be emptied completely before disposal. If residue remains, follow your local recycling guidelines for hazardous material packaging. Some councils may accept rinsed plastic and metal containers, while others require them to be taken to specialized disposal sites.
- Avoid Washing Epoxy Tools In The Sink: Rinse mixing cups, brushes, and rollers with a solvent like isopropyl alcohol or a designated epoxy cleaner. Collect the residue and dispose of it at a hazardous waste facility rather than washing it down household drains.
By following these best practices, you ensure that epoxy waste does not contaminate New Zealand’s waterways or ecosystems while staying compliant with environmental regulations.
Eco-Friendly Epoxy Options For Sustainable Projects
As sustainability becomes a priority in New Zealand, many epoxy manufacturers are developing eco-friendly resin alternatives with lower environmental impact. If you’re looking for sustainable epoxy solutions, consider the following.
- Bio-Based Epoxy Resins: Some brands now offer plant-derived resins, using renewable sources like soybean, cashew nut shell oil, and pine resin instead of petroleum-based chemicals. These products reduce carbon footprint while maintaining durability.
- Low-VOC And Solvent-Free Epoxy: Volatile Organic Compounds (VOCs) contribute to air pollution and health risks. Opt for low-VOC or solvent-free epoxy formulations, which emit fewer harmful fumes and are safer for indoor use.
- Water-Based Epoxy Coatings: Unlike traditional solvent-based epoxies, water-based epoxies offer similar durability with fewer toxic emissions. These are commonly used for floor coatings, countertops, and furniture finishes.
- Reusable And Sustainable Packaging: When purchasing epoxy, consider brands that use recyclable or biodegradable packaging. Some manufacturers also offer refillable containers, reducing plastic waste.
- Extend The Lifespan Of Epoxy Surfaces: The longer an epoxy-coated surface lasts, the less waste is produced. Proper maintenance, UV-resistant coatings, and avoiding chemical damage can help extend the life of your epoxy projects, reducing the need for replacements.
By choosing eco-friendly epoxy options, you contribute to a greener, more sustainable future while still enjoying the benefits of this incredibly versatile material.
Working with epoxy resin in New Zealand requires a balanced approach to safety and environmental responsibility. By following proper handling precautions, safe disposal methods, and sustainable alternatives, you can enjoy the many benefits of epoxy without harming your health or the planet. Whether you’re a DIY enthusiast or a professional, making conscious choices about epoxy use ensures that your projects are both high-quality and environmentally responsible.

FAQs: About Epoxy Guide NZ
Conclusion
As we wrap up this Ultimate Epoxy Guide NZ, it’s clear that epoxy resin is a game-changer for DIYers, homeowners, and professionals alike, offering unmatched durability, versatility, and aesthetic appeal. Whether you’re planning to coat a countertop, install an epoxy floor, or take on a creative resin art project, knowing how to choose, apply, and maintain epoxy properly ensures long-lasting and professional-quality results. By following the steps outlined in this guide, avoiding common mistakes, and using the right type of epoxy for New Zealand’s climate, you can tackle any project with confidence and ease. Now, it’s your turn—whether you’re a beginner testing out epoxy for the first time or a seasoned expert with valuable insights, we’d love to hear from you! Share your epoxy projects, ask questions, or drop your thoughts in the comments below. Let’s build a helpful community where we can exchange tips, troubleshoot challenges, and celebrate amazing epoxy transformations together.
Find A Professional Flooring Company Near You!
- Flooring Specialists Hamilton
- Flooring Specialists Wellington
About the Author:
Mike Veail is a recognized digital marketing expert with over 6 years of experience in helping tradespeople and small businesses thrive online. A former quantity surveyor, Mike combines deep industry knowledge with hands-on expertise in SEO and Google Ads. His marketing strategies are tailored to the specific needs of the trades sector, helping businesses increase visibility and generate more leads through proven, ethical methods.
Mike has successfully partnered with numerous companies, establishing a track record of delivering measurable results. His work has been featured across various platforms that showcase his expertise in lead generation and online marketing for the trades sector.
Learn more about Mike's experience and services at https://theleadguy.online or follow him on social media: