Welcome to your complete guide to deck framing in NZ, where we break down everything you need to know to build a strong, durable, and compliant deck that stands up to New Zealand’s unique conditions. Whether you’re planning a DIY project or simply want to understand how proper framing impacts safety and longevity, this guide will walk you through key components, materials, building code requirements, and expert tips so you can make informed decisions and avoid costly mistakes from the ground up.
Deck framing in NZ refers to the structural foundation of a deck, including piles, bearers, and joists, built to meet New Zealand Building Code requirements. It ensures proper load support, durability, and safety, using treated timber and correct spacing to withstand local weather conditions and provide a stable base for decking boards.
- What Is Deck Framing And Why It Matters
- NZ Building Requirements For Deck Framing
- Materials For Deck Framing In NZ
- Key Components Of A Deck Frame
- Step-By-Step Deck Framing Process (NZ Context)
- Common Deck Framing Mistakes To Avoid
- Cost Of Deck Framing In NZ
- DIY Vs Hiring A Professional In NZ
- Expert Tips For Long-Lasting Deck Framing
- References
- FAQs: About Deck Framing In NZ
- Conclusion
- Find A Professional Decking Company Near You!
What Is Deck Framing And Why It Matters
Deck framing is the structural foundation that supports your entire deck, and getting it right is what separates a long-lasting, safe outdoor space from one that starts failing within a few years. In a New Zealand context, where weather conditions, moisture exposure, and building standards all play a role, understanding how deck framing works is essential whether you are building yourself or managing a project.
What Is Deck Framing?
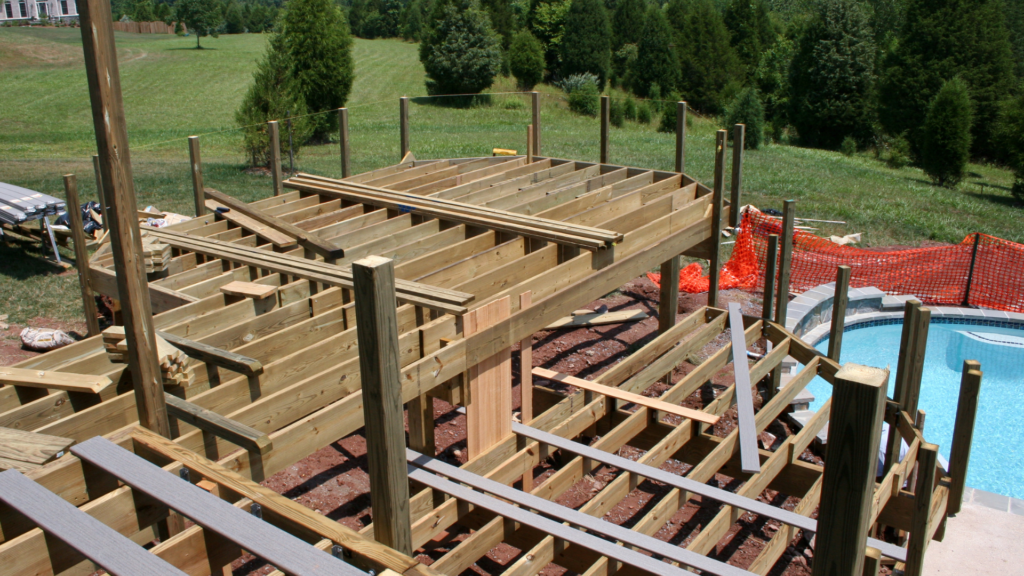
Deck framing refers to the substructure that sits beneath the visible decking boards. It is the load-bearing framework that holds everything in place and transfers weight safely to the ground.
The main components include:
- Piles: Vertical supports embedded into the ground that anchor the structure and carry loads down into stable soil
- Posts: Upright elements that connect piles to the rest of the frame, often used in raised decks
- Bearers: Primary horizontal beams that sit on piles or posts and carry the main structural load
- Joists: Secondary horizontal members fixed on top of bearers that support the decking boards directly
Each component works together as a system. If one part is poorly installed or undersized, it can affect the performance of the entire deck. This is why deck framing in NZ is not just about assembling timber, but about building a properly engineered support structure that meets local standards.
Why Framing Is Critical
The framing is not something you see once the deck is finished, but it is the most important part of the build. It determines how safe, stable, and durable your deck will be over time.
- Structural Integrity: A well-built frame ensures the deck can safely support people, furniture, and environmental loads such as wind or rain. Weak framing can lead to sagging, movement, or even structural failure
- Load Distribution: The framing system spreads weight evenly across piles and into the ground. Proper spacing of bearers and joists prevents pressure points that can cause bending or cracking
- Longevity Of Decking Boards: Even high-quality decking boards will fail early if the frame underneath is uneven or poorly spaced. A solid frame reduces movement, improves drainage, and extends the life of the surface materials
In practice, most deck issues do not start with the boards on top, but with the structure underneath. That is why experienced builders always prioritise framing over appearance.
NZ Building Context And Environmental Considerations
Building a deck in New Zealand comes with specific challenges that directly affect how framing should be designed and constructed.
- Moisture Exposure: NZ’s climate includes high rainfall and humidity in many regions, which increases the risk of timber rot if framing is not properly treated or ventilated
- Timber Treatment Requirements: Different parts of the frame require specific treatment levels, such as H3.2 for above-ground use, H4 for ground-contact components, and H5 for structural piles. Using the wrong treatment level is one of the most common and costly mistakes
- Durability Standards: The NZ Building Code sets minimum durability expectations for structural elements, meaning your framing must be designed to last for decades, not just a few seasons
- Site Conditions: Soil type, drainage, and slope all influence how piles are installed and how the frame is supported, especially in areas prone to movement or water retention
Understanding these factors ensures your deck framing is not only compliant but also built to handle real-world conditions over the long term.

NZ Building Requirements For Deck Framing
Before starting any deck-framing project in New Zealand, it is essential to understand the legal and structural requirements that apply. These rules are designed to ensure your deck is safe, durable, and compliant with national standards. Ignoring them can lead to costly rework or safety risks, so taking the time to get this right from the beginning is one of the most important steps in the entire build.
Do You Need Consent for a Deck in NZ?
Whether you need building consent depends largely on the height and complexity of your deck. While some smaller projects fall outside consent requirements, many decks still need to meet strict safety criteria regardless of approval status.
- Height threshold: Decks that are more than 1.5 metres above ground level typically require building consent. This is because elevated structures present a higher fall risk and must meet stricter safety standards.
- Low-level decks: Decks under 1.5 metres may not require consent, but they still need to comply with the Building Code. This includes proper structural support and safe construction practices.
- Barriers and handrails: If your deck is 1 metre or higher above ground, a compliant barrier or handrail is usually required. These must meet specific height and spacing rules to prevent falls, especially for children.
- Attached structures: If your deck is connected to your home, additional considerations such as weatherproofing and structural integration may trigger consent requirements.
It is always best to confirm with your local council before starting, as rules can vary slightly depending on location and site conditions.
Key NZ Building Code Considerations
The New Zealand Building Code sets the minimum performance standards for all structural elements, including deck framing. Understanding these requirements ensures your deck can handle weight loads and withstand environmental conditions over time.
- Load-bearing capacity: Your deck must be designed to support both dead loads, such as the weight of the structure itself, and live loads, including people, furniture, and outdoor features. Proper spacing and sizing of joists, bearers, and piles are critical to meeting these requirements.
- Structural connections: Strong and secure fixings are essential for maintaining stability. This includes using appropriate fasteners and ensuring all connections are properly installed to prevent movement or failure.
- Durability standards: Timber used in deck framing must meet specific treatment levels to resist moisture, insects, and decay.
- H3.2-treated timber: Suitable for above-ground framing such as joists and bearers.
- H4-treated timber: Required for components in ground contact, such as posts.
- H5-treated timber: Used for structural piles embedded in the ground, where long-term durability is critical.
- Moisture protection: Proper drainage and ventilation must be considered to prevent water buildup, which can weaken the structure over time.
Following these standards not only ensures compliance but also extends the lifespan of your deck.
Local Council Rules to Check
In addition to national regulations, local councils may have specific requirements that affect your deck design and placement. These rules are often tied to zoning, environmental factors, and neighbourhood planning guidelines.
- Boundary setbacks: Many councils require decks to be positioned a certain distance from property boundaries. This helps maintain privacy and ensures compliance with local planning rules.
- Height restrictions: Some areas have limits on how high a deck can be built, particularly in residential zones.
- Drainage considerations: Poor drainage can lead to water pooling around piles and footings, which may compromise structural integrity. Councils often require proper runoff management as part of the design.
- Site-specific factors: Sloped sections, coastal exposure, and soil conditions can all influence how your deck must be built. For example, coastal areas may require higher-grade fixings to resist corrosion.
Getting the building requirements right from the start sets a solid foundation for the rest of your deck build. It reduces risk, improves safety, and gives you confidence that your structure will perform well for years to come.
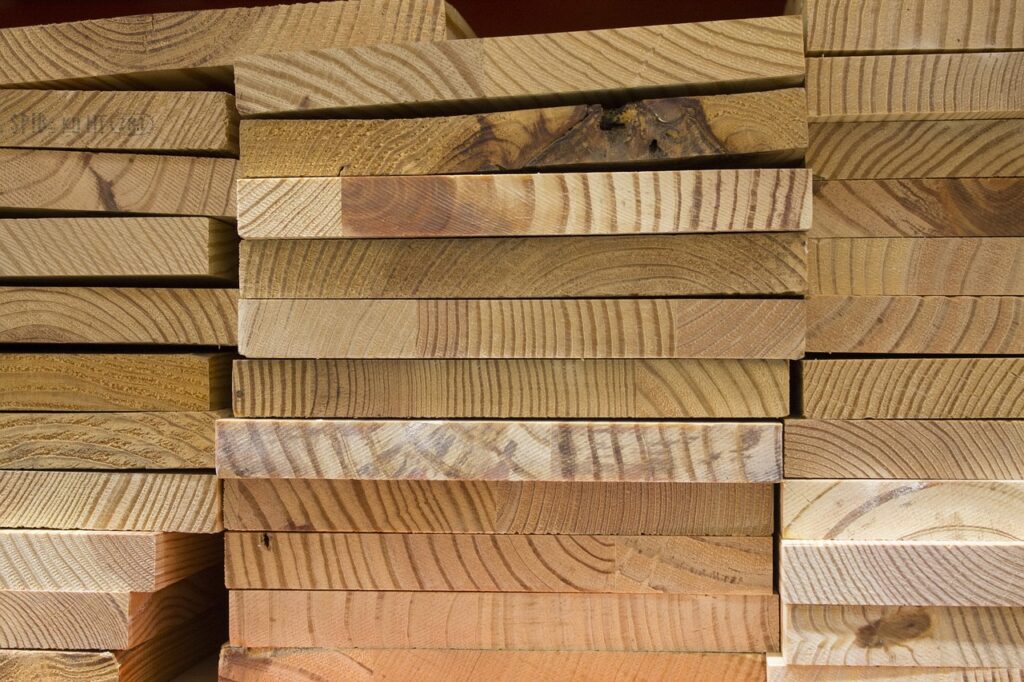
Materials For Deck Framing In NZ
Choosing the right materials for deck framing in NZ is one of the most important decisions you will make during the build process. New Zealand’s climate can be tough on timber, with high moisture levels, coastal salt exposure, and varying temperatures all playing a role in how long your deck will last. Using the correct materials not only ensures compliance with building standards but also helps prevent premature rot, structural failure, and costly repairs down the line.
Best Timber Types For NZ Conditions
Selecting the right timber is essential for creating a strong, long-lasting deck frame. In NZ, the choice usually comes down to treated pine or hardwood, each with its own advantages depending on your budget, location, and long-term expectations.
- Treated pine: This is the most widely used option for deck framing in NZ due to its affordability, availability, and ease of use. It is pressure-treated to resist rot, insects, and fungal decay, making it suitable for most residential projects. It is also lighter and easier to cut, which makes it ideal for DIY builds.
- Hardwood timber: Hardwood options such as kwila or vitex are denser and naturally more durable. They offer excellent strength and longevity, particularly in high-exposure environments. However, they are more expensive, heavier to work with, and can be harder on tools, which may not suit all builders.
In most cases, treated pine is the practical choice for framing, while hardwood is more commonly used for visible decking surfaces rather than the structural frame.
Understanding Timber Treatment Levels
Timber treatment levels in NZ are not optional details, they are critical for ensuring your deck meets durability requirements and performs well over time. Each treatment level is designed for a specific use case based on exposure to moisture and ground contact.
- H3.2 treatment: This level is used for above-ground structural timber that is exposed to the weather, such as joists and bearers. It protects against moisture and decay but is not suitable for direct ground contact.
- H4 treatment: Designed for timber that will be in contact with the ground, such as posts or components close to soil level. It offers a higher level of protection against rot and fungal attack.
- H5 treatment: This is the highest level commonly used in residential deck framing and is required for structural piles embedded in the ground. It provides maximum resistance to decay in high-risk conditions.
Using the wrong treatment level is one of the most common mistakes in deck construction. Even if everything else is done correctly, untreated or under-treated timber can fail much earlier than expected.
Fasteners And Hardware (Often Overlooked)
Fasteners and hardware might seem like a small detail, but they play a major role in the overall strength and durability of your deck frame. Poor-quality fixings can corrode over time, weakening connections and compromising the entire structure.
- Galvanized fasteners: These are coated to resist rust and are suitable for most inland environments. They are cost-effective and widely used for general deck framing applications.
- Stainless steel fasteners: These offer superior corrosion resistance and are highly recommended for coastal areas or locations exposed to salt air. While more expensive, they provide long-term reliability in harsh conditions.
- Corrosion-resistant hardware: Brackets, bolts, and connectors should be chosen based on your environment. Coastal builds require higher-grade materials to prevent premature failure, while inland builds may allow for standard galvanized options.
It is important to match your fasteners to your timber treatment as well. Certain treated timbers can be more corrosive to metals, so using compatible fixings helps avoid unexpected issues over time.
Key Components Of A Deck Frame
Understanding the key components of a deck frame is essential if you want a structure that is safe, durable, and compliant with NZ building standards. Each part of the frame plays a specific role in supporting weight, distributing loads, and protecting the deck from long-term damage. When these elements are installed correctly and work together as a system, you end up with a solid foundation that can handle both daily use and New Zealand’s variable weather conditions.
Piles And Footings
Piles and footings form the foundation of your deck and are responsible for transferring the load of the entire structure into the ground. Without properly installed piles, even a well-built frame above can shift, sink, or become unstable over time.
In most NZ builds, piles are set into concrete footings to anchor them securely. The depth and spacing of these piles depend on soil type, deck height, and load requirements, but getting this stage right is critical for long-term stability.
- Structural support: Piles carry the vertical load of the deck and prevent movement caused by ground shifts or moisture changes
- Depth requirements: Typical pile depths are at least 450mm into firm ground, but deeper installation may be needed for soft or uneven soil
- Spacing considerations: Piles are usually spaced between 1.2m and 1.8m apart depending on the design and load, ensuring even weight distribution
- Durability factor: H5-treated timber is commonly used for piles in NZ because it is designed for ground-contact conditions and long-term resistance to rot
A well-planned pile layout makes the rest of the framing process much easier and significantly reduces the risk of structural issues later on.
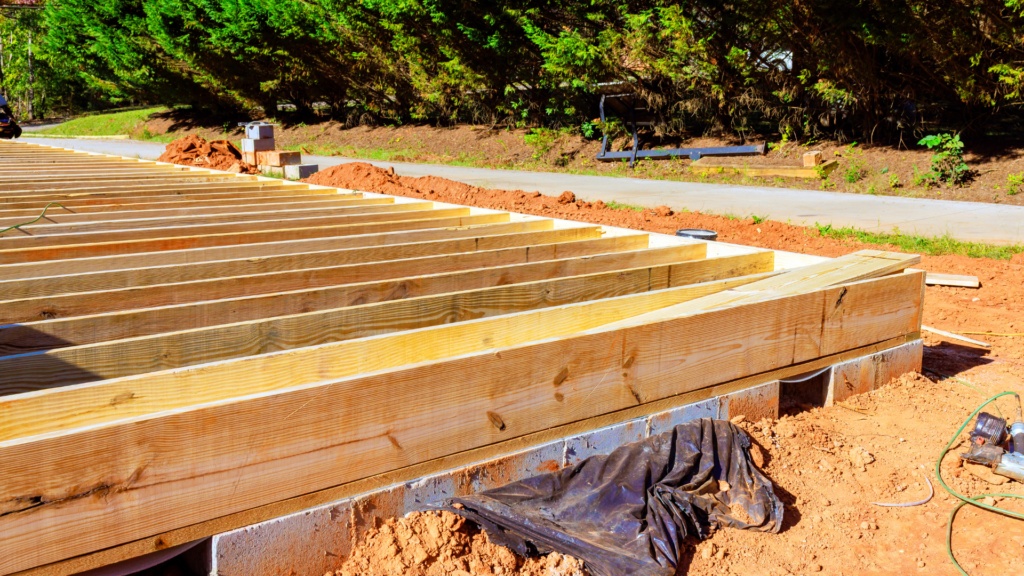
Bearers (Primary Support Beams)
Bearers are the main horizontal beams that sit on top of the piles and support the joists above. Think of them as the backbone of your deck frame, distributing weight evenly across all piles.
Correct placement and sizing of bearers are essential to prevent sagging or uneven surfaces. In NZ, bearer dimensions and spans are typically guided by building code tables, which ensure the structure can safely handle expected loads.
- Load distribution: Bearers transfer weight from the joists down into the piles, ensuring stability across the entire deck
- Placement accuracy: They must be installed level and properly aligned to avoid uneven decking later
- Span limits: The distance between piles affects the size of the bearer required, with longer spans needing stronger or double bearers
- Fixing methods: Bearers are usually fixed to piles using bolts or brackets to create a secure connection
Taking the time to correctly install and level your bearers will directly impact how straight and solid your finished deck feels.
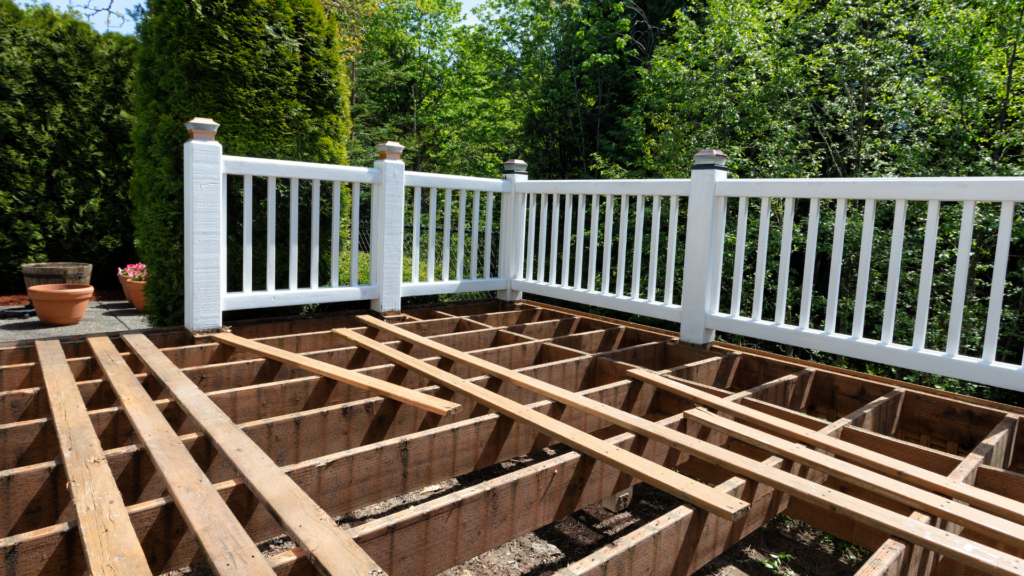
Joists (Secondary Support Structure)
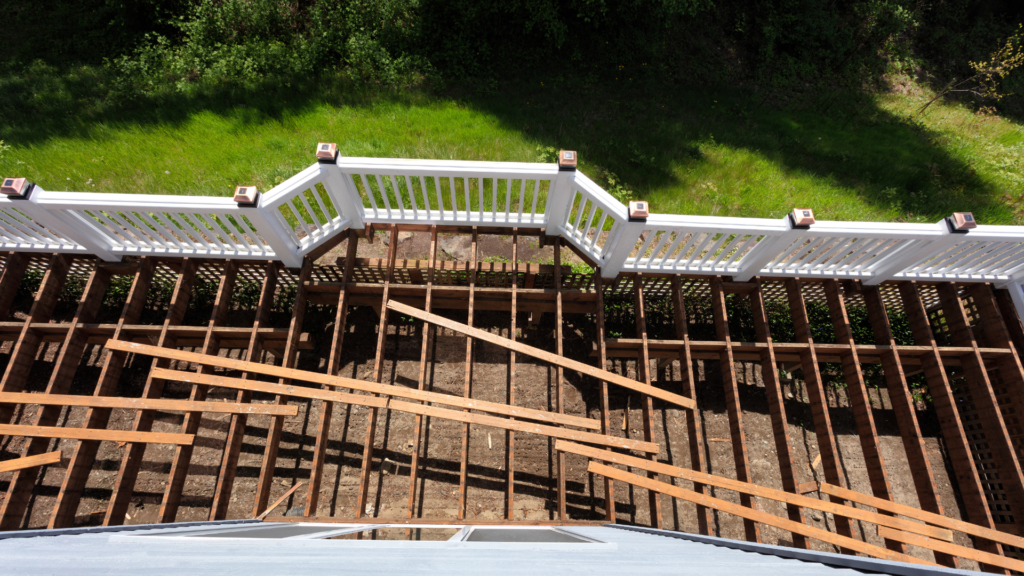
Joists are the secondary support members that sit on top of the bearers and provide the direct base for your decking boards. Their spacing and alignment have a major impact on both the strength of the deck and how the finished surface performs underfoot.
In NZ, joist spacing is typically either 400mm or 600mm centers, depending on the type and thickness of decking material used. Closer spacing generally results in a firmer, more stable surface.
- Spacing guidelines: 400mm centers are preferred for most timber decking, while 600mm may be used for thicker boards or lighter loads
- Deck performance: Tighter spacing reduces board flex and creates a more solid feel when walking on the deck
- Alignment importance: Joists must be installed straight and level to prevent uneven decking and water pooling
- Fixing strength: Proper fastening to bearers ensures the frame acts as a single, stable structure
Choosing the right joist spacing is one of those decisions that may not seem critical at first, but it has a noticeable effect on comfort and durability over time.
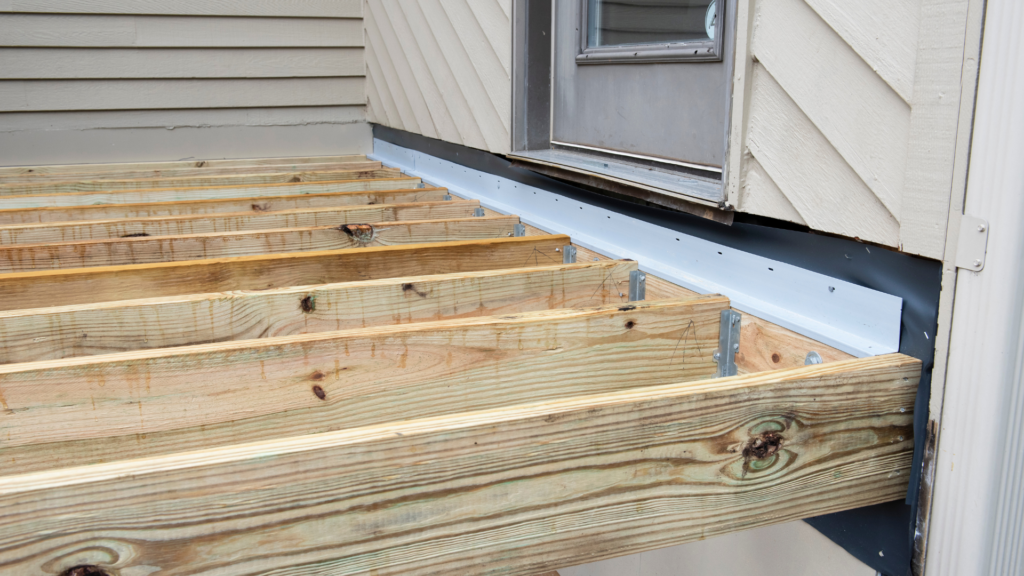
Ledger Board (If Attached To House)
A ledger board is used when the deck is attached directly to a house. It acts as the connection point between the deck frame and the building, supporting one side of the joists. While it simplifies construction, it also introduces one of the most common failure points if not installed correctly.
Water intrusion is the biggest risk with ledger boards, and poor installation can lead to serious structural damage to both the deck and the house.
- Connection role: The ledger board anchors the deck to the house and supports joists along that edge
- Waterproofing needs: Proper flashing must be installed to prevent water from entering the building structure
- Fixing requirements: Bolts or structural fixings are required to securely attach the ledger to framing, not just cladding
- Failure risks: Inadequate sealing or incorrect fixing can lead to rot, weakening both the deck and the house over time
Because of the risks involved, ledger board installation should always be done carefully and, in some cases, with professional input to ensure compliance and safety.
A well-built deck frame comes down to how these components work together, not just how each part is installed on its own. When piles, bearers, joists, and connections are properly planned and executed, you create a structure that feels solid, performs reliably, and lasts for years with minimal issues.
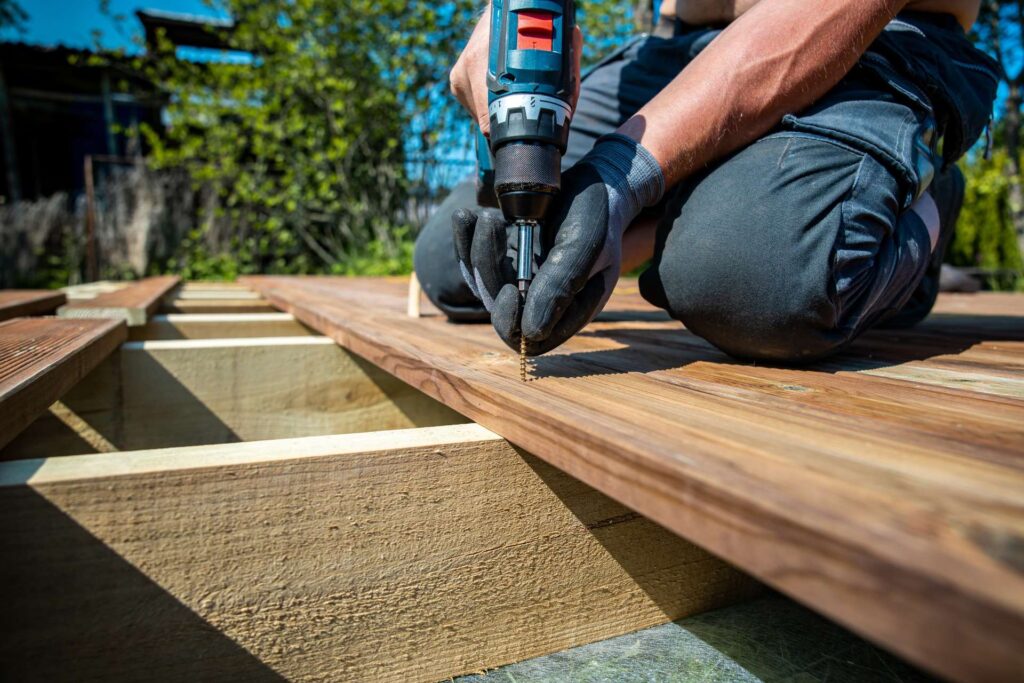
Step-By-Step Deck Framing Process (NZ Context)
Getting the framing right is what separates a long-lasting deck from one that starts to fail within a few years. In New Zealand, where moisture, ground conditions, and compliance requirements all play a role, following a structured, step-by-step approach ensures your deck is safe, durable, and built to standard. Below is a practical, experience-driven process that reflects how decks are typically framed on-site across NZ.
Step 1 – Planning and Layout
Before any digging begins, careful planning sets the foundation for a smooth build. This stage is where most costly mistakes can be avoided, especially with layout accuracy and site-specific considerations.
- Measuring the area: Start by marking out the deck footprint using string lines and stakes. Double-check all measurements, including diagonals, to ensure the layout is square. Even small errors at this stage can lead to alignment issues later.
- Marking pile positions: Identify where each pile will go based on your bearer layout and load requirements. Consistent spacing is critical for structural integrity, so follow standard NZ spacing guidelines or your design plan.
- Considering drainage and slope: Assess how water moves across your site. A well-planned layout allows for proper runoff, reducing the risk of moisture build-up under the deck, which is a common cause of timber deterioration in NZ conditions.
Step 2 – Installing Piles and Footings
Piles form the backbone of your deck’s support system, so accuracy and stability here are essential. This step requires attention to both depth and alignment.
- Digging holes: Excavate each hole to the required depth, typically at least 450mm, depending on soil conditions and local requirements. Ensure the base is firm and level to prevent future settling.
- Concrete setting tips: Place piles into position and pour concrete around them, ensuring each pile is plumb and aligned with your string lines. Allow sufficient curing time before adding load. In colder or wet conditions, allow extra time for proper setting to maintain strength.
Step 3 – Installing Bearers
Bearers act as the main horizontal support beams, transferring load from the joists down to the piles. Proper installation ensures the entire frame remains stable and level.
- Leveling techniques: Use a string line or laser level to ensure all bearers sit perfectly level across the span. Pack or trim piles as needed to achieve consistent height, as uneven bearers will affect the entire structure.
- Securing to piles: Fix bearers to piles using appropriate brackets or bolts designed for structural connections. In NZ, using corrosion-resistant fixings is especially important, particularly in coastal environments.
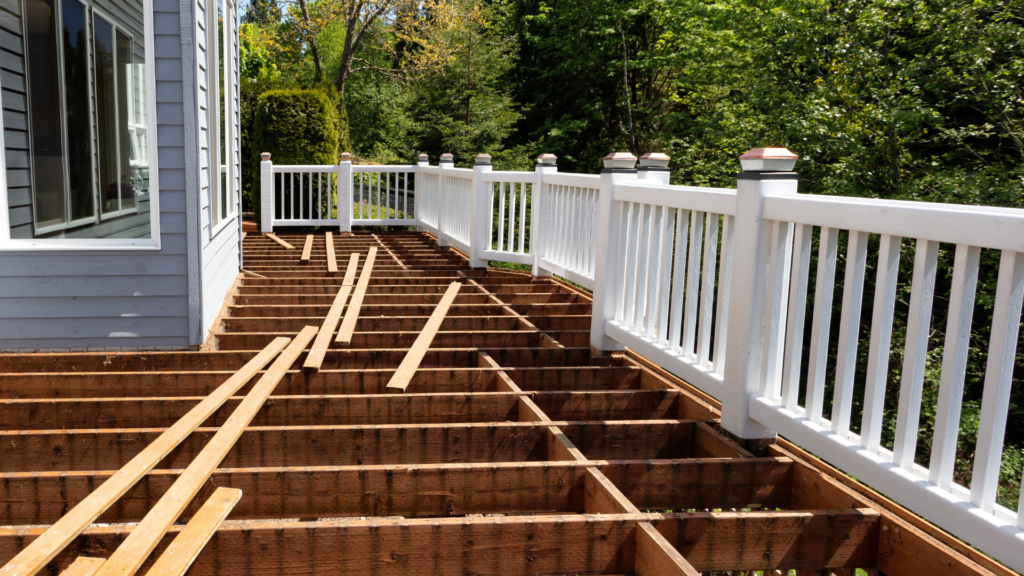
Step 4 – Installing Joists
Joists create the framework that directly supports your decking boards, so spacing and alignment must be precise to avoid bounce or uneven surfaces.
- Spacing and alignment: Install joists at consistent centres, typically 400mm or 600mm depending on your decking material. Ensure each joist is straight and properly aligned to maintain a uniform surface.
- Fixing methods: Secure joists to bearers using joist hangers or skew nailing, depending on the design. Use approved fasteners that meet NZ durability standards to prevent long-term corrosion and structural weakness.
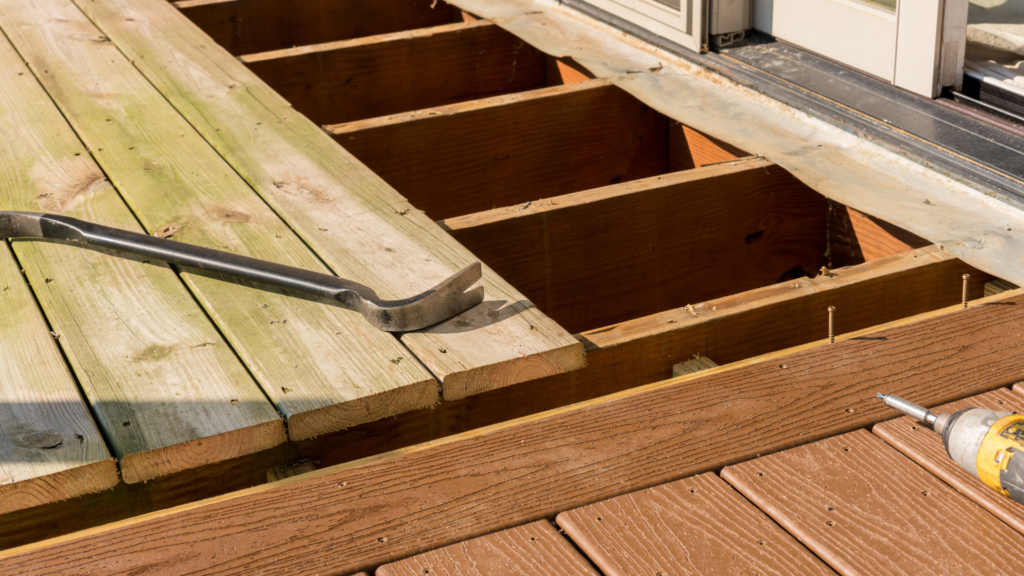
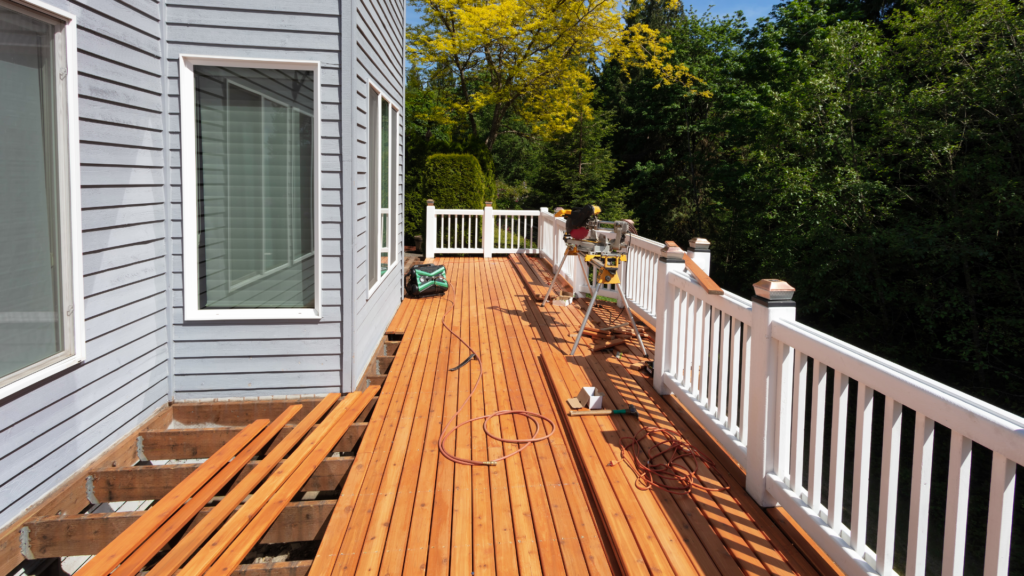
Step 5 – Final Framing Checks
Before laying any decking boards, a thorough inspection ensures your frame is structurally sound and ready for the next stage.
- Level, spacing, and stability: Check that all components are level, evenly spaced, and securely fixed. Walk across the frame to identify any movement or weak points that need reinforcing.
- Preparing for decking boards: Clear debris, confirm all fixings are tight, and ensure the frame is dry and ready. This is also the time to make any adjustments, as changes become much harder once decking is installed.
A well-built deck always starts with a well-executed frame. Taking the time to plan carefully, follow correct installation steps, and double-check your work will result in a structure that performs reliably for years in New Zealand’s demanding outdoor conditions.
Common Deck Framing Mistakes To Avoid
Even well-built decks can fail prematurely if key framing details are overlooked. In New Zealand, where moisture exposure, ground conditions, and compliance requirements all play a role, small mistakes during the framing stage can lead to costly repairs or safety risks down the track. Understanding these common issues will help you build a deck that is structurally sound, long-lasting, and fully compliant.
Using Incorrect Timber Treatment
Choosing the wrong timber treatment level is one of the most common and serious mistakes in deck framing. In NZ conditions, untreated or under-treated timber will quickly deteriorate when exposed to moisture and ground contact.
- Above-ground use: Timber used for joists and framing above ground should typically be H3.2 treated to resist moisture and insect damage.
- Ground-contact areas: Posts and piles require H4 or H5 treatment to withstand direct soil contact and prevent rot.
- Long-term durability: Using lower-grade timber may save money upfront, but it often leads to premature failure and expensive replacements.
Selecting the correct treatment level ensures your deck can handle New Zealand’s damp climate and extend its lifespan significantly.
Poor Drainage Planning Leading To Rot
Water management is critical in deck framing, yet it is often overlooked during planning. Trapped moisture accelerates timber decay and weakens the entire structure over time.
- Surface water runoff: Ensure the deck design allows water to flow away from the structure rather than pooling underneath.
- Ground clearance: Adequate spacing between the ground and framing improves airflow and reduces moisture buildup.
- Ventilation gaps: Proper spacing between components allows timber to dry out after rain.
A well-planned drainage system is one of the simplest ways to prevent long-term structural damage.
Incorrect Joist Spacing
Joist spacing directly affects how stable and comfortable your deck feels underfoot. Incorrect spacing can lead to sagging boards, excessive bounce, or even structural strain.
- Standard spacing: Most NZ decks use 400mm or 600mm centres, depending on the decking material.
- Material compatibility: Thinner decking boards often require closer spacing for adequate support.
- Load distribution: Proper spacing ensures weight is evenly spread across the frame, reducing stress on individual components.
Getting this right from the start avoids costly adjustments later and improves overall performance.
Skipping Building Code Checks
Ignoring NZ building regulations can result in compliance issues, safety risks, and potential fines. Many DIY builders underestimate how important these requirements are.
- Consent requirements: Decks over certain heights or with specific features may require council approval.
- Structural standards: The NZ Building Code outlines load-bearing and durability requirements that must be met.
- Inspection readiness: Following code from the beginning ensures your project passes inspections without delays.
Taking the time to understand local rules helps you avoid rework and ensures your deck is safe to use.
Using The Wrong Fasteners
Fasteners play a critical role in holding the entire deck frame together, especially in NZ’s often damp or coastal environments. Using incorrect fixings can lead to corrosion and structural weakness.
- Corrosion resistance: Galvanized or stainless-steel fasteners are essential for outdoor use.
- Coastal conditions: Stainless steel is strongly recommended in high-salt environments to prevent rust.
- Structural integrity: Poor-quality or incompatible fasteners can loosen over time, compromising safety.
Choosing the right fasteners ensures long-term stability and reduces maintenance issues.
Not Allowing For Timber Movement
Timber naturally expands and contracts with changes in temperature and moisture levels. Failing to account for this movement can cause warping, cracking, or structural stress.
- Spacing allowances: Small gaps between components allow for expansion without damage.
- Fixing techniques: Over-tightening fasteners can restrict movement and lead to splitting.
- Seasonal changes: NZ’s varying climate makes it especially important to plan for timber movement year-round.
Building a deck frame the right way comes down to paying attention to details that are easy to overlook but critical for long-term performance. By avoiding these common mistakes and following proven best practices, you can create a deck that is not only strong and compliant but also built to last in New Zealand conditions.
Cost Of Deck Framing In NZ
Understanding the cost of deck framing in NZ is essential before starting your project, whether you are planning a simple backyard deck or a more complex elevated structure. Costs can vary widely depending on materials, labour, and site-specific factors, so having a realistic budget upfront helps avoid surprises and ensures you make informed decisions that balance durability, compliance, and long-term value.
Average Material Costs
Material costs make up a significant portion of any deck framing project, and in New Zealand, pricing is heavily influenced by timber treatment requirements and environmental conditions.
- Treated timber pricing: Standard treated pine, commonly used for deck framing, typically ranges from around $4 to $8 per linear metre for smaller sections like joists, while larger structural components such as bearers can range from $15 to $30 or more per metre depending on size and treatment level. Higher-grade treatments like H4 or H5, used for ground-contact or structural piles, are more expensive due to their increased durability.
- Hardware and fixings: Fasteners, brackets, and connectors may seem minor but can add up quickly. Expect to spend anywhere from $200 to $800 or more depending on deck size and complexity. Coastal areas often require stainless-steel fixings, which cost more than standard galvanised options but provide better long-term corrosion resistance.
- Concrete and footing materials: If your deck requires piles, you will also need to factor in the cost of concrete, which can range from $10 to $20 per bag, with total costs depending on the number and depth of footings.
Labour Vs DIY Costs
One of the biggest cost decisions is whether to build the deck yourself or hire a professional. Each option has trade-offs that go beyond just upfront expenses.
- When DIY makes sense: A DIY approach can significantly reduce costs, especially for low-height, ground-level decks with simple layouts. If you have basic construction skills, the right tools, and a clear understanding of NZ building requirements, you can save on labour, which often represents 40 to 60 percent of the total project cost.
- When to hire a professional: Hiring a qualified builder is recommended for elevated decks, complex designs, or projects requiring building consent. Professional labour in NZ typically ranges from $50 to $100 per hour, but this cost includes expertise, efficiency, and compliance with building code standards. It also reduces the risk of costly mistakes that may arise from incorrect framing or poor planning.
- Time and risk considerations: While DIY may appear cheaper upfront, it often takes longer and carries a higher risk of errors. A poorly built frame can lead to structural issues, premature wear, or even safety hazards, which may cost more to fix than hiring a professional from the start.
Factors That Affect Cost
Several variables can influence the final cost of deck framing in NZ, and understanding these factors helps you plan more accurately and avoid budget overruns.
- Deck size and layout: Larger decks require more materials and labour, but complexity also plays a role. A simple rectangular deck is more cost-effective than a multi-level or irregular design, which requires additional framing and precision.
- Site conditions: Ground conditions, slope, and accessibility can significantly impact cost. Sloped or uneven sites may require deeper piles, additional structural support, or excavation work, all of which increase both material and labour expenses.
- Timber choice and treatment level: The type and treatment level of timber used directly affect cost and longevity. Higher-treatment timber such as H4 or H5 is more expensive but essential for structural components exposed to moisture or ground contact, ensuring long-term durability in New Zealand’s climate.
- Location-specific requirements: Coastal or high-moisture areas often require upgraded materials, such as stainless-steel fixings and higher-grade timber treatments, which can increase overall project costs but are necessary for durability and compliance.
- Design and compliance needs: Features like handrails, stairs, or specific building code requirements can add to the total cost. Projects requiring consent may also involve additional design, engineering, or inspection fees.
A well-planned deck framing project balances cost with quality, ensuring that the structure is not only affordable but also safe, compliant, and built to last. By understanding where your budget goes and making informed choices early, you can avoid unnecessary expenses while achieving a strong and reliable result.
DIY Vs Hiring A Professional In NZ
Deciding whether to build your own deck or hire a professional builder in New Zealand comes down to more than just cost. It involves understanding the complexity of the project, your level of experience, and the importance of meeting local building-code requirements. While a well-planned DIY deck can be rewarding and cost-effective, certain situations call for expert knowledge to ensure safety, durability, and compliance.
When DIY Is A Good Option
Taking the DIY route can work well for straightforward projects where risks are low and requirements are manageable. If you have basic construction skills and are willing to follow best practices, building your own deck can be both achievable and satisfying.
- Low-height decks: Decks built close to the ground are generally simpler and often fall below consent thresholds, making them more suitable for DIY projects. They require less structural complexity and are easier to stabilize.
- Simple designs: Basic, rectangular layouts without multiple levels, stairs, or integrated features are ideal for first-time builders. Fewer design variables mean fewer chances for structural or alignment issues.
- Basic tool familiarity: If you are comfortable using standard tools such as drills, saws, and levels, you can handle many aspects of deck framing with proper planning and care.
- Time flexibility: DIY projects allow you to work at your own pace, which can be beneficial if you want to spread the build over weekends or stages.
Even in these cases, it is important to follow New Zealand building-code guidelines, use the correct timber-treatment levels, and double-check measurements to avoid costly mistakes.
When To Hire A Builder
There are situations where hiring a qualified builder is not just recommended but essential. Professional expertise ensures that the deck is structurally sound, compliant with regulations, and built to last in New Zealand’s varied climate conditions.
- Elevated decks: Decks raised above ground level involve higher load-bearing requirements and safety considerations such as balustrades. A professional builder ensures proper engineering and compliance.
- Complex structures: Multi-level decks, irregular shapes, or designs that include features like built-in seating or stairs require advanced planning and precision. Mistakes in these areas can compromise both safety and aesthetics.
- Compliance concerns: If your project requires building consent or falls under strict council regulations, a licensed builder can help navigate approvals and ensure all work meets code requirements.
- Site-specific challenges: Sloped sections, poor soil conditions, or drainage issues can complicate construction. Professionals have the experience to address these factors effectively.
Choosing between DIY and professional help is ultimately about matching the project scope with your skills and confidence. Taking the time to assess this early can save time, money, and stress later on, while helping you achieve a deck that is both functional and built to last.
Expert Tips For Long-Lasting Deck Framing
Building a deck that stands the test of time in New Zealand requires more than just following basic construction steps. It comes down to making smart, experience-driven decisions that account for moisture, load demands, and long-term wear. The difference between a deck that lasts 5 years and one that lasts 20 often lies in small but critical details during the framing stage.
Plan For Water Runoff And Ventilation
Water is the biggest threat to any timber deck frame, especially in NZ’s often damp and variable climate. Poor drainage or trapped moisture will quickly lead to rot, even when treated timber is used.
- Allow natural water flow: Design the frame so water can drain away from the structure rather than pooling around piles or bearers
- Maintain ground clearance: Keep sufficient space between the ground and framing to promote airflow and reduce moisture buildup
- Avoid moisture traps: Ensure joists and bearers are not tightly boxed in, as enclosed spaces can trap damp air
- Consider deck orientation: Slight slopes or gaps can help direct water away from critical structural areas
A well-ventilated, free-draining frame significantly extends the life of your deck and reduces maintenance issues over time.
Over-Engineer Slightly For Durability
While it might be tempting to stick strictly to minimum code requirements, experienced builders often add a margin of strength to improve durability and performance.
- Reduce joist spacing: Closer spacing creates a more rigid structure and reduces movement over time
- Use larger timber where practical: Slightly oversized bearers or joists can better handle long-term loads and environmental stress
- Reinforce high-load areas: Stairs, outdoor furniture zones, and spa areas benefit from additional support
- Plan for movement: Timber naturally expands and contracts, so allowing for slight movement prevents structural stress
Taking a slightly conservative approach during framing helps prevent sagging, warping, and costly repairs later.
Use Higher-Grade Fixings In Coastal Areas
In coastal regions of New Zealand, salt-laden air accelerates corrosion, which can compromise structural connections faster than expected.
- Choose corrosion-resistant materials: Stainless steel fixings perform better than standard galvanized options in high-salt environments
- Match fixings to timber treatment: Some treated timbers can react with lower-grade metals, increasing corrosion risk
- Inspect metal components regularly: Early signs of rust should be addressed before they affect structural integrity
- Avoid mixed metals: Using incompatible metals can lead to galvanic corrosion and premature failure
Investing in the right fixings from the start is a small cost compared to the risk of structural failure down the line.
Regular Inspection And Maintenance
Even a well-built deck frame requires ongoing care to maintain its strength and safety. Regular checks help catch small issues before they become major problems.
- Check for movement or sagging: Uneven surfaces or shifting supports may indicate underlying structural issues
- Look for signs of rot: Discoloration, softness, or cracking in timber should be addressed early
- Inspect fixings and connections: Loose or corroded fasteners can weaken the entire structure
- Clear debris buildup: Leaves and dirt can trap moisture and accelerate timber deterioration
A simple yearly inspection routine can significantly extend the lifespan of your deck framing.
Future-Proofing For Extensions And Loads
Planning ahead during the framing stage can save time, money, and structural headaches if your needs change in the future.
- Allow for additional loads: Consider whether the deck may support heavier features like pergolas, spas, or outdoor kitchens
- Design with expansion in mind: Leave room or structural capacity for potential extensions
- Install extra support where needed: Adding additional piles or bearers early is far easier than retrofitting later
- Think long-term usability: A slightly larger or stronger frame can adapt to changing lifestyle needs
Future-proofing your deck framing ensures it remains functional and adaptable for years to come.
A long-lasting deck frame is built on thoughtful planning, quality materials, and attention to detail. By focusing on moisture control, structural strength, and long-term use, you can create a deck that not only looks great but performs reliably for decades.
References
- Building Code For Decks In NZ: Rules, Consent, And Safety
https://builderconnect.co.nz/blog/building-code-for-decks-nz/ - How To Design A Deck In NZ (Planning and Compliance Guide)
https://www.topbuilders.nz/post/how-to-design-a-deck-in-nz - Decking Installation Guidelines (NZ Timber Standards and Codes)
https://southpacifictimber.co.nz/wp-content/uploads/2023/12/Deck-install-guide-1.pdf - Designing A Deck (BRANZ Build Magazine Insights)
https://www.buildmagazine.org.nz/articles/show/designing-a-deck - Joists For A NZ Deck (Sizing and Structural Guidance)
https://www.robodeckdesigner.co.nz/joists-for-a-nz-deck.php
FAQs: About Deck Framing In NZ
Conclusion
Getting your deck framing right is what ultimately determines how safe, stable, and long-lasting your deck will be, especially in New Zealand where weather conditions and building standards demand careful attention to detail. A well-built frame is not just about supporting decking boards, it is about ensuring the entire structure performs reliably over time without costly repairs or safety risks. Taking the time to plan properly, choose the correct materials, and follow NZ Building Code requirements will always pay off in durability and peace of mind. Before you begin, it is worth checking with your local council to confirm any consent requirements or site-specific rules, as these can vary depending on your location and deck design. If you are unsure about structural elements or compliance, getting advice from a qualified builder or professional can help you avoid common mistakes and ensure everything is done correctly from the start. The most effective approach is to begin with a clear, well-thought-out plan that considers layout, load-bearing requirements, drainage, and long-term maintenance, so you can build a deck frame that not only looks good but stands strong for years to come.
Find A Professional Decking Company Near You!
- Balcony Construction Christchurch
- Deck Builders Alexandra
- Deck Builders Alexandra, Clyde & Cromwell
- Deck Builders Auckland
- Deck Builders Central Otago
- Deck Builders Christchurch
- Deck Builders Clyde
- Deck Builders Cromwell
- Deck Builders Hamilton
- Deck Builders Hawkes Bay
- Deck Builders Invercargill
- Deck Builders Kapiti Coast
- Deck Builders Kerikeri
- Deck Builders Lower Hutt
- Deck Builders Manawatu–Whanganui
- Deck Builders Nelson
- Deck Builders New Plymouth
- Deck Builders Paihia
- Deck Builders Palmerston North
- Deck Builders Porirua
- Deck Builders Queenstown
- Deck Builders Taupo
- Deck Builders Tauranga
- Deck Builders Upper Hutt
- Deck Builders Wanaka
- Deck Builders Warkworth
- Deck Builders Wellington
- Deck Builders West Auckland
- Deck Staining Palmerston North
- Pro Deck Builders Christchurch
About the Author:
Mike Veail is a recognized digital marketing expert with over 6 years of experience in helping tradespeople and small businesses thrive online. A former quantity surveyor, Mike combines deep industry knowledge with hands-on expertise in SEO and Google Ads. His marketing strategies are tailored to the specific needs of the trades sector, helping businesses increase visibility and generate more leads through proven, ethical methods.
Mike has successfully partnered with numerous companies, establishing a track record of delivering measurable results. His work has been featured across various platforms that showcase his expertise in lead generation and online marketing for the trades sector.
Learn more about Mike's experience and services at https://theleadguy.online or follow him on social media: