Welcome to your complete guide on bathroom renovation steps in Auckland, where we’ll walk you through everything you need to know before starting your project. From setting your budget and finding trusted Auckland contractors to choosing stylish, practical designs, this guide helps you plan with confidence. Whether you’re refreshing a small ensuite or transforming your main bathroom, you’ll learn each step to avoid common mistakes, manage costs, and achieve a space that fits your lifestyle and home. Consider working with concrete-contractors-nz/concrete-floor-slabs-kapiti-coast/”>concrete-contractors-nz/concrete-layers-lower-hutt/”>concrete services for professional results. For professional help, contact experienced plumbing experts in your area.
The steps of bathroom renovations in Auckland involve planning your layout, setting a realistic budget, hiring licensed professionals, selecting quality materials, completing demolition and installation, and adding finishing touches. Following each stage ensures a smooth, compliant, and stylish bathroom transformation that suits Auckland homes.
- Step 1: Plan Your Bathroom Renovation
- Step 2: Set Your Budget And Timeline
- Step 3: Choose Your Design And Layout
- Step 4: Hire Licensed Professionals
- Step 5: Source Quality Materials And Fixtures
- Step 6: Demolition And Preparation
- Step 7: Installation And Construction
- Step 8: Finishing Touches
- Step 9: Clean-Up And Maintenance
- FAQs: About Bathroom Renovation Steps In Auckland
- Conclusion
- Find A Professional Bathroom Renovation Company Near You!
Step 1: Plan Your Bathroom Renovation
Planning is the foundation of every successful bathroom renovation in Auckland. Before you start choosing tiles or fixtures, take time to clearly define what you want to achieve. Whether it’s improving your layout, adding more storage, or giving your space a modern refresh, having a clear vision helps you stay focused and avoid costly mistakes later on.
Start by identifying your main goals. Ask yourself: Do you need better functionality, more light, or just an updated look? Write down your priorities, then assess your current bathroom to see what’s working and what isn’t. Look at the size of the space, natural lighting, ventilation, and the condition of your plumbing and wiring. Understanding these factors early helps you plan realistic changes without overspending or causing structural issues.
Once you know your goals, explore Auckland bathroom design ideas online. Create a Pinterest board or mood board where you can collect inspiration for layouts, colors, fixtures, and materials. This visual reference will make it easier to explain your ideas to contractors or designers later on.
Next, set a clear and practical budget. Decide how much you’re willing to invest and include a small buffer for unexpected costs. This step is crucial in setting a bathroom renovation budget that aligns with your goals and prevents financial surprises mid-project.
If you’re unsure where to begin, consider speaking with local Auckland renovation specialists. They can offer expert advice on feasibility, council requirements, and cost estimates. Visiting showrooms around Auckland is also a smart move—it lets you see materials in person, compare prices, and understand what’s available locally.
Step 2: Set Your Budget And Timeline
Before you start your bathroom renovation in Auckland, setting a realistic budget and clear timeline is one of the most important steps. It helps you stay in control, make smarter decisions, and avoid stressful surprises later. Many homeowners skip this part and end up overspending or facing delays that could have been prevented with proper planning.
Understand The Main Cost Categories
Your total renovation cost will depend on the size of your bathroom, the materials you choose, and the scope of the work. To plan effectively, break down your expenses into key categories:
- Materials – Tiles, paint, cabinetry, benchtops, waterproofing, lighting, and ventilation. Quality materials can range from $3,000 to $8,000 depending on design and durability.
- Labour – This includes builders, plumbers, tilers, and electricians. In Auckland, professional labour often costs between $70 and $120 per hour. Full labour costs for a standard renovation may reach $7,000 to $12,000.
- Fittings And Fixtures – Toilets, sinks, taps, bathtubs, and showers can add another $2,000 to $5,000 depending on your choices.
- Permits And Inspections – If you’re making plumbing or structural changes, you may need Auckland Council approval. Fees usually range from $500 to $1,500, depending on the work’s complexity.
Know The Average Cost Of A Bathroom Renovation In Auckland
On average, a full bathroom renovation in Auckland costs between $15,000 and $30,000. A small basic remodel might stay around the lower end of that range, while a luxury or custom project with high-end finishes can exceed $40,000. Remember, your bathroom is a long-term investment — cutting corners on waterproofing or ventilation may lead to expensive repairs later.
Set A Realistic Timeline
A clear timeline keeps your renovation organized and reduces stress. Most Auckland bathroom renovations take three to five weeks to complete, depending on design complexity and contractor availability. Creating a timeline helps you coordinate tradespeople, order materials in advance, and keep the project moving smoothly.
Allow Extra Time For Delays
Even with a solid plan, delays can happen. Shipping issues, bad weather, or unexpected repairs behind the walls can push schedules back. Always build in an extra week or two to allow for these setbacks. If council approvals or permits are required, start those applications early to prevent bottlenecks.
Setting your budget and timeline early helps you stay confident and in control of your bathroom renovation. When you plan costs, track spending, and prepare for possible delays, you’ll avoid unnecessary stress and enjoy a smoother, faster renovation process.
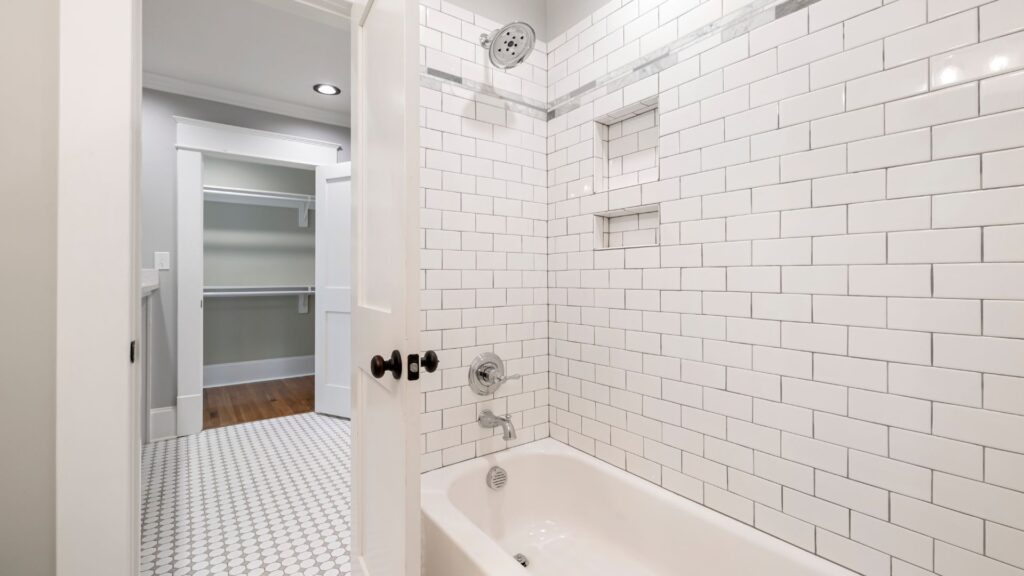
Step 3: Choose Your Design And Layout
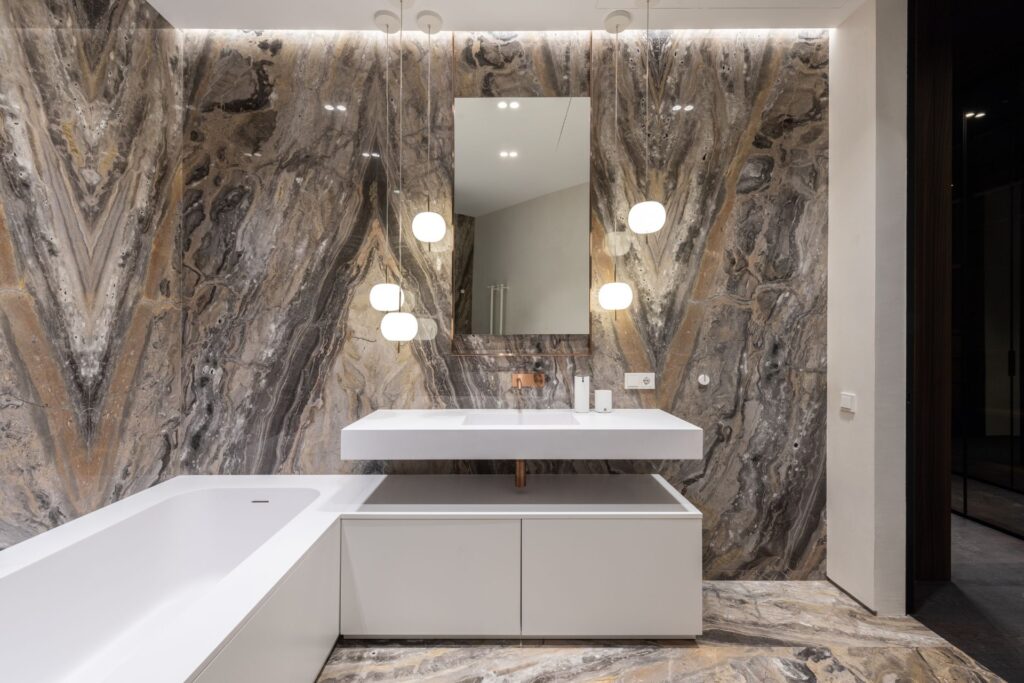
Designing your bathroom is one of the most exciting parts of a renovation. It’s where function meets style and where your personal taste can truly shine. In Auckland, bathroom design trends often reflect the city’s relaxed coastal vibe and focus on practicality. Choosing the right design and layout isn’t only about looks — it’s about creating a comfortable, efficient, and lasting space that fits your daily routine.
Common Auckland Bathroom Styles
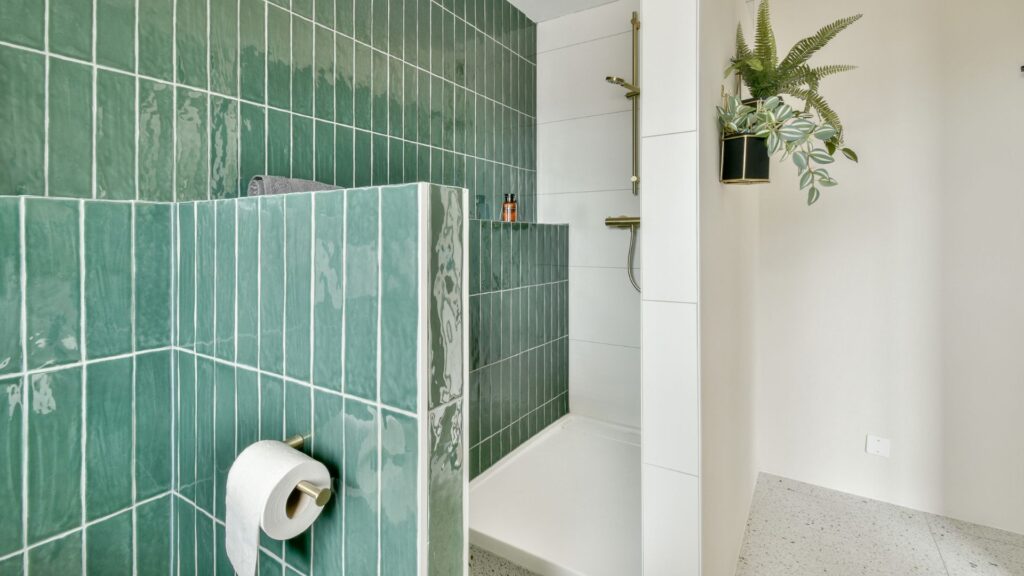
- Coastal Style:
Auckland’s proximity to beaches influences many homeowners to choose a calm, coastal look. Think white or sand-toned tiles, brushed brass or matte black fittings, and natural materials like timber and stone. Add soft lighting and simple décor to complete a relaxed seaside feel. - Modern Minimalist Style:
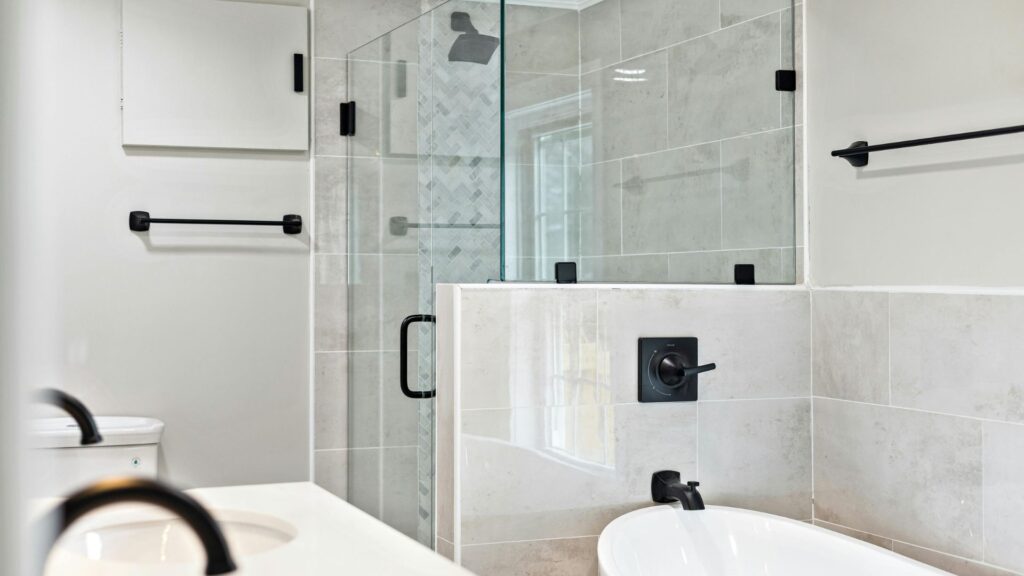
This style focuses on clean lines, uncluttered spaces, and smart storage. Many Auckland homeowners choose floating vanities, walk-in showers, and large mirrors to create an open, airy space. Neutral colours like grey, beige, or off-white work best for a timeless finish. - Classic Style:
For those who prefer a traditional look, the classic style never fades. It includes framed mirrors, porcelain basins, and elegant tapware in chrome or brass. Patterns like herringbone tiles or marble finishes bring sophistication without looking dated.
Layout Flow That Works
A functional layout is essential for comfort and safety. Always start with your bathroom’s fixed points — plumbing and electrical connections. Keep the toilet discreetly placed, away from direct view when entering. The shower should have enough space to move comfortably, with easy drainage and good ventilation. Plan your vanity location to allow smooth movement, and make sure storage areas like drawers and cabinets are easy to reach.
Eco-Friendly And Water-Saving Fixtures
Many Auckland homes now include eco-friendly features in their bathrooms. Installing low-flow showerheads, dual-flush toilets, and water-efficient taps helps reduce water waste while keeping utility bills lower. LED lighting and energy-efficient fans also make a noticeable difference. Look for WELS-rated products to ensure they meet New Zealand’s water efficiency standards.
Match Your Design To Your Home And Lifestyle
Your bathroom should reflect your lifestyle and the value of your home. If you live in a modern apartment, a sleek and minimal design may suit best. For older villas or character homes, traditional features can preserve charm while adding comfort. Balance trends with practicality — choose materials that are durable and easy to maintain. The goal is to create a bathroom that feels cohesive with the rest of your house and adds long-term value to your property.
Your bathroom design sets the tone for how the space feels and functions every day. By choosing a layout that flows well and a style that reflects both your home and lifestyle, you’ll create a bathroom that’s not only beautiful but built to last.
Step 4: Hire Licensed Professionals
When it comes to bathroom renovations in Auckland, hiring licensed professionals is one of the most important steps you can take. New Zealand law requires that any plumbing, electrical, or structural work be carried out by qualified and certified experts. This rule exists for good reason — your bathroom involves water, electricity, and construction, all of which can cause serious damage or safety risks if handled incorrectly.
Why Licensed Professionals Matter
Licensed builders, plumbers, and electricians follow strict safety standards set by New Zealand’s Building Code. They know how to install waterproofing systems, connect plumbing correctly, and ensure your electrical fittings are compliant. A licensed tradie will also handle council inspections or consents when needed, saving you time and potential fines.
Working with unlicensed workers might seem cheaper at first, but it can end up costing more. Faulty wiring, leaks, or poor waterproofing can lead to mold, short circuits, and expensive repairs later. By choosing professionals, you’re not just protecting your renovation — you’re protecting your home and family.
How To Find Reliable Renovation Experts In Auckland
Start by researching local bathroom renovation companies in Auckland. Look for those with a solid reputation, verified licenses, and positive online reviews. You can check the Licensed Building Practitioners (LBP) register or Master Plumbers NZ directory to confirm credentials.
Ask friends, family, or neighbors for referrals — word of mouth is often the most reliable source. Visit company websites to review past projects and see if their style matches your vision. Compare at least three quotes before deciding, and make sure each quote lists materials, labor, and timeline clearly.
Key Questions To Ask Before Hiring
- Are you a licensed builder, plumber, or electrician in New Zealand?
- How many similar bathroom renovations have you completed in Auckland?
- Can you provide recent references or photos of your past work?
- What warranties or guarantees do you offer for materials and labor?
- How do you handle permits, inspections, and unforeseen issues during the renovation?
These questions help you gauge reliability, communication style, and professionalism. A trustworthy contractor will answer openly and provide clear documentation.
Ensuring Safety And Compliance
A qualified team not only delivers a high-quality finish but also ensures your bathroom meets Auckland Council and NZ Building Code standards. Proper compliance prevents future insurance issues and helps maintain your property’s resale value. Licensed professionals also handle waterproofing certifications, electrical safety checks, and plumbing compliance records — essential for any home improvement project.
Choosing licensed professionals is an investment in peace of mind. With the right experts on your side, your Auckland bathroom renovation will run smoothly, meet legal requirements, and give you lasting results that look great and function safely for years.
Step 5: Source Quality Materials And Fixtures
Sourcing the right materials and fixtures is one of the most important parts of your bathroom renovation. Quality products don’t just look better—they last longer and perform well in Auckland’s changing weather conditions. Choosing trusted suppliers, comparing options, and focusing on durability will save you time and money in the long run.
When shopping for materials, start by visiting local Auckland bathroom suppliers or renovation showrooms. These stores often showcase full bathroom setups so you can see how different fittings, tiles, and vanities look together. You’ll also get expert advice from local professionals who understand what works best in Auckland homes. Many reputable suppliers carry brands known for reliability, such as Caroma, Methven, and Robertson Bathware.
If you prefer convenience, explore online bathroom stores that offer delivery across New Zealand. Make sure the supplier provides clear product descriptions, measurements, and images. Always check return policies before making a purchase, especially for large or fragile items.
When it comes to materials, choose those that can withstand Auckland’s humid climate. High-quality porcelain or ceramic tiles are moisture-resistant and easy to clean. Vinyl flooring is another solid option if you want something budget-friendly and water-resistant. For walls, opt for moisture-resistant paint or bathroom-specific finishes that prevent mould buildup. Proper ventilation is also essential, so invest in a good-quality extraction fan to keep the air dry and fresh.
Before buying any fixture, take time to compare warranties and product reviews. Warranties give you peace of mind that your products are built to last, while honest customer feedback helps you avoid disappointing purchases. Look for reviews that mention performance, durability, and customer service. If a product has many positive reviews over time, it’s usually a safe choice.
Auckland homeowners often balance design, cost, and durability when renovating. By sourcing materials carefully, you ensure your new bathroom not only looks stylish but also handles daily wear and tear with ease.
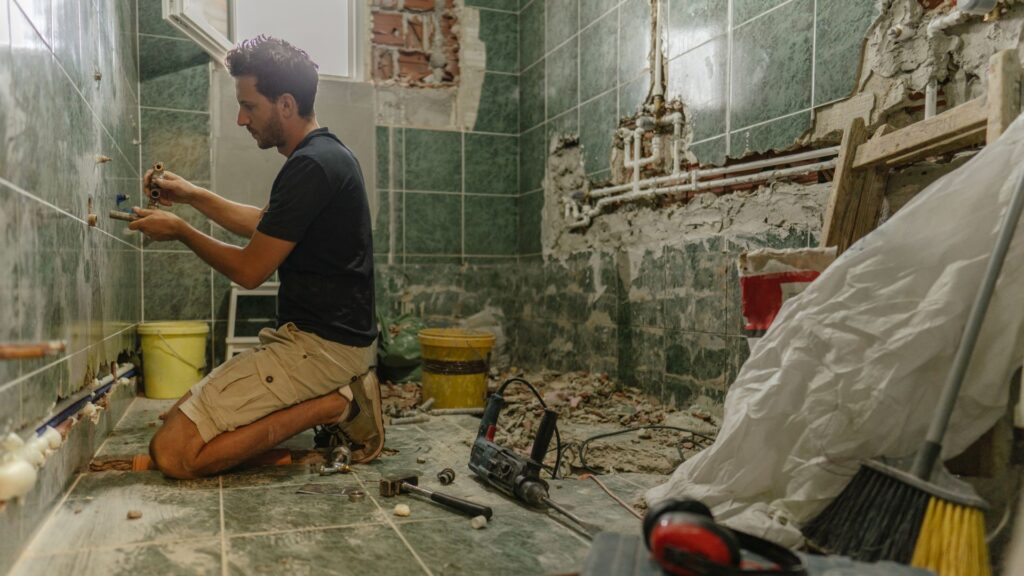
Step 6: Demolition And Preparation
Starting the demolition phase of your bathroom renovation in Auckland is exciting, but it requires careful planning and safety measures. This stage sets the foundation for the new space, so getting it right will save you time, stress, and unexpected costs later on.
Safe Demolition Practices
Before you pick up a hammer, safety should be your top priority. Begin by turning off the main water supply and shutting off electricity to the bathroom. This prevents leaks, shocks, and costly damage to other areas of your home. Next, remove all fixtures such as mirrors, cabinets, taps, and toilets carefully to avoid breakage.
Protect the rest of your house by sealing the bathroom entrance with plastic sheeting to control dust. Use drop cloths to cover floors and nearby furniture. If you’re removing tiles or walls, wear safety glasses, gloves, and a mask to protect yourself from debris and dust particles. Always dispose of hazardous materials like old insulation or mouldy surfaces properly.
If the bathroom contains asbestos, which is common in older Auckland homes, don’t attempt removal yourself. Contact a certified asbestos removal service to handle it safely according to New Zealand regulations.
Waste Disposal And Recycling Options In Auckland
Bathroom demolitions produce a surprising amount of waste — from old tiles and fixtures to packaging materials. Auckland Council provides several approved waste transfer stations and recycling centres where you can dispose of debris responsibly.
Whenever possible, recycle items like metal pipes, glass, and cardboard. Many Auckland recycling facilities accept construction waste, helping reduce landfill use. You can also contact local renovation companies that offer skip bin hire with recycling options. This ensures your project stays eco-friendly and compliant with local disposal rules.
If some items, like an old vanity or tapware, are still in good condition, consider donating them to community reuse centres or charities. It’s a sustainable way to reduce waste while helping others.
Check Subfloor, Plumbing, And Electrical Before Rebuilding
Once demolition is complete, take time to inspect the subfloor, plumbing, and electrical systems before rebuilding. This step is crucial because hidden damage or outdated systems can cause serious issues later.
Look for signs of rot or water damage in the subfloor — especially around the shower, toilet, or vanity area. Replace any weakened timber or boards to ensure a stable foundation. Have a licensed plumber check for leaks, corrosion, or outdated pipes that might need upgrading. Likewise, a qualified electrician should review the wiring to ensure it meets current New Zealand safety standards.
Addressing these structural and system checks early prevents costly fixes once your new tiles and fixtures are in place.
Step 7: Installation And Construction
The installation and construction stage is where your bathroom renovation in Auckland starts taking real shape. This phase focuses on precision, safety, and coordination among your contractors. Every detail matters, from the plumbing lines to the final tile placement.
Plumbing And Electrical Rough-Ins
Before the walls and floors are finished, licensed professionals complete what’s known as rough-ins. This includes installing all hidden systems — plumbing pipes, drainage lines, wiring, and power outlets. In Auckland, these must be handled by certified plumbers and electricians to meet New Zealand’s Building Code and safety standards.
Proper rough-ins ensure your water flow, lighting, and ventilation work correctly once everything is sealed. At this stage, it’s important to double-check fixture locations for basins, showers, and toilets. Making adjustments now prevents expensive fixes later.
Waterproofing The Bathroom Area
After the rough-ins, the next essential step is waterproofing. Auckland’s humid climate makes this process critical to prevent mould, leaks, and long-term damage. Certified waterproofers apply membranes to walls, floors, and joints, creating a moisture-resistant barrier.
Never skip professional waterproofing or rely on DIY products. Poor application can lead to hidden water leaks that cost thousands to repair. Once waterproofing is complete, the area must dry fully before tiling begins.
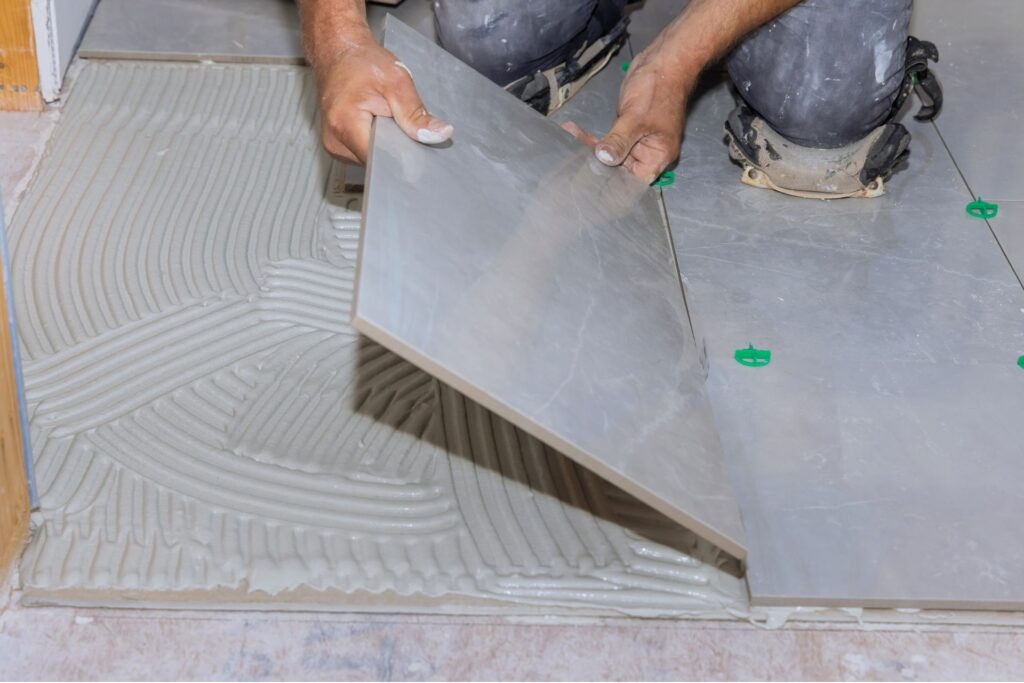
Tiling And Fixture Installation Order
With waterproofing done, tiling starts next. The process typically begins with wall tiles before moving to the floor to avoid damaging newly installed tiles. Always choose tiles rated for wet areas and suited to Auckland’s moisture conditions.
After tiling, the team installs fixtures like bathtubs, toilets, vanities, mirrors, and lighting. Precision matters — even a small alignment issue can affect drainage or aesthetics. This stage also includes sealing edges and testing water pressure to confirm everything functions perfectly.
Inspections And Council Approvals
For many Auckland bathroom renovations, Auckland Council inspections may be required, especially when you move plumbing points, alter walls, or upgrade wiring. These checks confirm compliance with local building and safety codes.
Your contractor should manage inspection scheduling and paperwork, but always ask for copies of approval documents. Keeping records protects you when selling or insuring your home later.
The Importance Of Communication
Consistent communication with your renovation team is vital during installation and construction. Stay updated on progress, material deliveries, and any design adjustments. Clear communication avoids costly misunderstandings and keeps your project on schedule.
Regular site visits also help you see the transformation firsthand and catch small details before they become issues. A good contractor will welcome your involvement and provide daily updates or photos.

Step 8: Finishing Touches
The final stage of your bathroom renovation in Auckland is all about polishing the details that bring everything together. Finishing touches may seem small, but they make a big impact on how your bathroom looks and feels. This step focuses on lighting, mirrors, décor, accessories, and making sure every element functions perfectly before the project is complete.
Lighting That Enhances Your Space
Good lighting can completely change how your bathroom feels. Layer your lighting by combining overhead lights with task and accent lights. Use warm white bulbs around mirrors to create a natural glow for daily grooming. Consider LED strip lighting under vanities or shelves to add a modern touch while saving energy. In Auckland’s naturally humid climate, always choose fittings designed for bathroom use to ensure safety and durability.
Mirrors That Add Light And Depth
A well-chosen mirror not only serves a practical purpose but also enhances the visual space. Large wall mirrors can make a compact Auckland bathroom feel more open. Framed mirrors bring a classic look, while backlit mirrors offer a sleek, modern finish. Place mirrors where they reflect natural light if your bathroom has a window—this makes the room brighter without using extra power.
Decor And Accessories That Tie It All Together
Your décor and accessories should match your overall design theme. Choose neutral tones for a calm and timeless look, or add color with towels, plants, and wall art for a personal touch. Use natural textures like wood or stone to create a warm, relaxing environment. Small details such as matching soap dispensers, towel racks, and shower caddies can instantly elevate the space and give it a cohesive appearance.
Smart Storage For Smaller Auckland Bathrooms
Many homes in Auckland have limited bathroom space, so smart storage is essential. Floating vanities, recessed shelving, and built-in niches keep the area clutter-free. Use baskets or containers under the sink for easy organization. Wall-mounted cabinets or mirror cabinets can store toiletries without taking up floor space. The goal is to create a clean, functional layout that makes your bathroom look spacious and tidy.
Final Checks Before You Sign Off
Before you consider your renovation complete, make sure every fixture works as intended. Test all taps, drains, lights, and switches. Check the waterproofing, sealant, and grout for any gaps or leaks. Ensure your ventilation system operates well to prevent moisture build-up. If you’ve hired a contractor, go through a final walkthrough to confirm that everything meets your expectations and complies with Auckland building standards.
The finishing touches are what turn your renovated bathroom from functional to exceptional. By paying attention to lighting, décor, and storage, you’ll create a space that’s stylish, practical, and built to last. Once everything is checked and working perfectly, you can finally enjoy the comfort and beauty of your newly completed bathroom.
Step 9: Clean-Up And Maintenance
Once your bathroom renovation is complete, it’s time to focus on cleaning up and maintaining your new space. This stage is just as important as the construction itself because it helps your bathroom stay fresh, safe, and long-lasting. A proper clean-up removes leftover dust, debris, and residue from the renovation process, while regular maintenance ensures that your investment continues to look and function like new.
Post-Renovation Cleaning Tips
Start by giving your bathroom a deep clean before using it. Remove all construction dust from tiles, windows, and corners using a damp microfiber cloth. Vacuum the floor and surfaces to collect small particles that can scratch tiles or glass. Wipe down mirrors, fittings, and hardware with a gentle cleaner — avoid harsh chemicals that may damage new finishes.
For tiles and grout, use a non-acidic cleaner to remove any leftover adhesive or grout haze. If you installed glass shower doors, clean them with vinegar and water to remove fingerprints or smudges. Don’t forget to disinfect handles, light switches, and other touchpoints to keep your bathroom hygienic from the start.
Maintaining Fixtures And Preventing Mould
Auckland’s climate can be humid, which makes bathrooms prone to mould and mildew. To prevent this, wipe down wet surfaces after every shower and keep the area dry. Use a mild detergent or a mix of baking soda and water to clean tiles and grout regularly.
Inspect your fixtures — taps, showerheads, and drains — for any mineral buildup or leaks. Clean showerheads once a month by soaking them in vinegar to remove limescale. For chrome or stainless-steel fixtures, use a soft cloth to polish and maintain their shine.
Avoid using abrasive sponges or strong chemicals on surfaces, as these can wear down the finish over time. Regular attention keeps your bathroom looking clean, while also reducing the risk of costly repairs later.
Ventilation Checks In Auckland’s Humid Conditions
Proper ventilation is essential in Auckland’s damp weather. Check that your bathroom’s extractor fan works efficiently and clean it every few months to remove dust and buildup. Open windows or vents when possible to allow fresh air circulation.
If your bathroom doesn’t have natural ventilation, consider installing a humidity sensor fan that automatically activates when moisture levels rise. Keeping the air dry helps prevent mould growth, peeling paint, and odors — common issues in Auckland homes.
FAQs: About Bathroom Renovation Steps In Auckland
Conclusion
After weeks of planning, decision-making, and hard work, your bathroom renovation in Auckland is finally complete—and it’s time to enjoy the results. Step into your new space and take a moment to appreciate how every detail came together: the tiles you carefully selected, the lighting that enhances the mood, and the layout that makes your daily routine easier. This is the reward for thoughtful planning, hiring the right professionals, and staying consistent with your vision. A well-executed bathroom renovation doesn’t just improve functionality; it also boosts your home’s comfort and long-term value. Remember, regular maintenance and good ventilation will keep your bathroom fresh for years to come. If you’re planning a bathroom renovation in Auckland, start by talking to a local expert or gathering quotes today—your dream bathroom could be closer than you think.
Find A Professional Bathroom Renovation Company Near You!
- Bathroom Renovations Alexandra
- Bathroom Renovations Alexandra, Clyde & Cromwell
- Bathroom Renovations Auckland
- Bathroom Renovations Cambridge
- Bathroom Renovations Central Otago
- Bathroom Renovations Christchurch
- Bathroom Renovations Clyde
- Bathroom Renovations Cromwell
- Bathroom Renovations East Auckland
- Bathroom Renovations Hamilton
- Bathroom Renovations Hastings
- Bathroom Renovations Hawkes Bay
- Bathroom Renovations Invercargill
- Bathroom Renovations Kapiti Coast
- Bathroom Renovations Levin
- Bathroom Renovations Lower Hutt
- Bathroom Renovations Napier
- Bathroom Renovations Nelson
- Bathroom Renovations New Plymouth
- Bathroom Renovations North Shore
- Bathroom Renovations Palmerston North
- Bathroom Renovations Porirua
- Bathroom Renovations Queenstown
- Bathroom Renovations South Auckland
- Bathroom Renovations Te Awamutu
- Bathroom Renovations Upper Hutt
- Bathroom Renovations Wanaka
- Bathroom Renovations Warkworth
- Bathroom Renovations Wellington
- Bathroom Renovations West Auckland
- Bathroom Renovations Kerikeri
- Bathroom Renovations Paihia
- Bathroom Renovations Tauranga
About the Author:
Mike Veail is a recognized digital marketing expert with over 6 years of experience in helping tradespeople and small businesses thrive online. A former quantity surveyor, Mike combines deep industry knowledge with hands-on expertise in SEO and Google Ads. His marketing strategies are tailored to the specific needs of the trades sector, helping businesses increase visibility and generate more leads through proven, ethical methods.
Mike has successfully partnered with numerous companies, establishing a track record of delivering measurable results. His work has been featured across various platforms that showcase his expertise in lead generation and online marketing for the trades sector.
Learn more about Mike's experience and services at https://theleadguy.online or follow him on social media: