Welcome to your step-by-step guide on how to lay paving stones in NZ—the simple way. Whether you’re refreshing a tired backyard, creating a patio, or adding a path through your garden, paving stones offer a clean, durable, and affordable solution. Doing it yourself might sound tough, but with a bit of planning and the right tools, it’s a project most homeowners can handle. This guide walks you through the entire process, from choosing the right pavers to placing the final stone. We’ll also cover tips tailored for New Zealand conditions, like dealing with drainage and unpredictable weather. So if you’re ready to save money, learn a new skill, and boost your outdoor space, this guide is for you.
To lay paving stones in NZ, start by marking your area and excavating to the correct depth. Add a compacted gravel base, then spread and level a layer of sand. Lay your pavers in your desired pattern, keeping consistent gaps. Tap them into place with a rubber mallet, then fill the joints with sand and compact the surface. Always allow for proper drainage and choose materials suited to New Zealand’s weather.
- Planning Your Project
- Choosing The Right Paving Stones
- Tools & Materials You’ll Need
- Step-By-Step: How To Lay Paving Stones
- Common Mistakes To Avoid When Laying Paving Stones
- Paving Tips For NZ Weather
- DIY Vs Hiring A Pro: What To Consider
- Maintenance & Care Tips For Paving Stones In NZ
- Real-Life Kiwi Paving Ideas
- FAQs: About How To Lay Paving Stones In NZ
- Conclusion
- Find A Professional Paving Company Near You!
Planning Your Project
Before you start laying a single paver, you need a solid plan. Skipping this step can lead to uneven surfaces, water drainage issues, or costly rework down the track. Here’s how to plan your paving project the right way—especially if you’re working on a Kiwi property.
- Start by deciding where you want to lay your pavers. Popular spots include patios, walkways, garden paths, driveways, or even around pools and BBQ areas. Choose an area that adds function and value to your outdoor space. For example, a paved path through your garden can make it easier to access plants year-round, while a paved driveway can instantly boost your home’s street appeal.
- Next, think about practical site conditions. Drainage is crucial—water needs to run off your paved area instead of pooling on it. This means you may need a slight slope (typically 1–2% gradient away from your house or structures). Also factor in sun exposure. Some pavers may fade over time if they’re constantly under harsh sunlight, so it’s worth checking with your supplier about UV resistance.
- Don’t forget to check with your local council. While many small paving jobs don’t require permits, larger projects—especially those affecting stormwater runoff or close to boundaries—might. Each council has its own rules, so it’s smart to look online or make a quick call before digging.
- Once you’re ready, measure your area accurately. Use a tape measure to get the length and width. Mark the layout with stakes, string lines, or spray paint. This gives you a clear visual guide and helps you estimate how many pavers and how much material you’ll need.
Tip: Always “call before you dig.” In New Zealand, there may be underground cables, pipes, or services running through your yard. You can use services like BeforeUdig.co.nz to request maps of any utilities in your area. It’s a small step that could save you from a major accident or repair bill.
Good planning makes the rest of your paving job much easier. You’ll have fewer surprises, avoid unnecessary costs, and set yourself up for a clean, long-lasting finish.

Choosing The Right Paving Stones
Choosing the right paving stones is a key step that affects the look, durability, and safety of your outdoor space. In New Zealand, you’ll find a range of materials to suit different styles, budgets, and practical needs. Whether you’re planning a backyard patio, a garden path, or a driveway, understanding your options will help you make the right decision.
Common Types Of Paving Stones In NZ
Homeowners in New Zealand typically choose from three main types of pavers: concrete-contractors-nz/concrete-floor-slabs-kapiti-coast/”>concrete-contractors-nz/concrete-layers-lower-hutt/”>concrete, brick, and natural stone.
Concrete pavers are the most widely used due to their affordability and versatility. They come in various shapes, sizes, and textures, making them suitable for almost any outdoor area. You can find smooth, exposed aggregate, or textured finishes that mimic the look of stone or tile.
Brick pavers offer a classic, timeless appearance and are often used in pathways and heritage-style homes. They’re strong, low maintenance, and retain their color well over time.
Natural stone pavers, such as bluestone, granite, or schist, bring a premium, high-end look to patios and garden features. These are more expensive but highly durable and unique in appearance due to natural color variations.
Slip Resistance, Durability, And Color Options
New Zealand’s weather conditions—rain, frost, and heat—make slip resistance a priority, especially for outdoor entertaining areas or pool surrounds. Look for textured or rough-surfaced pavers with a non-slip rating. Concrete and stone pavers usually offer good grip, while some polished surfaces may become slippery when wet.
Durability matters too. For high-traffic areas or driveways, choose thicker and denser pavers that can handle repeated use. Natural stone and heavy-duty concrete are better suited for load-bearing surfaces, while lighter pavers work well for footpaths or garden stepping stones.
Color options range widely. Neutral tones like grey, charcoal, beige, and sand are popular because they blend well with NZ homes and landscapes. Some homeowners prefer warm reds or terracotta for a more rustic look. Just be aware that lighter colors show stains more easily, while darker tones can absorb more heat in summer.
Where To Buy Locally
Paving stones are available from most large home improvement stores across New Zealand. Mitre 10 and Bunnings carry a broad selection of concrete and brick pavers in various styles and price ranges. Both retailers also offer online catalogues and delivery options.
If you’re after natural stone or a custom finish, it’s worth checking out local suppliers or landscape yards. These businesses often carry unique materials and can provide advice based on your project’s needs and your local climate.
Before buying, visit a store or yard in person if possible. It helps to see the color and texture in natural light and get a feel for the weight and finish.
Consider Traffic Load
Not all pavers are designed to handle the same amount of weight. That’s why you need to match your choice with the kind of traffic the area will receive.
For pedestrian zones like patios, walkways, or garden paths, standard thickness pavers (usually 40–50mm) are enough. They’re easy to install and work well for casual foot use.
For driveways or areas where vehicles will be parked, choose heavy-duty pavers at least 60mm thick. These are built to resist cracking and shifting under pressure. Skimping on the wrong type can lead to broken or uneven surfaces over time.
Taking the time to choose the right paving stones ensures your project looks great, functions properly, and lasts for years. It’s not just about style—it’s about getting the right material for the job.
Tools & Materials You’ll Need
Before you start laying paving stones, make sure you have all the right tools and materials ready. Using the proper equipment not only makes the job easier, but it also ensures a smoother, more durable finish. Whether you’re building a patio, path, or driveway in your New Zealand home, the tools listed below are essential for doing the job right the first time.
Spade or Shovel
A sturdy spade or shovel is your go-to for digging out soil and removing grass or top layers of dirt. It’s used in the excavation phase to prepare the site for your paving base. Choose one with a strong handle and a sharp edge to cut through compacted soil.
Rake
After excavation, use a rake to level the ground and spread your gravel or sand layers evenly. A garden rake is ideal for breaking up clumps and smoothing out the surface before compaction.
Wheelbarrow
Transporting heavy loads of gravel, sand, and pavers is much easier with a wheelbarrow. It saves time and reduces strain on your back, especially if you’re working on a larger area. One good-quality wheelbarrow can make a big difference in your efficiency.
Spirit Level
A spirit level ensures each paver is laid evenly and that the entire area is level or sloped correctly for drainage. Use it frequently during installation to check that your base, bedding sand, and pavers are sitting flat and even.
Plate Compactor (Can Rent)
A plate compactor is essential for compressing the base gravel and setting the pavers firmly in place. You can rent one from most hardware or equipment hire shops in New Zealand. Compaction helps prevent shifting and sinking over time.
Sand, Gravel (AP20), Pavers
You’ll need coarse sand for the bedding layer, and AP20 gravel (also called GAP20) for the base. These materials provide structure, support, and proper drainage. Choose pavers based on where you’re installing them—light foot traffic requires different pavers than a driveway would.
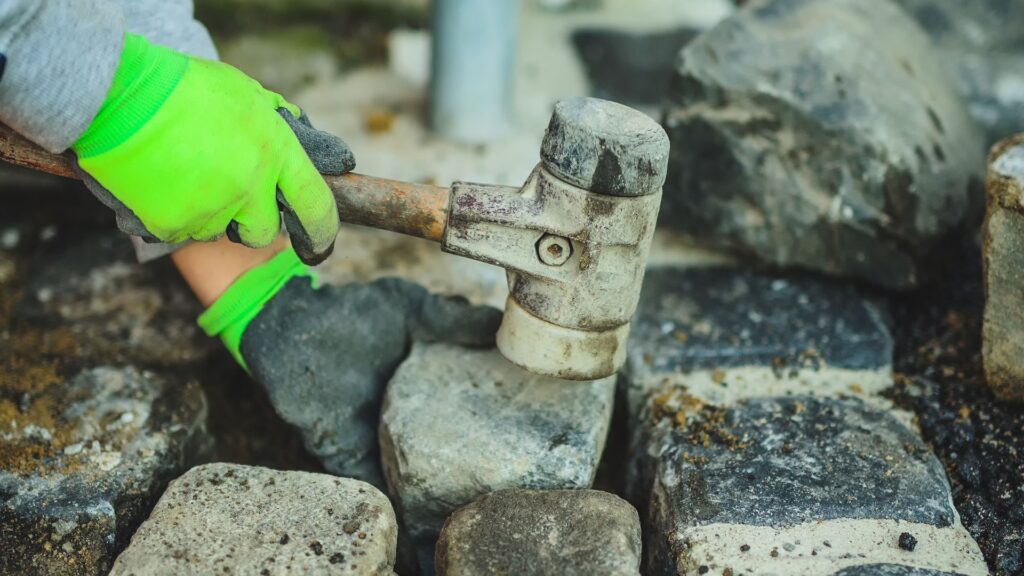
Rubber Mallet
A rubber mallet is used to gently tap each paver into position without cracking or damaging the surface. It helps align and level the stones during the laying process. Don’t use a regular hammer, as it can chip the pavers.
Gloves, Safety Glasses
Safety should never be an afterthought. Gloves protect your hands from sharp edges, rough materials, and blisters. Safety glasses keep dust and debris out of your eyes, especially when cutting pavers or using the compactor.
Having these tools and materials prepared before you start will help your project go more smoothly and lead to a professional-looking result. Taking the time to do it right ensures that your paved area stays solid and attractive for years to come.
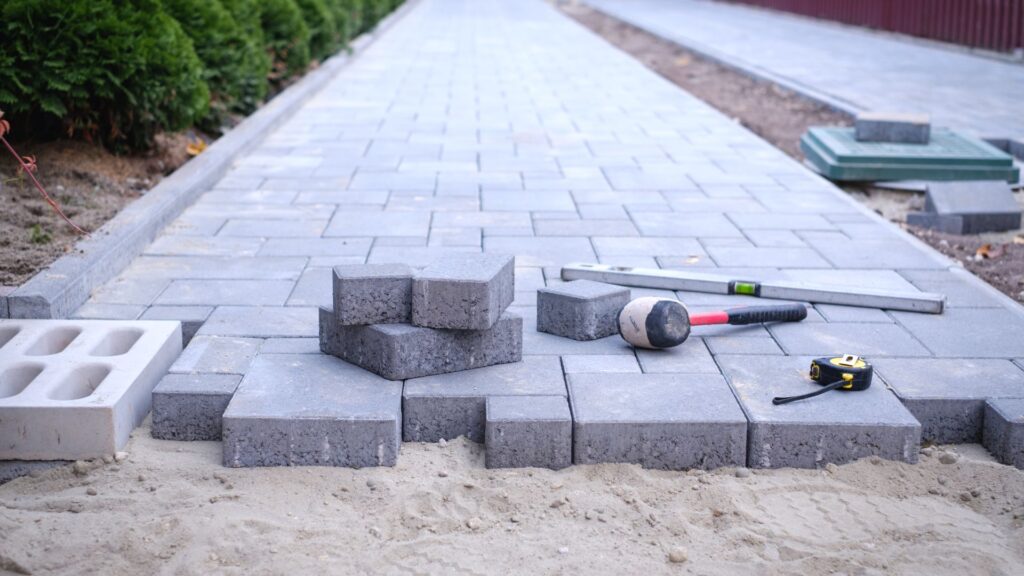
Step-By-Step: How To Lay Paving Stones
Laying paving stones is a straightforward DIY project when you follow each step with care. The process involves preparing a solid base, placing the stones correctly, and ensuring the surface remains level and durable over time. Here’s a full, detailed breakdown of each step, tailored for New Zealand conditions.
Step 1: Excavate The Area
Start by marking out the area you want to pave using string lines and wooden pegs. Once marked, dig out the topsoil and grass to a depth of 100–150mm. The exact depth depends on what the area will be used for—patios and garden paths need less depth than driveways.
Make sure to remove all roots, loose soil, and organic material. After excavation, check that the base is level across the area. Use a straight timber board and spirit level to confirm. Then, compact the soil using a hand tamper or a plate compactor. This ensures the ground won’t shift or sink over time.
Step 2: Lay The Base Layer
A stable foundation is crucial, so add a layer of compacted gravel. In New Zealand, AP20 or GAP20 gravel is ideal because it’s widely available and packs down well. Spread the gravel evenly to a depth of around 80–100mm.
Once in place, use a plate compactor to compress the gravel until it’s firm and level. Make sure the surface has a slight slope—about 1:100 gradient—away from buildings to allow water to drain naturally. This prevents puddles and long-term water damage.
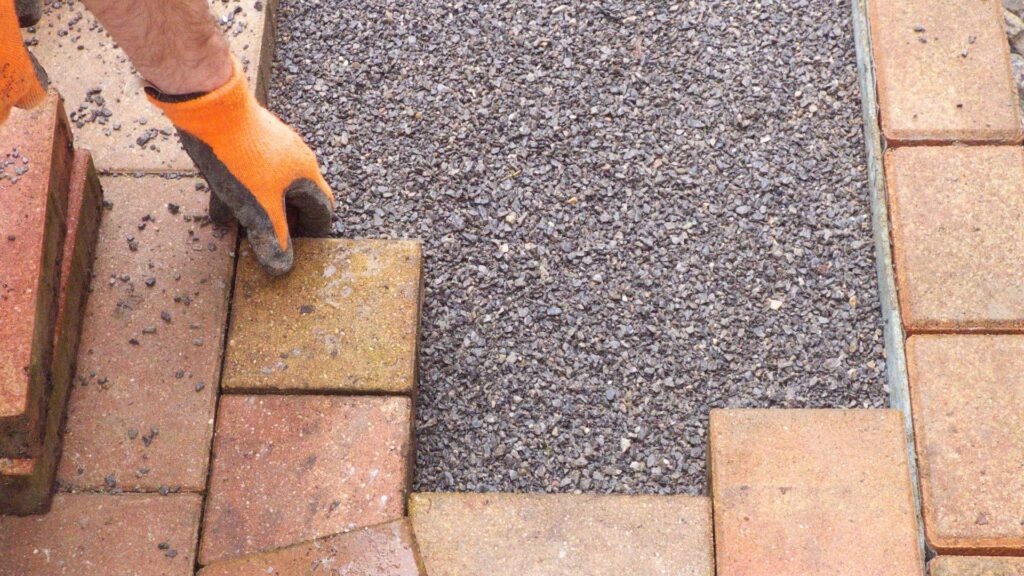
Step 3: Add The Bedding Sand
On top of the gravel base, add a layer of coarse, washed sand about 30mm thick. This layer helps you level the pavers evenly and cushions them for a snug fit.
Spread the sand with a shovel or rake, then screed it using a long straight edge, like a piece of timber or metal bar. For best results, set up screed rails (metal or pipe guides) at the correct height, then drag the screed across to create a flat surface. Be careful not to walk on the sand once it’s leveled—this will disrupt your work and create dips that are hard to fix later.
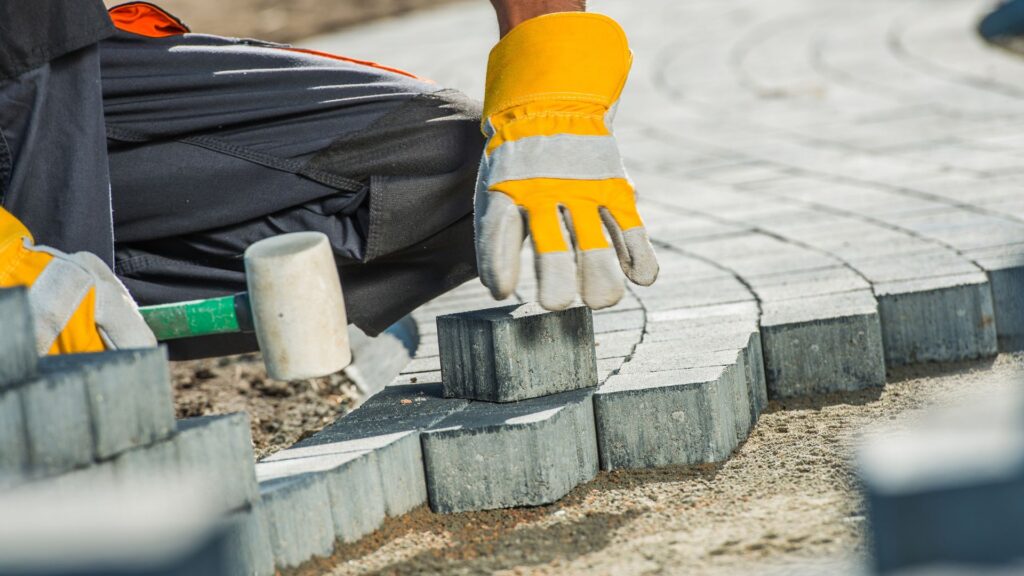
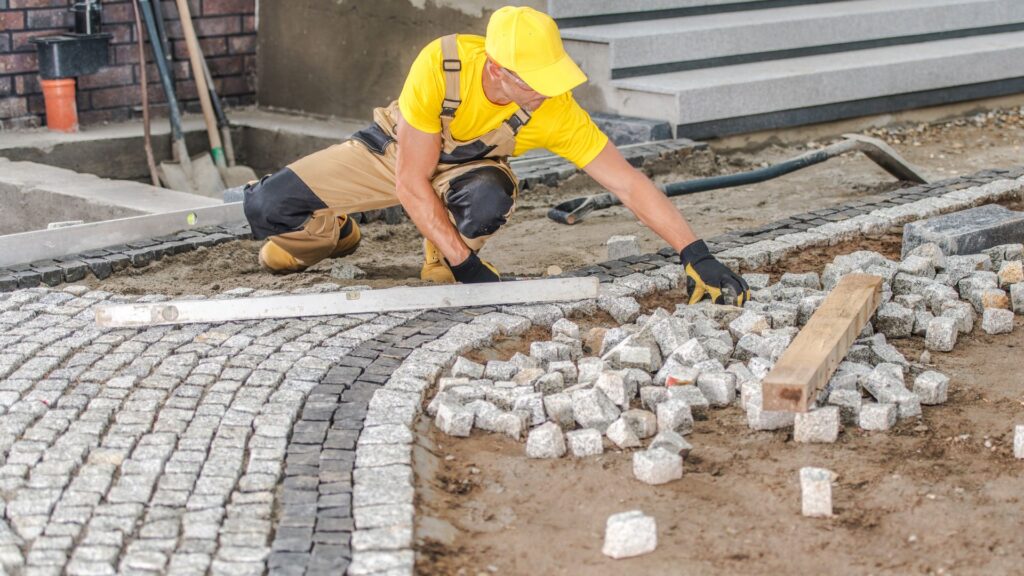
Step 4: Place The Pavers
Now it’s time to lay the paving stones. Start from one corner of your area—ideally along a straight edge like a wall or timber border. Choose a laying pattern that suits your space and style, such as stretcher bond, herringbone, or basket weave.
Place each paver gently on the sand, keeping the gaps between them consistent (around 3–5mm). Use small plastic spacers or eyeball it if you’re confident. Work row by row, and avoid stepping on the sand as you go.
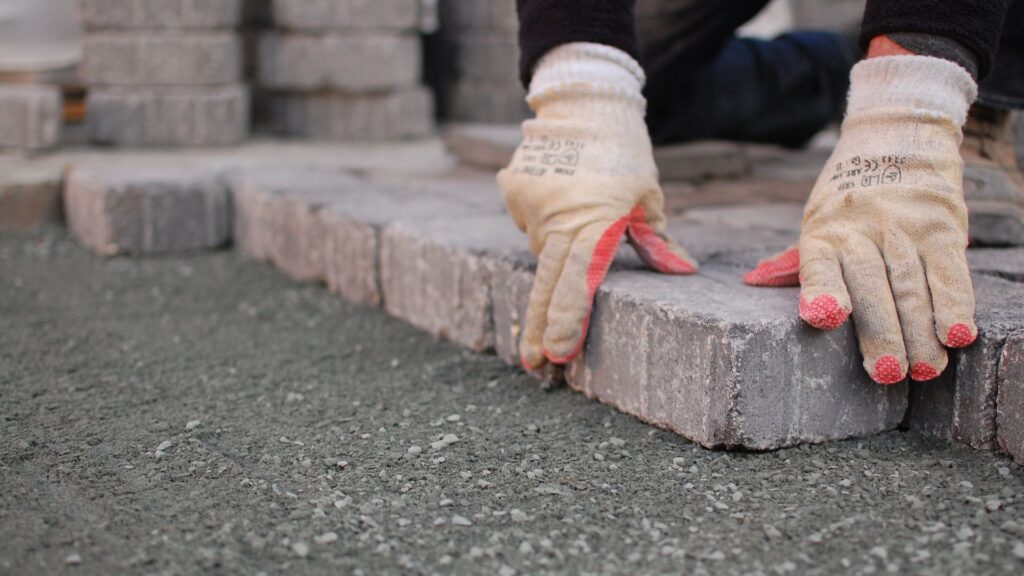
Step 5: Level & Adjust
Once the pavers are in place, use a rubber mallet to gently tap each one down to the right level. Check frequently with a spirit level to make sure the surface stays flat and even across the entire area.
Adjust any pavers that sit too high or low by lifting them slightly, adding or removing sand, and repositioning them. Taking time here avoids trip hazards and pooling water later.
Step 6: Fill The Gaps
After laying all the pavers and checking for level, it’s time to lock them in. Use dry, washed jointing sand (commonly called paving sand) to fill the gaps. Pour it onto the surface and sweep it into the joints using a stiff broom.
Once filled, compact the entire area again with the plate compactor. This helps the sand settle deeper into the joints and tightens the pavers into place. Sweep over the surface again to top up any sand and clean off loose material.
Step 7: Final Compact & Clean Up
Run the plate compactor over the paved area one more time to firmly set the pavers. This final pass ensures everything is secure and level. When done, lightly hose down the area to settle dust and help the jointing sand bind.
For extra stability, consider installing paver edging along the perimeter. Edging prevents the outer pavers from shifting over time, especially if they’re not bordered by a wall or fixed structure.
By following these steps carefully, you can achieve a clean, durable paving job that adds value and function to your outdoor space. Whether it’s a garden path or patio, a well-laid paved area will serve you well for years to come.
Common Mistakes To Avoid When Laying Paving Stones
Even with a solid plan, small mistakes during installation can ruin your paving project. These are common issues that many DIYers face when laying paving stones in New Zealand. Learning what to avoid can save you time, money, and frustration—and give your outdoor space a clean, long-lasting finish.
Uneven Base = Wobbly Pavers
A stable paving surface starts with a level and well-prepared base. One of the most common mistakes is rushing through this step or failing to check for evenness. If your base layer isn’t flat, the pavers will shift over time. You’ll end up with wobbly stones, dips, and potential tripping hazards. Always take your time to level the base layer using a spirit level or screed board, especially in high-traffic areas like walkways or patios.
Skipping Compaction
Another frequent issue is skipping the compaction step, or not doing it thoroughly enough. Each layer of your base material, whether gravel or sand, must be compacted using a plate compactor. Without proper compaction, the ground will settle unevenly, causing your paving stones to shift or sink after a few months. This is particularly important in New Zealand’s variable weather, where rain can wash out loose materials if not properly compacted.
Not Allowing For Drainage
Paving stones need proper drainage to prevent water pooling and long-term damage. If your installation doesn’t account for a slight slope or water runoff, you could face drainage issues that weaken the base over time. A good rule is to maintain a slight slope away from your home—about 10mm per metre—so water flows naturally. This is critical in New Zealand, where heavy rain can lead to water accumulation if not managed correctly.
Using Wrong Sand Or Gravel
Using the wrong materials can affect the entire project. For the base, you need crushed gravel like AP20 or GAP20, which compacts well and offers solid support. For the bedding layer, avoid beach sand or fine dust. Instead, use coarse, washed sand to ensure proper leveling and drainage. Using incorrect materials may cause your pavers to shift, sink, or grow weeds faster. Always buy from a trusted supplier and make sure the materials are rated for outdoor paving projects.
Gaps Too Wide Or Too Tight
Leaving the right amount of space between each paver is just as important as laying them straight. If the gaps are too tight, there’s no room for joint sand, which helps lock the pavers in place. If the gaps are too wide, the surface may feel unstable and collect debris or weeds. Aim for consistent spacing—usually 3 to 5mm—and fill the joints with dry paving sand. This adds strength to the structure and improves appearance over time.
Avoiding these mistakes will help your paving stones stay firm, level, and attractive for years. Paying attention to detail during each step of the process makes all the difference in the final result.

Paving Tips For NZ Weather
New Zealand’s climate can be tough on outdoor surfaces, especially paving. From humid summers to cold, wet winters, your paving stones must stand up to shifting conditions. If you want your paving project to last and look good year-round, it’s important to plan with local weather in mind. Below are practical, experience-backed tips to help you get it right the first time.
Choose Weather-Resistant Pavers
Not all pavers perform the same in harsh conditions. In regions where temperatures drop below freezing, like parts of the South Island, choose pavers rated for freeze-thaw resistance. These are made to handle expansion and contraction without cracking or shifting. Concrete and clay pavers are popular in NZ and offer good durability, but you should always check the manufacturer’s specifications before buying. Porous or lightweight pavers can absorb water and break down faster, especially if they’re exposed to frost. For coastal areas, look for pavers with added salt resistance to reduce erosion and surface damage.
Avoid Laying Pavers During Rainy Periods
Timing is just as important as technique. Wet weather creates several problems during installation. First, moisture softens the base layer, making it harder to compact properly. This leads to sinking or uneven pavers later on. Second, working with wet sand or muddy soil can ruin the leveling process, especially if water pools in the area. Always aim to lay pavers during a dry spell with a stable forecast—ideally two to three consecutive dry days. If you’re in a region with frequent rain, consider breaking your project into smaller sections to manage the risk.
Plan For Runoff And Water Flow
Poor drainage is one of the biggest reasons paving fails in New Zealand. Without a clear path for water to escape, rain can collect under or around your pavers, causing movement, moss growth, or erosion. To prevent this, create a slight slope, usually about 1 to 2 percent, away from buildings or garden beds. This helps direct water off the surface and into appropriate channels. You can also add drainage channels or soak pits if you’re paving a large area or a flat section of your yard. It’s a small step that protects your work from major problems over time.
By planning for local weather and choosing the right materials and timing, you’ll get a longer-lasting, lower-maintenance paving job that works with New Zealand’s environment, not against it.
DIY Vs Hiring A Pro: What To Consider
Laying paving stones might seem like a straightforward job, but there’s more to it than meets the eye. If you’re deciding between tackling the project yourself or bringing in a professional, it helps to weigh the pros and cons. Your decision will likely come down to four key factors: cost, time, effort, and complexity.
Cost Savings Of DIY
One of the biggest reasons homeowners in New Zealand choose to go the DIY route is cost. Doing it yourself means avoiding labor charges, which can make up a large part of any landscaping bill. Materials like pavers, gravel, and sand are relatively affordable and widely available from hardware stores like Mitre 10 or Bunnings.
If you already have basic tools at home, you’ll only need to rent a plate compactor and buy a few other supplies. This can cut costs significantly, especially for small or medium-sized areas. Many DIYers complete a basic patio or path for under $1,000, depending on the size and paver type.
Time And Effort
DIY paving isn’t overly technical, but it does require patience, physical effort, and close attention to detail. You’ll need to excavate soil, lay and compact the base, spread sand, place each paver correctly, and finish the joints with care. Depending on your pace and the size of the job, it can take several days to complete.
If you have a full-time job or limited experience with manual work, the time commitment can be a challenge. There’s also the risk of having to redo parts of the job if mistakes are made with leveling or spacing.
When To Hire: Large Areas, Complex Patterns, Time Constraints
Hiring a professional makes sense when you’re dealing with a large area, a complex design, or simply don’t have the time to manage the project yourself. If your paving layout includes curves, borders, steps, or patterns like herringbone or basketweave, a skilled contractor will likely achieve a better result.
Professionals can also assess your site properly, ensure correct drainage, and handle the job faster, often in just a few days. This can be especially important if your paving needs to be completed before a specific deadline, such as hosting a gathering or finishing a new home build.
Typical Costs In NZ For Contractors
The cost of hiring a paving contractor in New Zealand varies based on location, job size, and materials. On average, homeowners can expect to pay between $90 to $150 per square metre for professional paving installation. This includes excavation, materials, labor, and clean-up.
Keep in mind that cheaper quotes might not always deliver long-term results. Reputable professionals will offer warranties on their work and use proper base materials, ensuring your paved area holds up well over time.
If you’re confident in your skills, have time on your hands, and are working on a straightforward project, going DIY can save you money and offer a satisfying result. But if you’re aiming for a flawless finish, need the job done fast, or want peace of mind, hiring a professional could be the smarter choice. Either way, clear planning and realistic expectations will lead to better results.
Maintenance & Care Tips For Paving Stones In NZ
After investing time and effort into laying paving stones, keeping them in great condition is the next step. With the right care, your paved area can last for decades and stay safe, clean, and visually appealing. Below are simple but important maintenance tips tailored for New Zealand conditions.
Regular Sweeping And Occasional Hosing
Leaves, dirt, and debris build up over time and can cause stains or moss growth. Sweeping your paving stones regularly with a stiff outdoor broom prevents this buildup. For a deeper clean, hose down the area with water, especially after storms or in autumn when leaves are more common. Avoid using high-pressure washers too often, as they can wear down the surface or dislodge the joint sand.
Refill Joint Sand Once A Year
Joint sand helps lock pavers in place and prevent movement. Over time, rain and foot traffic can wash some of it away. Once a year, inspect the joints and sweep in fresh, dry joint sand where needed. Make sure to use sand designed specifically for paving. This small step helps prevent weed growth, limits shifting, and maintains a smooth surface.
Remove Weeds Early
Weeds can grow in the gaps between pavers if sand levels drop or if organic matter collects. Pulling weeds as soon as they appear is the easiest way to stop them from spreading. You can also use boiling water or a vinegar-based solution as a natural weed treatment. Avoid harsh chemical weed killers, especially in areas close to grass or garden beds.
Seal The Surface (Optional, Helps With Stains)
Sealing your pavers is optional, but it can help repel stains, reduce moss buildup, and make cleaning easier. A good quality sealer protects against food spills, oil leaks, and weather damage. It also enhances the color of natural stone or concrete pavers. If you choose to seal your surface, do it only after the pavers have fully settled and dried. Most sealers need to be reapplied every two to three years, depending on use and exposure.
A small amount of regular attention goes a long way. Clean surfaces are safer, look better, and reduce the need for costly repairs later. Keep an eye out for any movement, cracks, or drainage issues and fix them early before they become bigger problems.

Real-Life Kiwi Paving Ideas
Paving isn’t just about function—it can also enhance how your outdoor space looks and feels. Whether you’re working with a small backyard or a larger property, smart paving can create inviting zones for relaxing, entertaining, and improving property value. Below are a few popular paving ideas that work well in New Zealand homes. These examples are practical, easy to implement, and suited to our local climate and lifestyle.
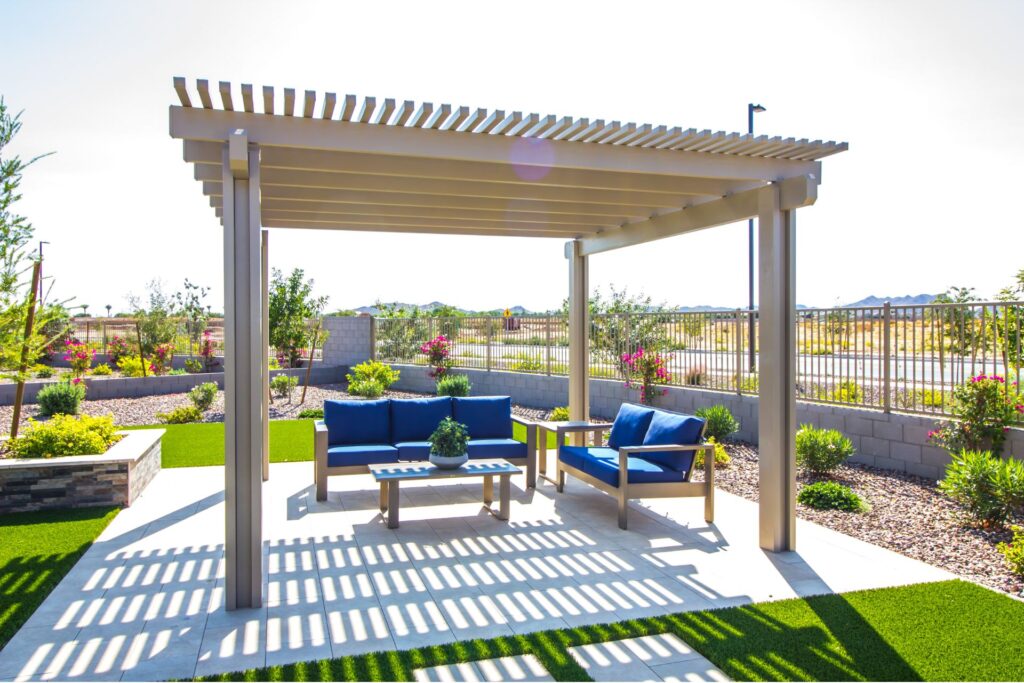
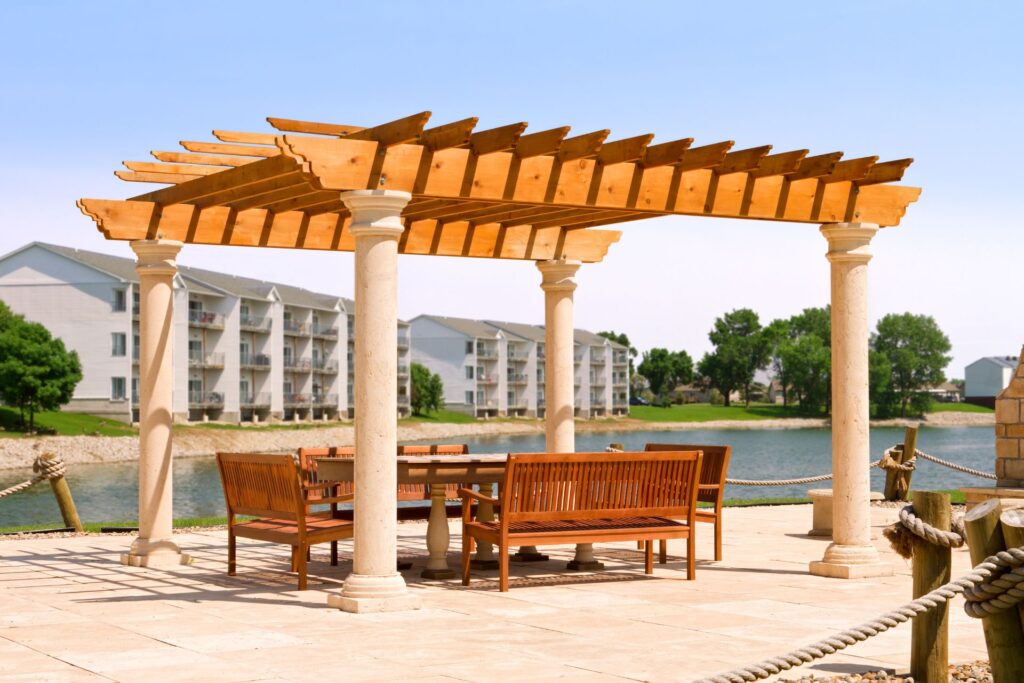
Outdoor Dining Area
A paved outdoor dining area is perfect for hosting summer barbecues or enjoying quiet meals with family. Choose large-format pavers in neutral tones to create a smooth, level surface for tables and chairs. Look for pavers with a non-slip finish, especially in areas exposed to rain or morning dew. To complete the space, add a pergola, outdoor lighting, or a few potted plants for a welcoming touch. This setup not only looks polished but also keeps grass and mud away from your seating area.
Garden Path
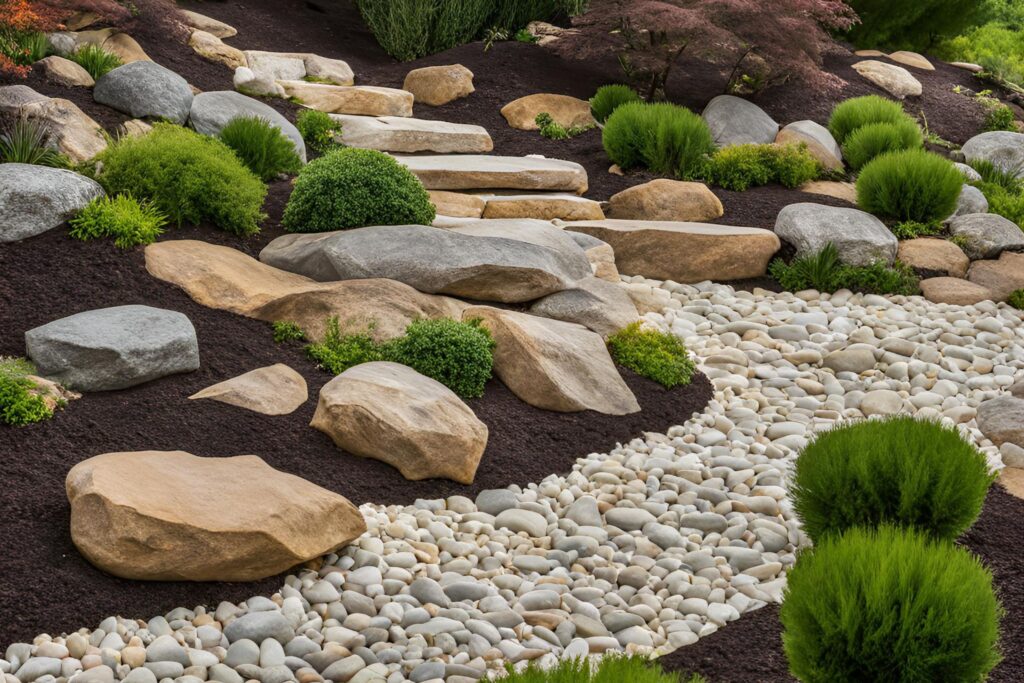
A simple paved path can transform how you move through your garden while protecting your lawn from foot traffic. Stepping stones spaced with gravel or grass in between create a relaxed, natural feel. You can also use uniform rectangular pavers for a more structured look. Paths are useful for directing visitors to key areas like a shed, veggie patch, or patio. In wetter regions of New Zealand, elevated pavers or drainage-friendly designs help prevent water pooling and mud buildup.
Paved Driveway
Replacing gravel or worn-out concrete with a paved driveway adds serious curb appeal and long-term durability. Concrete or brick pavers are great options—they’re strong, easy to maintain, and available in styles that suit both modern and classic homes. When designing your driveway, make sure to plan for proper water runoff and use edge restraints to keep the pavers in place. While it’s a bigger project, the finished result is a clean, solid surface that stands up to vehicles and weather.
Fire Pit Zone
A paved fire pit area can become the highlight of your backyard. Use circular or square paving layouts to define the space clearly. Choose darker-toned pavers that complement the fire pit and can handle heat. Add low walls or bench seating around the area to encourage gatherings during cooler nights. This type of zone is ideal for entertaining and adds year-round functionality to your outdoor space. Just be sure to follow local fire safety rules and keep the area clear of overhanging branches or flammable materials.
Each of these paving ideas brings structure, comfort, and value to your home. Whether you’re working on a weekend DIY project or planning a full backyard revamp, these real-life Kiwi paving setups can inspire the kind of outdoor space you’ll enjoy for years.
FAQs: About How To Lay Paving Stones In NZ
Conclusion
Laying paving stones yourself is a realistic DIY project for most New Zealand homeowners, especially with the right preparation and a clear step-by-step plan. While it might seem intimidating at first, breaking it down into manageable stages makes the process straightforward and rewarding. You don’t need to be an expert—just someone willing to measure carefully, follow instructions, and take your time. If you’re new to DIY work, start small with a garden path or a simple patio to build your confidence. With each project, you’ll gain more skill and be able to take on bigger tasks. Have you completed a paving project recently or planning one soon? Share your results or ask any questions in the comments below—we’d love to hear from you.
Find A Professional Paving Company Near You!
Paving Auckland
About the Author:
Mike Veail is a recognized digital marketing expert with over 6 years of experience in helping tradespeople and small businesses thrive online. A former quantity surveyor, Mike combines deep industry knowledge with hands-on expertise in SEO and Google Ads. His marketing strategies are tailored to the specific needs of the trades sector, helping businesses increase visibility and generate more leads through proven, ethical methods.
Mike has successfully partnered with numerous companies, establishing a track record of delivering measurable results. His work has been featured across various platforms that showcase his expertise in lead generation and online marketing for the trades sector.
Learn more about Mike's experience and services at https://theleadguy.online or follow him on social media: