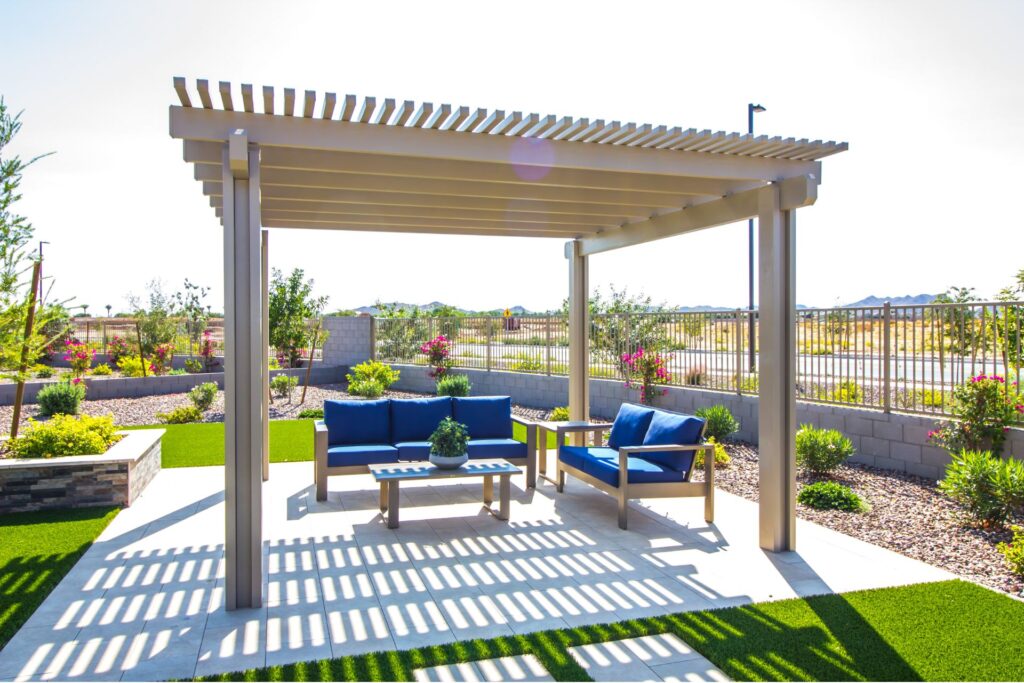
Welcome to your ultimate DIY Hydroseeding Guide NZ, where we’ll show you how to achieve a lush, green lawn without the hefty price tag of professional concrete-contractors-nz/concrete-floor-slabs-kapiti-coast/”>concrete-contractors-nz/concrete-layers-lower-hutt/”>services. If you’re looking for an affordable, efficient way to grow grass, hydroseeding is a game-changer—combining grass seed, mulch, fertilizer, and water into a powerful slurry that promotes faster germination and healthier growth. Perfect for Kiwi homeowners, hydroseeding is a great alternative to traditional seeding or laying turf, offering better coverage, erosion control, and moisture retention. Whether you’re reviving a patchy lawn, starting fresh, or just keen on a rewarding weekend project, this guide will walk you through the step-by-step process, recommended seed types for New Zealand’s climate, cost breakdowns, and expert tips to ensure success.
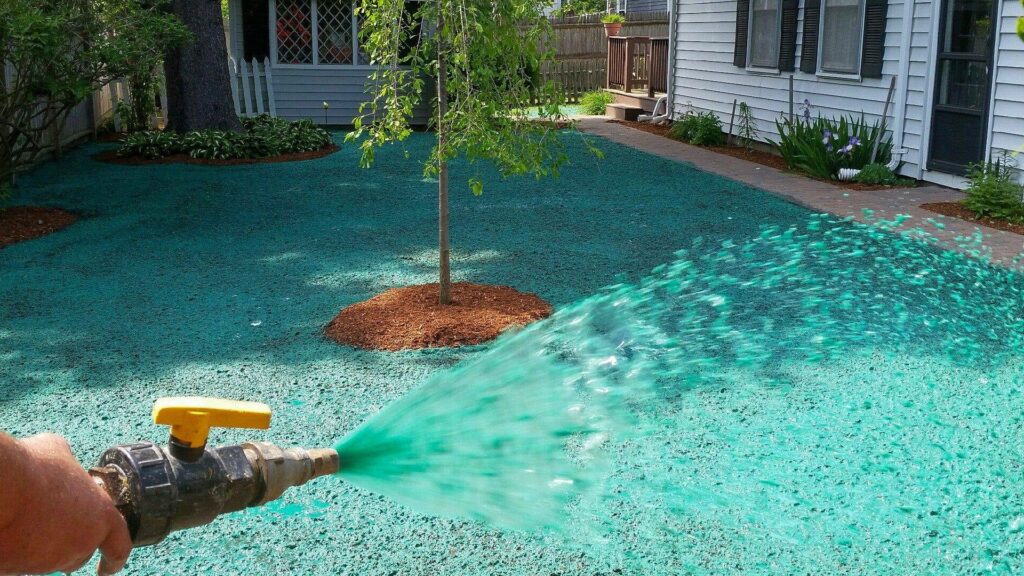
Hydroseeding is an affordable and efficient way to establish a lush lawn in New Zealand. To DIY hydroseed, prepare the soil by clearing debris and leveling the ground. Mix grass seed, mulch, fertilizer, and water into a slurry, then evenly spray it over the area using a hydroseeder or garden sprayer. Keep the soil moist by watering 2-3 times daily until germination begins (typically within 7-14 days). The best time to hydroseed in NZ is spring or autumn for optimal growth. With proper care, a full lawn develops in 4-6 weeks.
- What Is Hydroseeding?
- Is DIY Hydroseeding Right For You?
- Materials & Tools Needed For DIY Hydroseeding In NZ
- Step-By-Step DIY Hydroseeding Process: A Complete Guide
- Cost Breakdown: How Much Does DIY Hydroseeding Cost In NZ?
- Common DIY Hydroseeding Mistakes & How To Avoid Them
- Overwatering Or Underwatering – Finding The Right Balance
- Using The Wrong Seed Mix – Choose NZ-Friendly Grass Varieties
- Applying Too Thick Or Too Thin – Achieving The Right Coverage
- Skipping Soil Preparation – Poor Soil Leads To Poor Results
- Not Protecting The Area – Preventing Disruptions To New Growth
- How To Fix Patchy Growth
- FAQs: About DIY Hydroseeding Guide NZ
- Conclusion
What Is Hydroseeding?
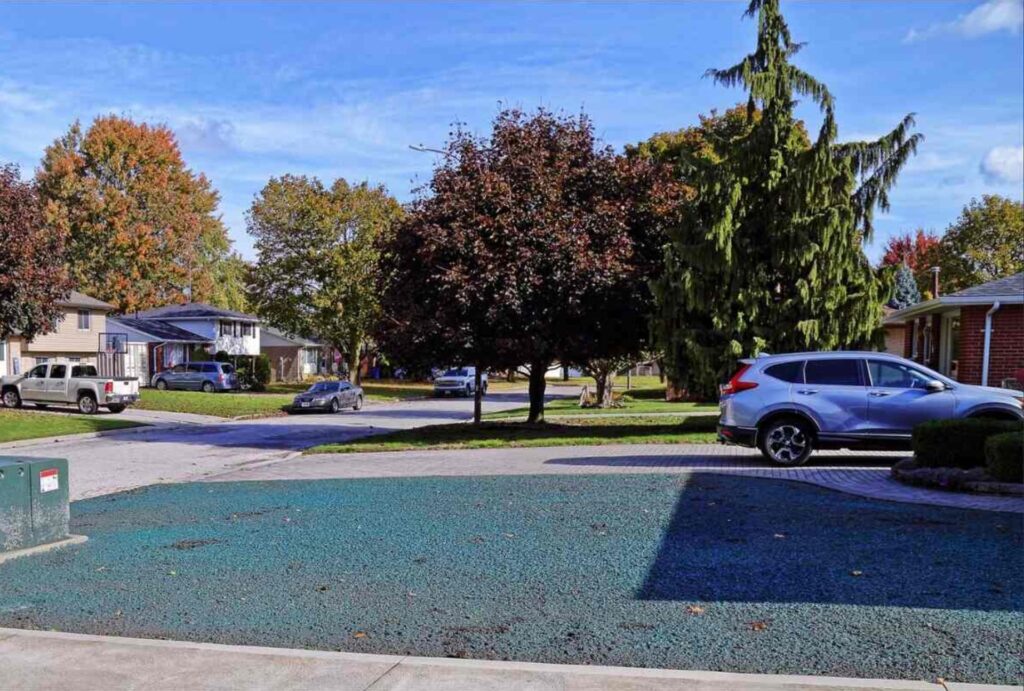
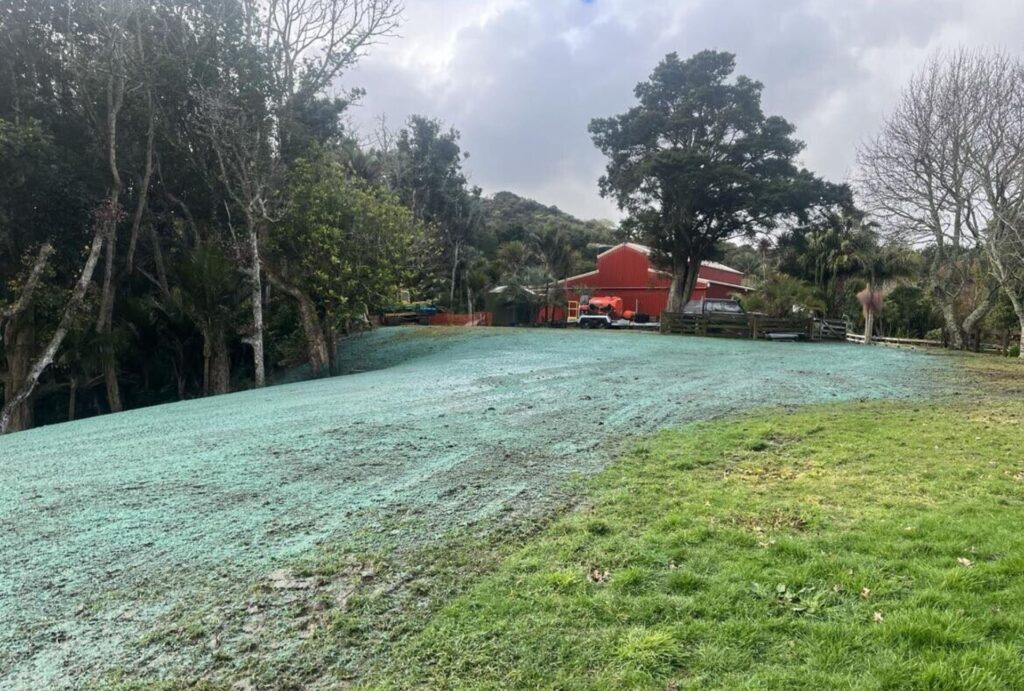
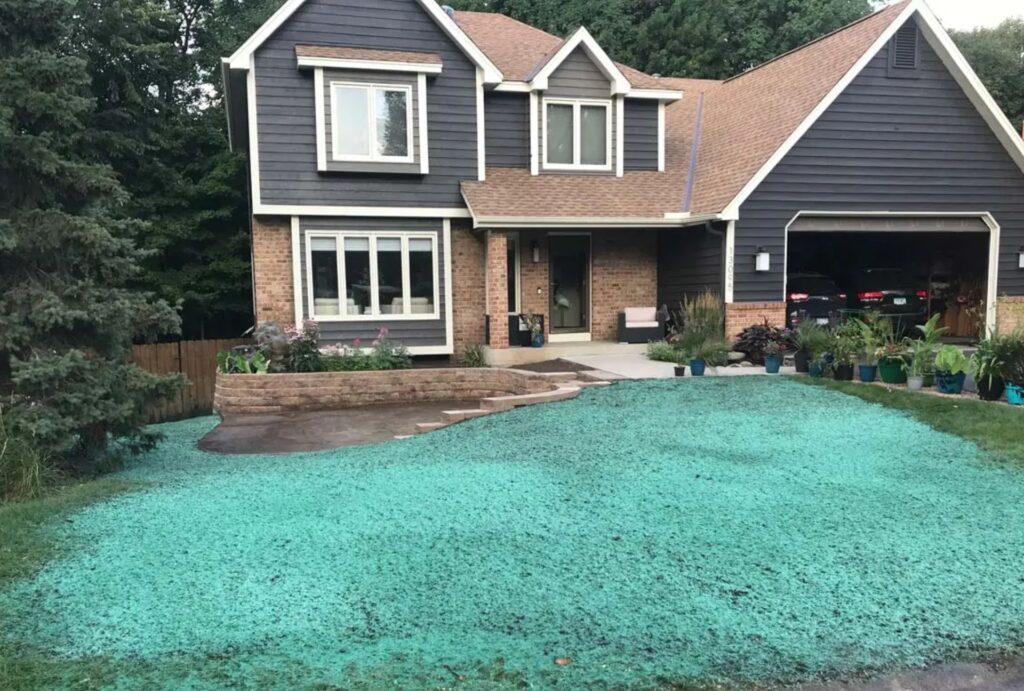
Hydroseeding is an efficient and cost-effective method of establishing a lush, healthy lawn by spraying a specially prepared mixture of grass seed, mulch, water, and fertilizer directly onto the soil. This technique is widely used in residential landscaping, commercial projects, and erosion control due to its ability to cover large areas quickly and promote strong, uniform grass growth. Unlike traditional seeding, which requires manual spreading and frequent maintenance, hydroseeding enhances seed germination, retains moisture, and offers better protection against environmental stressors.
How Does Hydroseeding Work?
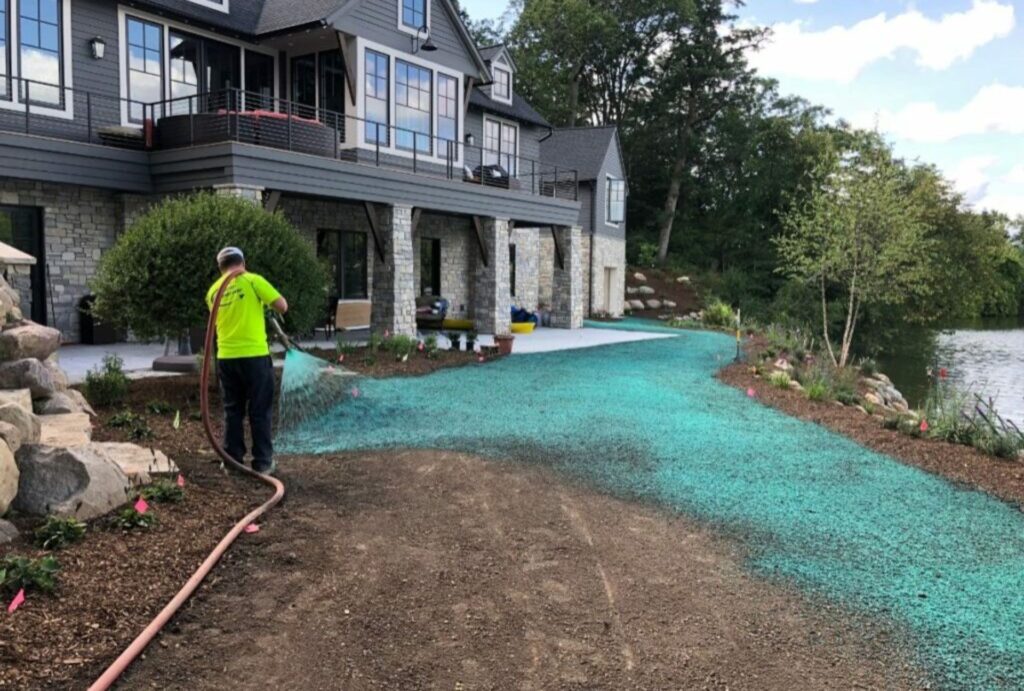
The hydroseeding process begins with mixing grass seed, mulch, water, and fertilizer into a thick, slurry-like substance. This nutrient-rich mixture is then sprayed onto prepared soil using a hydroseeder machine or a specialized sprayer. The mulch in the mix helps retain moisture, protect seeds from wind and erosion, and create an ideal environment for germination. As the seeds begin to sprout, the mulch gradually decomposes, enriching the soil with additional nutrients.
Hydroseeding vs. Traditional Seeding vs. Sod Laying
When it comes to establishing a lawn, many homeowners wonder whether hydroseeding is the best choice compared to traditional seeding or sod installation. Here’s how it compares.
- Hydroseeding vs. Traditional Seeding: Traditional seeding involves spreading dry grass seed manually and often requires straw or protective covering to retain moisture and prevent birds from eating the seeds. Hydroseeding, on the other hand, ensures better seed-to-soil contact, speeds up germination, and requires less maintenance during the initial growth phase.
- Hydroseeding vs. Sod Laying: Laying sod provides an instant lawn, but it comes with a hefty price tag and requires intensive labor. Hydroseeding is significantly more cost-effective while still offering fast and healthy grass establishment. Although hydroseeding takes a few weeks to fully grow, it provides better root integration into the soil, leading to long-term lawn health.
Key Benefits Of Hydroseeding
Hydroseeding offers several advantages that make it a preferred lawn-growing method for homeowners, landscapers, and commercial projects. Here are the top benefits.
1. Faster Germination
Hydroseeding accelerates the germination process by ensuring optimal seed-to-soil contact and consistent moisture levels. The mulch in the hydroseeding mixture retains water, preventing seeds from drying out and promoting faster and healthier sprouting. Typically, hydroseeded grass begins to germinate within 7 to 14 days, compared to traditional seeding, which can take 3 to 4 weeks.
2. Better Erosion Control
One of the biggest challenges with traditional seeding is soil erosion, especially on hillsides, slopes, and areas with loose or sandy soil. Hydroseeding provides a protective mulch barrier that helps stabilize the soil, prevent runoff, and keep seeds in place during rain or wind. This makes it an excellent option for areas prone to erosion or poor soil conditions.
3. Uniform Seed Distribution
Unlike manual seeding, which often leads to uneven coverage and patchy growth, hydroseeding ensures consistent seed distribution across the entire lawn. The hydroseeder sprays the slurry evenly, allowing the grass to grow in a smooth, uniform pattern without bare spots. This technique is particularly beneficial for large lawns, commercial landscapes, and areas with irregular terrain.
Why Choose Hydroseeding For Your Lawn?
If you’re looking for a cost-effective, low-maintenance, and highly efficient way to establish a new lawn, hydroseeding is an excellent choice. It combines the best qualities of traditional seeding and sod installation while reducing labor costs and providing a healthier, long-lasting lawn. Whether you’re a homeowner, contractor, or landscaper, hydroseeding can help you achieve a lush, green yard with minimal effort.
Is DIY Hydroseeding Right For You?
If you’re considering DIY hydroseeding for your lawn, you’re probably wondering if it’s the right choice for your situation. The good news is that hydroseeding can be done as a DIY project, but it requires careful preparation, the right materials, and ongoing maintenance to get the best results. While it’s a cost-effective alternative to sod or traditional seeding, it’s not always the best option for every lawn. Below, we’ll explore the ideal scenarios for DIY hydroseeding and when it might be better to call in the professionals.
DIY Hydroseeding Is Ideal If…
Hydroseeding is a great solution for many homeowners, especially if you’re looking for an affordable and effective way to grow a lush, green lawn. Here are the situations where DIY hydroseeding is the perfect choice.
1. You Have a Medium-to-Large Lawn
If your property has a moderate to large lawn area, DIY hydroseeding is a cost-effective way to achieve even grass coverage. Compared to hand-seeding, hydroseeding allows you to cover more ground in less time, ensuring a uniform distribution of seeds. It’s particularly useful for homeowners who want to refresh their lawn or start from scratch without spending thousands on sod.
2. You’re Looking for an Affordable Lawn Solution
Laying sod can be incredibly expensive, especially for large lawns, while traditional seeding requires a lot of patience and can lead to patchy growth. Hydroseeding offers a great balance—it’s cheaper than sod and faster than regular seeding, making it a budget-friendly option for homeowners who want quality results without breaking the bank. With the right seed mix and proper watering, you can achieve a thick, healthy lawn for a fraction of the cost.
3. You Can Dedicate Time to Watering and Maintenance
Hydroseeding isn’t a set-it-and-forget-it solution. It requires consistent watering—usually two to three times per day during the first couple of weeks—to ensure successful seed germination. If you have the time and commitment to keep your lawn properly hydrated, DIY hydroseeding can be a highly rewarding project. However, if you travel frequently or have a busy schedule, keeping up with the maintenance can be a challenge.
When Should You Hire a Professional?
While DIY hydroseeding works well for many homeowners, there are some situations where hiring a professional hydroseeding service is the better option. If any of the following apply to you, it may be worth investing in expert assistance.
1. Your Lawn Has Steep Slopes or Erosion Issues
Hydroseeding is a great erosion control method, but applying it correctly on steep slopes or uneven terrain can be challenging without professional equipment. If your yard has significant elevation changes, a professional will have the tools and expertise to ensure the hydroseeding mixture adheres properly and won’t wash away before germination.
2. You’re Seeding a Large Commercial Area
If you’re hydroseeding a large-scale project—such as a commercial property, golf course, or park—doing it yourself may not be practical. Professionals use industrial-grade hydroseeders that can cover large areas quickly and efficiently, ensuring uniform growth and long-term success.
3. You Want Guaranteed Results Without the Hassle
DIY hydroseeding requires trial and error, especially if you’ve never done it before. Hiring a professional means you’re getting expert knowledge, the right seed blend for your region, and a guarantee that your lawn will grow properly. If you prefer a hassle-free experience and want to ensure your lawn looks its best, it’s worth considering professional services.
DIY hydroseeding is a fantastic, budget-friendly option for homeowners with medium-to-large lawns who are willing to invest time in watering and maintenance. It’s a great way to achieve professional-quality results without the high costs of sod or professional seeding. However, if you have difficult terrain, a massive lawn area, or prefer a guaranteed outcome, hiring a hydroseeding expert might be the better choice.
By weighing the pros and cons, you can make the best decision for your lawn and enjoy the benefits of a lush, green yard for years to come.

Materials & Tools Needed For DIY Hydroseeding In NZ
When it comes to DIY hydroseeding in New Zealand, having the right materials and tools is crucial for achieving a lush, healthy lawn. Hydroseeding is more than just spraying grass seed—it’s a combination of seed, mulch, fertilizer, water, and sometimes tackifiers, all working together to create the ideal environment for grass growth. Below, we’ll break down everything you need, from essential supplies to equipment options and where to buy them in NZ.
Essential Supplies For DIY Hydroseeding
To successfully hydroseed your lawn, you’ll need the right combination of materials. Each component plays a vital role in seed germination, moisture retention, and overall lawn health.
1. Grass Seed – Choosing The Best Varieties For NZ
Selecting the right grass seed for New Zealand’s climate is one of the most critical steps in hydroseeding. The best choice depends on your location, climate, and lawn usage. Here are some of the most popular options.
- Ryegrass: Fast germination, thrives in cool climates, and is ideal for high-traffic areas.
- Fine Fescue: A great option for shady areas, offering a soft, dense lawn.
- Tall Fescue: Highly durable and drought-resistant, making it perfect for dry regions.
- Kikuyu: Best suited for warm regions in NZ; grows quickly and is excellent for sun-exposed lawns.
- Pro Tip: If you’re unsure which seed to use, opt for a blended seed mix tailored for NZ’s conditions. Many suppliers offer pre-mixed options that combine different grass species for a balanced, adaptable lawn.
2. Hydroseeding Mulch – Retaining Moisture & Protecting Seeds
Mulch is a key ingredient in hydroseeding because it helps retain moisture, prevents soil erosion, and protects newly planted seeds from being washed away or eaten by birds. The two most common types of hydroseeding mulch are.
- Paper-Based Mulch: A budget-friendly option that retains moisture well and decomposes over time.
- Wood Fiber Mulch: More effective at moisture retention and erosion control, making it ideal for slopes and large areas.
- Why Mulch Matters: Without mulch, seeds may dry out too quickly or fail to establish properly. It acts as a protective layer that improves germination rates and speeds up lawn establishment.
3. Fertilizer – Feeding Your New Lawn For Strong Growth
A high-quality starter fertilizer is essential for ensuring your new grass gets the nutrients it needs to develop strong roots and vibrant growth. Look for a fertilizer rich in.
- Nitrogen (N): Promotes healthy, green growth.
- Phosphorus (P): Helps with root development.
- Potassium (K): Improves drought resistance and disease prevention.
- Recommended Formula: Choose a high-phosphorus fertilizer, such as a 10-20-10 blend, which provides the perfect balance for young grass seedlings.
4. Tackifier (Optional) – Keeping Seeds In Place
A tackifier is an optional but highly beneficial additive that helps the hydroseeding mixture stick to the soil. This is especially useful for.
- Steep slopes or erosion-prone areas where seeds could wash away.
- Windy locations where mulch and seeds might get displaced.
- Ensuring better seed-to-soil contact, leading to improved germination.
If your lawn is on flat ground, a tackifier may not be necessary, but for sloped or uneven areas, it can significantly enhance the effectiveness of hydroseeding.
5. Water – The Lifeline Of Hydroseeding
Water is the most important factor in successful hydroseeding. Without adequate moisture, seeds won’t germinate, mulch won’t stay in place, and your lawn may fail to establish. Here’s what you need to know.
- During the first two weeks, water the hydroseeded area 2-3 times per day to keep the surface damp.
- After germination begins, gradually reduce watering frequency to once per day, then to every other day as the grass matures.
- Use a fine mist setting on your sprinkler or hose to prevent disturbing the mulch and seeds.
- Pro Tip: If possible, time your hydroseeding for a period when rain is expected—this will naturally support germination and reduce water costs.
DIY Hydroseeder Options
To apply the hydroseeding mix effectively, you’ll need a hydroseeder or a DIY alternative. Here are the best options based on your budget and lawn size.
1. Renting A Hydroseeder (Best For Large Areas)
For large lawns, renting a professional hydroseeder is the most efficient way to apply the mixture. You can find rental hydroseeders at landscaping supply stores or equipment hire centers in NZ.
- Pros: Covers large areas quickly, ensures even application.
- Cons: Can be expensive to rent, may require experience to operate.
2. DIY Alternatives – Budget-Friendly Application Methods
If you’re working on a small to medium-sized lawn, you don’t need an expensive hydroseeder. Instead, you can use.
- A pressure sprayer: Ideal for smaller lawns; simply mix the hydroseeding slurry in a large container and spray it evenly.
- A garden hose attachment: Some hydroseeding kits come with a specialized sprayer that connects to your garden hose.
- A watering can (for small patches): While not as effective, this can work for minor repairs or patchy areas.
- Pro Tip: If using a DIY sprayer, make sure the mulch is blended smoothly to prevent clogging.
Where To Buy Hydroseeding Materials In NZ
Finding the right hydroseeding materials is easy in New Zealand, as several retailers stock grass seed, mulch, fertilizer, and sprayers. Here are some of the best places to shop.
- Bunnings Warehouse NZ: Carries a variety of grass seed, fertilizers, and sprayers for DIY hydroseeding.
- Mitre 10: Offers NZ-friendly grass seed mixes and lawn care supplies.
- Online Gardening Stores: Websites like Kings Plant Barn, Palmers, and Oderings sell specialized lawn seed blends.
- Local Farm Supply Shops: If you’re covering a large area, check rural supply stores like PGG Wrightson or Farmlands for bulk hydroseeding materials.
- Pro Tip: Many NZ suppliers offer hydroseeding kits, which include pre-mixed seed, mulch, and tackifier, making DIY application even easier.
Having the right materials and tools is the foundation for successful DIY hydroseeding in New Zealand. By choosing the right grass seed, using quality mulch, fertilizing properly, and ensuring consistent watering, you can grow a lush, healthy lawn without needing expensive professional services. Whether you rent a hydroseeder or use a budget-friendly DIY sprayer, following these guidelines will help you achieve the perfect lawn.
Step-By-Step DIY Hydroseeding Process: A Complete Guide
Creating a lush, healthy lawn through DIY hydroseeding is an effective and budget-friendly approach, but it requires careful preparation and proper technique. In this step-by-step guide, we’ll walk you through the entire hydroseeding process, ensuring optimal grass growth and long-term success. Follow these detailed instructions, and soon you’ll have a thriving lawn that enhances your outdoor space.
Step 1: Prepare Your Lawn Area
Proper soil preparation is the foundation of successful hydroseeding. Skipping this step can result in uneven growth, poor germination, or drainage issues. Here’s how to get your lawn ready.
- Clear Debris, Weeds, And Old Grass: Start by removing any rocks, sticks, dead grass, or weeds from the area. Use a rake, garden hoe, or weed remover to ensure a clean slate for the new seed to take root.
- Level The Soil And Aerate For Better Seed Penetration: Uneven ground can cause water pooling, which affects seed germination. Use a garden rake or leveling tool to smooth out the area. If your soil is compacted, consider aerating it with a core aerator or garden fork to improve air and water circulation.
- Ensure Proper Drainage—Avoid Pooling Areas: Poor drainage can lead to seed washout and fungal diseases. If your lawn has low spots where water collects, fill them with a soil-sand mixture to create an even surface.
- Test The Soil pH (Ideal Range: 6.0 – 7.5): Grass grows best in a neutral to slightly acidic soil. Use a soil testing kit (available at Bunnings or Mitre 10 in NZ) to check the pH. If the pH is too high, add sulfur to lower it. If it’s too low, apply lime to balance it out.
Step 2: Mix The Hydroseeding Slurry
The hydroseeding slurry is the heart of the process, providing nutrients, moisture retention, and seed protection. Follow these steps to create a well-balanced mix.
- Combine Grass Seed, Mulch, Fertilizer, And Water In A Large Container: Use a 50:50 mix of paper-based and wood fiber mulch for moisture retention. Choose a high-quality starter fertilizer (preferably high in nitrogen and phosphorus) to encourage rapid root growth.
- Stir Well Until The Mixture Reaches A Soupy Consistency: The mixture should be thick enough to stick to the soil but liquid enough to spray evenly. If it’s too thin, add more mulch; if it’s too thick, dilute with water.
- If Using A Hydroseeder, Follow The Manufacturer’s Instructions For Loading: Renting a hydroseeder is recommended for larger areas. If you don’t have access to one, you can use a high-pressure garden sprayer or a pump sprayer as an alternative for smaller lawns.
Step 3: Apply The Hydroseeding Mix
Applying the hydroseeding mix correctly ensures even distribution, proper seed coverage, and optimal germination. Follow these techniques for the best results.
- Use Even, Overlapping Passes To Ensure Full Coverage: Just like painting a wall, move in a systematic, overlapping pattern to avoid missing spots. Start at one end of the lawn and work your way across in steady, even strokes.
- Avoid Applying Too Thickly—Seeds Need Sunlight And Air To Germinate: While it may be tempting to add a thick layer, excessive mulch can smother the seeds and block sunlight. Aim for a thin, uniform layer where the seeds are visible but protected.
- Focus On Areas Prone To Erosion, Applying A Slightly Thicker Layer: If you’re hydroseeding on a sloped area or windy location, apply a slightly heavier coat to prevent the seeds from being washed or blown away. Consider using a tackifier (bonding agent) to help the slurry stick to the soil.
Step 4: Watering & Initial Care
Watering is critical for the success of hydroseeding. The first few weeks require consistent moisture to activate seed germination and root development.
- Keep The Area Moist But Not Waterlogged—Water 2-3 Times Daily For The First Two Weeks: Light, frequent watering ensures the seeds remain hydrated without causing oversaturation. Use a gentle sprinkler or hose with a mist attachment to prevent soil disturbance.
- Reduce Watering Frequency As The Grass Begins To Establish: After 2-3 weeks, start watering once a day, gradually decreasing as the grass matures. By week 5-6, you should be watering every other day or as needed, depending on rainfall.
- Watch For Dry Patches And Apply Extra Hydration As Needed: If you notice uneven growth or dry spots, hand-water those areas to encourage even development. Avoid walking on the newly seeded lawn during this stage.
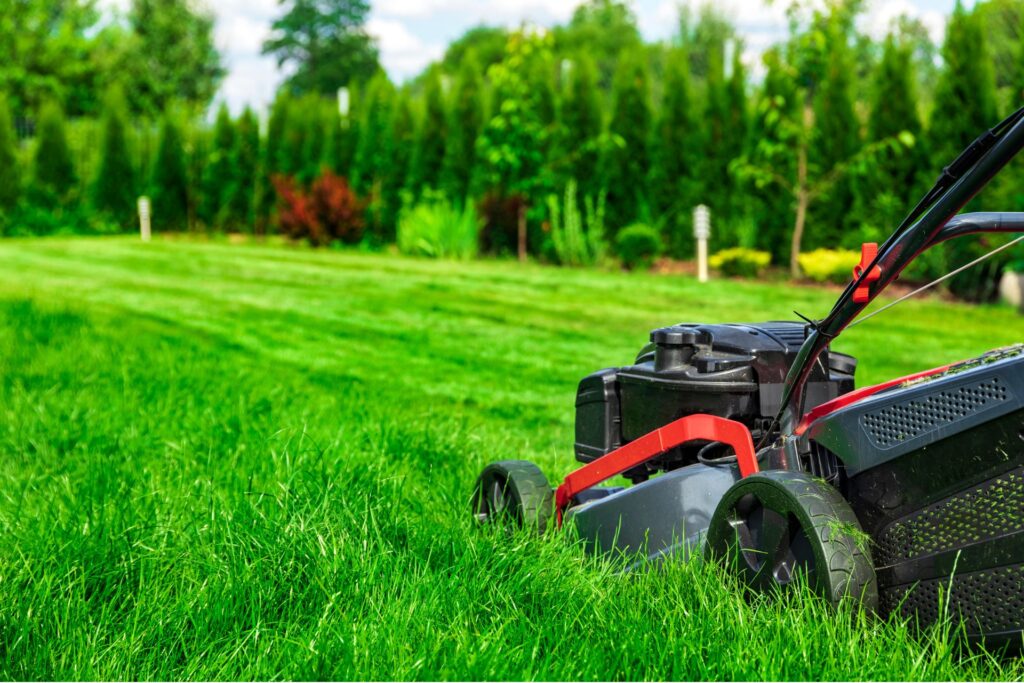
Step 5: First Mowing & Maintenance
Once the grass reaches 7-8cm in height, it’s time for the first mow. This step encourages stronger root systems and a thicker lawn.
- Wait Until The Grass Reaches 7-8cm Before The First Mow: Cutting too early can shock the grass and damage weak roots. Use a lightweight mower with a sharp blade to avoid pulling or tearing the young grass.
- Use A Sharp Mower Blade To Prevent Tearing Delicate New Grass: A dull blade rips grass instead of cutting it, which can lead to disease and stress. Keep your mower blade sharpened for a clean cut.
- Apply A Slow-Release Nitrogen Fertilizer After 4-6 Weeks: This step provides essential nutrients to strengthen the roots and encourage thicker growth. Choose a balanced lawn fertilizer that promotes deep green color and resilience.
Final Tips For A Successful DIY Hydroseeding Project
- Stay Patient: Hydroseeding takes time to establish. You may see patchy growth at first, but proper care will lead to full coverage within a few weeks.
- Avoid Foot Traffic: Keep pets, children, and vehicles off the newly hydroseeded area to prevent disruption.
- Fertilize Regularly: After the first application at 4-6 weeks, apply a high-quality lawn fertilizer every 6-8 weeks to maintain growth.
- Monitor Growth And Fill Bare Spots: If you notice thin patches, lightly overseed those areas and continue watering as needed.
By following this DIY hydroseeding process, you can create a beautiful, green, and healthy lawn without breaking the bank. With the right preparation, watering, and maintenance, your lawn will flourish, providing a vibrant outdoor space for years to come.
Cost Breakdown: How Much Does DIY Hydroseeding Cost In NZ?
Hydroseeding is an effective and budget-friendly way to establish a lush, healthy lawn in New Zealand. However, before diving into the DIY approach, it’s important to understand the associated costs and whether it’s truly more economical than hiring a professional. Below, we break down the DIY vs. professional hydroseeding costs, equipment rentals, material expenses, and money-saving tips to help you make an informed decision.
DIY Vs. Professional Hydroseeding Costs In NZ
One of the biggest advantages of hydroseeding is its affordability compared to laying sod (instant turf). But should you go the DIY route or hire a professional hydroseeding service? Here’s a cost comparison based on typical NZ prices.
DIY Hydroseeding Costs (Estimated: $100-$300 per 100m²)
The cost of DIY hydroseeding varies depending on whether you rent a hydroseeder or use alternative methods such as a pressure sprayer or garden hose attachment. The total cost includes.
- Grass Seed: $20-$50 per 100m² (varies by seed type).
- Mulch: $30-$80 per 100m² (paper-based or wood fiber mulch).
- Fertilizer: $15-$40 per 100m² (starter fertilizer with nitrogen and phosphorus).
- Tackifier (Optional): $10-$25 (helps seeds stick to the soil, reducing erosion).
- Water Costs: Minimal but necessary for ongoing maintenance.
- Equipment Rental (Optional): $50-$150 per day if renting a hydroseeder.
Professional Hydroseeding Costs (Estimated: $500-$1,000 per 100m²)
Hiring a professional hydroseeding company increases costs but comes with benefits like expert application, premium seed mixes, and faster results. Factors influencing professional costs include.
- Lawn Size: Larger areas typically cost less per square meter.
- Seed Type: Premium blends or erosion-resistant varieties may increase the price.
- Site Preparation: Extra charges apply if additional soil grading or weed removal is required.
- Labor & Equipment: Professionals use high-grade hydroseeding machines, ensuring uniform coverage.
Which Option Is Better?
For homeowners with small to medium-sized lawns, DIY hydroseeding can be significantly cheaper. However, for large or difficult terrains, professional hydroseeding might be worth the investment due to time efficiency and guaranteed results.
Equipment Rental Costs: Hydroseeder Rental Vs. DIY Alternatives
If you’re going the DIY route, the main decision is whether to rent a hydroseeder or use a lower-cost alternative like a garden sprayer. Here’s what you need to know.
- Hydroseeder Rental: Typically costs $50-$150 per day in NZ, available at equipment hire shops. Ideal for larger lawns or uneven terrain where a strong spray is needed.
- Garden Sprayer (DIY Alternative): A hose-end sprayer or high-pressure backpack sprayer costs $40-$100 and works well for small lawns or patch repair.
- Manual Spraying With Watering Can: The most affordable method but best for very small areas.
If you’re hydroseeding a large lawn (over 500m²), renting a hydroseeder is recommended for efficiency and even coverage. For smaller areas, a DIY sprayer setup will save money while still delivering good results.
Cost Of Grass Seed, Mulch, Fertilizer, And Additional Supplies
The type of grass seed, mulch, and fertilizer you choose will impact your total cost. Below is a breakdown of essential materials and their estimated prices in NZ.
Grass Seed Costs (Price per 100m²)
- Ryegrass: $20-$40 – Fast germination, great for cooler NZ climates.
- Fine Fescue: $30-$50 – Ideal for shaded areas, soft texture.
- Tall Fescue: $35-$60 – Drought-resistant, durable for high foot traffic.
- Kikuyu: $40-$70 – Warm-season grass, thrives in North Island regions.
Hydroseeding Mulch Costs (Price per 100m²)
- Paper-Based Mulch: $30-$50 – Absorbs water well, eco-friendly.
- Wood Fiber Mulch: $50-$80 – Holds moisture better, ideal for dry areas.
Fertilizer & Tackifier Costs
- Starter Fertilizer: $15-$40 – High nitrogen and phosphorus blend for fast root growth.
- Tackifier (Optional): $10-$25 – Prevents seed washout on slopes or windy areas.
- Pro Tip: Buy in bulk or look for local garden centers that offer discounts on larger quantities.
Tips To Save Money On DIY Hydroseeding Without Compromising Quality
DIY hydroseeding doesn’t have to break the bank. Here are cost-saving strategies to keep your lawn project affordable while still achieving a professional-quality finish.
- Choose The Right Grass Seed For Your Climate: Avoid expensive, imported seeds that may not thrive in NZ conditions. Opt for NZ-friendly blends suited to your region.
- Use A DIY Sprayer Instead Of Renting A Hydroseeder: If hydroseeder rentals are too expensive, a garden sprayer or backpack sprayer can do the job for small areas.
- Buy Supplies In Bulk: Many landscaping suppliers offer discounts on large seed and mulch orders. Split costs with a neighbor if they’re also planting a lawn!
- Prepare Your Soil In Advance: Removing weeds, aerating, and leveling the soil properly reduces the need for extra fertilizers and soil amendments later.
- Water Smartly: Early morning and evening watering prevent evaporation, reducing water costs while keeping seeds moist.
- Mix Your Own Slurry Instead Of Buying Pre-Made Packs: Some garden stores sell pre-mixed hydroseeding kits, but mixing your own seed, mulch, and fertilizer is often cheaper and customizable.
If you’re looking for an affordable, effective, and rewarding way to establish a lawn, DIY hydroseeding is a fantastic option. While initial costs range from $100-$300 per 100m², this is still far more budget-friendly than sod or professional hydroseeding. With the right materials, equipment, and maintenance, you can achieve a lush, green lawn without spending thousands.
However, if you’re dealing with a large property, steep slopes, or erosion-prone areas, hiring a professional may be a better investment to ensure even coverage and long-term success.
Common DIY Hydroseeding Mistakes & How To Avoid Them
Hydroseeding is a fantastic way to establish a lush, green lawn, but like any DIY project, mistakes can happen. These errors can delay germination, lead to uneven growth, or even cause the entire process to fail. To ensure your hydroseeding efforts are successful, it’s crucial to understand the most common mistakes and how to avoid them. Here’s what you need to watch out for when hydroseeding your lawn in New Zealand.
Overwatering Or Underwatering – Finding The Right Balance
One of the most critical factors for hydroseeding success is proper watering. Too much water can lead to pooling, which suffocates seeds and causes them to wash away. Too little water, on the other hand, prevents seeds from germinating, leaving you with dry, patchy areas.
How To Avoid This Mistake
- In the first 2-3 weeks, keep the soil consistently moist by watering 2-3 times per day with a light spray.
- Avoid over-saturating the soil; puddles and runoff mean you’re using too much water.
- After 3-4 weeks, reduce watering to once per day, then gradually transition to a deep, less frequent watering schedule to encourage strong root development.
Using The Wrong Seed Mix – Choose NZ-Friendly Grass Varieties
Not all grass seeds perform well in New Zealand’s climate. Some grass types thrive in colder regions, while others are better suited for warmer coastal areas. Using the wrong seed mix can result in poor growth, slow germination, and a weak lawn that won’t withstand NZ’s changing weather conditions.
How To Avoid This Mistake
- Choose grass seeds suited to your region. For colder areas, opt for Perennial Ryegrass or Fine Fescue. For warmer climates, Kikuyu or Tall Fescue works best.
- Consider a blended seed mix that includes different grass types for better resilience.
- Purchase high-quality seeds from reputable NZ garden suppliers like Bunnings, Mitre 10, or local farm stores.
Applying Too Thick Or Too Thin – Achieving The Right Coverage
Hydroseeding is effective because of its even distribution, but applying the mix too thickly or too thinly can cause problems. A thick application blocks sunlight and air, which can suffocate seedlings. A thin application leaves patches of bare soil where weeds can grow.
How To Avoid This Mistake
- Apply the hydroseeding mix in even, overlapping passes for uniform coverage.
- Follow the manufacturer’s guidelines for seed-to-mulch ratios.
- Use a test area before hydroseeding the entire lawn to ensure proper consistency.
Skipping Soil Preparation – Poor Soil Leads To Poor Results
Healthy soil is the foundation of a great lawn. Skipping soil preparation can lead to poor drainage, weak seed establishment, and slow growth. If the soil is too compacted or lacks nutrients, even the best hydroseeding mix won’t thrive.
How To Avoid This Mistake
- Clear the area of rocks, debris, and weeds before hydroseeding.
- Aerate the soil to improve drainage and root penetration.
- Test the soil pH (ideal range: 6.0 – 7.5). If the soil is too acidic, add lime; if it’s too alkaline, use sulfur.
- Incorporate compost or organic matter to enrich nutrient levels before seeding.
Not Protecting The Area – Preventing Disruptions To New Growth
Once you’ve hydroseeded, it’s important to protect the area from external disturbances. Birds, pets, and even foot traffic can disrupt seedlings before they’ve had a chance to root, leading to patchy growth and uneven coverage.
How To Avoid This Mistake
- Use temporary netting or bird deterrents to prevent birds from eating the seeds.
- Keep pets and people off the newly hydroseeded area for at least 4-6 weeks.
- If hydroseeding on a slope, use a tackifier to help the mixture stick and reduce runoff.
How To Fix Patchy Growth
Even with the best preparation, some areas may not germinate evenly. Patchy growth can occur due to uneven watering, poor soil conditions, or external disturbances. Fortunately, it’s easy to correct with a bit of patience and care.
Steps To Fix Patchy Hydroseeded Areas
- Reapply hydroseeding mix to thin areas 3-4 weeks after the initial application.
- Keep a consistent watering schedule—newly re-hydroseeded areas should be treated just like the original seeding.
- Fertilize after 6-8 weeks with a slow-release nitrogen fertilizer to encourage strong root growth.
- Overseed thin areas manually if needed, mixing grass seed with a light layer of compost to help with germination.
Avoiding these common DIY hydroseeding mistakes will save you time, effort, and money while ensuring a thick, vibrant lawn. With proper preparation, the right seed choice, and consistent care, you can enjoy a lush, green yard that thrives in New Zealand’s unique climate.

FAQs: About DIY Hydroseeding Guide NZ
Conclusion
DIY hydroseeding in NZ is an affordable, effective, and rewarding way to establish a lush, green lawn without the high costs of professional services. With the right preparation, high-quality seed mix, and consistent watering, you can achieve a thriving lawn that enhances your outdoor space. The key to success lies in proper soil preparation, patience, and maintenance—ensuring that your grass receives enough moisture, nutrients, and care throughout the germination process. While hydroseeding requires commitment and attention, the long-term benefits, including faster growth, improved erosion control, and better seed distribution, make it well worth the effort. Whether you’re starting fresh or repairing patchy areas, this method provides a cost-effective solution tailored to New Zealand’s unique climate and soil conditions. Have you tried hydroseeding your lawn, or do you have questions about the process? Share your experiences in the comments below, and let’s build a community of DIY lawn enthusiasts! For those ready to get started, check out trusted NZ retailers for hydroseeding supplies and ensure you have the best products for a successful lawn transformation.
About the Author:
Mike Veail is a recognized digital marketing expert with over 6 years of experience in helping tradespeople and small businesses thrive online. A former quantity surveyor, Mike combines deep industry knowledge with hands-on expertise in SEO and Google Ads. His marketing strategies are tailored to the specific needs of the trades sector, helping businesses increase visibility and generate more leads through proven, ethical methods.
Mike has successfully partnered with numerous companies, establishing a track record of delivering measurable results. His work has been featured across various platforms that showcase his expertise in lead generation and online marketing for the trades sector.
Learn more about Mike's experience and services at https://theleadguy.online or follow him on social media: