Welcome to our comprehensive guide on how to build a deck in New Zealand! Whether you’re dreaming of creating the perfect outdoor entertaining area or simply adding value to your home, building a deck is a great way to enhance your outdoor living space. In this guide, we’ll walk you through the process step by step, from planning and selecting materials to the final touches, while considering the unique aspects of building a deck in NZ, such as local regulations and weather conditions. Whether you’re a first-time DIYer or considering hiring a professional, this guide will give you everything you need to know to get started on your deck-building journey. For professional help, contact experienced fencing contractors in your area.
To build a deck in NZ, start by planning the deck’s purpose, location, and size, while ensuring compliance with local council regulations. Choose the right materials, such as pine, hardwood, or composite decking, and gather essential tools. Prepare the site, install concrete footings, and construct the frame with bearers and joists. Lay the decking boards with proper spacing, then finish by sanding, staining, and weatherproofing to protect against NZ’s climate. Regular maintenance, like cleaning and sealing, will keep your deck in top condition year-round.
Planning Your Deck
When embarking on the journey of building a deck, proper planning is the foundation for success. Careful consideration at this stage ensures that the end result is both functional and aesthetically pleasing, suited to your specific needs, and compliant with NZ regulations. Here’s what you need to know to plan your deck effectively.
Understanding Your Purpose
The first step in planning your deck is to define its purpose. Why are you building this deck? Different reasons will influence both the design and layout of your deck. For instance, if your deck is primarily for entertainment, you might want a larger space to accommodate outdoor furniture, a barbecue, or even built-in seating. A deck used for relaxation may be more intimate, perhaps designed with lounge chairs or a hammock in mind, creating a cozy retreat. Meanwhile, if outdoor dining is your focus, you’ll need space for a table, chairs, and easy access to the kitchen or indoor dining area.
Understanding your primary use for the deck helps you make key decisions about its size, layout, and features. For example, a family who enjoys outdoor gatherings might need a more open layout with plenty of seating, while a couple seeking a quiet escape may prefer a smaller, more private design with greenery or privacy screens. Take time to think about how you’ll use your deck throughout the year, as it will affect everything from the materials you choose to the layout.
Choosing the Right Location
Choosing the best location for your deck is just as important as determining its purpose. There are several factors to consider when deciding where to build. Sun exposure is a critical element—if your deck faces the harsh afternoon sun, you may need to plan for some form of shading, like an awning or pergola, to make the space usable during hotter months. On the other hand, if you prefer a sun-drenched deck for the cooler mornings, positioning it on the eastern side of your home could be ideal.
Wind and privacy are also key considerations. A deck that’s exposed to strong winds could be uncomfortable for relaxation or dining, so take note of the direction of prevailing winds in your area. Adding windbreaks like screens or planting shrubs could solve this issue. In terms of privacy, consider how visible your deck will be to neighbors or passersby. If necessary, you can integrate privacy screens, lattice work, or tall plants to create a more secluded environment.
Lastly, proximity to the house is vital for convenience. If you plan to use the deck for dining or entertaining, placing it close to the kitchen or living areas can make hosting easier. On the other hand, a deck that’s positioned further away might serve better as a quiet retreat or secondary outdoor living space.
Council Regulations and Permits in NZ
Before you start building, it’s important to understand NZ’s building consent regulations. The rules around building a deck vary depending on its size and height, and not adhering to these can lead to fines or having to dismantle your deck later on. Generally, if your deck is under 1.5 meters high, you may not need a building consent. However, if it exceeds that height or involves complex structures, such as retaining walls or handrails, you will likely need council approval. Check with your local council to see if a building consent or resource consent is required.
It’s also worth noting that local council regulations can vary slightly depending on your region, so always check with your council to see if a building consent or resource consent is required. Some councils may have additional guidelines related to the proximity of your deck to property boundaries or how it impacts the privacy of neighboring properties. Being aware of these regulations early in the planning process can save you time, money, and potential legal issues down the road.
Budgeting and Materials
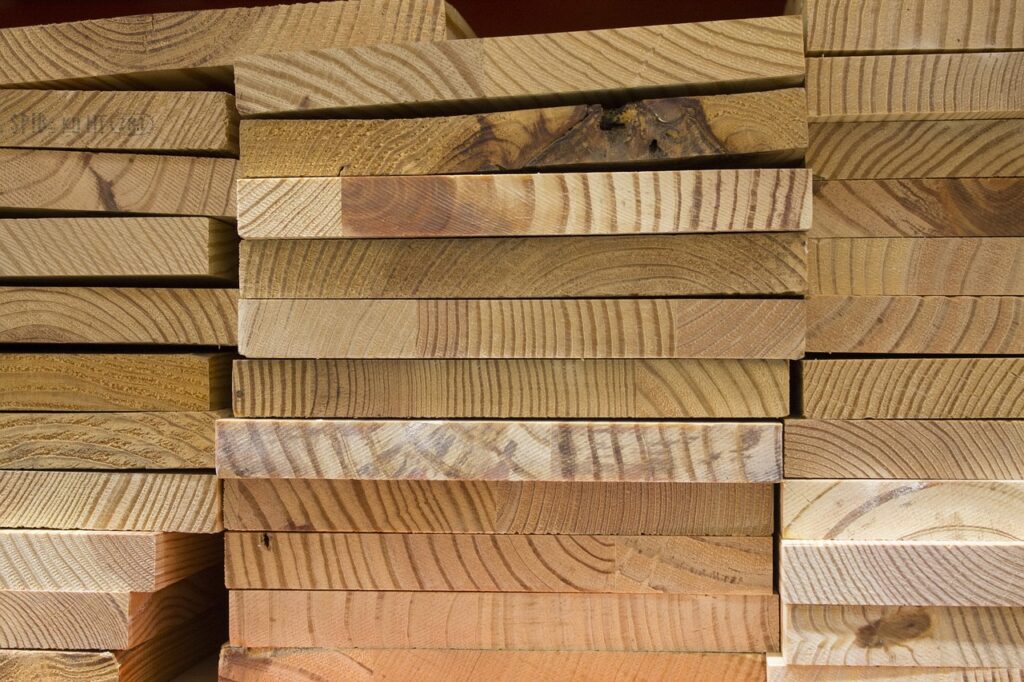
Building a deck can be a significant investment, so setting a realistic budget is crucial. Start by researching the costs of various decking materials. Treated pine is often the most affordable and commonly used option in NZ, known for its durability and ease of use. However, if you’re after something more durable and aesthetically pleasing, you might consider hardwoods like Kwila or Vitex, which are more expensive but longer-lasting.
Another popular option is composite decking, which offers the look of wood but requires far less maintenance. While composite materials can be more costly upfront, their long-term value may outweigh the initial investment due to their low maintenance needs.
In addition to decking boards, don’t forget to account for other costs like hardware, including nails, screws, brackets, and joists, as well as finishing materials like paint or stain. When budgeting, also factor in the cost of any additional features you may want, such as built-in seating, railings, or outdoor lighting.
Hiring a Professional vs. DIY
One of the biggest decisions you’ll need to make is whether to hire a professional or tackle the deck build yourself. DIY decking can be a cost-saving option, especially if you have the skills and tools to do the job. There are many resources available that can guide you through the process, and for small, simple decks, it may be a feasible project for a handy DIYer.
However, if you’re building a larger or more complex deck, or if the deck will be elevated, it’s worth considering hiring a professional. Elevated decks require more structural support and come with safety risks, making it essential to ensure they’re constructed correctly. A professional builder will not only understand the local building codes but also have the expertise to manage more challenging aspects, such as leveling the ground, securing footings, and ensuring your deck is structurally sound.
Ultimately, the choice comes down to your confidence, skill level, and the complexity of the deck. A professional can save you time and ensure that your deck is safe and compliant with all regulations, while DIY might be more satisfying and cost-effective for simpler projects.
Planning your deck involves thoughtful consideration of your deck’s purpose, location, local regulations, budget, and whether to hire a professional. By taking the time to plan each aspect carefully, you set yourself up for a successful build that will enhance your outdoor living space for years to come.
Designing Your Deck
Designing a deck in New Zealand requires a balance of style, functionality, and practicality, especially considering the country’s unique outdoor culture and weather conditions. This section will guide you through popular trends, material choices, eco-friendly considerations, and essential design elements to create a deck that’s not only visually appealing but also tailored to your specific needs.
NZ Decking Trends and Inspiration
New Zealand’s outdoor lifestyle heavily influences deck design, with several trends emerging to suit different preferences. Minimalist designs are increasingly popular, focusing on clean lines and simple layouts. These decks typically emphasize the natural beauty of materials like wood, using neutral tones to blend with the surrounding environment. For those seeking a more tropical vibe, tropical-inspired decks often incorporate rich, darker woods such as Kwila and Merbau, paired with lush greenery to create a resort-like atmosphere in your own backyard.
Another trending option is the multi-level deck, which is particularly suited for homes on sloping sections. Multi-level designs not only make the most of uneven terrain but also create distinct areas for dining, lounging, and entertaining. They add depth and dimension to outdoor spaces and can be an attractive feature when working with limited square footage or complex landscapes.
Choosing the Right Materials
When it comes to building a deck in NZ, selecting the right materials is crucial for ensuring durability, aesthetic appeal, and ease of maintenance. Here are the three most common materials used for decking in New Zealand.
- Pine: Treated pine is one of the most affordable and widely available options. It’s lightweight and easy to work with, making it a popular choice for DIY enthusiasts. However, it requires regular maintenance, including staining and sealing, to protect it from moisture and sun damage.
- Hardwood: For a more premium option, hardwoods like Kwila, Vitex, and Garapa offer exceptional durability and a rich, natural look. Hardwoods are more resistant to wear and weather conditions, which makes them ideal for long-term use. However, they tend to be more expensive and can be harder to work with, requiring specialized tools and skills for installation.
- Composite Decking: Made from a blend of recycled wood fibers and plastic, composite decking is gaining popularity due to its low-maintenance properties. Unlike timber, it doesn’t need regular staining or sealing, and it’s highly resistant to rot, insect damage, and warping. Although it comes with a higher initial cost, its long lifespan and minimal upkeep make it a cost-effective choice over time.
Sustainable and Eco-Friendly Options
Sustainability is an important consideration for many homeowners in New Zealand, and there are several eco-friendly materials available for decking. Recycled composite decking is a great option for those looking to minimize their environmental impact, as it is made from reclaimed wood and recycled plastics. Not only does it reduce waste, but it also requires less maintenance than traditional timber.
If you prefer a natural wood deck, look for sustainably sourced timber certified by organizations like the Forest Stewardship Council (FSC). This ensures the wood comes from responsibly managed forests, which helps reduce deforestation and promotes biodiversity. Additionally, some NZ suppliers offer thermally modified wood, which is treated with heat instead of chemicals to enhance its durability and resistance to decay, making it an environmentally friendly alternative to chemically treated wood.
Deck Size and Shape
The size and shape of your deck will largely depend on the available space and how you intend to use it. For example, a large deck might be ideal for entertaining large groups, while a smaller, more intimate deck could be perfect for a quiet space to relax. Consider how the deck will integrate with your home and landscape, and whether you need areas for specific functions like dining, barbecuing, or lounging.
If space is limited, opt for a simple rectangular or square design, which is more efficient in small areas and easier to build. On the other hand, if you have a larger yard or an uneven site, consider a more dynamic shape, such as a multi-level or curved design, to maximize usable space. Keep in mind that irregular or custom-shaped decks often require more time and materials to construct, which may increase costs.
Incorporating Features
A well-designed deck is more than just a flat surface – it should include features that enhance both its functionality and aesthetic appeal. For example, built-in seating is a practical way to save space and create a cozy environment. This can be particularly useful if you have limited room for outdoor furniture, and it can be customized to blend seamlessly with your deck’s design.
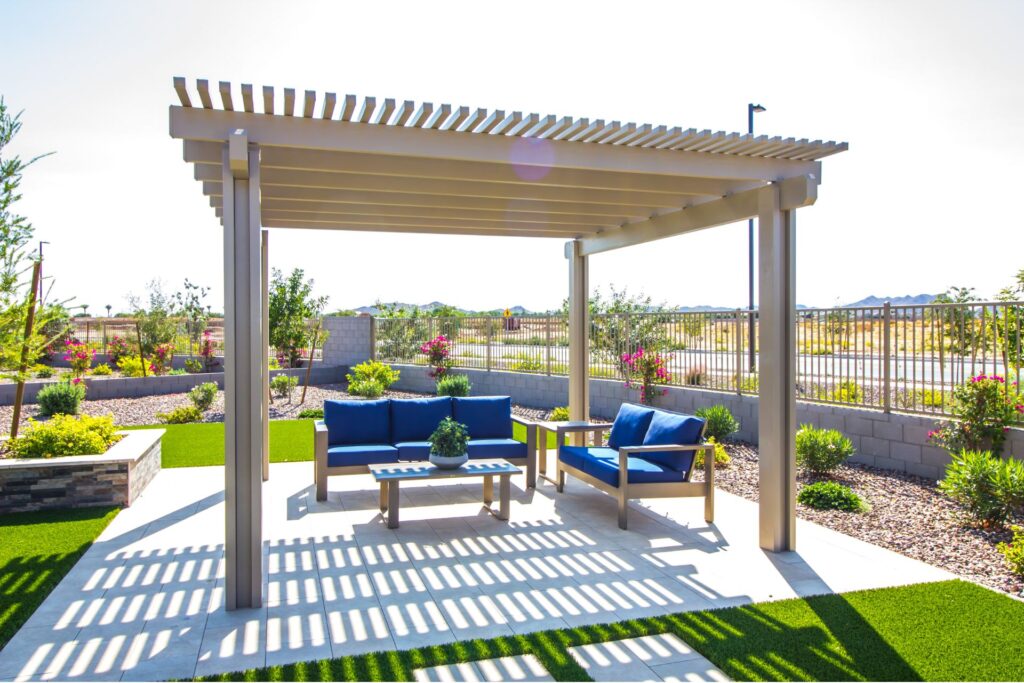
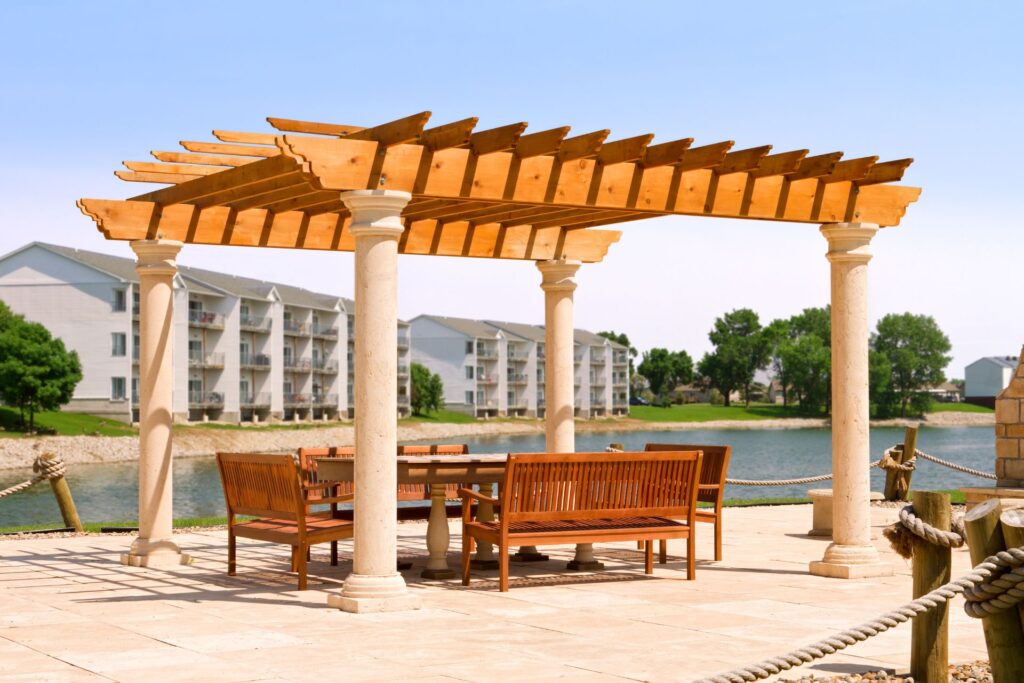
Another popular feature in NZ is the addition of pergolas or shade structures. These not only provide relief from the harsh summer sun but also add architectural interest. A pergola can serve as a frame for hanging plants or outdoor lighting, creating a more inviting and dynamic space for relaxation or entertaining.
For those looking to add a touch of greenery, planters and garden boxes can be incorporated directly into the deck design. They are a great way to soften the look of the deck and create a more natural, integrated connection with the surrounding environment. Other features like outdoor kitchens, fire pits, or even spas can further elevate the functionality of your deck, turning it into an outdoor living space that can be enjoyed year-round.
Designing a deck for your New Zealand home involves making thoughtful choices about materials, style, and features that suit both your lifestyle and the local environment. Whether you’re going for a minimalist look or a multi-level masterpiece, taking the time to plan your deck design will ensure you create a space that is both beautiful and functional for years to come.

Tools And Materials You’ll Need
Before starting your deck-building project, it’s crucial to have the right tools and materials on hand to ensure the job is done efficiently and safely. A well-planned toolset and a clear understanding of the materials you’ll need will make the process smoother, especially for those tackling a DIY build. Let’s dive into the essential tools and materials that will get you from the planning stage to a finished deck.
Tools
When building a deck, having the right tools is key to ensuring accuracy and safety. Here’s a list of the most important tools you’ll need.
1. Circular Saw or Miter Saw: A good quality saw is indispensable for cutting your decking boards and joists to size. If you’re dealing with hardwood or composite decking, ensure your saw blade is designed for tougher materials.
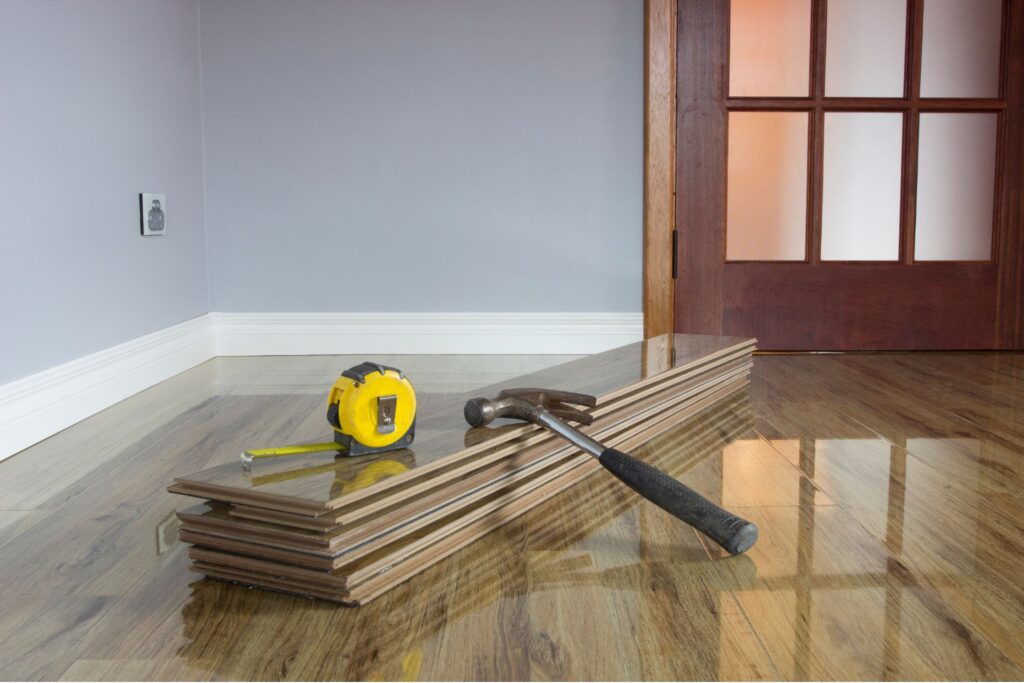
2. Measuring Tape: Precision is essential in every step of building a deck. A sturdy measuring tape helps you measure everything accurately, from the size of the deck frame to the gaps between the decking boards.
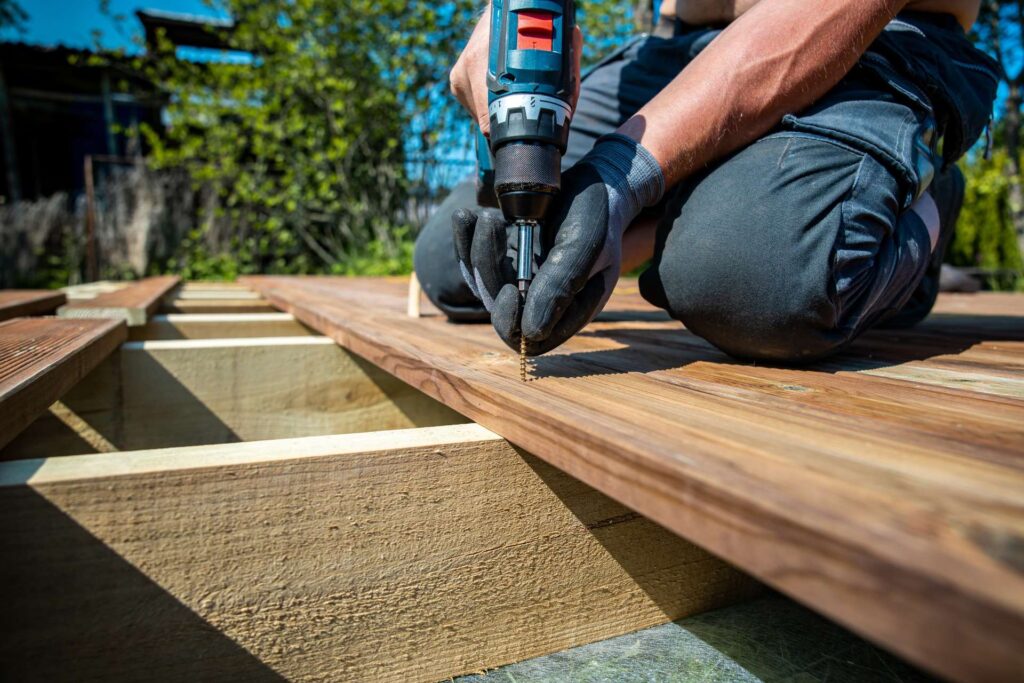
3. Drill and Drill Bits: You’ll need a reliable drill to pre-drill holes in your decking boards and joists for nails and screws. It’s also handy for driving screws, and having the correct drill bits on hand ensures you’re ready for any fastening job.
4. Spirit Level: To ensure your deck is perfectly level, a long spirit level will be your best friend. Keeping your deck balanced not only improves its appearance but also its structural integrity.
5. Hammer or Nail Gun: For fastening nails into the decking frame and boards, a hammer will suffice, but if you’re looking to save time, a nail gun could be a great investment, especially for larger projects.
6. Post Hole Digger: If your deck requires supporting posts in the ground, a post hole digger will make digging holes for footings much easier. This tool ensures you create the perfect depth for solid concrete footings.
7. Carpenter’s Square: Keeping corners square is essential for the deck’s structural alignment. A carpenter’s square will help ensure all your angles are correct, particularly when framing the deck.
8. Safety Gear: Safety first! Equip yourself with goggles, gloves, ear protection, and a dust mask. You’ll be cutting and drilling materials that could produce debris, dust, and loud noise, so protect yourself throughout the process.
9. Clamps: When working with long boards, clamps can hold pieces in place while you secure them, making the job much easier and ensuring accurate alignment.
10. Shovel: For leveling the ground or digging holes for posts, a sturdy shovel will help with site preparation and laying foundations.
By ensuring you have these tools available, you’ll be able to tackle every aspect of building your deck with confidence. Having the right tools can make the difference between a smooth build and one fraught with frustrations.
Materials
Now that you know what tools you’ll need, let’s move on to the materials that form the foundation and surface of your deck. Selecting the right materials is vital not just for the look of your deck, but for its durability and long-term maintenance requirements.
1. Decking Boards: These are the surface of your deck and can be made from several materials. In New Zealand, popular choices include.
- Treated Pine: Affordable, readily available, and easy to work with. However, it requires regular maintenance like staining or sealing to prevent rot.
- Hardwood (e.g., Kwila or Vitex): More expensive but highly durable and attractive. Hardwood naturally resists insects and rot, making it an excellent option for long-term use.
- Composite Decking: A low-maintenance alternative that’s made from a combination of recycled materials and plastic. It’s resistant to rot, doesn’t require staining, and is eco-friendly, although it tends to be more expensive upfront.
2. Joists and Bearers: These structural components form the frame that supports your decking boards. They are typically made from treated timber to resist moisture and insects. Make sure to choose the right size and spacing for your joists based on your deck’s size and load requirements.
3. Nails or Screws: Fasteners are crucial for assembling your deck frame and securing decking boards. Galvanized or stainless steel nails and screws are recommended because they resist rust and corrosion, especially in New Zealand’s often wet and coastal conditions. Decking screws are a better option for ensuring a secure fit and can help prevent boards from loosening over time.
4. Concrete Footings: If your deck is raised or built on uneven ground, concrete footings will anchor your deck securely in place. These footings support posts and keep your deck stable and level. Premixed concrete is usually the easiest option for DIYers, but ensure you dig post holes deep enough to avoid shifting or settling over time.
5. Decking Oil, Stain, or Paint: Once your deck is built, you’ll need to protect it from the elements. Depending on the type of wood you’ve used, regular applications of decking oil or stain will help prevent weather damage, while paint can provide an extra layer of protection and aesthetic appeal. Make sure to choose products designed for outdoor use in New Zealand’s diverse weather conditions.
6. Post Anchors and Brackets: These are used to secure the posts to the concrete footings and connect joists and bearers. Galvanized steel brackets and anchors are ideal for resisting rust, ensuring the long-term stability of the deck structure.
7. Deck Flashing Tape: To extend the life of your deck, especially in wet climates, apply deck flashing tape on the tops of joists before laying your decking boards. This helps prevent water from seeping into the wood, reducing the risk of rot.
8. Gravel or Pavers: For ground-level decks, adding a layer of gravel or pavers underneath the deck can help with drainage, preventing moisture buildup around the wooden structure.
By gathering all the necessary materials ahead of time, you’ll streamline the building process and reduce the likelihood of unexpected delays. Choosing high-quality, durable materials suited to New Zealand’s weather conditions ensures your deck will stand the test of time and provide you with a beautiful, functional outdoor space for years to come.
Having the right tools and materials at your disposal is the foundation of a successful deck-building project. Whether you’re going for a small, simple deck or something more elaborate, using quality materials and the appropriate tools will ensure a safer, more durable build. Planning ahead and understanding the purpose of each tool and material will set you up for a smooth construction process and a deck you can enjoy for many years in New Zealand’s unique climate.
Step-By-Step Guide To Building Your Deck
Step 1: Preparing the Site
The first and most crucial step in building a deck is site preparation. Before you start, it’s important to clear the area of any obstacles, such as plants, debris, or old structures. A clean, level workspace ensures that your deck’s foundation will be solid and reliable. Once the area is cleared, you’ll need to measure and mark out the deck’s dimensions. Accurate measurements are key—take the time to double-check your calculations, as this will prevent mistakes later on.
In New Zealand, particular attention should be given to soil conditions. Different regions may present various challenges, such as sandy, rocky, or clay-heavy soils. Good drainage is essential to prevent water pooling under your deck, which can lead to rotting and structural damage over time. You may need to incorporate drainage solutions, such as gravel layers or perforated pipes, depending on your soil’s characteristics. Stability is another important factor, especially if you’re building on a sloped site. In such cases, extra support or deeper footings might be necessary to ensure the deck remains level and safe.
Step 2: Laying the Foundation
The foundation of your deck is the backbone of the entire structure, so precision and care are vital at this stage. Start by digging holes for the posts, which will support the entire deck. The size and depth of these holes depend on the size of your deck and the local soil conditions. In New Zealand, it’s common to dig to a depth of around 600mm to 900mm to ensure stability, particularly in areas with soft or shifting soil. For coastal regions, where high winds are a concern, deeper footings may be needed.
Once the holes are dug, pour concrete footings into each one, making sure they’re level. It’s essential that the footings are perfectly flat and evenly spaced to avoid future problems with the structure. Use a spirit level to ensure precision. Let the concrete set properly before moving on to the next step. Skipping or rushing this step could lead to an uneven deck, so patience here will pay off in the long run.
Step 3: Installing the Frame
With your foundation set, it’s time to build the deck’s frame. Start by attaching the bearers (horizontal support beams) to the posts. The bearers should be securely fastened with galvanized bolts, which are ideal for outdoor use in NZ’s sometimes harsh weather conditions. Once the bearers are in place, you can install the joists. Joists are smaller beams that run perpendicular to the bearers, forming the skeleton of your deck and providing the main support for the decking boards.
When installing joists, it’s crucial to ensure they are spaced correctly—typically around 400mm to 600mm apart. This spacing will depend on the type of decking material you choose. For example, if you’re using heavier hardwood, you may need closer spacing for added support. Make sure the entire frame is level and square before securing everything in place. This step is critical to ensuring that your deck doesn’t warp or become unstable over time.
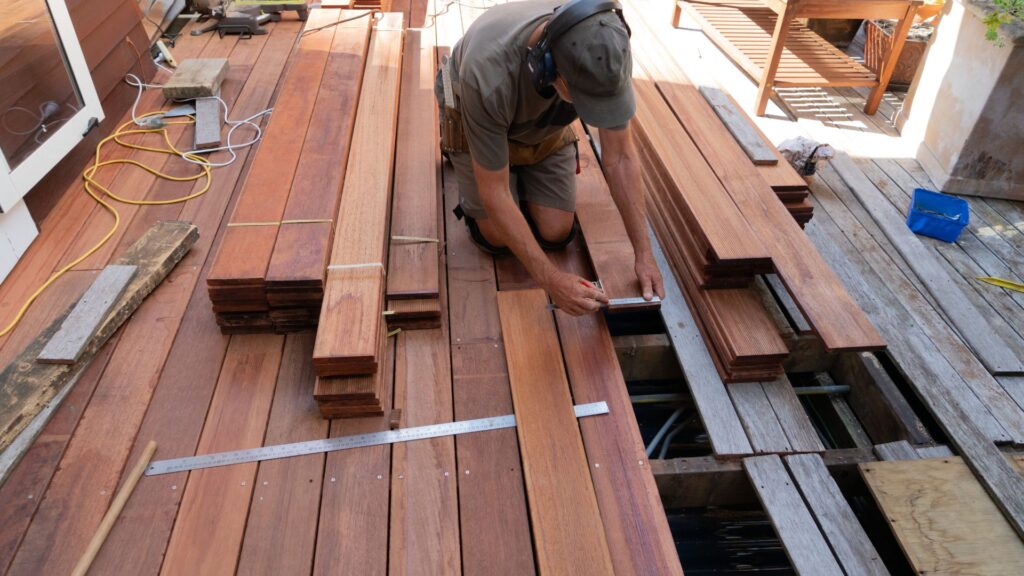
Step 4: Laying the Decking Boards
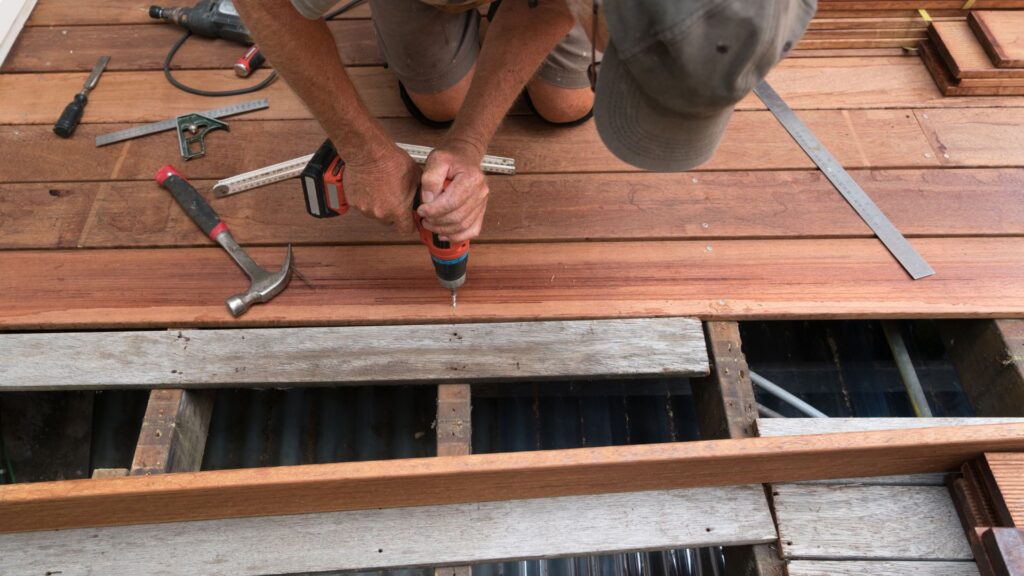
Once your frame is securely in place, you can begin laying the decking boards. Start at the house and work your way outwards. It’s important to leave a small gap between each board—typically around 3mm to 5mm. This gap allows for natural expansion and contraction of the wood due to temperature changes and moisture, which is particularly important in New Zealand’s varying climate. Without proper spacing, your boards can warp, buckle, or crack.
When securing the boards, use high-quality, weather-resistant screws or nails to ensure longevity. In New Zealand, moisture is a significant concern, so it’s crucial to use treated timber or moisture-resistant materials to prevent rot. Timber movement is common in NZ due to humidity, so make sure to secure the boards tightly while allowing for natural movement.
Step 5: Finishing Touches
Once the decking boards are in place, the next step is finishing. Begin by sanding the surface to remove any rough edges or splinters, making the deck safe for walking barefoot. After sanding, you can choose to stain, paint, or leave the wood with its natural finish, depending on your aesthetic preference. Staining is a popular option in New Zealand because it enhances the natural grain of the wood while providing a layer of protection against the elements.
Apply a weatherproofing sealant to protect your deck from NZ’s often unpredictable climate. Rain, strong sun, and humidity can all take a toll on untreated wood, so weatherproofing is essential to extend the life of your deck. Be sure to apply this treatment regularly, as even the best-treated wood can wear over time. Finishing your deck not only improves its appearance but also ensures that it will remain durable for years to come.
Deck Safety And Maintenance
When it comes to keeping your deck in top shape, ensuring both safety and longevity is crucial. Decks are outdoor structures exposed to the elements, so without proper maintenance, they can deteriorate over time. In this section, we’ll walk through essential safety measures and maintenance practices that will help protect your deck from wear and tear, especially in New Zealand’s unique weather conditions.
Ongoing Maintenance Tips
Maintaining your deck is key to extending its life and keeping it looking good year after year. Regular care will prevent common issues such as rot, warping, and mold growth, all of which can compromise the structural integrity of your deck.
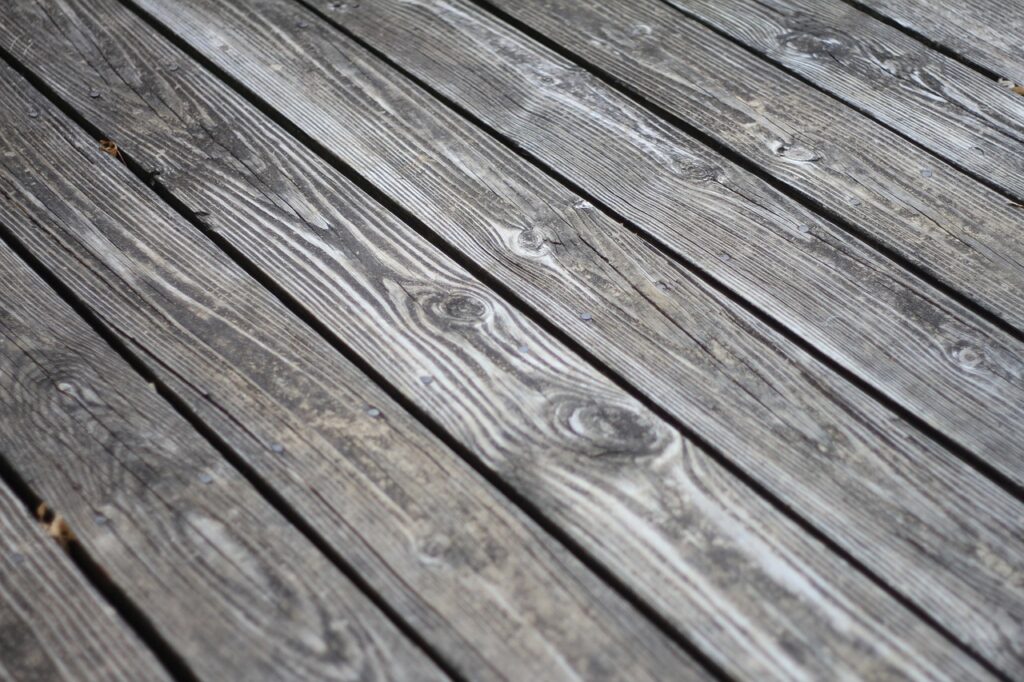
- Cleaning: Start by sweeping your deck regularly to remove dirt, leaves, and debris that can trap moisture and lead to mold or mildew growth. It’s a good idea to give it a deeper clean once or twice a year. A mix of mild soap and water, along with a scrub brush or a deck cleaner, will help get rid of stains, dirt, and any algae that might have accumulated. For tougher grime, consider using a pressure washer, but be cautious not to use too much pressure, as this could damage the wood.
- Staining and Sealing: To protect your deck from the elements, applying a high-quality stain and sealant is essential. Staining helps maintain the color and prevents the wood from fading due to UV exposure, while sealing provides a moisture barrier. Aim to re-stain and re-seal your deck every two to three years, or more frequently if you notice the wood absorbing water or losing its finish. For New Zealand’s climate, opt for products specifically designed to withstand both heavy rains and strong sunlight.
- Regular Inspections: Make it a habit to inspect your deck for signs of damage, such as loose boards, nails, or cracks. Look closely at areas that are prone to moisture, like near railings or around the base of stairs. Fixing small issues early can prevent costly repairs down the line.
Deck Safety Guidelines
Safety should always be a top priority when building or maintaining a deck, especially if your deck is elevated or frequently used by children or the elderly. Implementing the right safety features can make your deck both enjoyable and secure for everyone.
- Railings: If your deck is more than one meter above the ground, it’s a legal requirement in New Zealand to install a railing. Even for lower decks, railings add an extra layer of safety and can also enhance the design. Ensure the railing is sturdy, properly secured, and meets local building codes for height and spacing. Consider adding horizontal or vertical balustrades that don’t allow small children to climb.
- Stairs: If your deck includes stairs, it’s important to make sure they are stable and well-maintained. Treads should be wide enough for comfortable footing, and handrails should be installed on both sides for added support. Anti-slip tape or grip strips can be applied to each step to prevent slipping, especially during wet weather.
- Slip-Resistant Surfaces: Decks can become slippery when wet, which is especially true in New Zealand’s rainy seasons. To prevent falls, consider adding a slip-resistant finish to the deck surface. Some stains and sealers come with anti-slip additives, or you can use rubber mats or textured surfaces on high-traffic areas to increase traction.
Protecting Your Deck from NZ Weather
New Zealand’s climate can be challenging for outdoor structures like decks, with frequent rain, strong UV rays, and high winds in certain regions. Taking steps to protect your deck from these elements will help preserve its appearance and structure.
- Rain Protection: Water is one of the biggest threats to a wooden deck, as it can lead to swelling, warping, and rot. Ensure your deck is built with proper drainage in mind, so water doesn’t pool in any areas. Keep an eye on guttering and downspouts near your deck to ensure they’re functioning properly. After heavy rain, it’s a good idea to check for any standing water and remove it if necessary.
- Sun Exposure: In areas with high UV exposure, like many parts of New Zealand, the sun can quickly fade and dry out the wood. This can cause cracking and make the deck more susceptible to damage. Applying a UV-blocking stain or sealant will help protect the wood from sun damage. You can also consider adding shading elements like a pergola, awning, or outdoor umbrellas to shield the deck from direct sunlight.
- Wind Damage: If your deck is located in a region prone to high winds, it’s important to ensure that all components are securely fastened. Regularly check that screws, bolts, and joists are tightly secured. For additional protection, consider planting windbreaks like hedges or installing wind-resistant screens to reduce the impact of gusts.
Maintaining a deck in New Zealand requires ongoing attention to both safety and weather protection. Regular cleaning, staining, and sealing, along with careful inspections and safety upgrades like railings and slip-resistant surfaces, will not only keep your deck looking great but also ensure it remains a safe and durable part of your home for years to come. With the right care, your deck can be a welcoming outdoor space that stands up to New Zealand’s diverse climate.

Final Thoughts And Outdoor Living Ideas
When your deck is complete, the fun truly begins as you transform it into an inviting outdoor living space that’s both functional and stylish. In this section, we’ll explore how you can enhance your deck with thoughtful design elements and ensure it’s usable all year round, making it the perfect spot for relaxation and entertainment.
Enhancing Your Deck
A deck isn’t just about the structure itself; it’s about creating an atmosphere where you, your family, and friends want to spend time. To achieve that, you’ll want to think about a few key enhancements that will make your deck more comfortable and visually appealing.
Outdoor Furniture
Choosing the right outdoor furniture is essential to maximizing your deck’s functionality. Whether you’re looking for a cozy lounge setup with cushioned chairs and a coffee table or a large dining table for alfresco meals, it’s important to select pieces that can withstand New Zealand’s weather conditions. Materials like teak, rattan, or weatherproof metal are durable options. Don’t forget to add comfort with weather-resistant cushions and throws to create a warm, welcoming vibe.
Lighting
Well-placed outdoor lighting can completely transform the ambiance of your deck, especially in the evening. String lights or fairy lights bring a magical, relaxed feel, while solar-powered lanterns and pathway lights can provide both function and charm without the need for complex wiring. Consider adding soft lighting around seating areas or along railings for a cozy glow, or install brighter lights near dining areas to make outdoor meals easier and more enjoyable.
Plants and Greenery
Adding plants is a great way to soften the hard lines of a deck and create a more natural, inviting environment. Planters with native New Zealand plants, like ferns or flax, can add a touch of greenery and blend your deck seamlessly into its surrounding landscape. Hanging plants or vertical gardens are excellent choices for smaller decks, and potted trees can provide some natural shade. Additionally, herbs or small vegetable gardens can give your space both beauty and practicality.
Decorative Elements
Don’t be afraid to add your personal style through outdoor rugs, pillows, or even artwork designed for outdoor spaces. These touches bring comfort and individuality to your deck, making it feel like a true extension of your home.
Year-Round Enjoyment
While summer might seem like the ideal time to enjoy your deck, with some strategic planning, you can make it a space that’s functional and enjoyable throughout the year. Here are a few tips on how to use your deck in all seasons, even in New Zealand’s varied climate.
Winter-Proofing
When the colder months roll around, a few simple upgrades can turn your deck into a cozy retreat. Outdoor heaters, such as gas or electric patio heaters, can make the space comfortable even on chilly evenings. If you’re after something more atmospheric, consider installing a fire pit (keeping in mind local safety regulations) or using a chiminea. Adding warm blankets, cushions, and outdoor rugs will make the space more inviting and help insulate against the cold. Ensuring your deck is well-maintained with weatherproof sealants will also help protect it from rain and wind during the winter.
Shade Solutions
On the other end of the spectrum, New Zealand’s strong sun can make your deck uncomfortably hot in the summer. Installing a pergola, shade sail, or retractable awning can provide much-needed relief from the sun while adding to the overall aesthetics of your deck. You can also opt for outdoor umbrellas that are easy to move and adjust as the sun changes position throughout the day. If you want a more natural solution, planting fast-growing trees or adding climbing plants around a pergola can offer shade while enhancing the natural beauty of your space.
Weather-Resistant Features
To truly enjoy your deck year-round, think about how the weather impacts your area and prepare accordingly. Windbreaks like trellises, glass panels, or even outdoor curtains can block strong winds and create a more comfortable, enclosed feel without closing off your view. Additionally, consider waterproof furniture covers or built-in storage solutions to protect your cushions and textiles during unexpected weather changes.
All-Season Entertainment
A year-round deck can also serve as an entertainment hub with the right equipment. A built-in barbecue or outdoor kitchen area is perfect for summer but can also be used during winter with adequate lighting and warmth. Incorporating a sound system or outdoor projector can turn your deck into an entertainment zone, perfect for gatherings any time of the year.
Building a deck is an investment in both your home and lifestyle, and with the right enhancements, it can become your go-to space for relaxing, entertaining, and enjoying New Zealand’s beautiful outdoor environment all year long. By carefully selecting furniture, adding thoughtful lighting, and incorporating plants, you can create a warm, inviting space that reflects your style. At the same time, by preparing for weather changes with heating and shade solutions, you can make your deck a year-round retreat that adds comfort and value to your home.
FAQs: About How To Build A Deck NZ
Conclusion
In conclusion, building a deck in New Zealand involves several key steps, starting with planning the deck’s purpose, location, and design. Once you’ve got the basic layout sorted, you’ll move on to selecting the right materials, such as timber or composite decking, and making sure you meet local council regulations. From there, it’s all about preparing the site, installing footings, building the frame, and laying the decking boards. With a few finishing touches, like sanding, staining, and weatherproofing, your deck will be ready for use. Whether you’re tackling the project yourself or hiring a professional, planning with care will ensure your deck is both functional and stylish. Now that you have a solid understanding of the process, it’s time to start planning your own deck with confidence. If you need more help, don’t hesitate to explore additional resources on deck-building in NZ, or consult a professional to bring your vision to life.
Find A Professional Decking Company Near You!
- Balcony Construction Christchurch
- Deck Builders Alexandra
- Deck Builders Alexandra, Clyde & Cromwell
- Deck Builders Auckland
- Deck Builders Central Otago
- Deck Builders Christchurch
- Deck Builders Clyde
- Deck Builders Cromwell
- Deck Builders Hamilton
- Deck Builders Hawkes Bay
- Deck Builders Invercargill
- Deck Builders Kapiti Coast
- Deck Builders Kerikeri
- Deck Builders Lower Hutt
- Deck Builders Nelson
- Deck Builders New Plymouth
- Deck Builders Paihia
- Deck Builders Palmerston North
- Deck Builders Porirua
- Deck Builders Queenstown
- Deck Builders Taupo
- Deck Builders Tauranga
- Deck Builders Upper Hutt
- Deck Builders Wanaka
- Deck Builders Warkworth
- Deck Builders Wellington
- Deck Builders West Auckland
- Deck Staining Palmerston North
About the Author:
Mike Veail is a recognized digital marketing expert with over 6 years of experience in helping tradespeople and small businesses thrive online. A former quantity surveyor, Mike combines deep industry knowledge with hands-on expertise in SEO and Google Ads. His marketing strategies are tailored to the specific needs of the trades sector, helping businesses increase visibility and generate more leads through proven, ethical methods.
Mike has successfully partnered with numerous companies, establishing a track record of delivering measurable results. His work has been featured across various platforms that showcase his expertise in lead generation and online marketing for the trades sector.
Learn more about Mike's experience and services at https://theleadguy.online or follow him on social media: