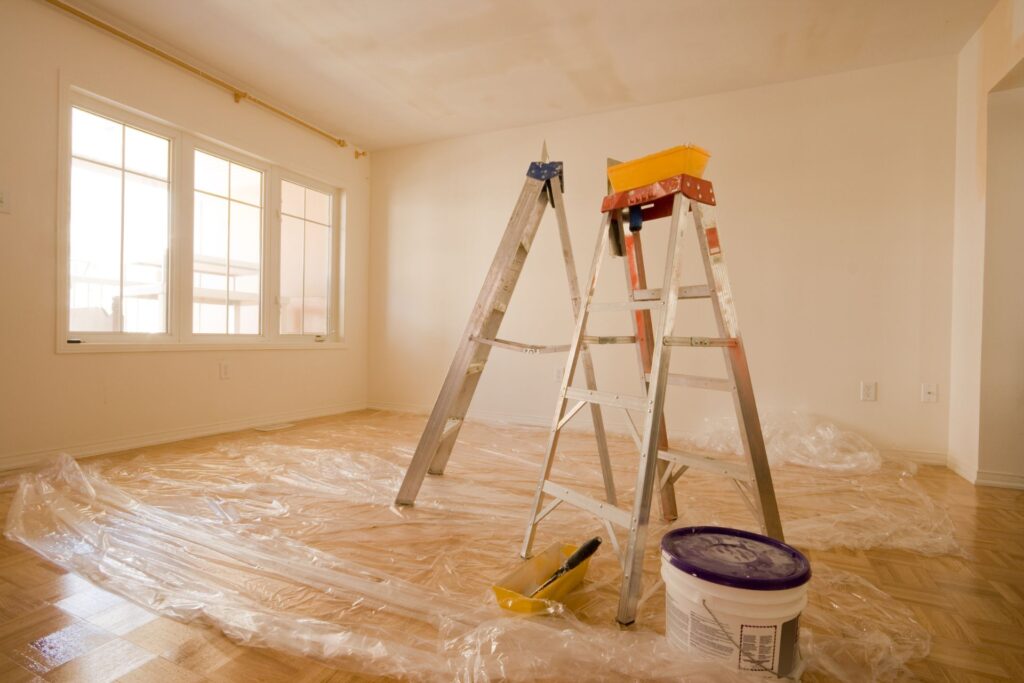
Welcome to your ultimate guide on DIY home renovations! If you’ve ever dreamed of transforming your space without breaking the bank, this blog post is for you. Whether you’re a first-time homeowner or simply looking to refresh your living environment, tackling renovations yourself can be incredibly rewarding. Not only do you save on labor costs, but you also get the satisfaction of bringing your personal vision to life. From small, beginner-friendly updates like painting and swapping hardware to more ambitious projects like laying new flooring, we’ll walk you through renovations you can confidently handle on your own. So, grab your tools and get ready to dive into the exciting world of DIY home improvement! For professional help, contact experienced building contractors in your area.
The best home renovations you can do yourself include painting walls, replacing hardware, installing shelves, laying laminate flooring, and adding a kitchen backsplash. These DIY projects are manageable for most homeowners and can significantly improve the look and feel of your space without requiring professional help. Always start with proper planning, gather the right tools, and know your limits to ensure a successful renovation.
- Why Diy Renovations?
- Easy Diy Renovations For Beginners
- Intermediate Diy Renovations For The Ambitious
- When To Call In The Pros
- How To Prepare For Your Diy Renovation
- Common Mistakes To Avoid During Diy Renovations
- Final Touches: How To Perfect Your Diy Projects
- FAQs: About What Renovations Can I Do Myself
- Conclusion
- Find A Professional Builders Company Near You!
Why Diy Renovations?
When considering a home renovation, the first thing that comes to mind is the potential cost. Hiring contractors can quickly add up, which is why many homeowners are turning to DIY (Do It Yourself) renovations. But beyond just saving money, DIY projects offer several other benefits that can make them an attractive option for many. Let’s break down the key reasons why you should consider handling your renovations yourself.
1. Cost Savings
One of the most significant advantages of DIY renovations is the ability to save on labor costs. When you hire a professional contractor, a large portion of the project’s budget often goes toward paying for labor. By rolling up your sleeves and doing the work yourself, you can substantially cut down on these expenses. Plus, you have control over purchasing materials, allowing you to hunt for bargains and further reduce costs. Of course, you still need to invest in quality tools and materials, but the overall savings can be quite significant when compared to hiring out the job.
Moreover, the more you take on yourself, the more you keep your overall budget manageable. Whether it’s painting, laying down flooring, or installing cabinetry, each task you handle cuts back on the need to bring in outside help—letting you funnel that extra cash into other areas of your home improvement project or simply back into your pocket.
2. Creative Freedom
Doing a renovation on your own doesn’t just save you money—it opens up the door for you to express your creativity. Unlike working with a contractor, who might impose limits or offer designs that don’t fully align with your vision, DIY allows you complete control over the project. Want a custom color scheme for your walls? Go for it. Prefer an unconventional backsplash in your kitchen? No problem. When you take on a renovation yourself, every design decision is up to you.
This level of creative freedom also means you can implement personal touches that make your home truly unique. DIY projects give you the chance to craft a space that reflects your personality, lifestyle, and preferences. Whether you’re aiming for a minimalist, modern look or something more rustic and cozy, the possibilities are endless. You’re in charge, and that makes all the difference.
3. Skill Development
Another often-overlooked benefit of DIY renovations is the valuable skills you can gain along the way. Tackling a home project forces you to learn and adapt, whether it’s figuring out how to install a tile floor, patch drywall, or use power tools. These are skills that not only boost your confidence but can be incredibly useful in future projects. As you grow more comfortable with different types of renovation tasks, you’ll also feel more empowered to take on more complex challenges down the line.
Additionally, these new skills can save you even more money in the long run. Once you’ve mastered the basics, you won’t need to hire someone for smaller repairs or touch-ups. Instead, you can handle these tasks on your own, adding to the overall value of your home and your capabilities as a homeowner.
4. Cautionary Note
While there are plenty of benefits to DIY renovations, it’s also crucial to recognize your limitations. Some projects require specialized knowledge or are simply too large to handle alone. While installing a backsplash might be doable, rewiring your electrical system or replacing your plumbing can be dangerous without the right experience. Knowing when to bring in a professional is essential to avoid costly mistakes or safety issues down the road. We’ll dive deeper into this topic in a later section, so stay tuned!
In summary, DIY renovations provide a great way to save money, unleash your creativity, and gain valuable skills. However, it’s important to weigh these benefits against the potential risks and know when it’s time to call in the pros. By striking the right balance, you can create a home that not only looks fantastic but also reflects your personal touch—without breaking the bank.

Easy Diy Renovations For Beginners
Start Small: Beginner-Friendly DIY Projects
If you’re new to DIY home improvement, it’s best to start with simple yet effective projects that don’t require extensive experience or expensive tools. Here are some beginner-friendly renovations that can give your space a fresh look with minimal investment and effort.
Painting Walls and Ceilings
One of the easiest ways to refresh any room is by painting the walls and ceilings. This DIY project is perfect for beginners because it doesn’t require specialized skills—just a little patience and attention to detail.
Step 1: Choose the Right Colors
Before you start, think about the vibe you want your room to have. Soft neutrals can make a space feel calm and spacious, while bold colors can add energy and personality. To narrow down your options, consider the room’s lighting, the size of the space, and how the color will complement your furniture and décor. It’s always a good idea to test out samples on your walls to see how the color changes throughout the day in different lighting.
Step 2: Prepping the Room
Preparation is key to achieving a professional-looking finish. Clear out as much furniture as possible and cover floors with a drop cloth. Use painter’s tape to protect trim, windows, and door frames. Also, ensure the walls are clean—dust, grime, and grease can prevent paint from adhering properly.
Step 3: Painting Technique
Start with cutting in the edges—this means painting the areas where the wall meets the ceiling, corners, and around doors and windows using a brush. Afterward, use a roller for the larger sections of the walls. For a smooth finish, use long, even strokes and avoid overloading the roller with too much paint. Two coats are typically recommended for full coverage, but check the paint manufacturer’s instructions.
This simple project can dramatically transform the look of your space, adding freshness and character without costing much.
Replacing Hardware (Knobs, Handles, Hinges)
If you’re looking for an easy way to modernize your kitchen, bathroom, or any other area in your home, replacing old hardware is a quick, impactful DIY upgrade. By swapping out worn, outdated knobs, handles, and hinges with modern finishes like brushed nickel, matte black, or brass, you can give your furniture or cabinetry an instant facelift.
Step 1: Choose the Right Style and Finish
Hardware comes in a variety of designs and finishes, so it’s essential to select one that complements your space. For a cohesive look, match the hardware finish with other fixtures in the room, such as faucets or light fixtures. If you want to add some flair, go for decorative styles or trendy pieces that can serve as accents.
Step 2: The Installation Process
Replacing hardware is straightforward. All you need is a screwdriver to remove the old knobs, handles, or hinges and install the new ones. For precision, use a template or a measuring tool to ensure your new hardware is aligned properly, especially if you’re installing it on doors or cabinets. It’s a fast project that can make a world of difference in your space’s aesthetic.
Installing Shelves and Storage
Adding extra storage to your home can help reduce clutter and create a more organized environment. Whether it’s hanging floating shelves or installing new storage units, this DIY project is manageable for most beginners and can be completed over a weekend.
Step 1: Selecting Your Shelves
Think about where you need extra storage and choose shelving accordingly. Floating shelves are great for displaying décor in living rooms or bedrooms, while more robust, bracketed shelves might be better for heavy-duty storage in kitchens, garages, or home offices. Be sure to select shelves that match the style and functionality of the room.
Step 2: Proper Installation
To install shelves properly, first, locate the wall studs to ensure your shelves are secure. If you can’t find studs in the desired location, be sure to use wall anchors to provide additional support. Use a level to make sure the shelves are straight, and measure carefully to position them at the right height. Floating shelves, in particular, can offer a sleek, modern look, while creating useful storage space.
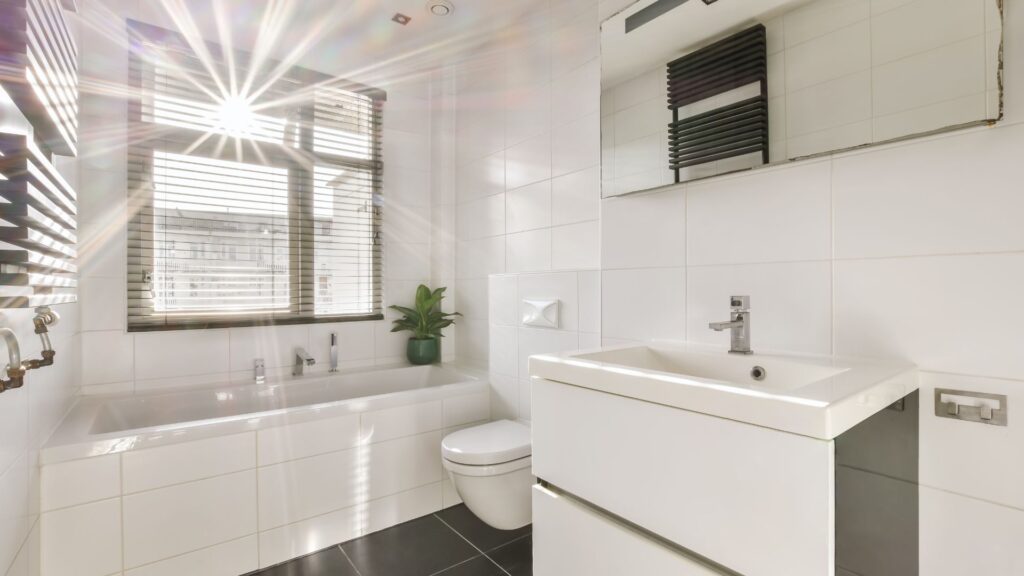
Refreshing Caulking Around Sinks and Tubs
Over time, the caulking around sinks, bathtubs, and showers can become discolored, cracked, or moldy. Refreshing the caulking is a simple yet impactful DIY project that will make your bathroom or kitchen look cleaner and prevent water damage.
Step 1: Remove Old Caulking
Before you can apply new caulk, you’ll need to remove the old, damaged caulk. Use a utility knife or a caulk removal tool to carefully cut away the old material. Be sure to clean the area thoroughly afterward to ensure a smooth application of the new caulk.
Step 2: Applying New Caulk
Once the area is clean and dry, it’s time to apply the new caulking. Choose a caulk specifically designed for bathrooms and kitchens, as these are water-resistant and mold-resistant. Apply the caulk in a steady, continuous line, using a caulking gun for control. Then, smooth the caulk with a damp finger or a caulking tool to ensure it’s evenly distributed. Allow the caulk to dry for the recommended time before exposing it to water.
By refreshing your caulk, you’ll prevent leaks and mold buildup, giving your bathroom or kitchen a cleaner, more polished look.
These simple, beginner-friendly DIY projects are perfect for homeowners looking to make a big impact with minimal investment. Whether it’s painting, upgrading hardware, adding storage, or refreshing caulking, these tasks are cost-effective ways to modernize your home and develop your DIY skills. Start small, build your confidence, and enjoy the satisfaction of transforming your space on your own.

Intermediate Diy Renovations For The Ambitious
Ready for a Challenge? Try These Intermediate Projects
If you’re a DIY enthusiast ready to take your home improvement skills to the next level, these intermediate projects might be just what you’re looking for. While they require more time, effort, and some specialized tools, they can significantly transform your space and boost your home’s value. Below, we’ll break down four projects that are both rewarding and achievable with the right preparation.
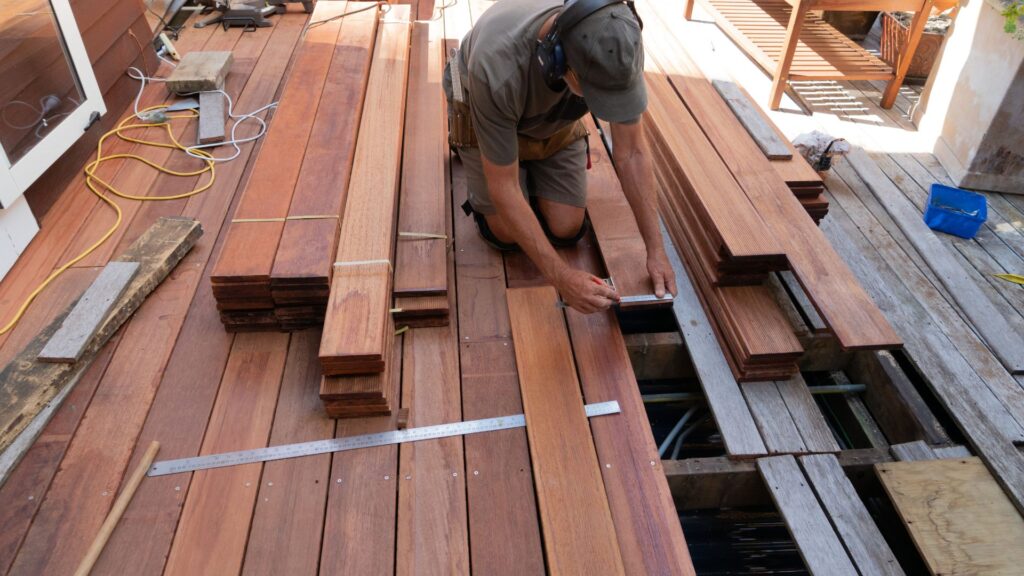
1. Laying Laminate or Vinyl Flooring: A Step-by-Step Guide
Upgrading your floors with laminate or vinyl planks is a game-changer. These materials are durable, stylish, and easier to install than you might think. Here’s how to do it:
- Preparation: Start by clearing out the room completely and removing any existing flooring, including baseboards. Ensure the subfloor is level, clean, and dry. If necessary, use a self-leveling compound to fill any gaps or low spots.
- Acclimate the Flooring: Allow the new laminate or vinyl planks to sit in the room for at least 48 hours. This helps them adjust to the room’s temperature and humidity.
- Cutting the Planks: Measure the length and width of the room. You’ll need a saw to cut the planks to fit, especially around doorways and corners. Be sure to leave a small gap (about 1/4 inch) between the flooring and walls to allow for expansion.
- Installing the Planks: Begin at one corner and lay the planks row by row, clicking or gluing them together as per the manufacturer’s instructions. Stagger the planks for a more natural look.
- Finishing Touches: Once the floor is fully installed, replace the baseboards and use a transition strip between rooms if necessary. Enjoy your brand-new flooring that brings both style and function to your space.
2. Installing a Backsplash in the Kitchen
A kitchen backsplash is a simple yet high-impact project that can add color, texture, and style to your space. Here’s a quick guide:
- Planning and Measuring: Measure the area where you want the backsplash to go. Consider the design—whether you prefer classic subway tiles, mosaic patterns, or even peel-and-stick tiles for an easier application.
- Prepping the Wall: Ensure the wall is smooth, clean, and dry. If you’re tiling over drywall, lightly sand the surface to help the adhesive stick better.
- Cutting the Tiles: Measure the tiles to fit your space. Use a tile cutter or wet saw to cut tiles to fit corners and edges.
- Applying Adhesive: Spread the tile adhesive (thin-set mortar or mastic) with a notched trowel in small sections to prevent it from drying out. Press the tiles into place, using spacers to ensure consistent grout lines.
- Grouting and Sealing: Once the tiles are set (usually after 24 hours), apply grout between the tiles, wiping away the excess with a damp sponge. Once dry, seal the grout to protect against stains.
With the right tools and patience, your kitchen backsplash can go from ordinary to extraordinary in just a weekend.
3. Updating Lighting Fixtures: A Bright Idea
Swapping out old light fixtures for something modern and stylish is a relatively simple project that can greatly enhance your home’s ambiance. Here’s what you need to know:
- Safety First: Before starting, turn off the power at the circuit breaker to avoid any electrical hazards. Use a voltage tester to ensure the power is off.
- Removing the Old Fixture: Unscrew the old light fixture and disconnect the wiring (typically black, white, and green or bare copper for grounding).
- Installing the New Fixture: Connect the wires from the new fixture to the corresponding wires in your ceiling. The black wire connects to black, white to white, and green or copper to the ground screw. Secure the fixture to the ceiling following the manufacturer’s instructions.
- Final Touches: After securing the fixture, turn the power back on and test your new lighting. You’ll instantly notice the difference in your room’s atmosphere.
With this upgrade, your home’s lighting can go from dated and dim to fresh and inviting in no time.
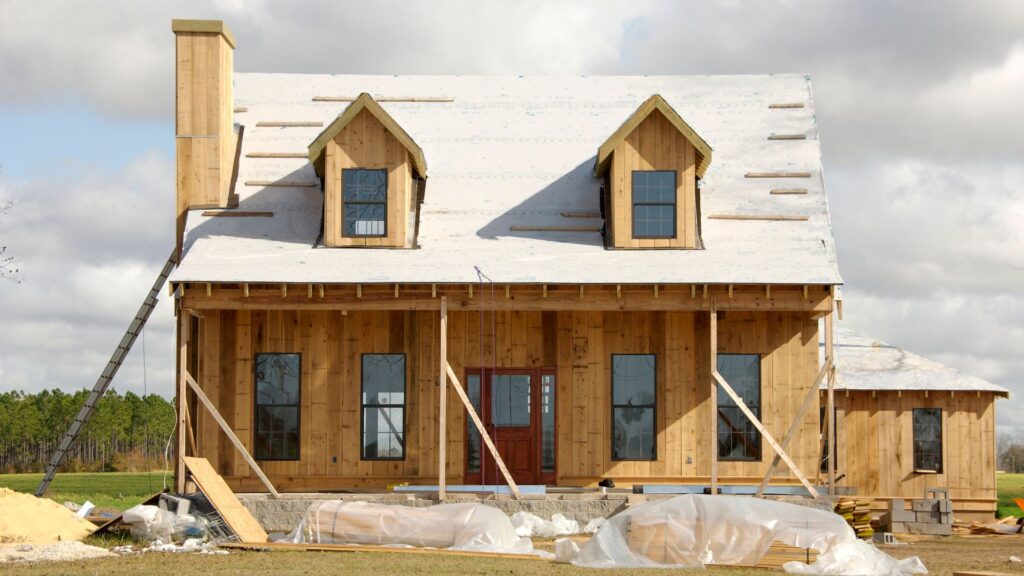
4. Building a Deck or Patio: Outdoor Living at Its Best
If you’re looking to enhance your outdoor living space, building a deck or patio can be a fantastic project. While this is a bit more labor-intensive, the results are well worth it. Here’s how to get started:
- Planning and Permits: Before you begin, check with your local building department to see if you need a permit. Plan your deck or patio layout, deciding on the size, shape, and materials. Common options include pressure-treated wood, composite decking, or concrete pavers for patios.
- Gathering Materials: Based on your design, purchase the necessary materials, including joists, decking boards, screws, and concrete if you’re building a deck, or pavers, sand, and gravel for a patio.
- Foundation Work: For a deck, dig holes for the footings and pour concrete to support the deck’s frame. For a patio, dig out the designated area and lay down a base of gravel and sand for stability.
- Building the Structure: For decks, construct the frame using joists and attach the decking boards securely. For patios, carefully lay the pavers in your desired pattern, ensuring they are level.
- Finishing Touches: Once the main structure is in place, you can add railings, stairs, or decorative touches like planters. Seal the wood or pavers to protect against the elements.
By the end of the project, you’ll have a stunning new outdoor space where you can relax or entertain, making your home even more enjoyable.
Taking on intermediate DIY renovations is a great way to flex your skills and give your home a fresh look. Whether it’s laying new flooring, adding a kitchen backsplash, upgrading lighting, or building a deck, these projects are sure to bring a sense of accomplishment and a significant upgrade to your living space.

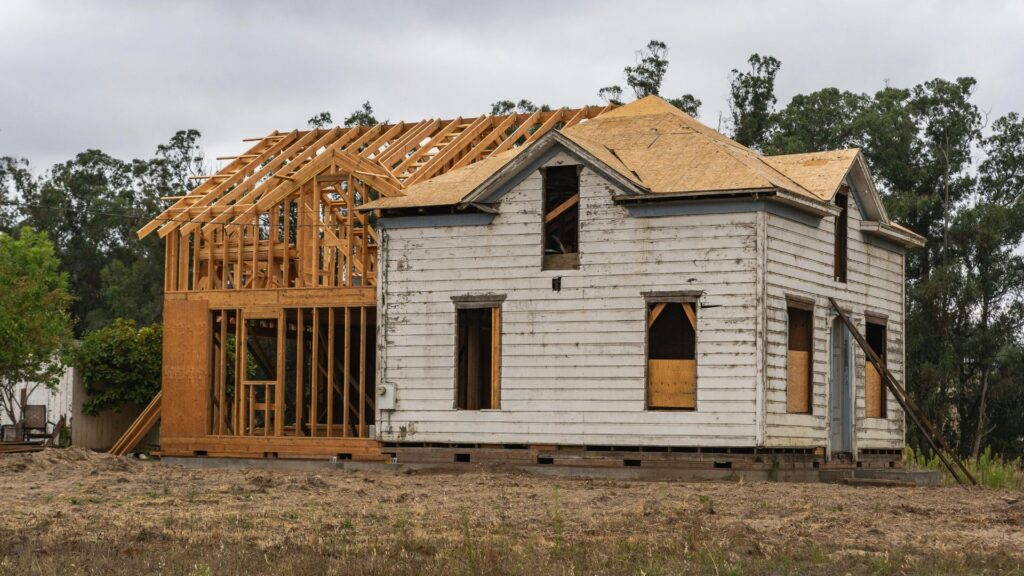
When To Call In The Pros
Undertaking DIY home improvement projects can be incredibly rewarding. However, some tasks require more than just enthusiasm and basic skills. When it comes to specific areas of your home, hiring a professional can ensure the job is done right, safely, and in compliance with building regulations. In this section, we’ll explore four common areas where it’s wise to know your limits and call in the experts.
Electrical Work Beyond Lighting
While changing a light fixture or replacing a switch plate might feel manageable for a weekend project, more complex electrical work is a whole different ball game. Any task that involves rewiring, installing new circuits, or working on the breaker panel poses significant risks. Electrical systems are tightly regulated by building codes for good reason—improper wiring can lead to fires, electric shocks, or system failures that could endanger your home and your family.
Hiring a licensed electrician ensures the job is done according to local safety codes and standards. These professionals have the expertise to diagnose problems, handle intricate wiring, and make sure your home’s electrical systems are up to code, providing peace of mind and long-term safety.
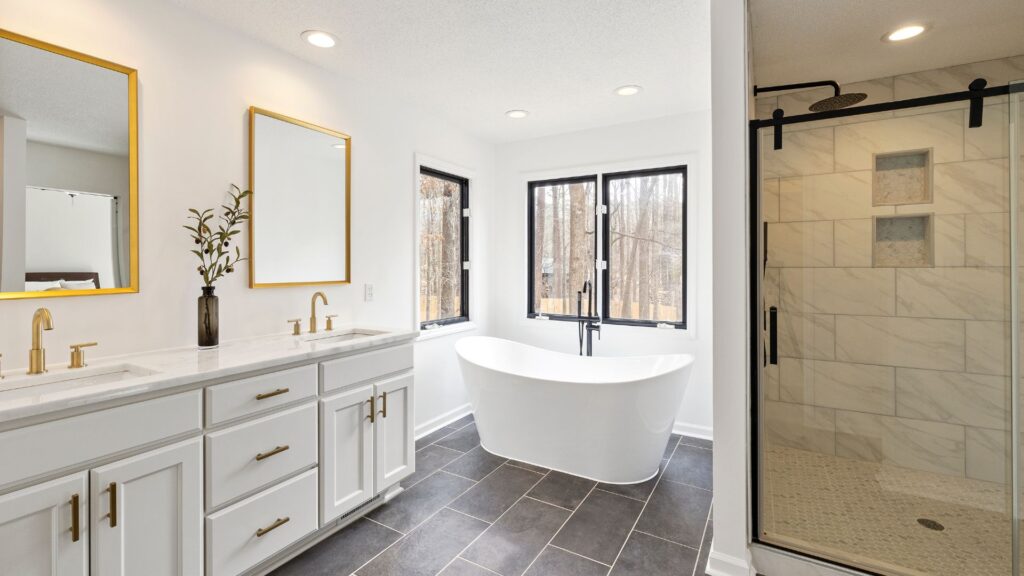
Plumbing Overhauls
When it comes to plumbing, many homeowners feel comfortable handling minor repairs like replacing a faucet or fixing a leaky toilet. However, when you’re dealing with more extensive tasks, such as moving water lines, installing large appliances (like a dishwasher or water heater), or reconfiguring your home’s plumbing layout, it’s best to hire a professional plumber.
Poorly installed plumbing can lead to leaks, water damage, and even mold growth, which can turn into costly repairs down the road. Professionals have the necessary tools, experience, and knowledge to handle complex installations and repairs while ensuring that everything is watertight and compliant with local building codes.
Structural Changes
Thinking of knocking down a wall to create an open floor plan? It might seem like a straightforward project, but structural changes are far from simple. Any renovation involving load-bearing walls, foundations, or structural elements should be left to professionals. A mistake in this area could result in serious damage to your home’s stability, leading to expensive repairs or, worse, compromising the safety of the building.
Licensed contractors are trained to evaluate which walls are load-bearing and how to safely alter the structure without causing damage. They also understand the importance of getting permits for structural changes, ensuring the project is legal and safe.
Roofing Repairs
Roof repairs may seem like a simple patch job, but they come with considerable risks. Working at heights, handling heavy materials, and dealing with unpredictable weather conditions can turn what seems like a simple task into a dangerous situation. Beyond the physical risks, improper roof repairs can lead to leaks, water damage, and insulation problems.
Roofing professionals are equipped with the right safety gear, tools, and experience to repair or replace your roof correctly and efficiently. They know how to spot hidden issues that a homeowner might miss and can ensure your roof is in top condition to protect your home for years to come.
Knowing your limits when tackling home improvement projects is essential for both your safety and the quality of the results. While DIY projects can be fun and cost-effective, there are certain jobs that should always be left to professionals. Whether it’s complex electrical work, plumbing overhauls, structural changes, or roofing repairs, trusting a skilled contractor ensures the job is done right the first time, keeping your home safe and up to code.

How To Prepare For Your Diy Renovation
Before You Start: Planning and Preparing for a DIY Project
Embarking on a DIY renovation can be an exciting and rewarding experience. However, to ensure a successful outcome, it’s essential to invest time in planning and preparation. Before you grab that hammer or drill, follow these steps to lay the groundwork for a smooth, efficient renovation.
1. Set a Budget
One of the first and most important steps in any DIY renovation project is setting a realistic budget. Begin by determining how much you’re willing to spend on the entire project, including materials, tools, and unexpected costs. Take into account the size of the renovation and the quality of materials you’ll need. It’s also wise to allocate 10-20% of your total budget for contingencies—because let’s face it, unforeseen expenses often arise in DIY projects.
A good strategy is to make a list of the materials and tools you’ll need, along with their estimated prices. Research local hardware stores and online platforms to compare costs. This way, you’ll have a clearer idea of what you can afford and where you might be able to cut costs without sacrificing quality.
2. Gather the Right Tools
Before starting any renovation, it’s essential to ensure you have the right tools at your disposal. The last thing you want is to stop halfway through a project because you’re missing something critical. A well-stocked toolbox can make all the difference between a smooth project and one filled with delays.
Here’s a checklist of essential tools for most DIY renovations:
- Drill: A power drill is crucial for tasks ranging from hanging shelves to assembling furniture.
- Saw: Whether it’s a handsaw or a power saw, you’ll need this for cutting wood or other materials.
- Measuring Tape: Accurate measurements are the foundation of any successful renovation.
- Level: Ensure everything you hang or build is straight and level.
- Screwdrivers: Both flathead and Phillips head screwdrivers are must-haves.
- Hammer: A basic tool for nailing and other tasks.
- Utility Knife: Perfect for cutting materials like drywall, carpets, and packaging.
- Pliers: Helpful for pulling nails or holding objects steady.
- Safety Gear: Don’t forget protective glasses, gloves, and earplugs. Safety should always come first.
By gathering these tools beforehand, you’ll minimize interruptions and keep your project on track.
3. Measure Twice, Cut Once
The old adage “measure twice, cut once” couldn’t be more relevant in DIY renovations. Proper measurements are crucial to avoid waste, rework, and costly mistakes. For example, cutting a piece of wood too short means you’ll need to buy more materials, adding unnecessary time and expense to your project.
When measuring, always use a high-quality measuring tape and double-check your figures before making any cuts. Taking an extra minute to confirm your measurements can save you hours of frustration later on.
It’s also wise to draw out your plans and measure the area where you’ll be working. This helps you visualize the space, making it easier to spot potential issues before they arise. Whether you’re hanging shelves or installing new flooring, careful measurement ensures your project looks professional and fits perfectly.
4. Research and Watch Tutorials
The beauty of DIY in today’s world is the wealth of information available at your fingertips. Take advantage of this by thoroughly researching the project you’re about to undertake. Watching tutorials is an excellent way to get familiar with the tools, techniques, and potential challenges you might face.
YouTube, blogs, and DIY websites offer countless step-by-step guides on almost any project you can think of. Don’t just rely on one source—watch multiple videos or read a variety of articles to get different perspectives and tips. This can also help you avoid common mistakes or learn shortcuts that make the process easier.
Additionally, many hardware stores offer free workshops or online tutorials, which can be especially helpful if you’re tackling a larger project like tiling a floor or installing new plumbing. The more you know, the smoother your renovation will go.
Final Thoughts
Preparing for a DIY renovation is all about thoughtful planning. By setting a budget, gathering the right tools, measuring carefully, and investing time in research, you’ll be well on your way to a successful and stress-free project. Remember, patience is key—take your time to do things right the first time, and you’ll be proud of your handiwork for years to come.

Common Mistakes To Avoid During Diy Renovations
Avoid These Pitfalls: Mistakes to Watch Out For
When it comes to DIY home renovations, there’s nothing more satisfying than seeing your hard work come together in a beautiful, functional space. However, many homeowners fall into common traps that can lead to costly repairs, wasted time, or even serious injuries. In this section, we’ll go over some of the most frequent mistakes DIYers make and how to avoid them. Whether you’re a seasoned DIY enthusiast or just starting out, keeping these tips in mind will save you both time and money while ensuring a smoother renovation process.
1. Underestimating the Project Scope
One of the biggest mistakes in any DIY project is underestimating how long it will take and how complex it really is. Many homeowners are excited to jump right into a project, only to find that what seemed like a quick fix turns into a much larger, more time-consuming task.
It’s essential to plan realistically by evaluating every step of the project and the tools or materials needed. Don’t just rely on a quick internet search or a short tutorial video; take the time to fully understand what the project entails. This includes accounting for potential complications that could arise, which are often missed when you rush through the planning phase. Giving yourself a buffer in your timeline will reduce stress and ensure you’re not left with an unfinished project or unexpected hurdles.
2. Skipping Safety Precautions
DIY projects often involve working with power tools, electricity, chemicals, or heights, all of which can be hazardous if safety isn’t prioritized. One of the most dangerous mistakes a DIYer can make is overlooking the importance of safety gear and proper safety protocols.
It’s crucial to use the right protective equipment, such as safety goggles, gloves, and masks, especially when cutting materials or dealing with harmful substances like paint fumes. If your project involves electricity, make sure the power is turned off before you start working on wiring. Additionally, always follow manufacturer guidelines for tool usage and handle all equipment responsibly to avoid injury. Safety should never be an afterthought—it’s a proactive measure to keep you and those around you safe.
3. Poor Preparation
Proper preparation is key to the success of any home improvement project. One of the most common DIY mistakes is neglecting this step, which can lead to poor, unprofessional-looking results. For example, painting over dirty or greasy walls, or failing to sand surfaces before staining or applying finish, often results in uneven, peeling, or unattractive surfaces.
Preparation can also involve cleaning the area, measuring materials correctly, and using the appropriate primers or sealants to ensure that your finishes are smooth and long-lasting. Remember, taking the time to properly prep your space before getting to the “fun” part can make a huge difference in the final outcome.
4. Overlooking Permits and Regulations
Many homeowners overlook the need for permits when tackling seemingly straightforward projects, such as building a deck, putting up a fence, or even remodeling a bathroom. However, skipping this crucial step can lead to legal headaches, fines, or even being forced to tear down your hard work.
Each locality has its own set of building codes and regulations that govern home improvements. It’s important to check with your local government or homeowner’s association before starting any major work to see if you need a permit. Failing to do so could not only delay your project but also create larger problems if your renovations don’t comply with local codes. While the permitting process can seem like a hassle, it ensures that your project is done safely and up to standard, which will protect your home’s value and your personal investment in the long run.
By keeping these common mistakes in mind, you can tackle your DIY renovations with confidence. Proper planning, attention to safety, and thorough preparation are key to ensuring that your projects turn out just the way you envision. And while it may be tempting to cut corners, taking the extra time to do things right will save you from future headaches and ensure that your hard work pays off.

Final Touches: How To Perfect Your Diy Projects
Finishing Strong: Add the Perfect Touches
After spending hours, days, or even weeks on a DIY project, it’s tempting to call it done once the major tasks are completed. However, the final touches are what truly set your project apart and give it that polished, professional look. These last steps might seem small, but they can make a world of difference in how your project is perceived. Let’s break down how you can finish strong and take your DIY project to the next level.
Attention to Detail
The key to making your DIY project look like a pro-level job is paying attention to the little things. This could include something as simple as ensuring all corners are aligned perfectly or making sure the finishing trim is neatly installed. These seemingly minor details often catch the eye and can make or break the overall presentation of your project. For instance, a crooked trim or uneven paint lines can make an otherwise fantastic renovation seem amateurish.
Start by going back over your project and checking for any imperfections. Are there gaps in the trim? Does the paint need a bit of a touch-up? Is everything leveled and symmetrical? Sometimes, taking a fresh look at your work after a short break can help you spot issues that you might have missed while in the thick of it.
Another great tip is to clean up as you go. Not only will this make the final reveal look more appealing, but it will also help you focus on any areas that need tweaking without the distraction of dust or debris. Clean paint drips, smooth out rough edges, and buff surfaces for a spotless finish. A well-organized and clean space speaks volumes about the quality of your work.
Decorating the Space
Now that the hard work is done, it’s time to add those personal touches that will truly make your space shine. Decorating newly renovated areas is an excellent way to highlight all the effort you’ve put in and to make the space feel complete.
Start with small decorative accents like new throw pillows that match your color scheme, or hang artwork that enhances the atmosphere of the room. A well-placed piece of art can draw attention to a specific area and act as a conversation starter. You could also consider incorporating plants into your space. Greenery not only adds a touch of life to the room but can also improve the overall ambiance by creating a more relaxed and inviting environment.
Lighting can also play a significant role in decorating and finalizing your project. The right lighting can enhance architectural features and showcase the craftsmanship of your DIY work. Consider updating light fixtures or adding accent lighting to highlight certain areas of the room. Whether it’s a cozy lamp on a side table or a bold overhead chandelier, lighting has a way of tying everything together and setting the right mood.
Lastly, don’t forget about the overall flow of the space. Rearrange furniture if necessary to complement your newly renovated area, ensuring that everything looks cohesive and functional. This stage is where you get to enjoy the fruits of your labor and make the space uniquely yours.
By taking the time to add these finishing touches and focusing on both the details and the decor, you’ll turn your DIY project from good to great. Each final touch will reflect your hard work and attention to craftsmanship, leaving you with a space that feels both personal and professionally done.

FAQs: About What Renovations Can I Do Myself
Conclusion
In conclusion, we’ve covered a range of DIY renovation projects, from beginner-friendly tasks like painting and small decor updates to more intermediate projects such as installing flooring or replacing light fixtures. We also highlighted when it’s smart to call in the professionals, especially for complex jobs like electrical work or major plumbing. If you’re just getting started with DIY, don’t hesitate to begin with something simple and gradually build your skills and confidence for larger projects. The satisfaction of transforming your space with your own hands is unbeatable! We’d love to hear your DIY renovation stories—feel free to share your experiences or ask questions in the comments below. And don’t forget to bookmark this post as a go-to guide for your future home improvement plans. Happy renovating!
Find A Professional Builders Company Near You!
- Auckland Builders For Small Jobs
- Builders Alexandra
- Builders Ashburton
- Builders Auckland
- Builders Blenheim
- Builders Cambridge
- Builders Central Otago
- Builders Christchurch
- Builders Clyde
- Builders Cromwell
- Builders Dunedin
- Builders Feilding
- Builders Gisborne
- Builders Hamilton
- Builders Hastings
- Builders Havelock North
- Builders Hawkes Bay
- Builders Hibiscus Coast
- Builders Invercargill
- Builders Johnsonville
- Builders Kapiti
- Builders Kerikeri
- Builders Levin
- Builders Lower Hutt
- Builders Manawatu
- Builders Masterton
- Builders Mosgiel
- Builders Napier
- Builders Nelson
- Builders New Plymouth
- Builders Oamaru
- Builders Paihia
- Builders Palmerston North
- Builders Paraparaumu
- Builders Porirua
- Builders Pukekohe
- Builders Queenstown
- Builders Rangiora
- Builders Rolleston
- Builders Taupo
- Builders Tauranga
- Builders Te Awamutu
- Builders Timaru
- Builders Tokoroa
- Builders Upper Hutt
- Builders Waikanae
- Builders Wanaka
- Builders Warkworth
- Builders Wellington
- Builders West Auckland
- Builders Whakatane
- Builders Whanganui
- Builders Whangarei
- Handyman Wellington
- Home Builders Rotorua
- Kitchen Removal Service Auckland
- Wellington Builders For Small Jobs
About the Author:
Mike Veail is a recognized digital marketing expert with over 6 years of experience in helping tradespeople and small businesses thrive online. A former quantity surveyor, Mike combines deep industry knowledge with hands-on expertise in SEO and Google Ads. His marketing strategies are tailored to the specific needs of the trades sector, helping businesses increase visibility and generate more leads through proven, ethical methods.
Mike has successfully partnered with numerous companies, establishing a track record of delivering measurable results. His work has been featured across various platforms that showcase his expertise in lead generation and online marketing for the trades sector.
Learn more about Mike's experience and services at https://theleadguy.online or follow him on social media: