Welcome to your ultimate guide to horse arena building in New Zealand. Whether you’re planning your first backyard arena or upgrading an old setup, getting it right from the start saves you time, money, and headaches. From navigating council rules to choosing the right surface, there’s a lot to consider, especially with NZ’s varied weather and terrain. This guide covers everything you need to know, step by step, in clear language. No jargon. No guesswork. Just real, practical advice to help you build an arena that works for your space, your horses, and your goals. Consider working with concrete-contractors-nz/concrete-floor-slabs-kapiti-coast/”>concrete-contractors-nz/concrete-layers-lower-hutt/”>concrete services for professional results.
Horse arena building in NZ involves planning, designing, and constructing a safe, durable riding surface for horses. It includes site selection, drainage, base preparation, surfacing, and often fencing or lighting. Factors like weather, soil type, and council regulations play a key role in creating a functional arena suited to New Zealand conditions.
- Why A Good Arena Matters
- Key Considerations Before You Build
- Choosing The Right Site
- Arena Size And Layout
- Arena Base Construction
- Surfacing Options In NZ
- Indoor Vs Outdoor Arenas
- Council Permits & NZ Regulations
- Maintenance Tips
- Estimated Budget Breakdown
- FAQs: About Horse Arena Building NZ
- Conclusion
Why A Good Arena Matters
Building a horse arena isn’t just about having a flat space to ride on. It’s about creating a safe, reliable, and comfortable environment for both you and your horse. Whether you’re schooling a young horse or fine tuning movements for competition, the quality of your arena plays a big role in everyday results.
Safety Comes First
A well built arena helps prevent slips, trips, and strains. Horses put enormous pressure on their joints during rides, especially when turning, stopping, or jumping. If the ground is uneven, muddy, or too hard, the risk of injury increases. That could mean a simple misstep turns into weeks of rehab.
Imagine riding after a storm, your arena’s flooded, the surface is slippery, and the edges are pooling water. It’s not just frustrating. It’s dangerous. Your horse may struggle to maintain balance or confidence, leading to hesitation, mistakes, or worse, accidents.
Better Performance Every Ride
A consistent riding surface helps your horse focus. They can move freely without adjusting for unpredictable ground. That means better turns, more confident jumps, and clearer communication between horse and rider.
Riders also benefit. You’ll spend less time adjusting to the terrain and more time working on real progress. Whether you’re practicing dressage, flatwork, or poles, a solid arena supports steady growth.
Long-Term Cost Savings
Cutting corners early can cost you later. Poorly designed arenas break down fast. You’ll end up spending more on fixes, regrading, or drainage repairs than if you’d done it right from the start. Worse, if you damage your horse due to a poor surface, vet bills can skyrocket.
Investing in good base layers, proper drainage, and quality surfacing saves you money over time. It reduces maintenance and makes sure you’re not losing days, or months, of riding due to repairs or weather.
One Real-Life Scenario
Ever ridden in a soggy paddock after a storm? You know the feeling, each step sinks. You can’t trot properly. Your horse starts hesitating or losing grip. That’s what happens when an arena isn’t built with drainage or surface quality in mind.
When you build an arena the right way, you don’t have to cancel rides or worry about slipping. You just ride.
Key Considerations Before You Build
Before you start building a horse arena in New Zealand, take time to plan the essentials. Rushing into construction without answering key questions can lead to poor results, wasted money, and ongoing issues. This section covers the most important decisions to make early, so you can build with confidence.
Purpose: Riding Lessons? Competitions? Personal Use?
Why are you building the arena? Your answer will shape everything from layout to surfacing.
- For personal riding: You might only need a basic 20x40m space.
- For lessons or clinics: You’ll need extra room for horses, riders, and spectators.
- For competitions: You’ll need to meet specific size and surface standards.
Be honest about your goals. It’s easier to scale up later if the design supports it from the beginning.
Budget: Initial Vs Long-Term
Arena costs go beyond the first quote. Think about both the upfront build and the future upkeep.
- Initial costs: Earthmoving, fencing, surfacing, permits, and possibly drainage systems.
- Ongoing costs: Dragging the surface, top, ups, repairs, and weed control.
You don’t need to spend a fortune, but you do need a clear plan. Cutting corners now often means bigger bills later.
Local Council Regulations: Resource Consents, Drainage Rules
Rules vary across NZ regions. Some councils are stricter than others, especially with rural properties or earthworks.
- Check if your arena requires resource or building consent.
- Some councils require drainage plans or stormwater management.
- If you’re adding lighting or structures, permits are likely needed.
Have you checked your local zoning rules yet? One quick call to the council can save months of delays, or even fines.
Access And Positioning: Sunlight, Wind Exposure, Truck Access
Where you build matters just as much as how you build.
- Sunlight: Place the arena to avoid glare during key riding hours.
- Wind: Avoid exposed hilltops or valleys where wind channels.
- Access: Ensure trucks, floats, and machinery can reach the site easily.
- Future needs: Leave room for seating, lighting, storage, or shelter down the track.
Good access and positioning will save you hassle every time you use the arena, so don’t treat it as an afterthought.
Choosing The Right Site
Before you think about the surface, fencing, or lighting, start with one of the most critical parts of arena construction, site selection. Picking the right spot can save you thousands of dollars and a lot of future maintenance. It affects drainage, usability, and even the lifespan of your riding surface. Let’s break it down.
Flat Ground Vs Sloped: What’s Easier To Manage
Building on flat land is often simpler and more cost effective. It requires less excavation, less soil movement, and fewer structural adjustments. A flat site also makes it easier to install an even surface and manage water flow.
But if you only have sloped land available, don’t worry, it can still work. It just takes more prep. You’ll need proper leveling, potential retaining walls, and more advanced drainage planning. This adds time and increases your budget. Many builders in hilly areas use cut, and fill techniques, which involve digging into the slope and using the soil to level the base.
- Tip: Avoid building on sharp slopes unless you’re ready for a complex construction project.
Drainage Potential: Keep Water Off The Arena
New Zealand’s weather varies widely, and rainfall can quickly damage a poorly drained arena. That’s why drainage should never be an afterthought.
A good site naturally sheds water, meaning it’s not at the bottom of a valley or sitting in a boggy patch. You want your arena to sit slightly elevated so rainwater flows away from it. Installing a proper base layer and slope (usually a 1–2% crown or camber) helps move water off the surface quickly.
In wetter regions like the West Coast or parts of the Waikato, drainage is even more crucial. You may need additional drains around the arena or a more porous surface to handle heavy rain.
- Pro move: Test the site after a storm. If you see standing water 24 hours later, look elsewhere.
Soil Type: Importance Of A Firm Base
Soil is the foundation of your arena. If it’s soft, sandy, or unstable, your arena base won’t hold up, and neither will your surface.
In New Zealand, common soil types include clay, loam, and sandy soils. Clay holds water and can shift under pressure, while sandy soils drain well but may lack stability. Ideally, you want compact, stable soil that holds its shape when compacted.
If your soil isn’t ideal, you may need extra layers like geotextile fabric or deeper gravel foundations. This adds to your cost but protects the entire structure in the long run.
- Quick check: Grab a handful of soil after rain. Does it crumble or stick like glue? That’s your drainage clue.
NZ Regional Differences: It’s Not One, Size, Fits, All
Your region plays a big role in arena site selection. For example,
- Canterbury: Known for its drier climate and flatter land. Easier for outdoor builds, less concern about heavy rain.
- Waikato: Wetter, especially in winter. You’ll need excellent drainage and possibly a covered arena to use it year round.
- Otago: Can have rocky or uneven terrain. Site prep may involve more excavation.
- Northland: Subtropical rains can flood low, lying land, look for high ground with solid footing.
What works well in Southland may be a poor choice in Taranaki. Always consider local weather, soil composition, and topography before breaking ground.
Arena Size And Layout
Choosing the right arena size and layout is one of the most important steps in building a functional, safe, and long, lasting horse arena in New Zealand. Your arena should reflect your riding goals, available space, and budget. This section breaks down the standard sizes for different disciplines, how to decide on the right dimensions for your property, and what extra space you’ll need around the arena.
Standard Sizes For Different Disciplines
Arena dimensions vary depending on what you plan to use the arena for. Here are the most common sizes based on discipline.
Dressage
Dressage arenas typically come in two standard sizes. A 20×40 meter arena is used for training and lower level tests, while a 20×60 meter arena is used for higher level competition. The longer arena allows for extended movements and more advanced patterns.
Show Jumping
Jumping arenas need more space for safe approaches, landings, and turns. While there’s no strict standard, most riders go for at least 30×60 meters or larger. If you plan to include full courses, a wider and longer layout provides better flow.
Schooling Or General Use
For casual riding, groundwork, or small group lessons, a 20×40 to 25×50 meter arena is often enough. It offers enough flexibility without being overwhelming to maintain.
How Much Space You Really Need
It’s easy to think bigger is always better, but it’s more important to match your arena size to your riding needs. Consider these questions.
- Will you ride alone or with others?
- Are you planning to use jumps, poles, or barrels?
- Do you expect to host clinics or small competitions?
- Is your property flat enough for a large arena?
If your land or budget is limited, start with the most practical size. A well built 20×40 meter arena can still handle a wide range of riding activities. Just make sure the layout doesn’t limit your goals down the line.
Also, it’s smart to consider how horses move. They need space to turn, especially at faster gaits. If the arena feels cramped, horses may start resisting work.
Leave Room For
Your riding surface isn’t the only thing that needs space. Always leave extra room around the arena for added features that improve usability and safety.
Viewing areas
Even if you don’t expect crowds, it’s useful to have space for a trainer, friend, or family member to watch safely. You might want to add seating, a mounting block, or a shaded shelter.
Lighting
If you plan to ride in the early mornings or evenings, allow for pole mounted lights around the perimeter. Avoid placing them too close to the riding area to reduce glare and shadows.
Fencing
Fences keep horses contained and help define the riding space. Most people add a simple post, a rail fence or use flexible tape systems. Make sure there’s at least 1–2 meters of space around the outside of the arena for maintenance and safe horse handling.
A thoughtful layout can make a huge difference in the long term performance of your arena. Don’t rush this part, spending time on smart design now will save you from expensive changes later.
Arena Base Construction
Building a solid arena base is one of the most important steps in horse arena construction. A well built base keeps the surface stable, drains water effectively, and protects your investment for years. Skimping on this stage leads to poor footing, puddles, and expensive repairs.
Here’s a simple breakdown of each layer, what it does, and how to get it right.
Layer Breakdown
Subgrade
This is the natural ground underneath the arena. It must be cleared, leveled, and compacted. If your soil is soft, clay, heavy, or uneven, you’ll need to bring in machinery to stabilize it. A poor subgrade leads to movement and water pooling. Some contractors also add lime or other stabilizers to strengthen soft soil.
Base Layer (AP40, Limestone, etc.)
On top of the subgrade goes your base layer, this is the foundation that supports your surface. In New Zealand, common materials include AP40 (a compactable mix of crushed rock and fine particles), crushed limestone, or quarry dust. This layer is compacted multiple times to make it firm and level. It’s usually laid 100–150mm deep depending on soil conditions and intended use.
Drainage System
Good drainage is non-negotiable. Without it, water will sit on the surface and ruin your arena. Many NZ arenas use perforated drainage pipes laid in trenches beneath the base. Others rely on sloped bases with gravel for passive drainage. A geotextile fabric (laid between the base and surface layers) is often used to stop the surface material from mixing into the base.
Common Mistakes To Avoid
Skipping The Geotextile Fabric
This layer may seem optional, but it keeps your surface clean and prevents it from sinking into the base over time. Without it, you’ll lose material and footing consistency.
Not Compacting Each Layer
Rushing the compaction process means the layers won’t hold up under pressure. Loose layers lead to dips, shifting, and uneven surfaces.
Ignoring Local Soil Conditions
What works in Waikato might fail in Southland. If your subsoil retains water or is prone to frost, your arena needs special attention, don’t follow a generic plan.
Poor Drainage Planning
Relying on natural runoff or forgetting to add slope can lead to soggy, unusable footing after just one rainy week.
Estimated Costs In NZD (Rough Ranges)
Here’s what you might expect to pay for the base phase alone.
- Site preparation and subgrade leveling: $3,000 to $6,000
- Base material (AP40 or similar): $6,000 to $12,000 for a 20x40m arena
- Drainage installation: $3,000 to $8,000 depending on the system
- Geotextile fabric (optional but recommended): $2,000 to $3,000
Prices can vary widely depending on region, access, and soil type. For remote areas, transport of materials can add 10–20% to the cost.
Investing properly in your arena base means fewer problems in the future. Get this right, and you’ll spend more time riding , and less time dealing with puddles, potholes, or mud.
Surfacing Options In NZ
Choosing the right surface is one of the most important steps in building a horse arena in New Zealand. The surface affects your horse’s comfort, your safety, and the long term performance of the arena. It also influences how much maintenance you’ll need to do, and how much money you’ll spend over time. Below, we break down the most commonly used arena surfaces in NZ, what they cost, how to maintain them, and what works best in wetter regions.
Most Used Surfaces
Sand
Sand is the most common and affordable surface in New Zealand. It offers good cushioning and grip for most riding styles. Washed river sand or crusher dust are often used because they’re less dusty and more stable.
Pros
- Affordable
- Readily available
- Drains well if installed correctly
- Low, impact on horse joints
Cons
- Can compact over time
- May need regular leveling
- Dusty if not watered or mixed with other materials
Sand + Rubber Mix
This option combines the firmness of sand with the spring and shock absorption of shredded rubber. It’s popular for jumpers and competitive arenas.
Pros
- Improved cushioning
- Reduces impact stress
- Less dust than plain sand
- Holds moisture longer
Cons
- More expensive
- Rubber can break down under UV exposure
- Harder to source quality rubber in rural areas
Wood Fiber
Wood chip or fiber mixes are becoming more popular in NZ. They’re eco, friendly and have a soft, springy feel underfoot.
Pros
- Good shock absorption
- Natural and biodegradable
- Helps retain moisture
Cons
- Breaks down faster than other surfaces
- Needs topping up more often
- Can be slippery when wet or decomposing
Synthetic Blends
These blends often include sand, textile fibers, wax, or polymers. They’re designed to deliver consistent footing in high performance arenas.
Pros
- High durability
- Consistent ride quality
- Weather, resistant
Cons
- Most expensive option
- Often requires professional installation
- May not be practical for small private arenas
Cost Comparisons
Arena surfacing costs can vary depending on region, quality, and delivery fees. Here’s a general guide.
- Sand: $10–$30 per tonne
- Sand + rubber mix: $40–$80 per square metre (installed)
- Wood fiber: $20–$50 per square metre
- Synthetic blends: $80–$120+ per square metre
These are rough estimates. Always get local quotes, especially in rural areas where transport can increase costs.
Maintenance Needs
Each surface has different maintenance requirements.
- Sand needs frequent leveling and occasional watering.
- Rubber mix reduces dust but still requires grading.
- Wood fiber must be topped up every 1–2 years and monitored for rot.
- Synthetic blends require less day to day care but may need professional attention for regrading or material adjustment over time.
Tip: No matter what surface you choose, regular grooming with a harrow or drag will extend its life.
Best Options For Wet Regions Of NZ
New Zealand’s wetter areas, like the West Coast or parts of Waikato, need surfaces that drain well and don’t get boggy.
- Sand with proper drainage layers is still the top choice for wet regions.
- Sand + rubber mix helps retain bounce and reduce compaction in rain.
- Synthetic blends perform well in all weather, though at a higher cost.
- Avoid wood fiber in very wet areas unless you have excellent drainage, as it can break down faster and become slippery.
When building in a wet zone, drainage is just as important as surface choice. A great surface on poor drainage will still lead to problems.
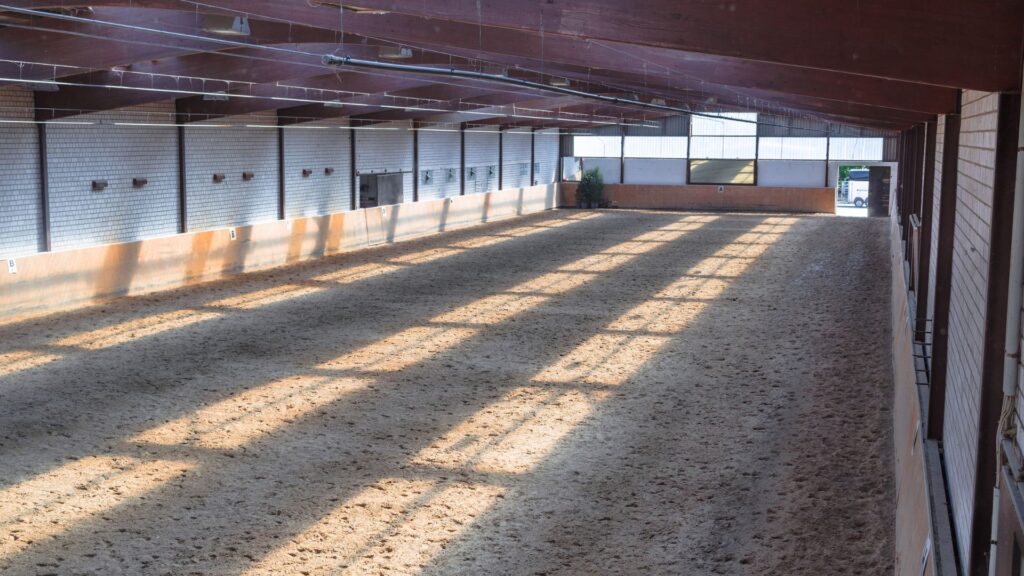
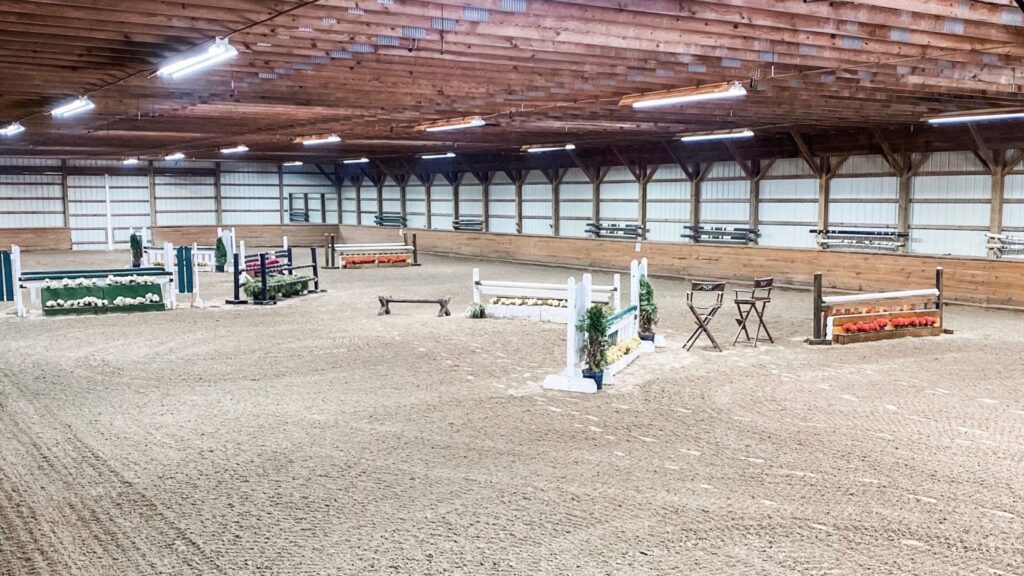
Indoor Vs Outdoor Arenas
Choosing between an indoor and outdoor horse arena depends on your location, riding goals, and budget. Both options offer clear advantages, but they also come with trade offs. Understanding the pros and cons of each will help you make a better long, term decision for your horses and property.
Pros And Cons Of Each
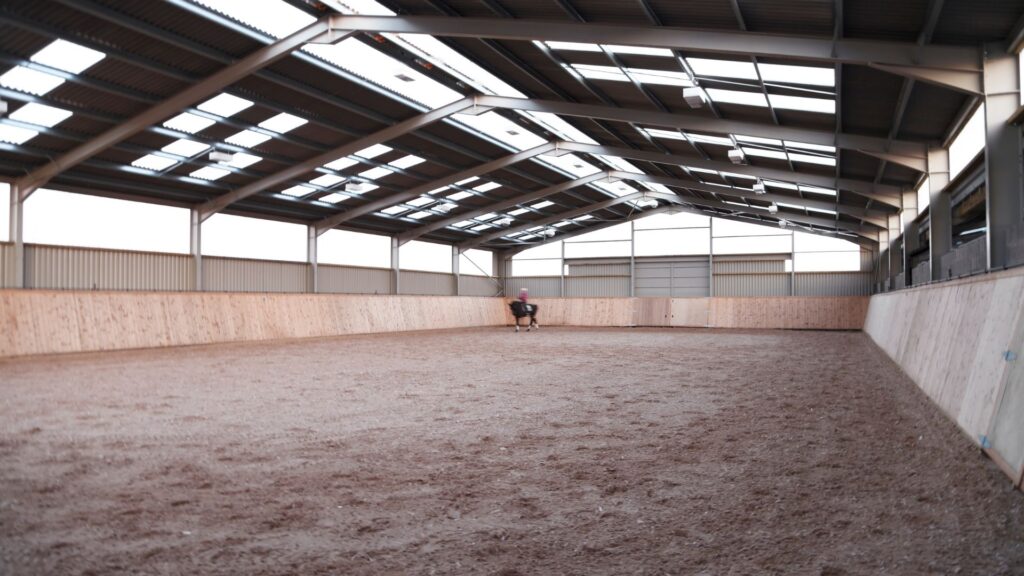
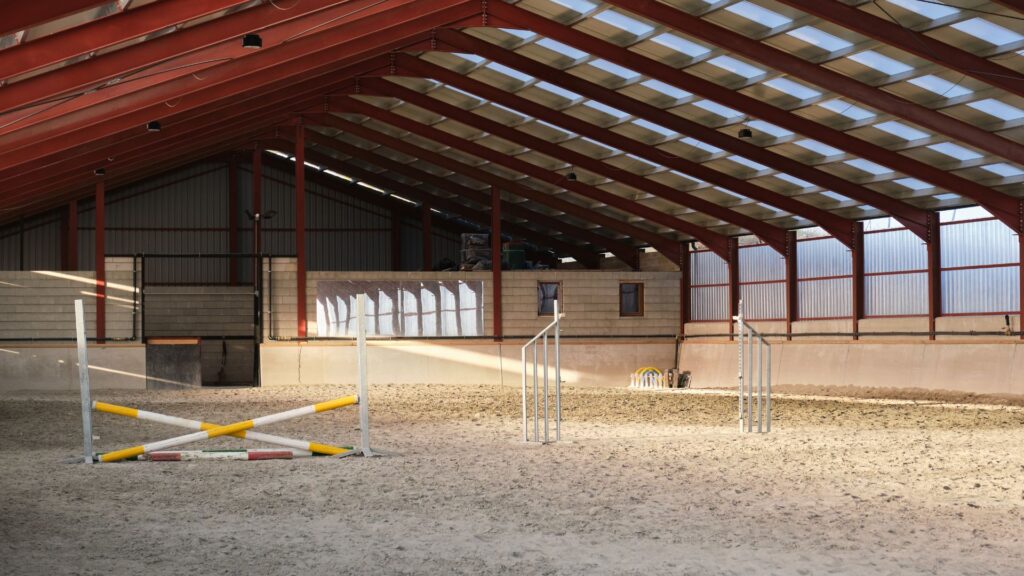
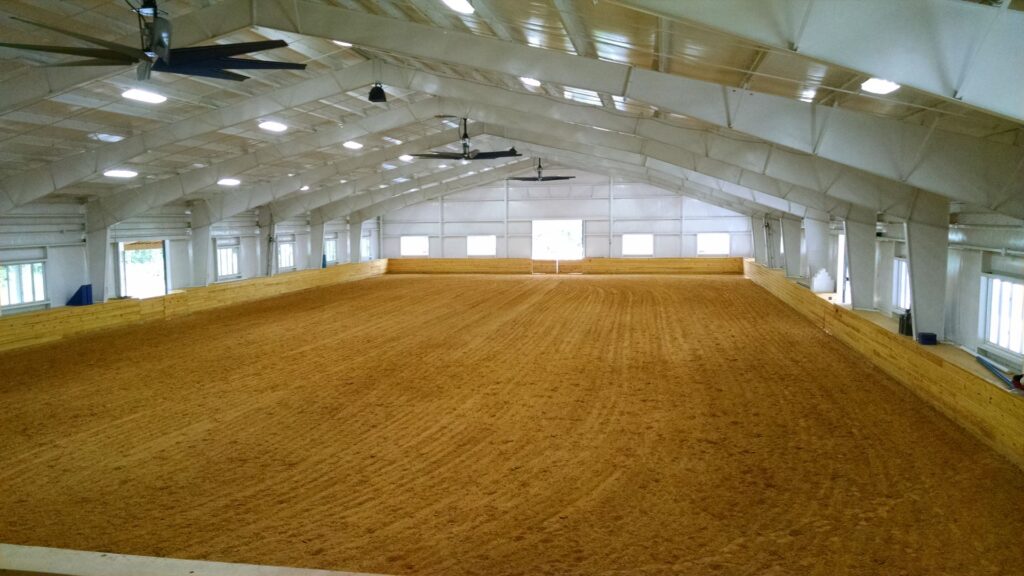
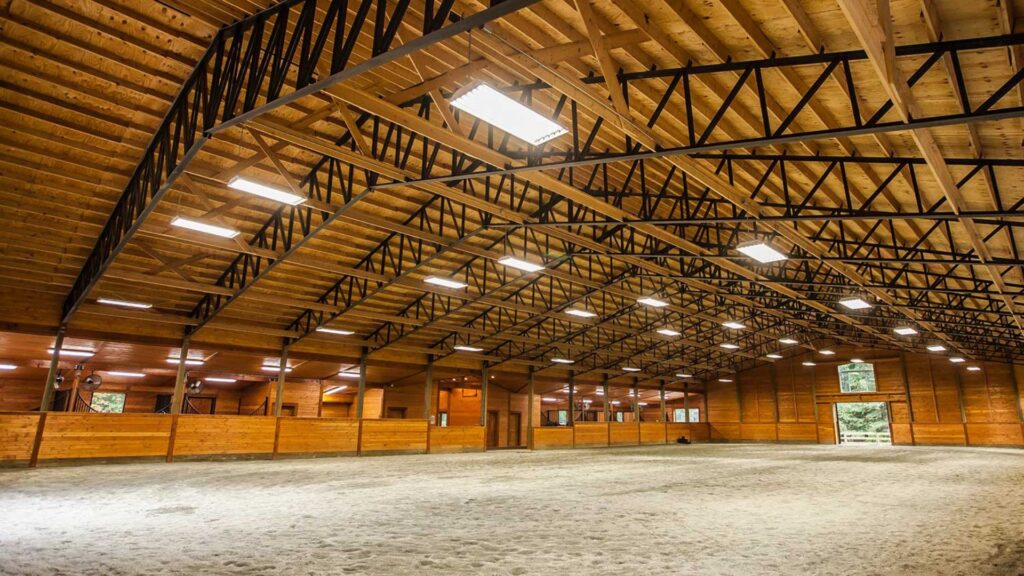
Indoor arenas let you ride year, round, no matter the weather. Rain, wind, and harsh sun won’t interrupt your training or routines. This makes indoor spaces ideal for riders who train regularly or run lessons and clinics. However, they come at a much higher cost. Building an enclosed structure, installing lights, and managing ventilation add up quickly.
Outdoor arenas are more budget, friendly and faster to build. If you’re in a region with a mild or dry climate, they’re a practical option. But they’re vulnerable to flooding, dust, wind, and UV damage. Wet surfaces may lead to delays, especially during winter or after storms.
Consider Weather In Your Region
New Zealand’s weather varies widely. If you’re in the South Island or high rainfall zones like the West Coast, an outdoor arena may see limited use during winter. In drier areas like Canterbury, a well, drained outdoor setup can perform well most of the year. Wind direction, frost, and seasonal temperature swings should also guide your choice.
Ask Yourself
- How often will I be riding during wet months?
- Can I afford downtime during poor weather?
- Will wind or dust be a constant issue?
If your area gets heavy rain or unpredictable seasons, investing in a roof or enclosed setup may save you time and frustration later.
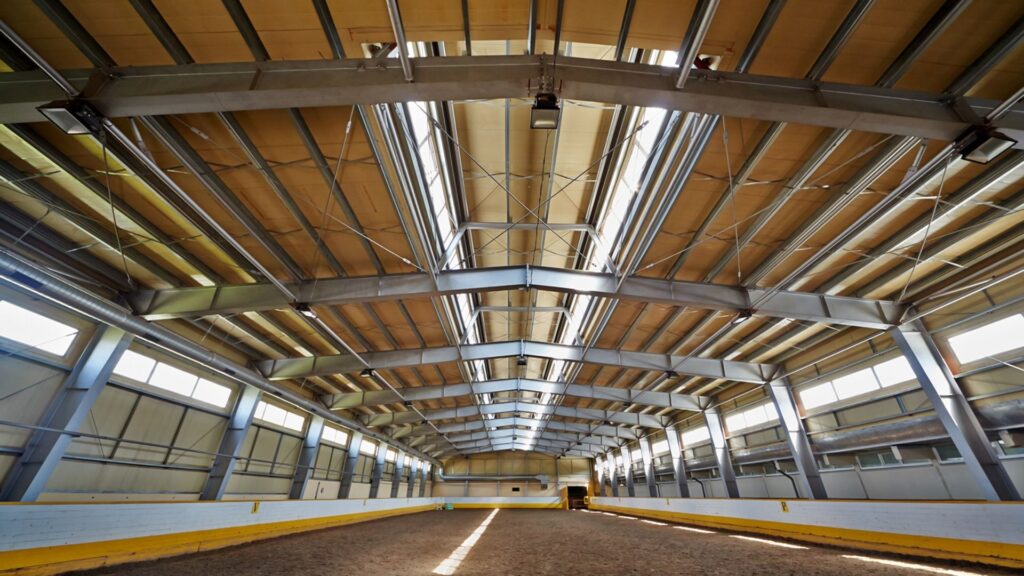
Mention Structure Types
If you’re leaning toward an indoor or partially covered arena, there are several common structures used in New Zealand.
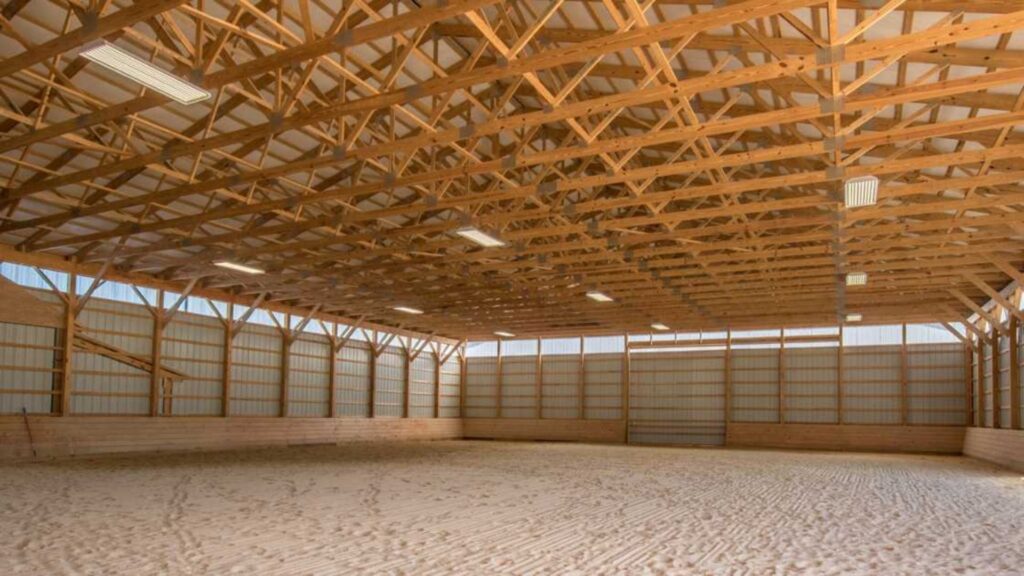
- Steel kit sheds: These are durable, low maintenance, and popular for full indoor arenas. They’re prefabricated, which makes construction faster, and they hold up well against wind and rain.
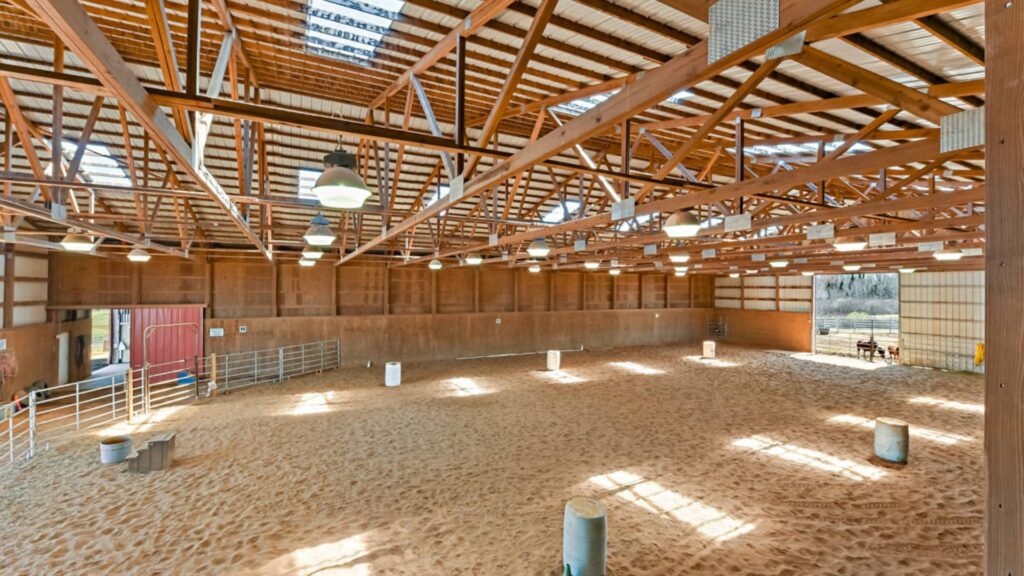
- Timber frames: These offer a more natural look and can blend in better with rural properties. Timber is strong but may require more upkeep over time, especially in damp areas.
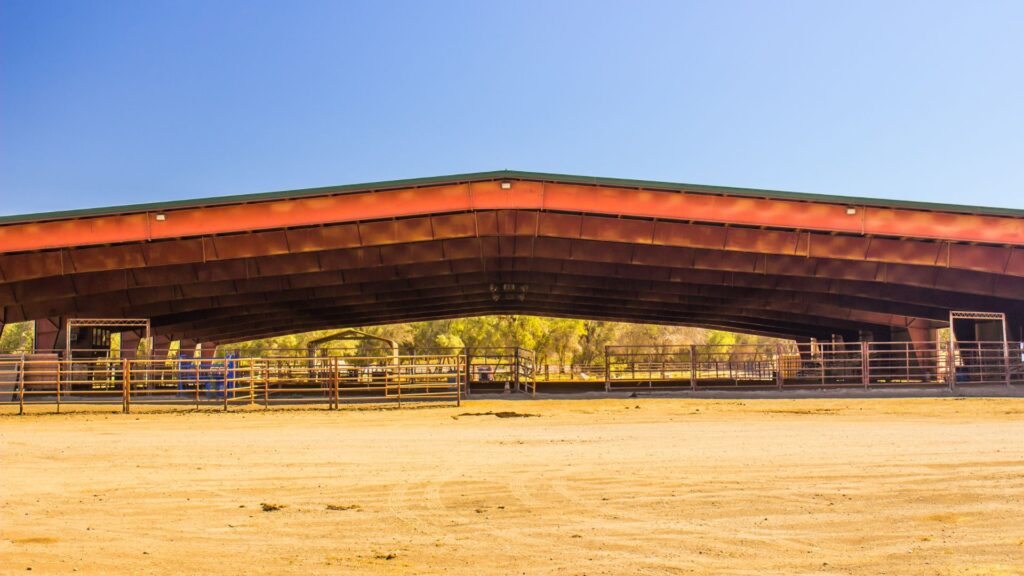
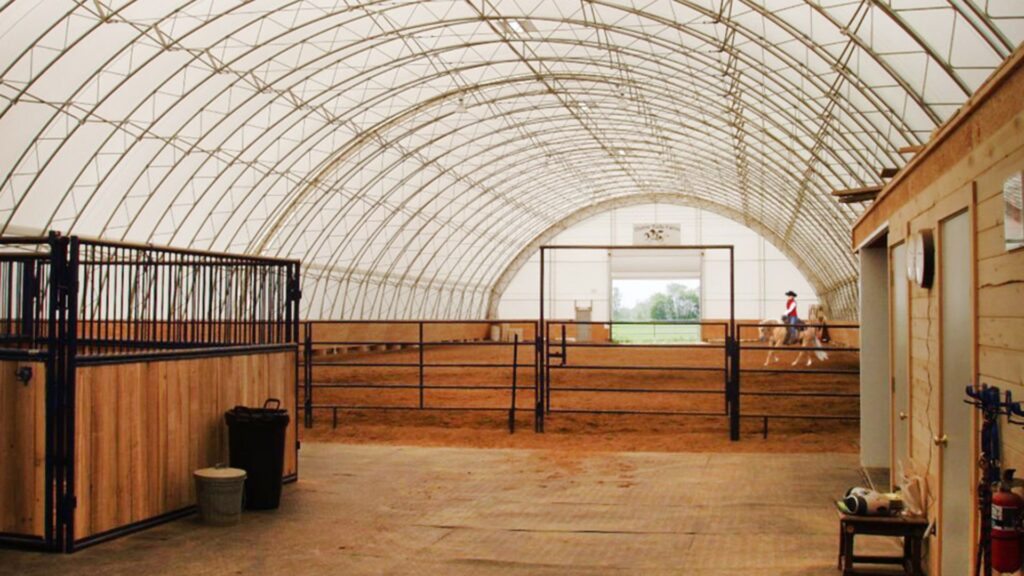
- Covered yards: A covered yard is a hybrid option. It provides a roof for shelter but leaves the sides open for airflow. This can be a cost, effective solution that offers protection without the full cost of an indoor build.
Each of these structures can be customized to suit your riding needs and property layout. Always consider site orientation, drainage, and airflow when planning any covered or enclosed space.
Council Permits & NZ Regulations
Before you break ground on your horse arena, it’s important to understand what local rules apply in your area. In New Zealand, building a horse arena, especially one with earthworks, drainage, lighting, or permanent fencing, may require approval from your local council.
What’s Usually Required?
Every region has slightly different rules, but in general, you may need one or more of the following.
- Resource consent: if your project affects natural drainage, involves large scale earth movement, or is in a sensitive zone (e.g. near wetlands or rivers).
- Building consent: for any permanent structures like sheds, lighting poles, covered arenas, or retaining walls.
- Stormwater management: your council might ask for a drainage plan to prevent runoff from affecting nearby properties.
- Zoning compliance: you’ll need to confirm your land use is permitted under your local district plan, especially if you live in a rural, residential or lifestyle block area.
Some councils are stricter than others. For example, Auckland, Christchurch, and Wellington all have specific zoning rules that could affect arena builds.
Where To Check NZ Council Rules
Start by visiting your council’s official website. Auckland Council page on building and resource consents.
If you’re outside Auckland, just search your region’s name plus “building consents” or “horse arena rules.” For example,
- “Waikato District Council horse arena consent“
- “Canterbury earthworks permit“
These searches will usually take you straight to the relevant documents or contact forms.
Talk To Your Local Council First
Every site is different. Your soil, layout, and planned use all influence whether or not you need consent. That’s why the safest move is to contact your local council before starting any work. Ask what’s needed for your specific location and project.
Trying to avoid permits or skipping paperwork might seem easier, but it can lead to big problems later. You could face stop, work notices, fines, or issues when selling your property.
If the council process feels overwhelming, consider working with a local arena builder or planning consultant. They often know what paperwork is required and can handle the submission process for you.
Taking care of permits early keeps your project on track, and gives you peace of mind knowing you’re building it right.
Maintenance Tips
Taking care of your horse arena isn’t just a one time task, it’s part of keeping your horses safe and your investment protected. A well maintained arena gives riders better footing, prevents long, term damage, and extends the life of the surface and base. Here’s how to stay on top of it year round without spending a fortune or hours every week.
How To Keep Your Arena Safe And Level
Ruts, holes, and uneven footing are common if the arena is used regularly. Horses put a lot of pressure on the surface with every step. Over time, this causes the footing to shift, compact, or wear down in high traffic areas, especially along the rail and near corners. To keep the surface safe and level.
- Walk the arena weekly to check for dips or uneven spots.
- Rake or flatten areas that look loose or lumpy.
- Pay extra attention after rain or heavy use.
Keeping the arena level isn’t just about appearance, it helps prevent joint stress and injury for both horse and rider.
Dragging The Surface
Dragging is one of the most important maintenance tasks. It helps redistribute the surface evenly, breaks up compacted areas, and improves footing consistency. How often you drag depends on.
- How often the arena is used
- What type of footing you have
- How wet or dry the surface stays
Most private arenas benefit from being dragged at least once a week. Use a drag or groomer designed for your specific footing type. Avoid over, dragging if you have blended or layered surfaces, as it can mix materials and affect drainage.
Dealing With Weeds Or Pooling Water
Weeds can creep in around the edges or through weak spots in your base. To stop them.
- Use a safe herbicide or pull them out by hand
- Keep the area around the arena trimmed
- Check for areas where water sits, it usually causes weeds to grow faster
Pooling water is a red flag. It means your base or drainage layer isn’t working properly. After heavy rain, walk the arena and mark where water collects. Solutions may include:
- Regrading the surface
- Adding drainage trenches or soak holes
- Fixing compacted or clogged base layers
Letting water sit too long will break down your surface and invite mud, weeds, and bugs.
Seasonal Checks
New Zealand’s weather can change fast, especially in rural or coastal areas. Make it a habit to do a full arena check at the start of each season. Here’s what to include.
- Inspect your fencing for damage or loose rails
- Test your lighting if you ride in the evenings
- Clear any debris or leaves that block drainage
- Check footing depth and replace worn spots
Winter brings more rain and surface compaction. Summer might dry things out and make footing dusty. Each season brings its own challenges, so staying ahead helps you avoid bigger repair costs later.
By doing small maintenance tasks regularly, you’ll avoid big headaches and keep your arena safe, functional, and comfortable for both you and your horses.
Estimated Budget Breakdown
Before starting any horse arena project in New Zealand, it’s smart to have a clear idea of the total cost. Pricing can vary based on region, land condition, materials, and whether you’re building it yourself or hiring a contractor. Below is a breakdown of common costs involved in building a standard 40x20m outdoor horse arena, with rough NZD estimates.
Site Prep
Site preparation is the first major step and can’t be skipped. This includes clearing vegetation, leveling the land, and improving drainage. If your land is already flat and dry, costs will be lower. But if excavation, grading, or major drainage work is needed, expect to pay more.
- Estimated cost: $3,000 – $8,000
Base
A good base ensures your arena drains properly and stays level over time. This usually involves multiple layers: compacted subgrade, base metal (like AP40), and a geotextile membrane. Cutting corners here often leads to long, term issues like water pooling and surface damage.
- Estimated cost: $7,000 – $12,000
Surfacing
The surface you choose depends on your riding needs and local weather. Sand is the most common and affordable option. Sand mixed with rubber, fiber, or synthetic materials adds cushioning and durability but costs more. Choose a surface that suits your budget and training goals.
Estimated Cost
- Basic sand: $4,000 – $8,000
- Sand with rubber or fiber mix: $8,000 – $15,000+
Lighting And Fencing
While not essential for everyone, adding proper fencing and arena lighting improves safety and usability, especially in winter or if you ride early mornings or evenings. Costs vary depending on the size, material, and number of lights.
Estimated Cost
- Fencing (timber or post and rail): $3,000 – $6,000
- Lighting (basic LED setup): $2,000 – $5,000
Ongoing Maintenance
Once built, your arena will need regular upkeep. This includes dragging the surface to keep it even, topping up the footing as needed, clearing drainage, and addressing wear and tear. Annual maintenance helps extend the life of your investment.
- Estimated annual maintenance cost: $500 – $1,500
Total estimated cost example
If you’re building a simple 40x20m outdoor arena in a relatively flat area, your total cost might start from around $20,000, but can easily climb to $40,000+ if you choose premium surfacing, add lighting, or build in a tricky location.
Tip: Always get multiple quotes and ask local riders or builders for referrals. Costs can vary by region and contractor.
FAQs: About Horse Arena Building NZ
Conclusion
Building a horse arena in New Zealand may feel overwhelming at first, but it becomes manageable once you understand the key steps. From picking the right location and choosing materials to following council rules and budgeting smartly, every decision plays a part in the success of your project. The most important thing is to take action, start by sketching out your space, thinking through your must, haves, and getting advice from local contractors who understand NZ conditions. You don’t need to build everything all at once. Start simple, make sure the groundwork is solid, and expand when you’re ready. Got questions about your setup? Drop them in the comments, we’re here to help.
About the Author:
Mike Veail is a recognized digital marketing expert with over 6 years of experience in helping tradespeople and small businesses thrive online. A former quantity surveyor, Mike combines deep industry knowledge with hands-on expertise in SEO and Google Ads. His marketing strategies are tailored to the specific needs of the trades sector, helping businesses increase visibility and generate more leads through proven, ethical methods.
Mike has successfully partnered with numerous companies, establishing a track record of delivering measurable results. His work has been featured across various platforms that showcase his expertise in lead generation and online marketing for the trades sector.
Learn more about Mike's experience and services at https://theleadguy.online or follow him on social media: