Welcome to your go-to guide on earthquake strengthening in NZ, a must-read for anyone who owns, lives in, or plans to invest in property across the country. With New Zealand’s position on the Pacific Ring of Fire, earthquakes are a reality we can’t ignore. You’ve likely heard about major events like the Christchurch and Kaikōura quakes, and maybe even wondered if your own home or building could withstand the next one. This article will walk you through what earthquake strengthening really means, why it’s essential, how the law applies, what options you have, and how to get started without feeling overwhelmed. Whether you’re a homeowner, landlord, or small business owner, you’ll leave with a clearer sense of how to protect what matters most.
Earthquake strengthening in NZ involves upgrading buildings to better withstand seismic activity. It’s essential for older structures, especially unreinforced masonry, to meet safety standards under New Zealand’s building laws. Common methods include wall bracing, foundation reinforcement, and base isolators. Strengthening improves safety, protects property, and may be legally required in earthquake-prone zones.
- What Is Earthquake Strengthening?
- Why New Zealand Buildings Need Strengthening
- Signs Your Building Might Need Strengthening
- The Legal Side: NZ Earthquake Strengthening Requirements
- Earthquake-Prone Building Notices: What They Mean
- Common Earthquake Strengthening Methods In NZ
- Costs And Funding Options
- How To Start The Strengthening Process
- Can I Still Live In My Home During Strengthening?
- Mistakes To Avoid
- Earthquake Strengthening Success Stories
- FAQs: About Earthquake Strengthening In NZ
- Conclusion
- Find A Professional Civil Construction Company Near You!
What Is Earthquake Strengthening?
Earthquake strengthening is the process of making buildings safer and more stable during seismic activity. In simple terms, it means upgrading a structure so it can better resist the shaking, twisting, and movement caused by an earthquake. The goal is to reduce the risk of collapse, protect the people inside, and minimize costly damage.
Many older buildings in New Zealand weren’t designed with modern seismic standards in mind. These structures can be more vulnerable, especially if they were built before stricter building codes were introduced in the 1970s. Earthquake strengthening helps bring those buildings up to safer standards.
Strengthening Vs Retrofitting: What’s The Difference?
People often use the terms “strengthening” and “retrofitting” interchangeably, but there’s a key difference.
- Earthquake strengthening usually refers to a broad range of upgrades aimed at improving how a building performs during an earthquake. This can include bracing walls, reinforcing foundations, or anchoring heavy features like chimneys.
- Seismic retrofitting is more specific. It involves modifying an existing structure with the goal of improving its earthquake resistance, without tearing the building down. Retrofitting is essentially one method of strengthening, but not the only one.
Think of it like this, all retrofitting is strengthening, but not all strengthening is retrofitting.
What Types Of Buildings Usually Need Earthquake Strengthening?
Not all buildings in New Zealand need earthquake strengthening. But there are certain types more likely to fall short of modern safety standards.
- Unreinforced masonry buildings: These are usually older brick or stone buildings with little to no internal steel reinforcement. They’re especially vulnerable.
- Pre-1976 buildings: Many structures built before this period don’t meet the current seismic codes and may lack adequate support.
- Heritage buildings: While culturally significant, many heritage buildings were not built to withstand earthquakes. Strengthening them takes extra care to preserve their original character.
- Commercial buildings in high seismic zones: Properties in areas like Wellington, Christchurch, and Napier face higher risk and are often prioritized for assessment and upgrades.
If you own or are thinking about buying a property, especially in a high-risk zone, getting a structural assessment from a qualified engineer is a smart move. It could help you avoid future costs, and keep your building safe when the next quake strikes.
Why New Zealand Buildings Need Strengthening
New Zealand is one of the most earthquake-prone countries in the world. Sitting on the boundary of the Pacific and Australian tectonic plates, it’s no surprise that earthquakes are part of life here. While many Kiwis are used to the occasional shake, the reality is that even moderate quakes can cause serious damage, especially to older buildings that weren’t designed with today’s safety standards in mind.
Recap Of Major NZ Earthquakes
Over the past two decades, New Zealand has experienced several destructive earthquakes that highlighted the urgent need for building strengthening.
The 2010 and 2011 Christchurch earthquakes were especially devastating. The February 2011 quake claimed 185 lives, caused billions in damage, and left thousands of homes and commercial buildings uninhabitable. Many of the structures that failed were older, unreinforced masonry buildings.
In 2016, the Kaikōura earthquake, measuring 7.8 on the Richter scale, triggered massive landslides, damaged roads and railways, and affected buildings as far away as Wellington. Once again, several older structures sustained significant damage or required demolition.
These events were not isolated incidents. They served as a wake-up call and pushed the government and communities to rethink building safety.
Government Reports Or Stats On Building Safety
Following these major events, the New Zealand Government and engineering authorities conducted national building assessments. These revealed a large number of buildings, especially pre-1976 constructions, that do not meet modern seismic safety standards.
According to data released by MBIE (Ministry of Business, Innovation and Employment) and local councils:
- Thousands of commercial buildings were flagged as earthquake-prone.
- Many residential buildings, particularly those with brick or stone walls, were found to be vulnerable.
- The government introduced tighter regulations, including the Building (Earthquake-prone Buildings) Amendment Act, requiring owners to identify and strengthen risky buildings within fixed timeframes.
This push for compliance isn’t just about ticking legal boxes, it’s about ensuring safer communities across cities, suburbs, and small towns.
Personal Angle: How Earthquakes Affect Homes And Families
Beyond the statistics, the emotional toll of earthquakes is real. Families have lost homes, businesses, and loved ones. For many, the trauma of rebuilding after the Christchurch earthquakes still lingers. Even those who weren’t directly affected often worry about whether their homes could withstand another big shake.
Strengthening isn’t just about protecting buildings, it’s about protecting lives. It brings peace of mind to families, security to business owners, and stability to communities. When a home is reinforced, it’s not just safer during a quake, it’s more likely to remain livable and insurable afterward.
If you’re a homeowner, landlord, or property investor, earthquake strengthening isn’t just a good idea, it’s a responsibility. It’s about preparing for the unexpected and keeping people safe.
Signs Your Building Might Need Strengthening
Not every property owner knows what to look for when it comes to earthquake risks. But understanding the warning signs can help you avoid costly damage and keep your property safe. If you’re in New Zealand, where seismic activity is common, it’s even more important to assess whether your home or commercial building is structurally sound.
Below are the key indicators that your building may need earthquake strengthening:
Age And Structure Of Your Home Or Building
Older buildings are often more vulnerable during earthquakes. If your property was built before 1976, there’s a high chance it doesn’t meet current seismic design standards. Many homes and small commercial buildings from that era lack the structural reinforcements required to handle modern quake loads.
Also, the building’s layout plays a big role. Irregular shapes, overhanging sections, or soft-story designs (where one level is significantly weaker than others) are more likely to fail under seismic pressure. If your building falls into any of these categories, a professional inspection is a smart next step.
Unreinforced Masonry And Outdated Foundations
Unreinforced masonry (URM) is a major red flag. These structures are made with brick, block, or stone without the steel reinforcements needed to hold them together during a quake. They’re especially common in older homes, churches, schools, and historic buildings across NZ.
Cracks in walls, loose bricks, or shifting foundations are early signs of trouble. Outdated or shallow foundations may also weaken the entire building’s ability to withstand ground shaking. If you’re unsure about what materials were used in your structure, a structural engineer can help you figure it out.
Local Council Notices Or Assessments
One of the clearest signs your building needs strengthening is an official notice from your local council. Councils in New Zealand regularly assess buildings, especially in areas with high seismic risk. If your property receives an Earthquake-Prone Building (EPB) notice, you’re legally required to take action within a set timeframe.
These notices are not just formalities, they indicate that your building has been reviewed and found to be below minimum safety standards. Ignoring them can lead to fines or even forced closure of your property. If you receive one, start by contacting an experienced engineer to discuss your options.
Recognizing these signs early can save you from major repair costs later and ensure your safety during a seismic event. Whether you’re buying, selling, or living in a property, it’s worth getting a seismic assessment, especially if your building is older or located in a known fault zone. Don’t wait until after an earthquake to find out your property needs strengthening.
The Legal Side: NZ Earthquake Strengthening Requirements
If you own a property in New Zealand, especially an older one, it’s important to understand what the law says about earthquake strengthening. This isn’t just about staying safe, it’s also about meeting your legal obligations. Let’s break down what you need to know so you’re not caught off guard.
Overview Of The Building (Earthquake-prone Buildings) Amendment Act
In response to deadly earthquakes like those in Christchurch, the New Zealand Government introduced the Building (Earthquake-prone Buildings) Amendment Act 2016. This law is part of the Building Act 2004 and sets a clear framework for identifying, reporting, and fixing earthquake-prone buildings across the country.
The Act gives territorial authorities (your local council) the responsibility to assess buildings and issue notices if they don’t meet the minimum seismic performance level. Specifically, if a building’s seismic rating falls below 34% of the New Building Standard (NBS), it’s legally classified as “earthquake-prone”.
If your building is assessed as such, you’ll receive a formal notice and a deadline by which strengthening work must be completed.
What The Law Says About Commercial Vs Residential Properties
Not all buildings are treated the same under the law. Whether your property is commercial or residential can affect how and when you need to act.
Commercial buildings, especially those open to the public like offices, retail stores, and hotels, are closely monitored and often prioritized in assessments. These structures must be brought up to code within a set timeframe once deemed earthquake-prone.
Residential buildings, on the other hand, are only subject to the law if they are:
- Two or more stories, and
- Contain three or more residential units
This means a standalone home or a small two-flat property might not fall under the same legal scrutiny, though strengthening is still encouraged for safety.
Also, heritage-listed buildings, while still needing to meet earthquake requirements, may have some flexibility or funding support due to their historical value.
Timeframes And Responsibilities For Building Owners
If your building is identified as earthquake-prone, the clock starts ticking the moment you receive an official notice.
Here’s how the timeframes work:
- Buildings in high seismic risk areas: You have 7.5 years to complete strengthening
- Buildings in medium-risk areas: You get 12.5 years
- Buildings in low-risk areas: You’re allowed up to 35 years
The countdown includes the time taken by the council to assess and notify you. Once the notice is issued, it’s your responsibility as the property owner to:
- Hire a qualified structural engineer
- Submit strengthening plans to the council
- Complete the work within the given timeframe
- Confirm compliance with updated documentation
Failure to do so can lead to fines, legal action, or restrictions on how the building can be used or sold.
Link To Official Council Guidance Or MBIE Website
To get accurate and up-to-date guidance, always check with your local council. Requirements may vary slightly depending on your region and property type.
You can also visit the Ministry of Business, Innovation and Employment (MBIE) website for full details on legal responsibilities, assessment criteria, and support options.
Earthquake-Prone Building Notices: What They Mean
If you’ve received an Earthquake-Prone Building (EPB) notice from your local council, it’s natural to feel unsure or even overwhelmed. But don’t panic. This notice doesn’t mean your building is unsafe right now, it simply means that, in a significant earthquake, your building could be at risk. These notices are part of New Zealand’s national push to make our cities and towns safer for everyone.
What To Do If You Receive One
The first step is to read the notice carefully. It will outline why your building has been classified as earthquake-prone, what parts of it are affected, and what actions you need to take.
You’ll usually be given a deadline to either strengthen or demolish the building. The timeframe depends on the building’s location and risk zone.
- High-risk areas (like Wellington or Christchurch) have shorter deadlines
- Low-risk areas may allow up to 35 years
Don’t ignore the notice. Doing so can result in fines, legal issues, or restrictions on using the building.
Take these steps right away:
- Acknowledge the notice in writing to your council
- Keep all communication documented
- Don’t make rushed decisions, gather information first
Who To Talk To (Engineers, Council, Legal Help)
Start by contacting a chartered structural engineer. They’ll assess your building and confirm whether the council’s notice is accurate. They may also suggest strengthening options that meet code without breaking your budget.
You should also:
- Reach out to your local council’s building unit. They can clarify deadlines, zoning, and any heritage protections
- Consider speaking with a lawyer, especially if you’re selling the property or facing insurance issues
- If the building is leased or tenanted, notify all tenants and discuss how the process may affect them
Don’t try to navigate this alone. Professional guidance ensures you don’t make costly mistakes or miss critical legal steps.
Realistic Timelines And Costs
The timeframe to complete strengthening work depends on:
- The type and size of your building
- Its construction materials
- The location and seismic risk zone
For example, a small brick retail building in a high-risk zone might have a 7.5-year deadline, while a larger structure in a lower-risk area could have up to 25 years.
As for cost:
- Residential buildings might cost between $20,000 and $150,000 to upgrade
- Commercial buildings could range from $100,000 to over $1 million
- Older or heritage-listed buildings may require specialist work, which increases costs
Always get a detailed quote from a qualified engineer or contractor. Don’t rely on guesswork.
You can also ask your council if there are any financial support programs, rate relief, or funding for heritage buildings. Some councils and government programs do offer limited assistance, especially for safety-critical work.
An EPB notice is serious but manageable. The earlier you act, the more options you’ll have, and the easier it will be to protect both your property and the people who use it.
Common Earthquake Strengthening Methods In NZ
New Zealand’s history with seismic activity makes earthquake strengthening a must for many homes and buildings, especially older ones. Whether you own a commercial space or a small residential home, knowing how strengthening works can help you make informed decisions and avoid costly mistakes.
Here are the most common earthquake strengthening methods used across NZ:
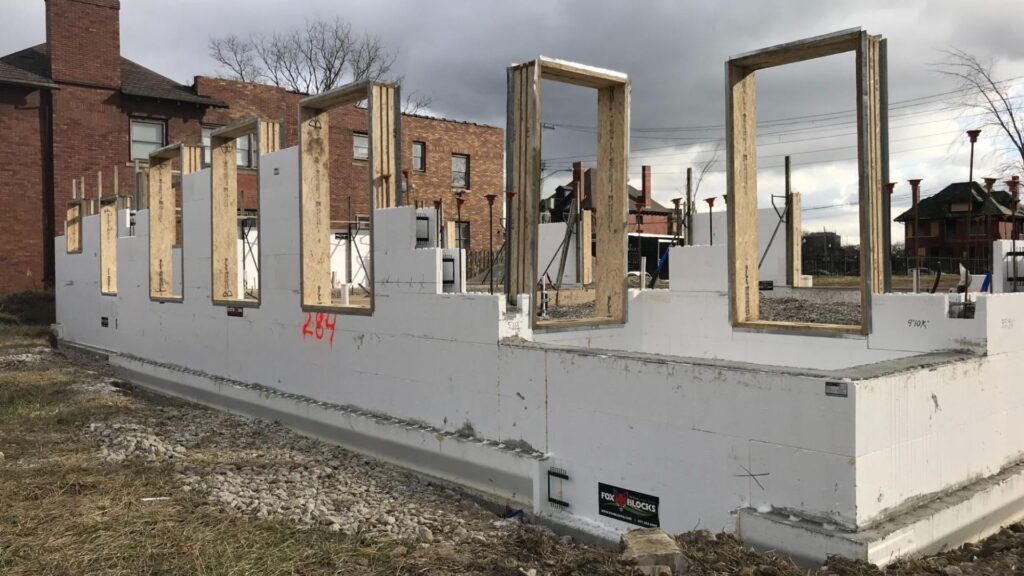
Base Isolators
Base isolators are installed between a building’s foundation and its structure. They act like shock absorbers, allowing the ground to move during an earthquake without transferring the full force to the building above.
These systems are especially popular in high-risk zones and are often used in hospitals, schools, and government buildings. While base isolators are more common in new construction, some large retrofitting projects also use them to reduce lateral forces during seismic events.
- Key benefit: They reduce the building’s movement and increase safety without needing major changes to internal structures.
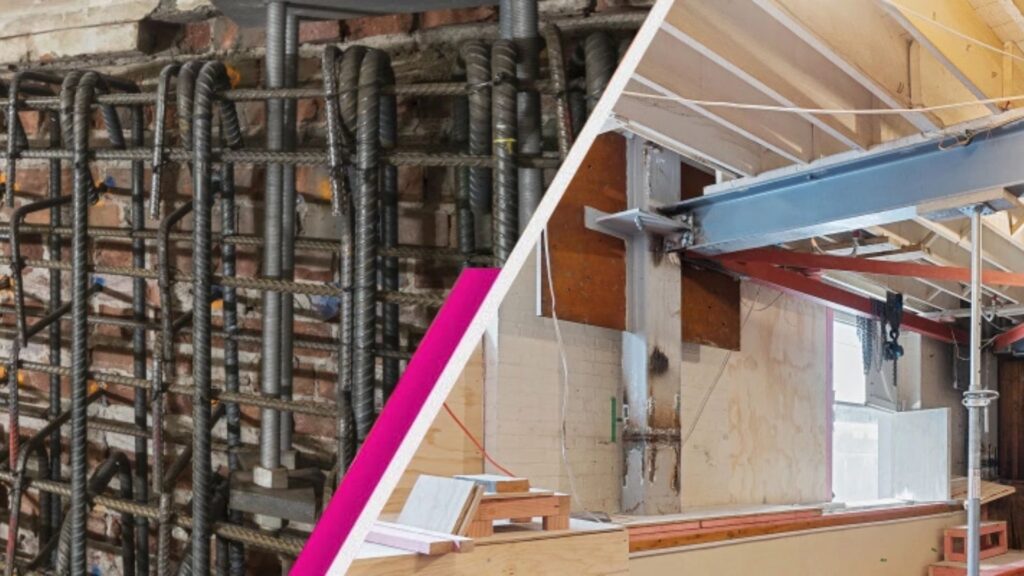
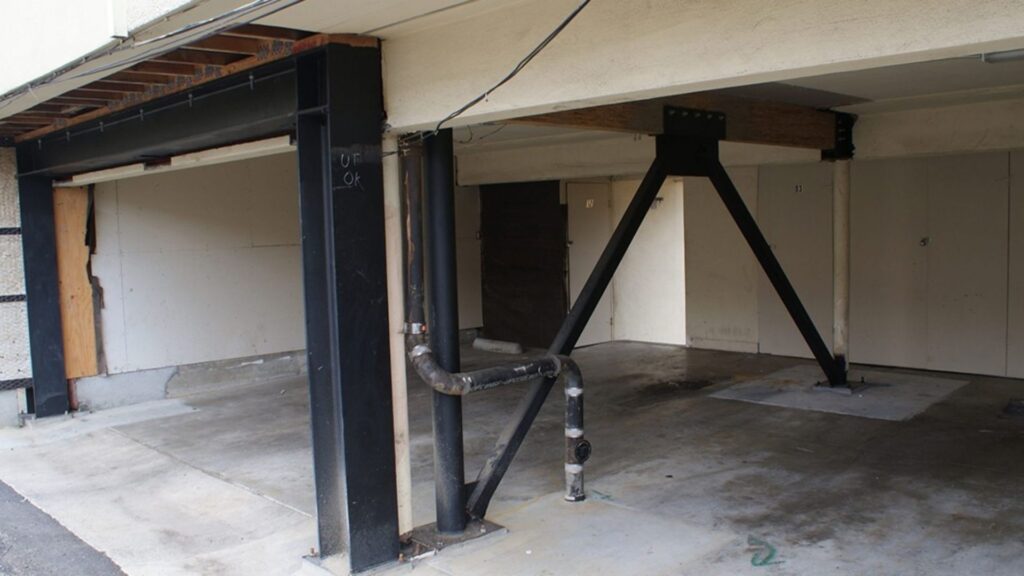
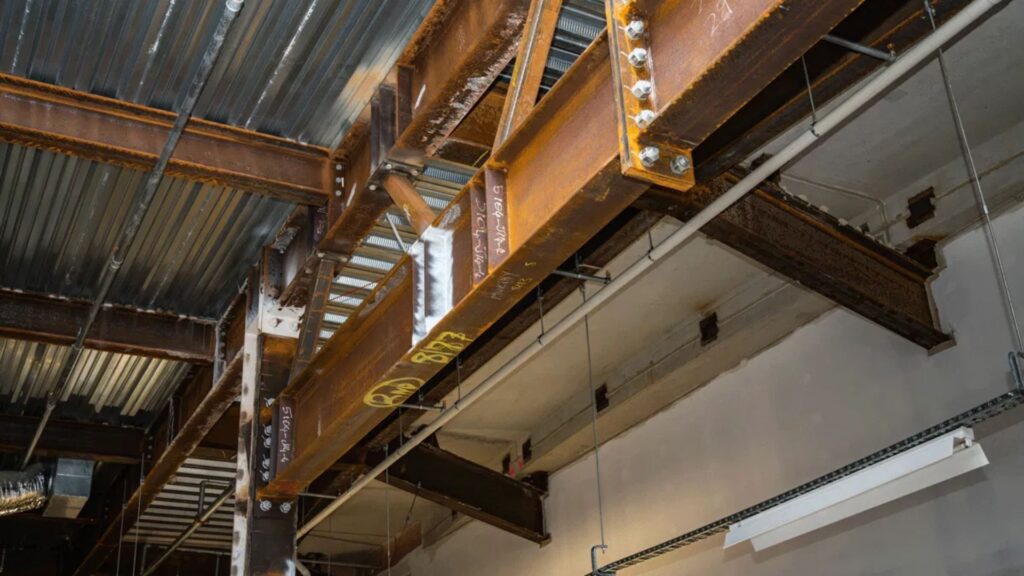
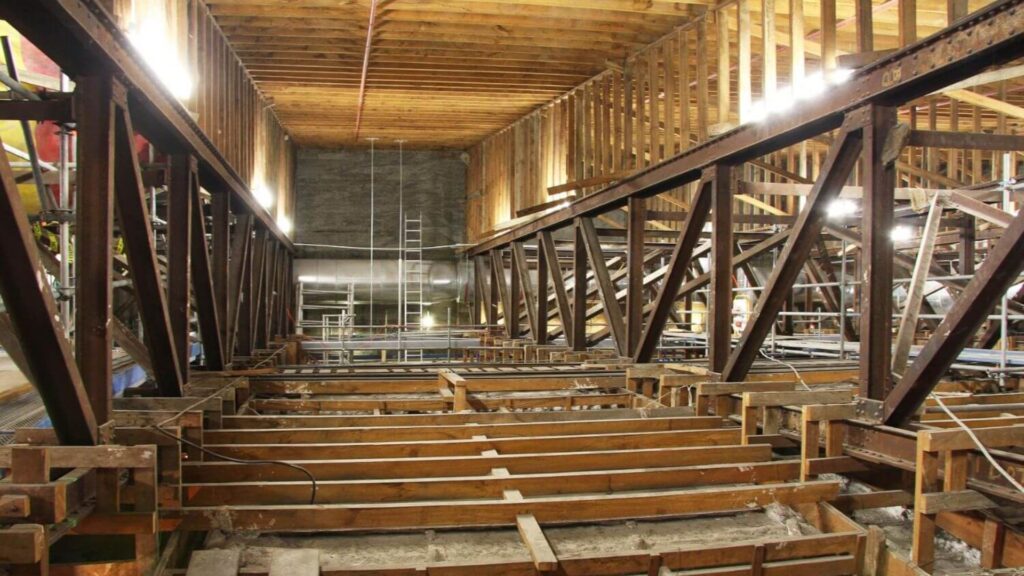
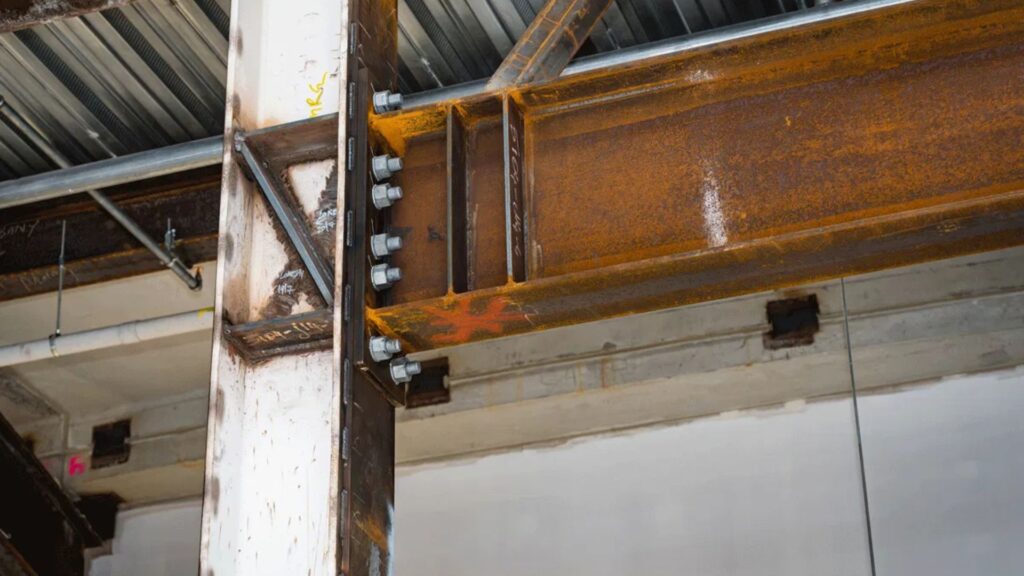
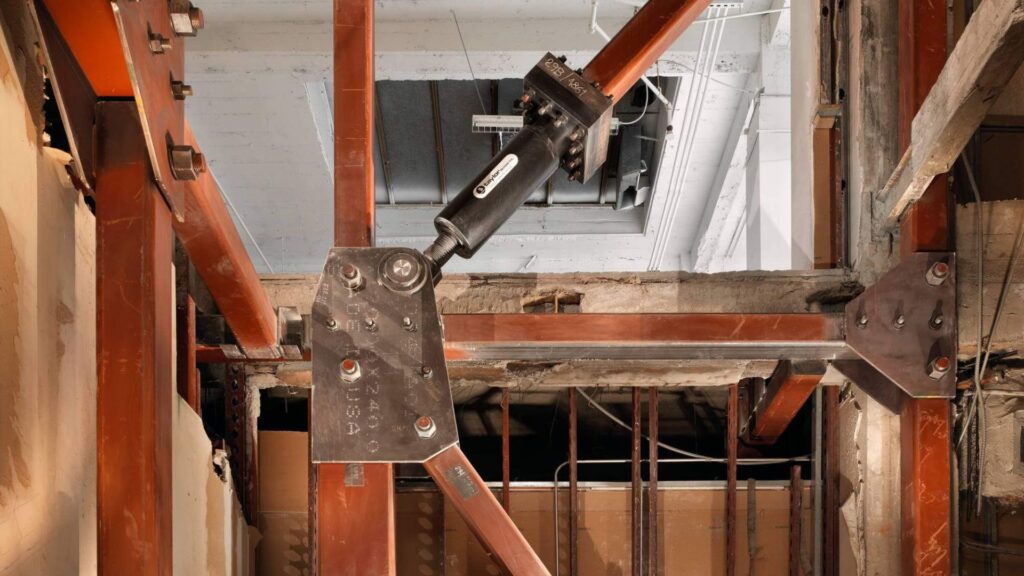
Steel Bracing And Reinforcement
Steel bracing is one of the most widely used strengthening techniques. It involves adding steel elements, like braces, rods, or frames, into walls, ceilings, or support beams. These reinforcements help the building resist lateral loads that earthquakes typically cause.
If your building has long walls, open floor spaces, or weak connections between parts of the structure, steel bracing can improve its performance dramatically.
- Why it matters: It strengthens vulnerable sections without requiring full demolition or rebuilds.
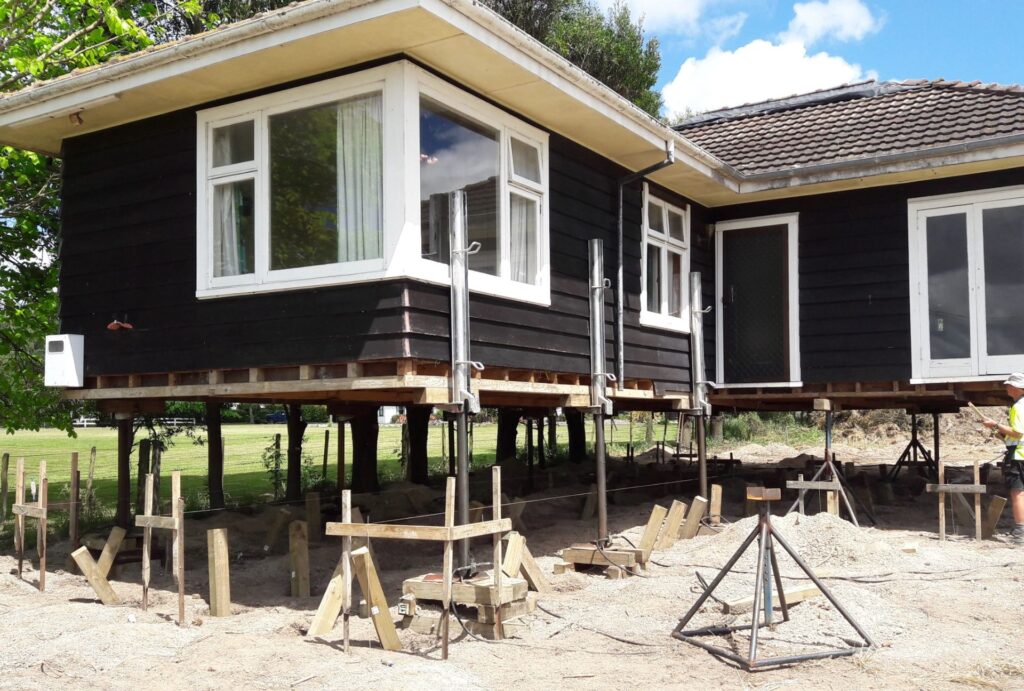
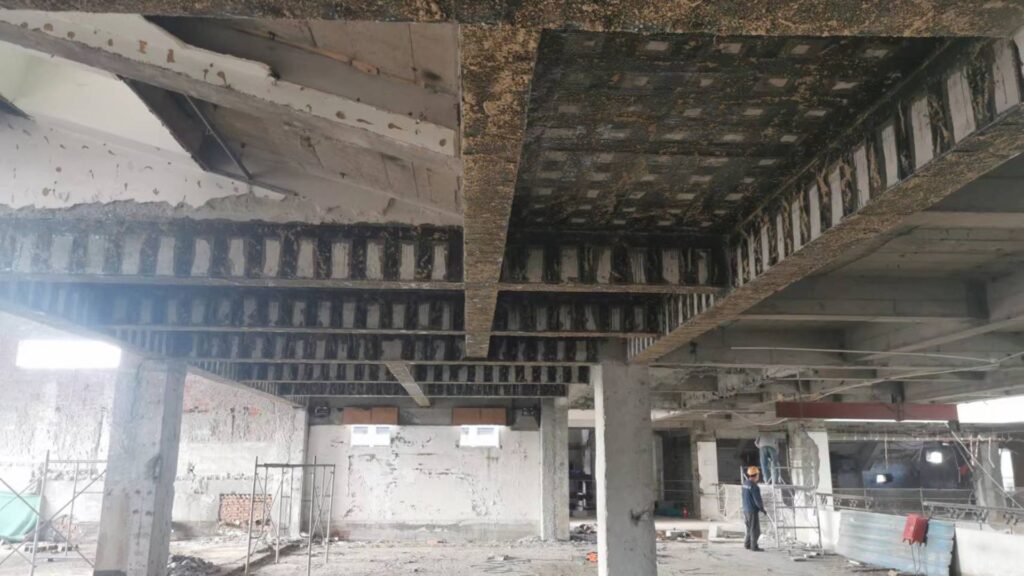
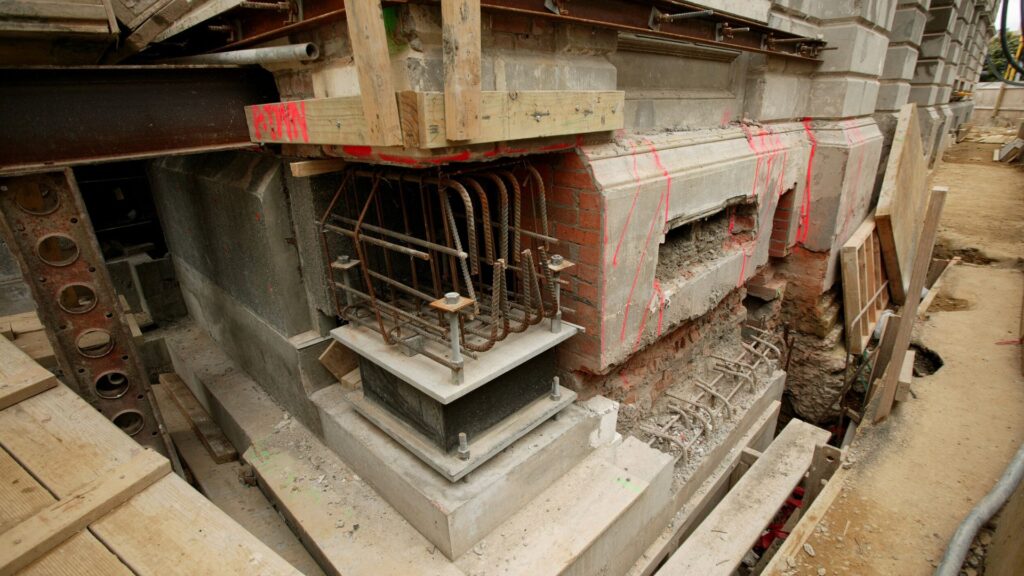
Foundation Improvements
Foundations play a major role in how your building reacts to shaking. If a foundation is shallow, cracked, or uneven, it becomes a weak point during an earthquake.
Strengthening the foundation can include:
- Deepening or widening footings
- Adding concrete-contractors-nz/concrete-floor-slabs-kapiti-coast/”>concrete-contractors-nz/concrete-layers-lower-hutt/”>concrete reinforcement
- Installing ground anchors or piles
- Stabilizing soil around the structure
These upgrades may seem invisible, but they make a massive difference in structural stability.
- Pro tip: Always get a geotechnical assessment before foundation work, it saves money and avoids surprises.
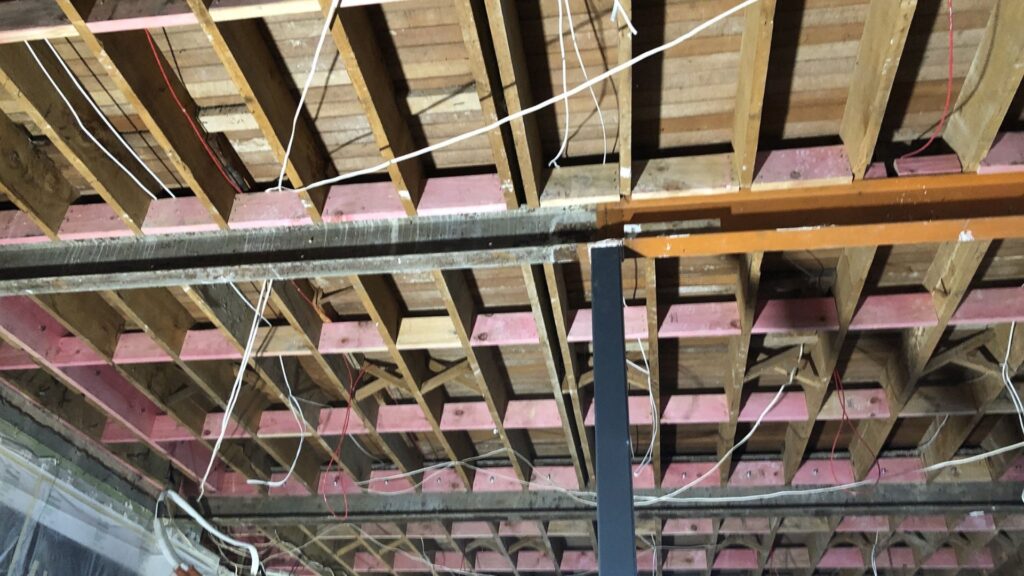
Wall Or Floor Anchoring
Wall and floor anchoring secures different parts of your building so they move as one unit. When walls, floors, and roofs aren’t properly connected, seismic shaking can tear them apart.
Anchoring solutions include:
- Tying walls to floors or the roof
- Using metal straps, bolts, or epoxy systems
- Securing chimneys, parapets, and facades
This method is commonly used in older unreinforced masonry buildings and heritage structures. It’s a cost-effective way to reduce collapse risk without altering the look of the building too much.
Anchoring reduces internal damage and stops parts of the structure from separating during a quake.
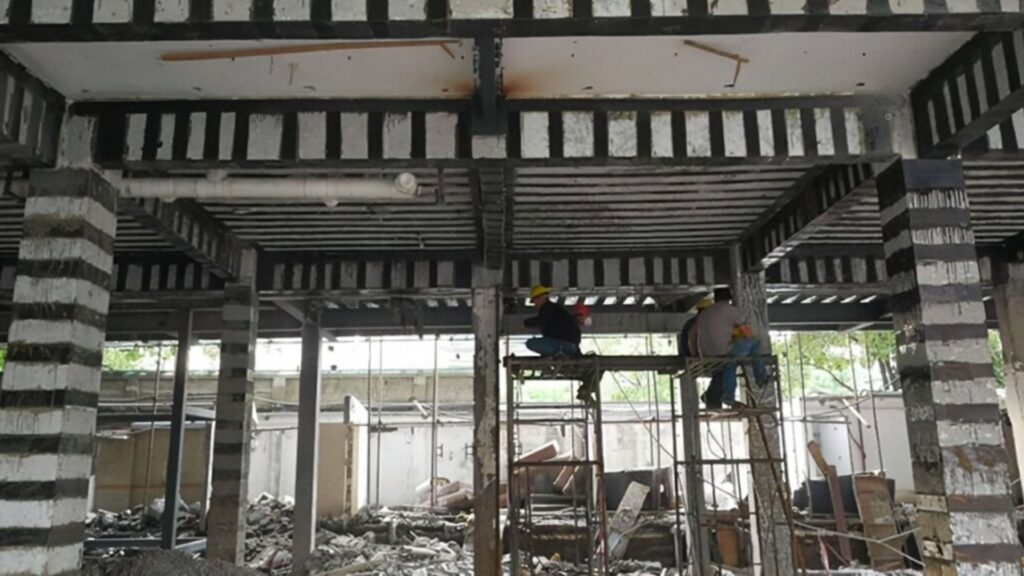
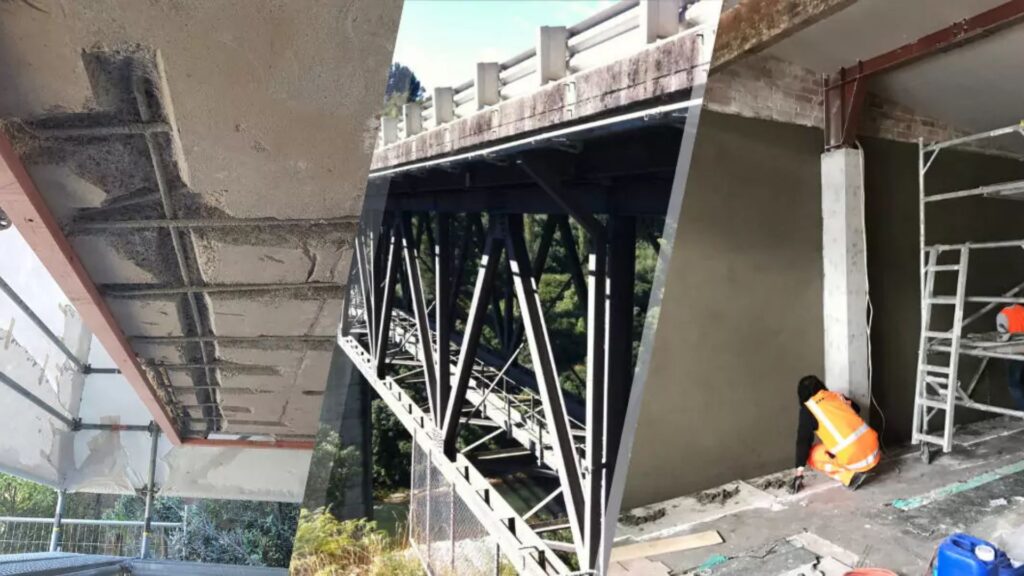
Before-And-After Project Examples
Seeing real-world examples can help you understand what earthquake strengthening looks like in practice. Here’s what to look for in project case studies.
- Photos of the building before and after strengthening
- Clear explanation of what methods were used
- Timeframes, costs, and any challenges faced
- Testimonials from property owners or tenants
- Example: A 1920s brick commercial building in Wellington added wall anchors and internal steel bracing while preserving its original facade. The owner noted improved tenant confidence and higher insurance coverage after the upgrade.
Including visual proof and relatable stories builds trust and encourages others to take action.
Costs And Funding Options
Understanding the costs of earthquake strengthening in New Zealand is one of the biggest concerns for homeowners and small business owners. The process is not always cheap, but it’s an investment that protects lives, property, and long-term value. This section breaks down what to expect when budgeting for a strengthening project and where to look for help with the cost.
What Homeowners Or Small Business Owners Should Expect
If you own a residential home or a small commercial building, earthquake strengthening can feel overwhelming at first, especially when you start asking about pricing. The truth is, costs vary depending on several factors like:
- Age and condition of the building
- Structural design and materials used
- Size and number of floors
- Required strengthening level (partial or full compliance)
Before anything begins, you’ll need a structural assessment from a qualified engineer. This can cost anywhere from $2,000 to $10,000, depending on complexity.
After that, the actual strengthening work depends on what’s needed. For example, adding steel bracing to walls or anchoring floors to foundations will differ in price from installing full base isolation systems.
Cost Ranges For Common Upgrades
While every project is different, here’s a general guide to typical strengthening costs in New Zealand.
- Basic Bracing And Reinforcement: $15,000 – $50,000
- Foundation Strengthening: $30,000 – $100,000+
- Wall And Floor Anchoring: $10,000 – $40,000
- Full Seismic Retrofitting For A Large Building: Can exceed $300,000
Keep in mind that these are estimates only. Labour, materials, access, and building type will all impact your final cost. Commercial or multi-story buildings often face higher costs due to their scale and legal requirements.
One smart move is to get at least two or three quotes from licensed professionals before you commit.
Government Grants, Regional Support, Or Heritage Building Help
There are funding options available, especially if you own a heritage building or face serious financial hardship. Some of the most common sources include:
- Heritage EQUIP Funding: For heritage-listed buildings, the Ministry for Culture and Heritage offers grants that can cover up to 50% of strengthening costs
- Local Council Incentives: Some councils offer rates relief, fee waivers, or small grants to ease the financial pressure on property owners
- Regional Support Schemes: In certain high-risk areas, additional support may be available through local programs or development agencies
- Commercial Tenancy Collaboration: If you’re a landlord, some tenants may be open to co-funding improvements that benefit their safety and business continuity
Before starting your project, always check with your local council or consult a professional who understands the regional options available in your area.
Earthquake strengthening is a serious commitment, but it doesn’t have to derail your budget. With the right planning and support, most property owners can find a path that balances safety, compliance, and cost. The key is to start early, explore your funding options, and avoid cutting corners.
How To Start The Strengthening Process
Starting the earthquake strengthening process in New Zealand may feel overwhelming, especially if you’ve never dealt with building assessments or council notices before. But once you understand the steps involved, it becomes easier to manage. This section breaks down the process in a practical, step-by-step way, whether you’re a homeowner, a landlord, or a small business owner.
- The goal is simple: make your building safer, meet the legal requirements, and protect your investment.
Step-By-Step: From Assessment To Project Completion
1. Book A Professional Assessment
Your first step is to hire a structural engineer who is experienced in seismic assessments. They’ll visit your property, inspect its condition, and evaluate how well it would hold up during an earthquake.
2. Get An Initial Report
After the assessment, you’ll receive a detailed report. This outlines any weaknesses in your structure and recommendations for strengthening. It also helps determine if your building is officially earthquake-prone.
3. Consult With Your Local Council (If Needed)
If your building has been issued an Earthquake-Prone Building notice, you must inform the council about your action plan. In some regions, you may need to submit formal engineering plans for approval before any work begins.
4. Plan The Strengthening Work
Once the report is in, your engineer will help you create a strengthening plan. This includes technical drawings, cost estimates, and the best approach for your building type.
5. Hire A Qualified Contractor
Work with a licensed building contractor who has experience with seismic upgrades. Your engineer may recommend one, or you can search through NZ’s official directories.
6. Get Council Consent (If Required)
In many cases, especially for major structural work, you’ll need to apply for a building consent from your local council. Always do this before beginning construction.
7. Start Construction
With plans approved and a contractor ready, strengthening can begin. Timelines vary, but your engineer or project manager should guide you through each stage and keep things on track.
8. Final Sign-Off And Inspection
After the work is completed, your council may require an inspection to confirm everything meets code. Once signed off, you’re fully compliant, and your property is safer.
Choosing A Qualified Structural Engineer Or Contractor
Not all engineers or builders have earthquake strengthening experience. Choose professionals who:
- Are chartered or registered with Engineering New Zealand
- Have completed similar projects in your area
- Are familiar with the local council process
- Can provide references from past clients
Check their online reviews, browse recent work, and ask about their understanding of New Zealand’s seismic design standards.
Questions To Ask Before Hiring Anyone
Before you commit, ask:
- Have you worked on buildings like mine before?
- Can you show examples of past strengthening work?
- What’s your estimated cost range and timeline?
- How do you handle council paperwork and consents?
- Do you offer a fixed-price quote or charge hourly?
A good engineer or contractor will welcome these questions. If they dodge or give vague answers, consider it a red flag.
Typical Project Timeline
Every project is different, but here’s a rough idea of how long the process might take:
- Initial Assessment: 1–3 weeks
- Engineering Report And Plan: 2–6 weeks
- Council Consent (If Needed): 4–12 weeks
- Construction Phase: 4–16 weeks depending on size and complexity
- Final Inspection And Approval: 1–2 weeks
If your building is in a high-risk zone or has heritage status, the process could take longer due to stricter regulations or specialist approvals.
Starting earthquake strengthening is a major step, but a smart one. You’re protecting your property, your family, your tenants, and your peace of mind. Take it one step at a time, and work with people who know what they’re doing. It’ll make all the difference.
Can I Still Live In My Home During Strengthening?
Whether you can stay in your home during earthquake strengthening depends on several factors. Each situation is different, so there’s no one-size-fits-all answer. Your decision will mostly come down to the type of work needed, how long it will take, and whether the process affects essential parts of your house like the kitchen, bathroom, or structural walls.
It Depends On The Scope Of Work
Some strengthening projects are minimally invasive. If your engineer only needs to reinforce certain parts of the foundation or install wall bracing, you might be able to live in the home throughout the process. You may need to move furniture or adjust your routine, but it’s doable.
On the other hand, large-scale structural work, like foundation replacement or internal steel framing, might make your home temporarily unsafe or uncomfortable. If workers need to cut through walls, floors, or ceilings, it could disrupt your water, power, or heating. In these cases, staying elsewhere might be the safer option.
Temporary Accommodation Options If Needed
If your strengthening project requires you to move out, you have a few options to consider.
- Short-term rentals: Renting a small unit or serviced apartment can keep you close to your home while work is underway.
- Staying with family or friends: This can cut costs if you have someone nearby willing to help.
- Council or community assistance: Some local councils offer support or advice if the work is urgent and affects your ability to stay at home.
- Insurance coverage: Check if your homeowner’s insurance covers temporary housing during earthquake upgrades. Some policies include this, especially if the work is required after a seismic event.
Real Stories From NZ Homeowners
Many homeowners across New Zealand have faced this decision. Some stayed put with minor disruptions, living in one room while the rest of the house was worked on. Others chose to move out entirely, especially when young children or elderly family members were involved.
One Wellington homeowner shared how her family lived in the garage for three weeks while contractors reinforced their brick home. Another Christchurch couple moved in with relatives during major floor and foundation upgrades, saying it was worth it for the peace of mind and smoother workflow for the contractors.
Be Clear With Your Contractor
Always talk to your contractor or engineer before the work starts. Ask:
- Will the water or power be shut off?
- Will noise, dust, or debris make certain rooms unusable?
- Is it safe to be in the house while work is done?
Understanding the impact ahead of time helps you plan smartly. It also helps avoid delays, especially if living in the space could slow the project down.
You can sometimes live in your home during earthquake strengthening, but only if the work is minor and doesn’t affect essential services or structural integrity. For larger jobs, it’s often safer and less stressful to make temporary arrangements. Talk to your engineer, assess the scope, and make the call that works best for your situation and family.
Mistakes To Avoid
Earthquake strengthening in New Zealand is a serious process that impacts safety, legal compliance, and property value. While many building owners act with urgency and care, others unknowingly make mistakes that slow down the process or cause bigger problems later. Below are common errors you should avoid, and why they matter.
Ignoring Notices Or Delaying Action
If you receive an Earthquake-Prone Building notice from your local council, don’t put it off. These notices come with legal timeframes. Missing deadlines can result in fines or enforcement actions. More importantly, delays increase the risk to anyone using the building, tenants, customers, or your own family. Acting early gives you time to plan the project, gather funding, and get expert advice without being rushed.
Hiring Unlicensed Contractors
Always work with licensed, experienced professionals. Earthquake strengthening isn’t like general renovations. It requires knowledge of structural engineering, New Zealand Building Code standards, and council regulations. Unqualified contractors might offer cheaper quotes, but they can cut corners, use incorrect materials, or even skip key reinforcements. Poor workmanship can lead to failed inspections, or worse, unsafe buildings.
Not Getting Multiple Quotes
One quote is never enough. Costs for earthquake strengthening can vary greatly depending on the contractor, method, and materials. Getting at least two or three detailed quotes helps you understand what’s included and how pricing compares. Ask each contractor to explain their scope of work clearly. This makes it easier to avoid hidden charges or low-quality proposals that don’t meet compliance standards.
Skipping The Paperwork
It’s tempting to move quickly, but never skip the documentation. Always keep records of building assessments, engineering reports, council approvals, contracts, and payment receipts. If you ever sell the property or face a legal dispute, these documents are your protection. More importantly, they prove that your building meets New Zealand’s seismic safety requirements. Council officers may ask for this documentation at any stage of the project.
Avoiding these mistakes can save you time, money, and stress. More importantly, it helps you complete your earthquake strengthening project with confidence, knowing your building is safer for everyone who enters it.
Earthquake Strengthening Success Stories
Real-life stories help make earthquake strengthening feel less technical and more personal. They show how proper planning, timely upgrades, and expert help can protect lives, reduce property damage, and restore confidence after a quake. Below are two relatable case studies from New Zealand that highlight how earthquake strengthening made a real difference.
Family Home In Wellington: Safety And Peace Of Mind
The Johnson family lives in a 1950s brick home in Wellington. After the Kaikōura earthquake in 2016, they noticed cracks forming in their internal walls. Concerned about their safety and unsure what to do next, they consulted a local structural engineer for an assessment. The engineer found that their home lacked proper wall anchoring and had no foundation ties, making it vulnerable during strong shaking.
After receiving a full report, the Johnsons decided to move forward with strengthening. The project included wall bracing, roof-to-wall tie-downs, and foundation reinforcement. The work was completed in under four weeks. During that time, the family stayed with relatives. When a moderate earthquake hit the region a year later, their home showed no new damage. Their decision to act early gave them peace of mind.
Their testimonial read.
“We feel safer now knowing our house is better prepared. It was an investment in our future.“
Christchurch Café Owner: Reopening After Strengthening
Lisa, a small café owner in Christchurch, faced a different challenge. Her building, built in the 1930s, was red-tagged after the 2011 earthquake. The council notified her that the structure was earthquake-prone and needed upgrades before reopening. With limited budget and the risk of losing her business, she explored her options.
Working with a heritage engineer and builder, Lisa secured partial funding through the council’s Earthquake-Prone Building Support Scheme. Strengthening included installing steel frames, reinforcing internal brick walls, and upgrading the roof structure. Despite the complexity, the project stayed on budget and was completed within six months.
Lisa’s café reopened with stronger foundations and a new sense of security. She was able to rehire her staff and even received positive media attention for preserving the heritage design.
Her feedback.
“I thought I might lose everything, but strengthening saved my business. Now I’m back, and customers love the changes.“
What You Can Learn From These Stories
These stories highlight key lessons:
- Early assessments save money and stress
- Funding support exists, especially for heritage or high-risk buildings
- Working with qualified professionals leads to safer, stronger results
Earthquake strengthening is not just about compliance, it’s about protecting your family, your livelihood, and your future. These success stories show that with the right help and a proactive mindset, you can make your building safer and stronger without losing your peace of mind.
FAQs: About Earthquake Strengthening In NZ
Conclusion
Investing in earthquake strengthening makes practical sense for anyone who owns property in New Zealand. With the country’s high seismic risk, taking proactive steps to reinforce your home or building isn’t just about meeting legal requirements, it’s about protecting your life, your family, and your long-term investment. Strengthening work improves structural safety, adds peace of mind, and can increase the overall value of your property, especially when buyers are looking for secure, compliant homes. Delaying the process may only lead to higher costs or risks down the track. If you’re unsure where to start, the best first step is to book a professional building assessment. That one decision can set you on the path to a safer, stronger, and more resilient future.
Find A Professional Civil Construction Company Near You!
- Christchurch Earthworks Contractors
- Civil Construction Company Hastings
- Civil Construction Company Hawkes Bay
- Civil Construction Company Napier
- Civil Construction Company Wellington
- Civil Engineering Earthworks Cambridge
- Digger Hire Kapiti
- Earthmoving Hamilton
- Earthmoving South Auckland
- Earthworks Hamilton
- Earthworks Kapiti
- Earthworks Mangawhai
- Earthworks Northland
- Earthworks Rotorua
- Earthworks Warkworth
- Earthworks Whangarei
- Hastings Earthmovers
- Hawkes Bay Earthmovers
- Hydro Seeding Auckland
- Hydroseeding Hamilton
- Hydroseeding Kapiti
- Hydroseeding Waikato
- Napier Earthmovers
- Siteworks Kapiti
- Tauranga Earthworks Contractors
- Wellington Earthworks Contractors
About the Author:
Mike Veail is a recognized digital marketing expert with over 6 years of experience in helping tradespeople and small businesses thrive online. A former quantity surveyor, Mike combines deep industry knowledge with hands-on expertise in SEO and Google Ads. His marketing strategies are tailored to the specific needs of the trades sector, helping businesses increase visibility and generate more leads through proven, ethical methods.
Mike has successfully partnered with numerous companies, establishing a track record of delivering measurable results. His work has been featured across various platforms that showcase his expertise in lead generation and online marketing for the trades sector.
Learn more about Mike's experience and services at https://theleadguy.online or follow him on social media: