Welcome to your ultimate guide to understanding the costs of tiling a kitchen floor in New Zealand. Whether you’re planning a complete kitchen overhaul or simply refreshing the flooring, navigating the expenses can be overwhelming. In this guide, we’ll break down everything you need to know about tiling costs, from selecting the right materials to understanding labor and additional expenses. By the end, you’ll have a clear picture of what to expect, empowering you to make informed decisions that fit both your style and budget. Let’s dive into the details and help you create the kitchen floor of your dreams without breaking the bank. For professional help, contact experienced building contractors in your area.
On average, the cost to tile a kitchen floor in New Zealand ranges from $75 to $150 per square meter, depending on the type of tile used, labor costs, and any additional expenses such as subfloor preparation and waterproofing.
- Why Tiling Your Kitchen Floor Is Worth The Investment
- Breakdown Of Costs To Tile A Kitchen Floor In NZ
- Factors Affecting The Total Cost
- Tips To Save Money On Kitchen Floor Tiling
- Real-Life Examples And Case Studies
- FAQs: About Cost To Tile Kitchen Floor NZ
- Conclusion
- Find A Professional Kitchen Renovators Near You!
Why Tiling Your Kitchen Floor Is Worth The Investment
When it comes to making upgrades in your home, especially in a high-traffic area like the kitchen, it’s essential to consider both immediate benefits and long-term value. Tiling your kitchen floor is one of those investments that checks all the boxes. Whether you’re looking at durability, aesthetics, or even resale value, tiling offers a practical and stylish solution that’s hard to beat. Let’s explore why tiling your kitchen floor is a smart choice.
Durability and Longevity
Kitchens are the heart of the home, which means they endure a lot of wear and tear. From spills and splashes to high foot traffic and the occasional dropped pan, your kitchen floor has to handle it all. This is where tiles shine. Tiles are incredibly durable, designed to withstand daily use without losing their charm. Whether you choose ceramic, porcelain, or natural stone tiles, each offers exceptional resistance to stains, heat, and moisture.
Unlike other flooring options that may need frequent repairs or replacement, a well-installed tile floor can last for decades. It’s not just about endurance, though; it’s about maintaining that fresh, clean look year after year. With tiles, you won’t have to worry about scratches, dents, or fading. This longevity makes tiling a cost-effective choice in the long run, reducing the need for constant upkeep and replacement costs.
Aesthetic Appeal
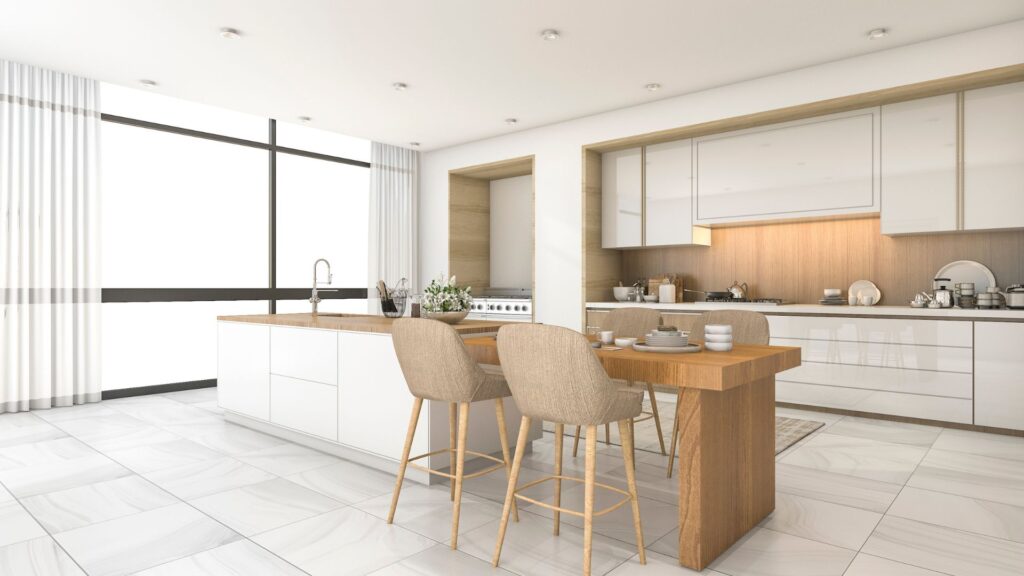
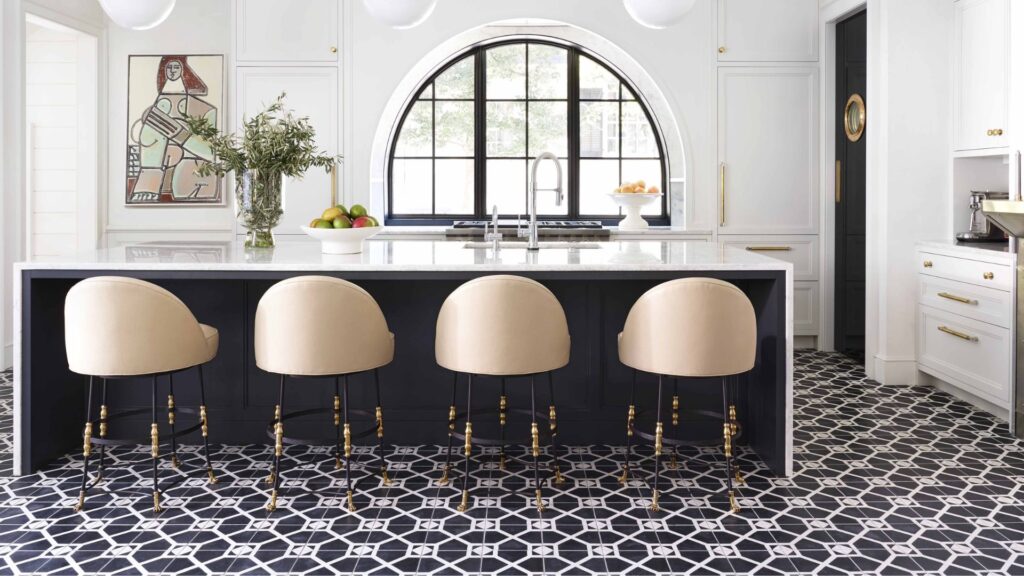
Beyond functionality, your kitchen floor plays a crucial role in setting the tone for your entire kitchen. Tiles offer an almost endless variety of designs, colors, and finishes, giving you the freedom to create a space that truly reflects your style. Whether you’re drawn to the timeless elegance of marble, the rustic charm of terracotta, or the sleek modernity of polished porcelain, there’s a tile to match your vision.
Moreover, tiles allow for creative layouts and patterns that can transform the look of your kitchen. From classic checkerboard patterns to intricate mosaics, the design possibilities are vast. This flexibility means that tiling not only complements your kitchen’s existing décor but can also be the focal point of the room, adding character and personality.
Choosing the right tile can even make a small kitchen feel larger or a large kitchen feel more intimate. With the right combination of size, color, and pattern, tiles can enhance the overall ambiance of your kitchen, making it a more enjoyable space for cooking, dining, and gathering with family and friends.
Resale Value
While you may not be thinking about selling your home right now, it’s always wise to consider how your upgrades will affect its future value. A well-tiled kitchen can significantly boost your home’s resale value. Potential buyers often see a quality tiled floor as a sign of a well-maintained, stylish home. It’s one of those features that can set your home apart in a competitive market, making it more appealing to prospective buyers.
In fact, kitchens are often the first place buyers look when evaluating a home. A beautiful, durable tile floor can leave a lasting impression, making your home more attractive and likely to sell at a higher price. Even if selling isn’t on your radar, it’s reassuring to know that your investment in a tiled kitchen floor is likely to pay off in the future.
Tiling your kitchen floor isn’t just about following trends; it’s about making a lasting investment in your home. With its unmatched durability, endless design possibilities, and the potential to increase your home’s value, tiling is a choice you’ll appreciate every day. Whether you’re planning to stay for years or thinking ahead to resale, a tiled kitchen floor is a decision that will serve you well for the long haul.

Breakdown Of Costs To Tile A Kitchen Floor In NZ
When planning to tile your kitchen floor in New Zealand, understanding the costs involved is essential for budgeting. This breakdown covers the major expenses you can expect, from tile materials to labor and additional necessities like subfloor preparation and waterproofing.
Tile Material Costs
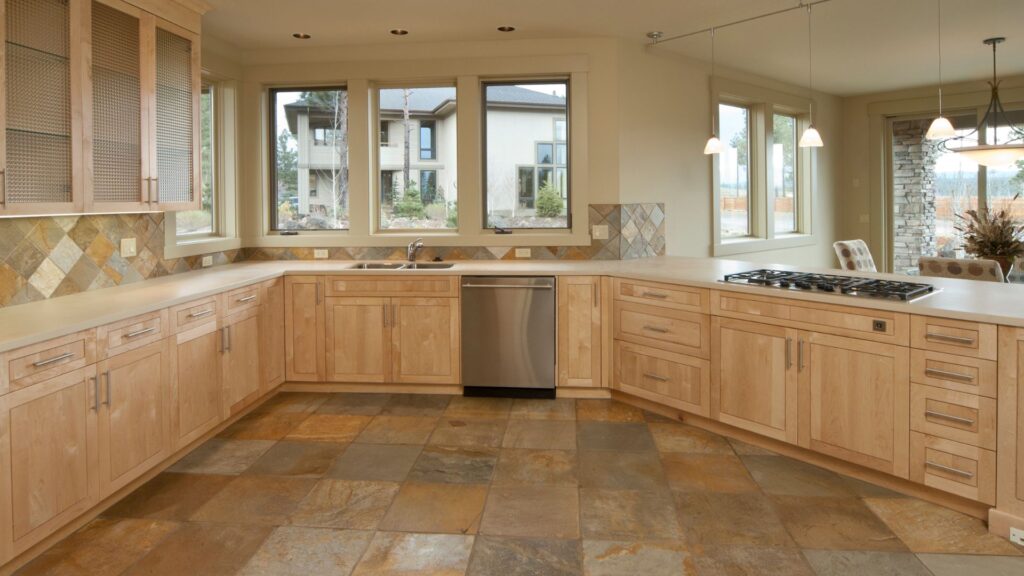
Ceramic Tiles
Ceramic tiles are a popular choice for kitchen floors due to their affordability and wide range of designs. These tiles are made from natural clay, which is fired at high temperatures. Ceramic tiles are durable, resistant to moisture, and easy to clean, making them suitable for high-traffic areas like the kitchen. On the downside, ceramic tiles can chip or crack if something heavy is dropped on them, and they may feel cold underfoot in winter. In New Zealand, the average cost of ceramic tiles ranges from $30 to $70 per square meter, depending on the quality and design.
Porcelain Tiles
Porcelain tiles are a type of ceramic tile but are denser, harder, and more water-resistant. These qualities make them ideal for kitchen environments where spills and moisture are common. Porcelain tiles can mimic the look of natural stone, wood, or even concrete, offering a wide range of design options. However, they are more challenging to cut and install due to their density, which can lead to higher labor costs. Porcelain tiles typically cost between $50 and $100 per square meter in New Zealand, depending on the finish and brand.
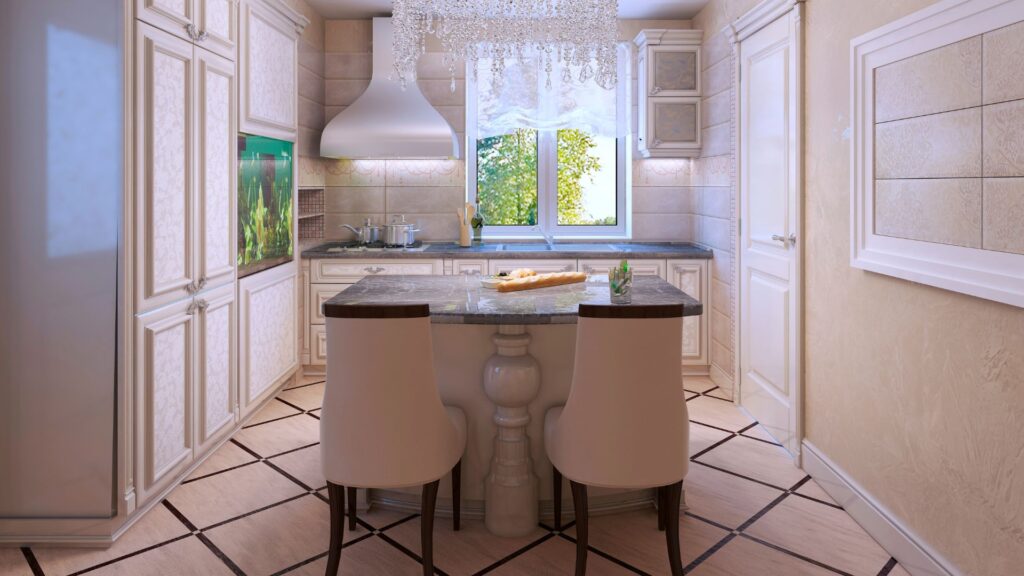
Natural Stone Tiles (e.g., Marble, Granite)
For a luxurious and timeless look, natural stone tiles such as marble or granite are excellent choices. Each stone tile is unique, offering a natural variation that can’t be replicated by man-made materials. Natural stone tiles are highly durable and can increase the value of your home. However, they require regular sealing to prevent staining and are more susceptible to scratches and etching. Additionally, natural stone tiles are heavier, which may necessitate additional subfloor reinforcement. The cost of natural stone tiles can vary widely, but you can expect to pay anywhere from $100 to $300 per square meter in New Zealand.
Other Options (e.g., Vinyl, Mosaic)
While not as traditional as ceramic or stone, alternative flooring options like vinyl or mosaic tiles are worth considering. Vinyl tiles are affordable, water-resistant, and comfortable underfoot, making them a practical choice for kitchens. They range from $25 to $50 per square meter. Mosaic tiles, on the other hand, offer intricate designs and patterns that can add a unique touch to your kitchen. However, they can be more labor-intensive to install, which might increase the overall cost. Mosaic tiles generally cost between $60 and $150 per square meter in New Zealand.
Labor Costs
Hiring a Professional Tiler
The cost of hiring a professional tiler in New Zealand can vary based on experience, location, and the complexity of the job. On average, professional tilers charge between $45 and $100 per hour. Factors that can influence these rates include the tiler’s expertise, the region you live in (urban areas tend to be more expensive), and the difficulty of the tiling project. For instance, intricate designs or working with challenging materials like natural stone might incur higher labor costs.
DIY vs. Professional Installation
Choosing between DIY and professional installation depends on your skills, time, and the complexity of the project. DIY tiling can save you money on labor, but it comes with risks. If you’re inexperienced, you might make mistakes that could lead to costly repairs or even require hiring a professional to fix. On the other hand, a professional tiler ensures the job is done correctly and efficiently, but at a higher cost. Consider your ability to handle the project and the potential for long-term savings when making this decision.
Additional Expenses
Subfloor Preparation
Before tiling, it’s crucial to ensure the subfloor is properly prepared. This might involve leveling, repairing, or even replacing the existing subfloor to create a smooth, stable surface. The cost of subfloor preparation in New Zealand can range from $10 to $30 per square meter, depending on the condition of the current floor and the work required.
Grout and Adhesive
Grout and adhesive are essential materials for a tiling project. Adhesive secures the tiles to the floor, while grout fills the gaps between tiles, providing a finished look and protecting against moisture. On average, grout and adhesive can add an additional $10 to $20 per square meter to your tiling costs.
Tile Removal
If you’re replacing old tiles, you’ll need to factor in the cost of removing and disposing of them. Tile removal can be labor-intensive, especially if the existing tiles were installed with strong adhesive. The cost for tile removal in New Zealand typically ranges from $20 to $50 per square meter, depending on the difficulty of the job.
Waterproofing and Sealant
In a kitchen, where moisture is prevalent, waterproofing is essential to protect the subfloor and prolong the life of your tiles. Waterproofing membranes and sealants help prevent water from seeping through the tiles and causing damage. The cost of waterproofing and sealant in New Zealand can vary but generally adds an extra $20 to $40 per square meter to your project.
By understanding these costs, you can better plan and budget for tiling your kitchen floor, ensuring that you achieve the best possible outcome within your financial constraints.
Factors Affecting The Total Cost
When planning to tile your kitchen floor in New Zealand, several factors can significantly influence the overall cost. Understanding these elements can help you budget more effectively and make informed decisions that balance quality with affordability.
Kitchen Size
The size of your kitchen is one of the most straightforward factors impacting the total cost of tiling. The larger the space, the more tiles you’ll need, which directly translates to higher material costs. But it’s not just the materials that increase; labor costs will also rise with the square footage. A larger kitchen requires more time to tile, meaning you’ll pay more in labor, whether you’re hiring a professional or doing it yourself. For example, a kitchen that’s 20 square meters will naturally cost more to tile than one that’s 10 square meters because you’re essentially doubling both the materials and labor required.
Complexity of Layout
The complexity of your kitchen’s layout plays a significant role in the cost of tiling. If your kitchen has a straightforward, open floor plan with few obstacles, the job will be relatively simple and less time-consuming. However, if your kitchen has intricate designs, odd angles, or requires custom tile patterns, you can expect the labor costs to increase. Tiling around corners, islands, or appliances can be tricky and time-consuming, adding to the overall expense. For example, a kitchen with a herringbone tile pattern or one with multiple nooks and crannies will require more precise cutting and careful placement, which can drive up labor costs significantly.
Tile Quality and Brand
The quality and brand of the tiles you choose can have a substantial impact on your budget. Premium tiles, such as natural stone or designer ceramics, tend to be more expensive, not just in terms of the initial purchase price but also in installation, as they often require more careful handling. While it might be tempting to opt for the highest quality tiles, it’s essential to balance this with your overall budget. Sometimes, mid-range tiles offer a good compromise between cost and quality, providing durability and aesthetic appeal without breaking the bank. For example, opting for a high-end Italian porcelain tile could enhance the look of your kitchen but will certainly add to your overall costs compared to a standard ceramic option.
Location and Availability
Your location in New Zealand can also affect the total cost of tiling your kitchen. Prices for materials and labor can vary depending on where you live, especially if you’re in a more remote area. In cities like Auckland or Wellington, you might have more options and competitive pricing due to higher availability of tiles and contractors. However, if you’re in a rural or less populated area, you might face higher prices due to the additional costs of shipping materials or the limited availability of skilled labor. For instance, getting premium tiles delivered to a remote area like Fiordland could be more expensive and take longer compared to sourcing them in a major urban center, thereby increasing both the material and installation costs.
Tips To Save Money On Kitchen Floor Tiling
Tiling a kitchen floor can be a significant investment, but with some careful planning and smart decisions, you can keep costs under control without sacrificing quality or style. Here are some practical tips to help you save money on your kitchen floor tiling project.
Choosing Cost-Effective Tiles
When selecting tiles for your kitchen floor, it’s easy to be swayed by luxurious options that come with hefty price tags. However, there are plenty of budget-friendly alternatives that offer both durability and aesthetic appeal. Start by considering ceramic or porcelain tiles, which are typically more affordable than natural stone but still provide a wide range of styles and finishes. These materials are not only cost-effective but also known for their longevity, making them a practical choice for busy kitchens.
Don’t shy away from exploring clearance sections at tile stores or online marketplaces. Often, you’ll find overstock or discontinued tiles at a fraction of the cost. These tiles can be just as stylish and durable as their full-priced counterparts, so it’s worth taking the time to hunt for these deals.
Comparison Shopping
One of the most effective ways to save money on your kitchen floor tiling project is by comparison shopping. Get multiple quotes from different suppliers and tilers before making any commitments. Prices can vary significantly from one supplier to another, and the same applies to installation costs. By taking the time to shop around, you can identify the best deals and potentially negotiate better rates.
In addition to price, consider the reputation and reviews of the suppliers and tilers you’re considering. Sometimes, paying slightly more for a reliable professional can save you money in the long run by avoiding costly mistakes or the need for repairs.
Seasonal Sales and Discounts
Timing is everything when it comes to saving money on big purchases like tiles. Keep an eye out for seasonal sales, such as end-of-year clearances or holiday promotions. Many suppliers offer significant discounts during these periods, allowing you to purchase high-quality tiles at a lower cost.
Another tip is to subscribe to newsletters from tile retailers or follow them on social media. This way, you’ll be among the first to know about upcoming sales or exclusive discounts. If you’re not in a rush, waiting for these sales can make a considerable difference to your overall budget.
DIY Where Possible
While professional installation is often necessary for a polished finish, there are aspects of the tiling process that you can handle yourself to reduce costs. For example, removing old tiles before the professionals arrive can save you a substantial amount in labor fees. This task, while labor-intensive, is something most homeowners can manage with a few basic tools and some elbow grease.
Another area where you can save money is by handling the clean-up after the tilers have finished their work. This could include disposing of old materials or performing the final cleaning of the newly tiled surface. Every bit of DIY effort contributes to lowering the overall cost of your project.
By following these tips, you can enjoy a beautifully tiled kitchen floor without breaking the bank. Remember, the key to saving money is in the planning—taking the time to make informed decisions will help ensure your project stays within budget while still delivering the stylish results you desire.
Real-Life Examples And Case Studies
Real-life examples and case studies bring the numbers and advice we’ve discussed to life. They offer a glimpse into what actual homeowners have experienced when tiling their kitchen floors in New Zealand. By looking at specific cases, we can better understand the cost variations and the factors that influence them. Let’s dive into a couple of examples from different cities, showcasing different materials and sizes of kitchens. These case studies will not only provide a breakdown of costs but also highlight lessons learned, helping you make more informed decisions.
Example 1: A Small Kitchen in Auckland with Ceramic Tiles
Imagine a cozy, compact kitchen in a suburban Auckland home, where the homeowners decided to upgrade their outdated vinyl flooring to sleek, modern ceramic tiles. This project was undertaken by a young couple looking to enhance their home’s aesthetic appeal without breaking the bank.
Total Cost Breakdown
- Area Covered: 12 square meters
- Tile Cost: $30 per square meter
- Labor Cost: $50 per hour (Total 15 hours)
- Additional Materials (Adhesive, Grout, Sealant): $150
- Total Cost: $1,500
The couple sourced their tiles from a local supplier, taking advantage of a seasonal sale. Labor costs were slightly above average due to the precision required in a smaller space, where cuts and adjustments were more frequent. The additional materials were a necessary expense, ensuring the tiles were properly installed and would last for years.
Homeowner’s Experience
The homeowners reported that the project was completed within a week, with minimal disruption to their daily routine. They were particularly pleased with the outcome, noting that the ceramic tiles significantly brightened up their kitchen. However, they did mention that the final cost was slightly higher than initially anticipated due to unforeseen expenses like a minor subfloor repair. The couple emphasized the importance of budgeting for unexpected costs and suggested allowing a 10-15% buffer in your budget.
Example 2: A Larger Kitchen in Wellington with Natural Stone Tiles
Now, consider a more extensive project in Wellington, where a family decided to tile their expansive kitchen with luxurious natural stone. This case presents a different scenario, highlighting the challenges and costs associated with a high-end material in a larger space.
Total Cost Breakdown
- Area Covered: 25 square meters
- Tile Cost: $90 per square meter
- Labor Cost: $60 per hour (Total 25 hours)
- Additional Materials (Adhesive, Grout, Sealant): $400
- Total Cost: $3,950
Natural stone is significantly more expensive than ceramic, both in material and labor. The labor cost was higher due to the weight and fragility of the stone, requiring specialized handling. The installation process was also more time-consuming, adding to the overall labor hours.
Lessons Learned
The family faced a few challenges during the project, such as delays in sourcing the exact shade of stone they wanted and the need for a professional to reinforce their subfloor to support the heavier tiles. In hindsight, they recommended that anyone considering natural stone should plan for extra time and potentially higher costs than initially expected. However, they were thrilled with the result, feeling that the investment was worthwhile due to the timeless beauty and durability of the stone tiles.
Quotes from Homeowners or Experts
To further enrich these case studies, let’s hear directly from those who’ve been through the process.
- Homeowner in Auckland: “We didn’t realize how much the small things would add up—like the cost of extra materials or the few extra hours of labor. But seeing our kitchen now, it was worth every cent.”
- Industry Expert in Wellington: “Natural stone is a stunning choice, but it’s essential to be prepared for the added costs of both the material and the necessary prep work. It’s an investment that pays off, but planning is key.”
These real-life examples and expert insights provide valuable perspectives on what you might expect when budgeting for your kitchen floor tiling project. Whether you’re working with a smaller space or aiming for a luxurious upgrade, learning from others’ experiences can help you avoid common pitfalls and make the most of your investment.
FAQs: About Cost To Tile Kitchen Floor NZ
Conclusion
In conclusion, the cost to tile a kitchen floor in New Zealand hinges on several key factors, including the type of tiles chosen, the size and complexity of the kitchen layout, labor costs, and any additional preparation work required. It’s essential to weigh these aspects carefully to make an informed decision that suits your budget and design preferences. Whether you’re considering sleek ceramic tiles or opting for a more durable porcelain option, taking the time to assess your needs and consult with local professionals can help you get an accurate estimate. Don’t hesitate to reach out for quotes, explore different tile options, and get a clearer picture of what’s involved. If you’ve recently tiled your kitchen floor, we’d love to hear about your experience—feel free to leave a comment below! And if you found this post helpful, sharing it on social media could help others in their home improvement journey too.
Find A Professional Kitchen Renovators Near You!
- Kitchen renovations Alexandra
- Kitchen Renovations Alexandra, Clyde & Cromwell
- Kitchen Renovations Central Otago
- Kitchen Renovations Christchurch
- Kitchen Renovations Clyde
- Kitchen renovations Cromwell
- Kitchen Renovations Hamilton
- Kitchen Renovations Hastings
- Kitchen Renovations Hawkes Bay
- Kitchen Renovations Kerikeri
- Kitchen Renovations Napier
- Kitchen Renovations Paihia
- Kitchen Renovations Queenstown
- Kitchen Renovations Wanaka
- Kitchen Renovations Wellington
- Kitchen Renovations Wellington
About the Author:
Mike Veail is a recognized digital marketing expert with over 6 years of experience in helping tradespeople and small businesses thrive online. A former quantity surveyor, Mike combines deep industry knowledge with hands-on expertise in SEO and Google Ads. His marketing strategies are tailored to the specific needs of the trades sector, helping businesses increase visibility and generate more leads through proven, ethical methods.
Mike has successfully partnered with numerous companies, establishing a track record of delivering measurable results. His work has been featured across various platforms that showcase his expertise in lead generation and online marketing for the trades sector.
Learn more about Mike's experience and services at https://theleadguy.online or follow him on social media: