Welcome to your go-to guide for painting ideas for fences in NZ, where a simple change of colour can completely refresh your outdoor space. In New Zealand, fences do more than mark boundaries; they add character, protect against the elements, and enhance your home’s street appeal. Whether you’re aiming for a timeless neutral, a bold modern statement, or something uniquely creative, the right paint can transform a tired fence into a standout feature. This guide will give you fresh inspiration, practical tips, and locally relevant advice to help you choose colours, designs, and finishes that not only look great but also withstand our country’s diverse weather conditions. From sunny coastal areas to cooler inland regions, you’ll learn how to make your fence both beautiful and durable, while adding a personal touch that reflects your style. For professional help, contact experienced fencing contractors in your area.
Painting ideas for fences NZ include using neutral tones like white or charcoal for a modern look, earthy greens and browns to blend with natural surroundings, or bold colours such as deep blue or mustard for standout appeal. In New Zealand’s climate, choose UV-resistant exterior paints, prepare the surface by cleaning and sanding, and paint in mild, dry weather for the best finish.
- Why Paint Your Fence?
- Choosing The Right Paint For NZ Conditions
- Colour Inspiration For NZ Homes
- Creative Painting Ideas
- Preparation And Application Tips
- Common Mistakes To Avoid
- Maintenance Tips For Longevity
- Cost Considerations And Budgeting
- FAQs: About Painting Ideas For Fences In NZ
- Conclusion
- Find A Professional Fencing Company Near You!
Why Paint Your Fence?
A well-painted fence lifts your whole property. It tidies edges, frames your garden, and makes outdoor areas feel finished. If you’re searching for painting ideas for fences NZ, start with the basics; colour choice, protection from our climate, and how the finish reflects your style.
Aesthetic Upgrade
- Fresh colour boosts street appeal the moment someone pulls up.
- Neutral tones like charcoal, soft grey, or off-white suit modern Kiwi homes and make greenery pop.
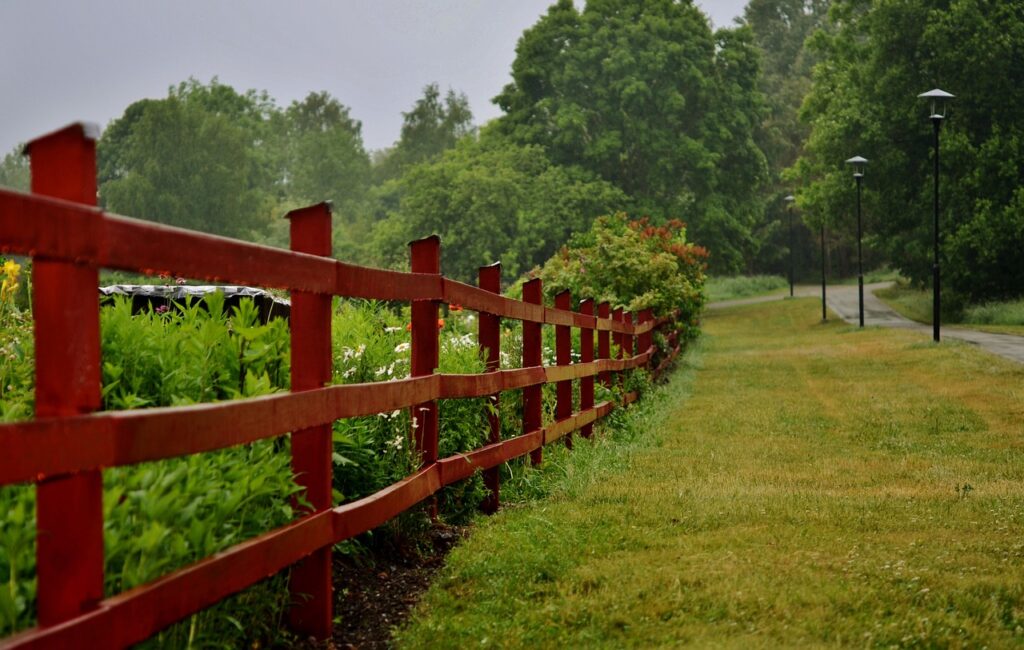
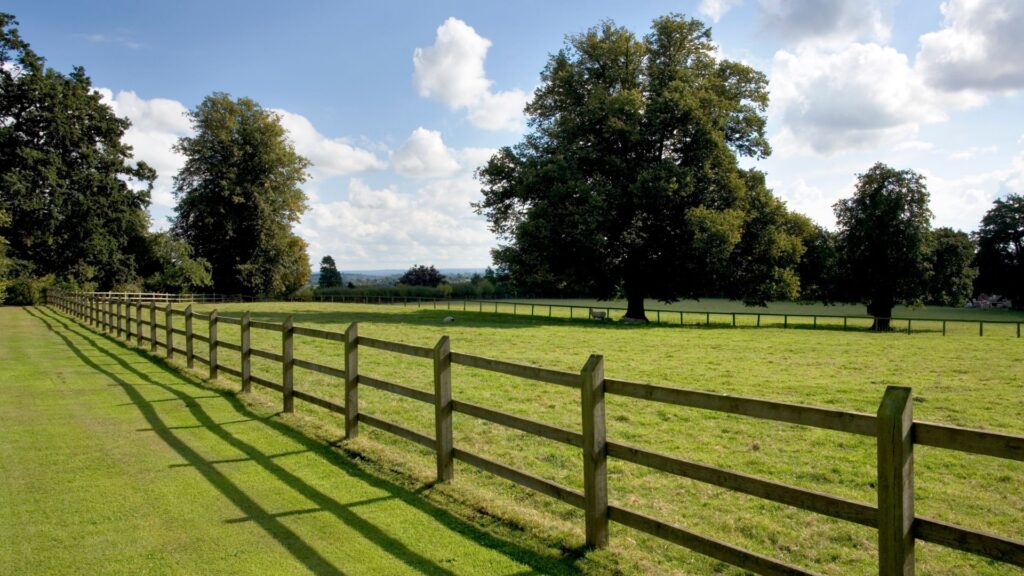
- Earthy greens and browns blend with native planting and rural settings.
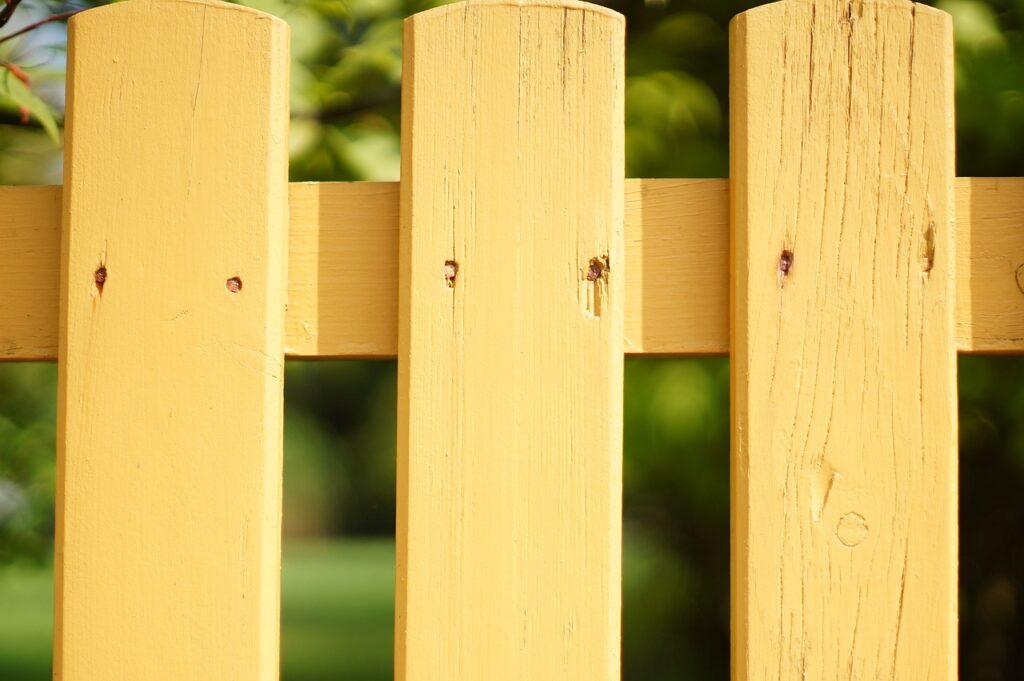
- Bolder picks, deep blue, eucalyptus green, or muted terracotta, create a focal point without overwhelming the yard.
- Match or complement existing elements: roofing, cladding, garage door, deck stain, and front door.
- A uniform finish hides mismatched panels, old stains, and weathering, so your boundary looks clean and intentional.
- A tidy fence helps buyers feel the home is cared for, which can support a stronger first impression.
Protection
- New Zealand’s sun is tough on timber. Quality exterior paint forms a barrier that slows fading, cracking, and warping.
- In rainy and coastal areas, paint helps keep moisture and salt out of the wood, reducing mould, swelling, and rot.
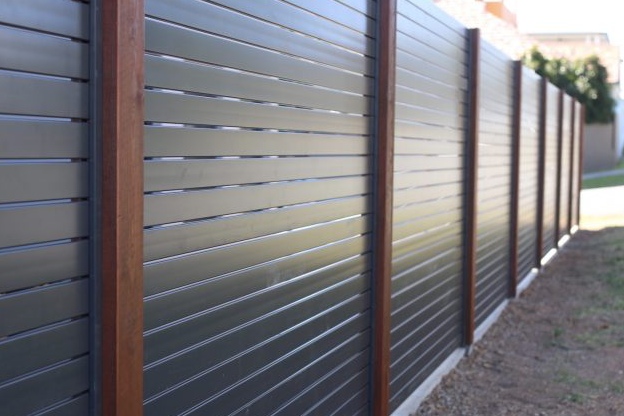
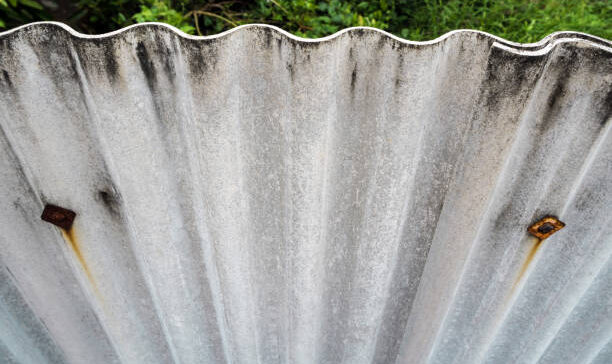
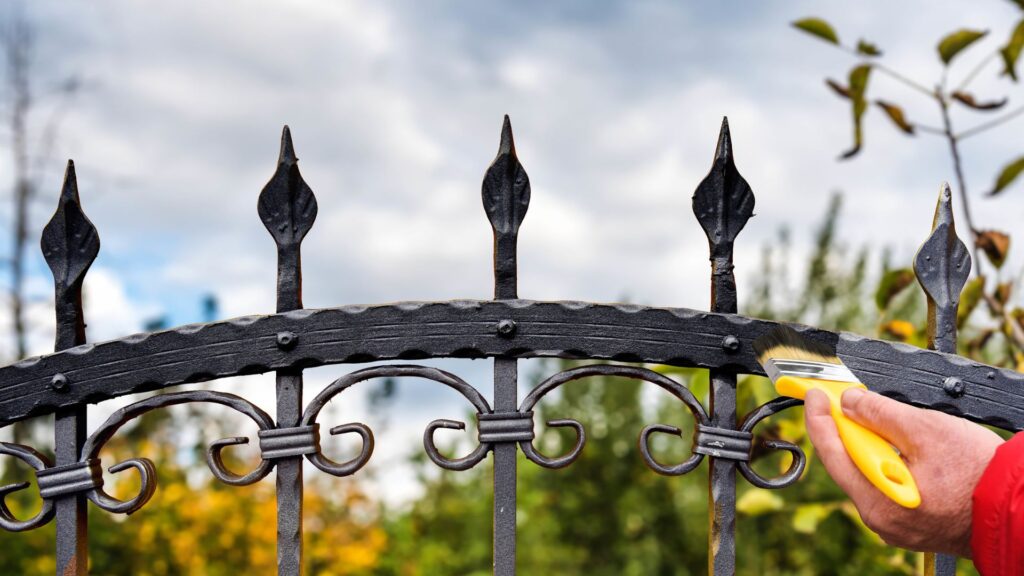
- For metal fences, the right coating resists rust and extends the life of posts and rails.
- Proper prep multiplies that protection: clean, dry, sand where needed, fix loose nails or palings, then prime before colour.
- Choose paints labelled exterior, UV-resistant, and suited to your fence material (timber, steel, aluminium, or composite).
- Aim to paint in mild, dry conditions with light wind so the coating cures well and lasts longer.
Personal Expression
- Your fence can reflect who you are without shouting.
- Keep it simple with a solid colour, or add interest with two-tone rails and posts, a darker base, or a lighter cap.
- Create subtle patterns using vertical or horizontal stripes that follow the boards for a clean architectural look.
- Try stencils for geometric shapes or nature themes inspired by local flora, ferns, flax leaves, or coastal silhouettes.
- Blend stain and paint: stain the palings to show grain, paint the frame for contrast.
- Coordinate with outdoor furniture, planters, pergolas, and garden lighting so the whole space feels connected.
- Turn it into a weekend project with the family, small mural panels or accent sections make the yard feel personal and welcoming.
Quick Tips To Get It Right
- Test swatches on the actual fence and view them at different times of day.
- Stand at the street and the patio, does the colour work from both angles.
- Use a brush to cut in edges and a roller or sprayer for even coverage.
- Plan simple maintenance: a gentle wash each year and quick touch-ups where needed.
When you paint with purpose, appearance, protection, and expression, you get a fence that looks sharp, handles NZ weather, and feels like part of your home. If you want help picking a palette or shortlisting products for your location, say where you live and the fence material, and I’ll tailor options.
Choosing The Right Paint For NZ Conditions
New Zealand’s climate is hard on fences. Strong UV, changeable humidity, and salty coastal air all push coatings to their limits. Pick products built for local weather, prep the surface well, and match the paint type to your timber or metal fence. That’s how you get colour that lasts and a finish you’re proud of.
Weather Factors To Weigh Up
UV Exposure
- NZ sunshine fades pigments fast and heats dark colours.
- Choose exterior lines with UV protection. For dark shades, consider heat-reflective tech that keeps surfaces cooler and reduces stress on the coating. Resene’s CoolColour range is designed for this purpose.
Humidity And Rain
- Frequent wet-dry cycles make timber swell and shrink.
- Flexible, waterborne acrylics handle movement well and dry fast between showers.
Coastal Salt
- Salt accelerates wear, especially on metal fences and fixings.
- Use exterior systems rated for steel and galvanised substrates. Dulux Weathershield is specified for NZ exteriors and suitable for steel, including Colorsteel surfaces when used as a paint system (not as a touch-up for factory finishes).
Paint Types: What To Use And When
Acrylic (Waterborne) Exterior Paint
- Pros: Fast drying, low odour, easy clean-up, flexible film for timber movement.
- Best for: Most timber fences and previously painted surfaces where you want an even, solid colour.
Oil-Based (Solvent) Exterior Paint
- Pros: Strong adhesion and penetration; can help with tannin-rich woods.
- Consider for: Weathered timber that needs extra bite or where product data calls for it.
Outdoor Wood Stain (Semi-Transparent)
- Look: Shows the grain; natural, timber-first aesthetic.
- Great picks in NZ: Resene Waterborne Woodsman for colour plus visible grain; Cabot’s Deck & Exterior Stain in oil-based and water-based options; Wattyl Forestwood stains with UV protection.
Solid (Opaque) Paint
- Look: Hides grain; strongest colour control.
- Use when: You want a uniform finish or need to mask mismatched boards and past repairs.
Local Examples Popular In NZ
Resene
- Waterborne Woodsman stains for fences when you want the timber to show through.
- CoolColour technology for dark exteriors to reflect more heat.
Dulux
- Weathershield exterior range built for NZ weather, with MaxiFlex technology and colour matching to Colorsteel for cohesive schemes.
Cabot’s
- Deck & Exterior Stain in water-based and oil-based formulas; wide colour range stocked across NZ retailers.
Wattyl
- Forestwood exterior stains, including Aquatech Oil Stain, recommended for fences and other exterior timber.
Importance Of Prep Work And Primer
Good paint fails on bad prep. Take the time to set the surface up right.
Inspect
- Replace rotten palings. Tighten or replace corroded fixings.
Clean
- Remove dirt, mould, and chalky residue. Rinse well and let the fence dry fully before coating.
Sand
- Smooth rough fibres and de-gloss old coatings. Dust off.
Prime
- Bare timber: Use an exterior timber primer suited to your topcoat.
- Tannin-rich or previously stained timber: Use a stain-blocking or tannin-blocking primer as directed by the paint system.
- Galvanised or steel fences: Use a metal primer compatible with your finish coat (check the system guide for the brand you choose). Dulux Weathershield systems list steel and galvanised iron among suitable substrates.
Plan Your Weather Window
- Paint in mild, dry conditions with no rain or heavy dew on the horizon. Avoid hot, direct sun that can flash-dry and drag.
What Should You Use?
- Want a natural timber look that fits NZ gardens? Pick a semi-transparent stain like Resene Waterborne Woodsman or Wattyl Forestwood.
- Want crisp, modern colour with strong durability? Go for an acrylic exterior paint such as Dulux Weathershield. For dark colours in high sun, consider heat-reflective tints.
- Unsure about colour near a steel-roofed home? Match your fence to Colorsteel colours through Weathershield for a cohesive palette.
Colour Inspiration For NZ Homes
New Zealand light is strong, coastal air is salty, and gardens are lush. Your fence colour should handle those conditions and still look good with your home, deck, and planting.
Neutral Classics
Neutrals suit modern Kiwi architecture and keep the focus on your home and garden.
- Go-to paints: soft white, warm grey, mid-charcoal.
- Works with: black joinery, concrete-contractors-nz/concrete-floor-slabs-kapiti-coast/”>concrete-contractors-nz/concrete-layers-lower-hutt/”>concrete pavers, cedar cladding.
Sample Palettes
- Crisp: Off-White fence + Black hardware + Native green planting
- Modern: Light Grey fence + Charcoal posts + Pale timber deck
- Dramatic: Charcoal fence + White trim + Lime or kōwhai-coloured pots
Tips
- Use satin or low-sheen to hide minor imperfections.
- If your house is dark, try a mid-tone fence for contrast so the section doesn’t feel closed in.
Earthy Tones
Earth colours blend with rural and bush settings and complement native plants.
- Colours: clay brown, raupō reed, olive, dusky green.
- Works with: weatherboard cottages, corrugated roofs, stone pathways.
Sample Palettes
- Bush Blend: Olive fence + Dark brown posts + Ferns and flax
- Rural Warmth: Clay brown fence + Cream cap rail + Macrocarpa or pine deck
- Coastal Bush: Grey-green fence + Sand-toned gravel + Manuka and grasses
Tips
- Consider a semi-transparent stain on rough-sawn timber to keep the grain visible.
- In shaded areas, pick a slightly lighter earthy tone so the boundary doesn’t read too heavy.
Bold Statements
Bold colours bring energy and define zones without more structures.
- Colours: deep blue, oxblood red, mustard, teal.
Use Cases
- Feature wall behind a seating nook
- Backdrop for a sculpture or herb garden
- Accent on rails or posts while panels stay neutral
Sample Palettes
- Urban Pop: Mustard panel + Charcoal frame + Concrete planters
- Harbour Mood: Deep blue fence + Pale timber bench + Silver grasses
- Retro Warm: Oxblood posts + Mid-grey panels + Terracotta pots
Tips
- Keep neighbouring boundaries calmer to avoid visual clutter.
- Test a large swatch and view at midday and late afternoon to confirm you like the saturation.
How To Coordinate Fence Colours With House Exteriors, Gardens, And Decks
Start with what won’t change soon, then layer.
- Pick Your Anchor: roof or cladding colour sets the base tone.
- Match The Undertone: cool greys with cool claddings; warm greys with warm bricks and timbers.
- Respect Sightlines: stand at the street and at the deck; ensure the fence supports the view, not fights it.
- Echo, Don’t Copy: one shade lighter or darker than the house keeps harmony without looking flat.
- Tie In The Deck: choose a deck stain that shares the fence’s undertone so the transition feels clean.
- Use Planting As A Bridge: repeat foliage colours. Olive or flax greens love charcoals and earthy browns; silver foliage pops against deep blue.
- Hardware Matters: black powder-coated latches and hinges suit most palettes and read tidy.
Paint Order
1. Repair and prime
2. Paint frames and posts
3. Paint panels
4. Finish caps and hardware
NZ-Specific Tips To Resist Fading In Strong UV
- Our UV is intense, so plan for colourfastness from day one.
- Choose exterior paints labeled UV-resistant with high-quality binders.
- Dark colours absorb heat; pick premium ranges to reduce early chalking.
- Favour low-sheen or satin for colour retention on rough-sawn timber.
- Check Light Reflectance Value (LRV): mid-tones often balance longevity and heat build-up.
- North and west faces fade faster; consider a slightly darker initial tone on those runs.
- Apply the full system: clean, sand, prime, two topcoats at the recommended spread rate.
- Recoat cadence: quick wash each spring; touch up exposed tops and post caps before summer.
- Test Patches: paint an A4-sized sample board and view it across two sunny days before committing.
Creative Painting Ideas
Fresh paint can turn a plain fence into a feature that lifts your whole backyard. Use these ideas to create a look that fits New Zealand light, coastal air, and modern Kiwi homes while keeping your project practical and long-lasting.
Two-Tone Designs
1. Split your fence into two clear zones. Paint the top lighter to feel taller, or go dark on the bottom to anchor the space.
2. Try vertical or horizontal splits. You can also paint posts one colour and panels another.
3. Colour pairs that work in NZ:
- Charcoal and soft grey for a modern build
- Olive green and flax for bush or rural settings
- Navy and off-white for coastal homes
4. How to do it well:
- Mark a straight line with a chalk line and painter’s tape.
- Paint the lighter colour first, let it cure, then tape and add the darker shade.
- Remove tape while the paint is still slightly wet to avoid tearing.
Ombre Effect
1. Create a gradient that moves from light to dark. Run it top-to-bottom for height or left-to-right to lead the eye along the boundary.
2. Pick one colour family and choose 3–5 steps from light to deep.
3. Simple method:
- Paint the lightest tone across the full panel.
- While it is tacky, add the next tone halfway down.
- Blend the join with a dry brush or roller using light, quick passes.
- Repeat with deeper tones toward the base.
- Keep it subtle. The best ombre for fences feels natural in daylight and does not shout.
Patterns And Stencils
1. Geometric options: stripes, chevrons, herringbone, or a simple grid. These suit contemporary cladding and decks.
2. Organic options: leaf silhouettes, fern shapes, or soft arcs that echo garden beds.
3. NZ-inspired ideas: koru-style curves, kowhai leaves, or wave lines. If you reference Māori motifs, do it respectfully. Commission a local artist or use open designs.
4. How to get crisp lines:
- Cut stencils from mylar so they hold shape and clean easily.
- Snap chalk lines and use a level for repeat patterns.
- Off-load your brush or foam roller on a tray, then dab with light pressure to stop bleed.
- Work in sections and step back often to check spacing.
Murals
Themes That Fit Kiwi Settings
- Coastal scenes with pale blues, dune grasses, and soft greys
- Native birds like tūī or pīwakawaka with stylised outlines
- Simple mountain ranges or rolling hills in layered silhouettes
Plan First
- Sketch a small version, then grid your fence with light pencil marks to scale it up.
- Start with large background blocks, then add mid-tones and finish with line work.
Street-Facing Or Shared Boundaries
- Check local rules and talk with neighbours. A quick chat avoids disputes and helps the design land well.
Mixing Paint And Stain
1. Blend natural texture with solid colour for a balanced look.
2. Options that work:
- Stain posts and rails in a warm timber tone. Paint the infill boards charcoal or deep green.
- Paint the frame off-white. Stain the slats a medium brown to show grain.
3. Tips:
- Stain first, let it cure fully, then mask and paint. Paint covers stain bleed better than the reverse.
- Choose a semi-transparent stain if you want grain, or a solid-colour stain for extra coverage and UV hold.
Make Creative Designs Last Outdoors
Preparation
- Wash the fence with a fence cleaner or mild detergent. Rinse well and let it dry.
- Remove flaking paint. Sand to a sound surface. Replace rotten boards before you start.
- Prime bare timber and cut ends. Seal end grain to stop moisture wicking.
Product Choices
- Use exterior acrylic paints with UV resistance for colour work. They flex with timber movement.
- For stain, pick exterior oil-based or water-based products rated for UV and mildew resistance.
- Choose satin or low-sheen finishes to hide minor surface flaws and reduce glare in strong sun.
Application
- Work on mild, dry days. Avoid direct midday sun, strong wind, or dew risk.
- Use quality brushes and rollers. Back-brush into gaps and edges for full coverage.
- Apply two coats of colour. Add a clear exterior topcoat with UV absorbers for murals or high-chroma shades. Test first to ensure no yellowing.
Detailing
- Use stainless or galvanised fixings to prevent rust stains.
- Lift boards off soil with a gravel strip or paver edge to reduce splashback and rot.
Maintenance
- Rinse yearly, trim plants off the fence line, and touch up chips right away.
- Expect a refresh every 5–7 years in sheltered spots. Plan shorter cycles near the coast or in high-sun areas.
Quick Planning Checklist
- Does the design fit your house style and garden layout?
- Have you tested colours on the actual fence in morning and late light?
- Are you using exterior-rated products for NZ conditions?
- Do you have neighbour approval for boundary designs that face them?
- Will the pattern or mural still look tidy after a season of growth and weather?
Use these ideas to craft a fence that suits your place and your routine. You get curb appeal, better protection, and a design that feels like home. Sprinkle in keywords naturally as you write the full article: painting ideas for fences NZ, fence paint colours NZ, NZ fence painting, creative fence designs. Keep your voice personal and practical, share small wins or lessons from past projects, and your content will read like it came from real experience.
Preparation And Application Tips
A good finish starts before the first brush stroke. Use these steps to prep, paint, and protect your fence in NZ conditions so your work lasts.
Cleaning And Sanding Old Surfaces
- Wash off dirt, salt, and mould. Use sugar soap or a mild detergent and a soft brush.
- Treat mould or algae. Apply a mould wash, wait as directed, then rinse well.
- Water-blast on a low setting if the timber can handle it. Keep the nozzle at least 30 cm from the surface to avoid gouging.
- Let the fence dry fully. Aim for two dry days after rain before sanding or priming.
- Sand to create a key for new paint. Use 80–100 grit on rough spots, then 120 grit for a smoother base.
- Feather any peeling edges so old and new layers blend.
- Wipe dust off with a damp cloth and let the timber dry again.
Checking For Damage Or Rot Before Painting
- Inspect rails, posts, and the bottom of palings. These areas collect moisture first.
- Probe soft spots with a screwdriver. If it sinks in easily, replace or splice the affected timber.
- Tighten or replace loose fasteners. Use galvanised or stainless fixings, especially near the coast.
- Fill small cracks and nail holes with exterior wood filler. Let it cure, then sand flush.
- Seal open joints and end grain with exterior-grade sealant to block water.
- Check gates for sagging. Adjust hinges now so fresh paint does not crack later.
Weather Conditions Ideal For Painting In NZ
- Pick mild, dry days. Target 10–25°C with low humidity.
- Avoid full sun on the fence. Paint when the panels are in shade to slow drying and reduce lap marks.
- Start after morning dew has lifted. Stop before late afternoon when dew returns.
- Plan for a rain-free window. Give primer and each coat enough time to dry before any showers.
- In windy areas, work on the leeward side first to limit dust on wet paint.
- Late spring to early autumn offers the most reliable windows in many NZ regions.
Step-By-Step Application Tips For A Smooth Finish
Prime Smart
- Bare timber: use an exterior primer that blocks tannin bleed on hardwoods like cedar.
- Weathered timber: spot-prime knots, filled areas, and any sand-throughs.
- Metal fencing: remove rust, use a rust-inhibiting metal primer.
Choose The Right Tools
- Brush: a 63–75 mm synthetic brush cuts in edges and gets into gaps.
- Roller: 10–12 mm nap for smooth boards, 20 mm for rough-sawn timber.
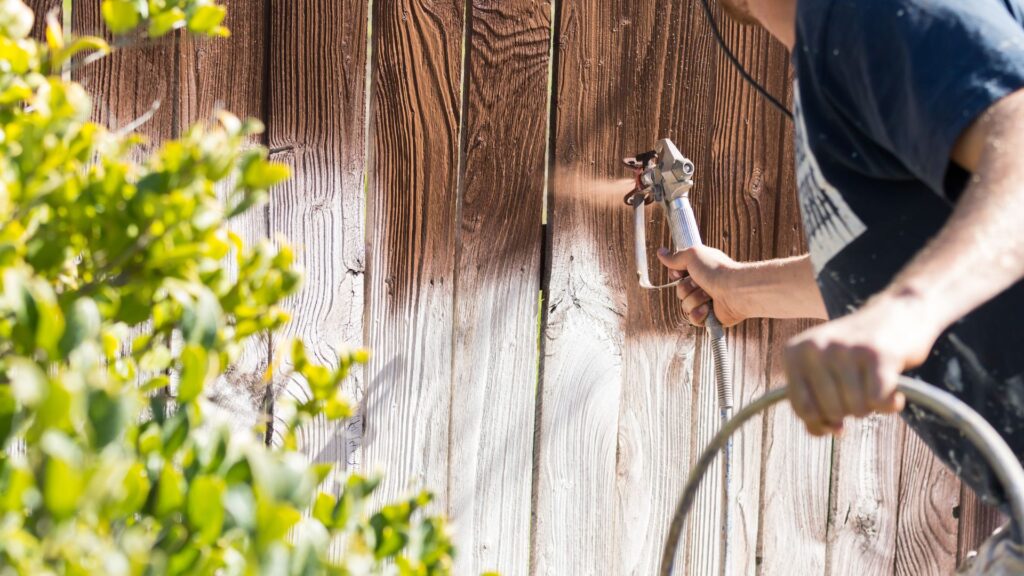
- Sprayer is fine if you back-brush to drive paint into grain and joints.
Work In Panels
- Paint top rails, then verticals, then bottom rails.
- Keep a wet edge. Overlap slightly into fresh paint to avoid lap lines.
- Brush with the grain for a cleaner finish.
Apply Two Full Coats
- Follow label dry and recoat times. Do not rush the second coat.
- Lightly sand between coats with 180–220 grit if the surface feels rough. Wipe clean.
Mind Coverage And Quantity
- Typical coverage is about 10–12 m² per litre per coat.
- Example: a 30 m fence at 1.8 m high, both sides, is roughly 108 m². Two coats at 10 m² per litre needs about 22 litres, plus 10% for touch-ups.
Finish Clean
- Remove masking while the last coat is tacky for crisp lines.
- Check edges, caps, and gate areas for missed spots.
- Let the paint cure before leaning items on the fence or running sprinklers nearby.
These steps raise quality, cut rework, and help your colour hold up in Kiwi weather. They pair well with any style from this guide on painting ideas for fences NZ, whether you choose a classic neutral, an earthy tone, or a bold statement shade.

Common Mistakes To Avoid
You want a fence that looks sharp and lasts in NZ weather. Steer clear of these common pitfalls and you’ll save time, paint, and money.
Painting In Full Sun Or Wet Conditions
Direct sun makes paint dry too fast. You get lap marks, brush drag, and weak adhesion. Wet or damp timber traps moisture under the film. That leads to blistering and peeling.
Do This Instead
- Paint in shade or when the fence is out of direct sun.
- Aim for mild, dry conditions: roughly 10–25°C with low wind.
- Keep humidity under 80% when you can. Avoid painting right after rain or during heavy dew.
- Check the forecast for a clear 24-hour window.
- In coastal or humid areas, start late in the morning once dew has lifted. Stop before evening dew returns.
Skipping Primer
Primer bonds your topcoat to the surface, blocks stains and tannins, and evens out porosity. If you skip it on bare timber or patched areas, the finish can flash, stain through, or fail early.
Use Primer When
- The timber is bare, weathered, or highly absorbent (e.g., cedar, treated pine).
- You’ve sanded back to raw wood or filled holes.
- You’re switching from oil-based to water-based paint.
- You see knots, tannin bleed, or previous water stains.
Tips
- Choose an exterior, stain-blocking primer for softwoods and tannin-rich species.
- Tint the primer toward your topcoat colour for better coverage.
- Spot-prime repairs even if most of the fence has sound paint.
Ignoring Fence Repairs Before Painting
Paint can’t fix structural or moisture problems. If boards are loose, posts are leaning, or rot has started, the new coat will fail early and hide issues you should address now.
Fix First, Paint Second
- Replace rotten palings and rails. Probe suspect spots with a screwdriver.
- Re-set or replace wobbly posts. Tighten or swap rusted fixings.
- Treat mould and moss with an exterior cleaner. Rinse and let dry.
- Sand splinters and feather peeling edges.
- Fill cracks with exterior filler and sand smooth.
- Trim plants away to improve airflow and reduce future moisture.
Using Indoor Paint Outside
Interior paints aren’t built for NZ sun, rain, and salt air. They chalk, fade, and soften. You’ll repaint sooner and fight peeling.
Choose The Right Product
- Use exterior-grade acrylic or enamel with UV and moisture resistance.
- For timber, pick flexible exterior acrylic that moves with the wood.
- For metal fences, apply an anti-corrosion primer and a compatible exterior topcoat.
- Pick the sheen for your goals: matte hides defects, satin balances cleanability and look, gloss is durable but shows flaws.
Practical Notes
- Follow the can’s recoat times and spread rates.
- Don’t thin more than the label allows.
- Keep a record of brand, colour, and batch for future touch-ups.
Maintenance Tips For Longevity
Keep your fence looking fresh in NZ by setting a simple maintenance rhythm. High UV, salt air, and wet winters are the big culprits. Tackle small issues early and you’ll delay a full repaint. These tips pair well with your painting ideas for fences NZ.
How Often To Repaint In NZ Climate Zones
- Coastal zones (Auckland, Northland, Bay of Plenty): repaint every 3–5 years for paint; 2–3 years for stains. Salt and sun speed up fading.
- Urban/inland North Island (Hamilton, Palmerston North): repaint every 4–6 years; stains 2–4 years.
- South Island inland (Canterbury plains, Southland towns): repaint every 5–7 years; stains 3–5 years thanks to cooler temps.
- High UV or alpine areas (Central Otago, Mackenzie): repaint every 4–6 years; stains 2–3 years due to intense sun and freeze–thaw.
- Dark colours fade faster. North- and west-facing runs need attention sooner than shaded sides.
- Keep a maintenance log: colour name, brand, sheen, batch, and date. It speeds up touch-ups and colour matching.
Annual Checks For Peeling Or Fading
- Inspect twice a year: end of summer (UV damage) and end of winter (moisture damage).
- Look for: chalky colour, hairline cracks, blisters, peeling edges, greyed timber, moss, mould, and soft spots near ground contact.
- Run the tape test: press painter’s tape on suspect paint, pull back. If flakes lift, plan spot repairs.
- Probe for rot with a screwdriver at posts, rails, and end-grain. Soft wood needs drying, hardener, or replacement.
- Check hardware and fasteners. Rust stains bleed through paint; treat with rust-inhibiting primer.
- Scan irrigation lines. Redirect sprinklers so they don’t wet the same panels daily.
- Trim plants 150–300 mm off the fence to let timber breathe and dry after rain.
Quick Touch-Ups To Prevent Larger Issues
- Clean the area: mild detergent and water, soft brush, rinse, and let dry fully.
- Lightly sand: feather the edges of any lifted paint; smooth splinters and rough grain.
- Kill mould: apply a mould wash where needed; rinse and dry.
- Spot-prime: use an exterior primer suited to timber, tannin-blocking for hardwoods, or metal primer for steel hardware.
- Recoat smart: two thin coats of UV-resistant exterior paint; follow label dry times. For stains, apply one even coat and wipe off excess.
- Seal weak points: end-grain, cut tops, and post caps. These soak water first and fail first.
- Fix fastener bleed: dab rust-inhibiting primer on nail and screw heads before topcoat.
- Caulk gaps where rails meet posts to keep water out.
- Keep a “fence kit”: small pail of the fence colour, primer, mini-roller, sash brush, sanding sponge, painter’s tape, disposable drop cloth.
- Do micro-maintenance: touch up scuffs after lawn work, seal new cuts after repairs, and refresh top edges before peak summer.
- Protect the base: add a narrow gravel strip to reduce splashback and soil contact.
Follow this cycle and you’ll extend repaint intervals, avoid costly repairs, and keep your fence colour true. It’s simple: inspect, clean, spot-prime, and touch up before problems spread.
Cost Considerations And Budgeting
You want a fresh-looking fence without overspending. Use these New Zealand-specific costs and tips to plan well and avoid surprises.
Average Costs For Paint And Supplies In NZ
Fence Paint (10L pails)
- Budget fence finishes: from about $57.90–$69 per 10L (PPG and British Paints).
- Mid–premium acrylics for fences: around $145.50–$195 per 10L (British Paints and Dulux Timbacryl).
- Stain option: 4L deck/fence stain about $71.
Primers And Undercoats
- Dulux 1Step 4L: about $134.
- Zinsser Bulls Eye 1-2-3 10L: about $194.98.
- PPG Sure Coat Sealer/Undercoat 8L: about $95.
Tools And Consumables (Typical Retail)
- Drop sheet: from $2.75.
- 4-piece brush set: about $11.29.
- 230mm roller kit: from $7.52.
- Painter’s tape (48mm x 55m): about $20.82.
Sprayer Hire (Optional)
- Airless sprayer: about $150 + GST per day (Graco 490/495).
Quick Coverage Math (So You Buy The Right Amount)
- Dulux’s NZ calculator uses 16 m²/L per coat for topcoats and 12 m²/L for prep products.
- Rough-sawn timber drinks more paint: expect about 4–10 m²/L per coat on many fences.
- Example: a 30m long x 1.8m high fence (one side) ≈ 54 m². Two coats at 16 m²/L need about 6.8L of topcoat; round up to 8–10L to allow for posts, waste, and rough areas.
Hiring A Professional Vs. DIY
Typical Pro Pricing You’ll See Advertised
- Per m²: roughly $35–$55, depending on prep and access.
- Per lineal metre offers also exist (e.g., from $18 + GST per metre for clean fences).
When Hiring Makes Sense
- You have long runs, a double-sided fence, or heavy prep (mould, flaking, repairs).
- You want a spray application for a consistent finish and faster turnaround.
When DIY Wins
- The fence is sound, access is easy, and you can paint in two mild, dry days.
- You already own basic gear or can split a sprayer rental with a neighbour.
What A “Real” Budget Looks Like (Worked Scenarios)
DIY, Value Range (One Side, ~54 m², Two Coats)
- Paint: 10L budget fence finish ≈ $58–$69.
- Primer only if needed: allow $0–$134 (surface-dependent).
- Accessories: drop sheets, brush/roller kit, tape ≈ $35–$50.
- Total ballpark: ~$93–$253 (paint + basics), plus time.
DIY, Premium Range
- Paint: 10L Dulux Timbacryl ≈ $194.45.
- Primer: up to ~$135–$195 if required.
- Accessories: ~$35–$50.
- Optional sprayer hire: ~$150 + GST/day.
- Total ballpark: ~$230–$540, or ~$380–$690 if you hire a sprayer.
Professional
- Using $35–$55/m² for ~54 m²: about $1,890–$2,970 for one side, excluding extras like repairs or heavy washing.
Cost-Saving Tips Without Sacrificing Quality
Match Product To Timber And Texture
- Check coverage rates before you buy. Rough-sawn or weathered boards need more paint; smooth boards need less.
Buy Smart
- Choose 10L pails for better per-litre value; compare budget vs premium lines on actual coverage, not just sticker price.
- Watch weekly promos at big-box stores and use loyalty cards where available.
Reduce Prep Costs
- Clean and sand sections the day before. Mask only what you must. Reuse trays and frames; replace just sleeves and brush heads.
Speed Up The Job
- Roll large flats; brush edges and posts. For long runs, a one-day sprayer hire shared with a neighbour can cut labour hours sharply.
Plan For Maintenance
- A quick wash and touch-up each year delays full repaints and keeps long-term costs down.
Questions To Keep You On Budget
- How many square metres are you actually painting?
- Is the timber rough-sawn or smooth?
- Do you need a primer, or will a self-priming fence paint suffice?
- Will sharing a sprayer hire or bulk-buying with a neighbour lower your cost per metre?

FAQs: About Painting Ideas For Fences In NZ
Conclusion
A freshly painted fence not only boosts your home’s curb appeal but also adds an extra layer of protection against New Zealand’s sun, rain, and coastal elements, helping it last for years to come. Whether you prefer timeless neutrals, earthy tones that blend with nature, or bold statement colours that make your outdoor space stand out, painting your fence is a simple yet impactful way to express your personal style. Don’t be afraid to experiment with creative designs, two-tone finishes, or patterns that reflect your personality and complement your home’s surroundings. Now it’s your turn, grab some paint, bring your vision to life, and share your fence painting results or any questions you may have in the comments so we can inspire each other and keep the ideas flowing.
Find A Professional Fencing Company Near You!
- Farm Fencing Waikato
- Fence Builders Alexandra, Clyde & Cromwell
- Fence Builders Auckland
- Fence Builders Central Otago
- Fence Builders Christchurch
- Fence Builders Hamilton Waikato
- Fence Builders Invercargill
- Fence Builders Kapiti
- Fence Builders Lower Hutt
- Fence Builders Palmerston North
- Fence Builders Queenstown
- Fence Builders Taupo
- Fence Builders Upper Hutt
- Fence Builders Wanaka
- Fence Builders Wellington
- Fencing Contractors Levin
- Fencing Contractors Napier
- Fencing Hastings
- Fencing Hawkes Bay
- Fencing Kerikeri
- Fencing Mangawhai
- Fencing Nelson
- Fencing New Plymouth
- Fencing Paihia
- Fencing Taranaki, New Plymouth
- Fencing Warkworth
About the Author:
Mike Veail is a recognized digital marketing expert with over 6 years of experience in helping tradespeople and small businesses thrive online. A former quantity surveyor, Mike combines deep industry knowledge with hands-on expertise in SEO and Google Ads. His marketing strategies are tailored to the specific needs of the trades sector, helping businesses increase visibility and generate more leads through proven, ethical methods.
Mike has successfully partnered with numerous companies, establishing a track record of delivering measurable results. His work has been featured across various platforms that showcase his expertise in lead generation and online marketing for the trades sector.
Learn more about Mike's experience and services at https://theleadguy.online or follow him on social media: