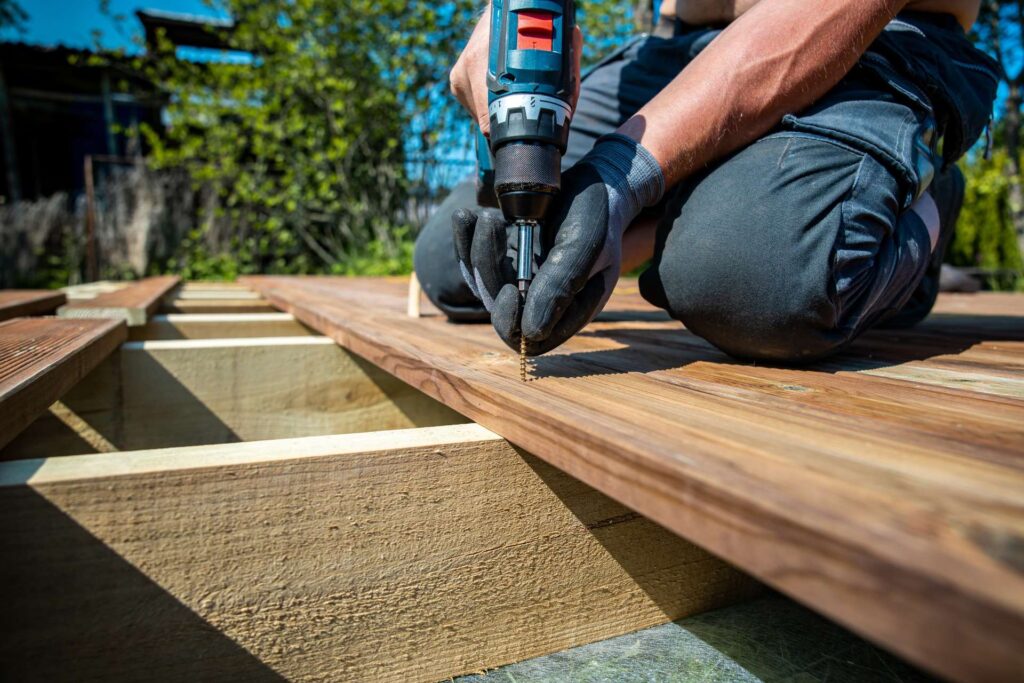
Welcome to your ultimate guide on how to remove paint from a deck in New Zealand! Whether your deck’s paint is peeling, fading, or you’re simply ready for a new look, maintaining your outdoor space is essential, especially with the wear and tear that comes from NZ’s unique weather conditions. In this step-by-step guide, we’ll walk you through everything you need to know, from gathering the right tools to safely removing paint, ensuring your deck is prepped and ready for its next transformation. By the end, you’ll have all the tips and tricks to make your deck look as good as new! For professional help, contact experienced fencing contractors in your area.
To remove paint from a deck in NZ, start by scraping off loose paint using a paint scraper. Apply a paint stripper suitable for outdoor use, let it sit as per instructions, then remove the softened paint. Use a pressure washer or hose to clean off any residue, and sand the surface to smooth the wood. Finally, clean the deck thoroughly and let it dry before applying a new finish or paint.
- Why Remove Paint From Your Deck?
- Tools And Materials You’ll Need
- Step-By-Step Guide To Removing Paint From A Deck
- After Paint Removal: What’s Next?
- Common Mistakes To Avoid When Removing Paint From A Deck
- Eco-Friendly Options For Paint Removal
- When To Call A Professional
- FAQs: About How To Remove Paint From Deck NZ
- Conclusion
- Find A Professional Decking Company Near You!
Why Remove Paint From Your Deck?
Removing old paint from your deck is a necessary task for homeowners in New Zealand, especially given the unique weather conditions that can take a toll on outdoor structures. The reasons for removing paint often stem from factors such as weather damage, fading, and the desire to refresh the deck’s appearance to align with current trends. Over time, the sun’s UV rays, rain, wind, and even sea salt can cause paint to deteriorate, leading to peeling, flaking, or discoloration. When this happens, the deck not only looks worn out but also becomes more vulnerable to further damage.
Leaving old, peeling paint on your deck can have more serious consequences than just aesthetic concerns. As the paint breaks down, it no longer provides adequate protection for the wood underneath. Moisture can seep through the cracks, leading to swelling, warping, or even rot. Wood rot is especially problematic because it weakens the structure of the deck, making it less safe to use and potentially leading to expensive repairs. Furthermore, an unsightly deck with peeling paint can significantly reduce your home’s curb appeal, making it less attractive to visitors or potential buyers if you ever decide to sell.
By regularly removing old paint and maintaining your deck, you ensure that the wood remains healthy and strong. Proper maintenance, such as repainting or staining after removing the old layers, creates a protective barrier that shields the deck from environmental damage. This not only extends the lifespan of your deck but also keeps it looking fresh and well-maintained. In the long run, a well-cared-for deck can boost your home’s value, as outdoor living spaces are highly desirable in the New Zealand real estate market. A deck that is in great condition can make your home more appealing, helping it stand out among others.
Removing paint from your deck is more than just an aesthetic choice—it’s a key part of maintaining the integrity of your outdoor space. Whether you’re dealing with weather-worn paint or simply want a new look, keeping your deck in good condition protects your investment and ensures that it remains a safe, attractive part of your home for years to come.
Tools And Materials You’ll Need
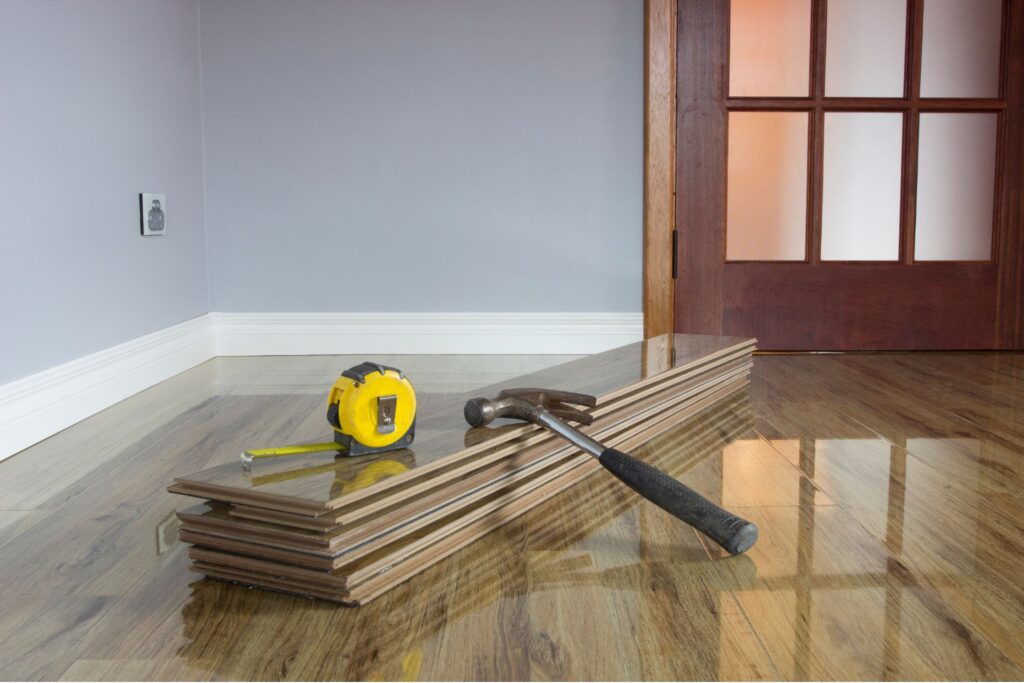
Before starting your deck paint removal project, it’s essential to gather all the right tools and materials to ensure a smooth, efficient process. Having the right supplies not only makes the job easier but also helps to protect your deck and surrounding areas from damage. Here’s a comprehensive list of the essential tools and materials you’ll need.
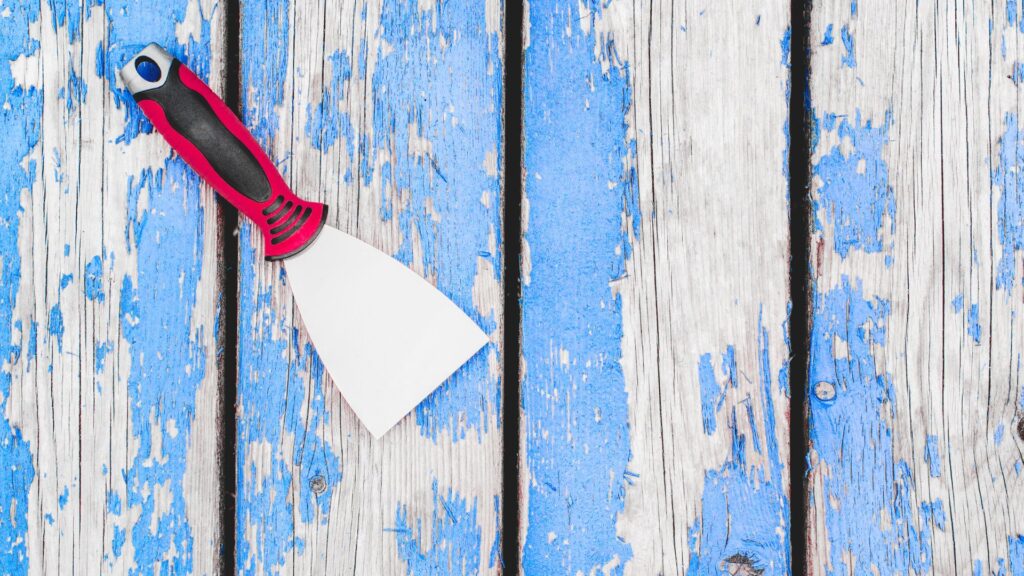
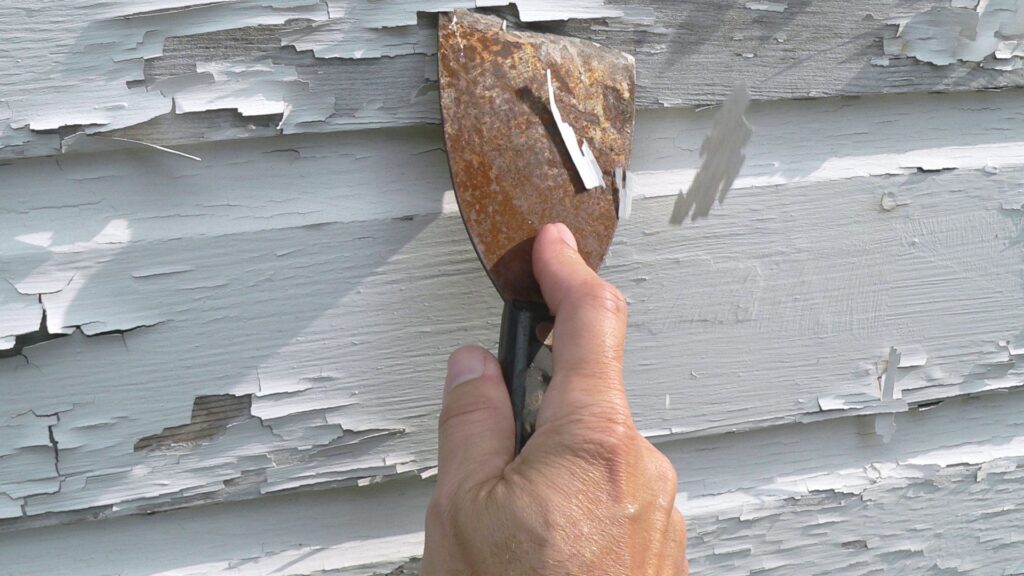
1. Paint Scraper
A paint scraper is your go-to tool for manually removing loose or peeling paint. It allows you to tackle areas where the paint is already lifting or flaking, giving you a clean slate to work with. Make sure to choose a scraper with a comfortable handle and a sharp, durable blade. In some cases, a combination of a putty knife and a wire brush can also help with tougher spots. When using a scraper, be gentle to avoid gouging or damaging the wood underneath.
2. Sandpaper or Power Sander
Sanding is a critical step in smoothing out the deck after paint removal. You’ll need sandpaper or a power sander to eliminate the last traces of paint and create a clean surface for refinishing. For larger decks, a power sander can save you a lot of time and effort, while sandpaper is more suited for smaller, detailed areas. Medium-grit sandpaper (around 80-120 grit) is recommended for most decks, as it’s effective without being too harsh on the wood.
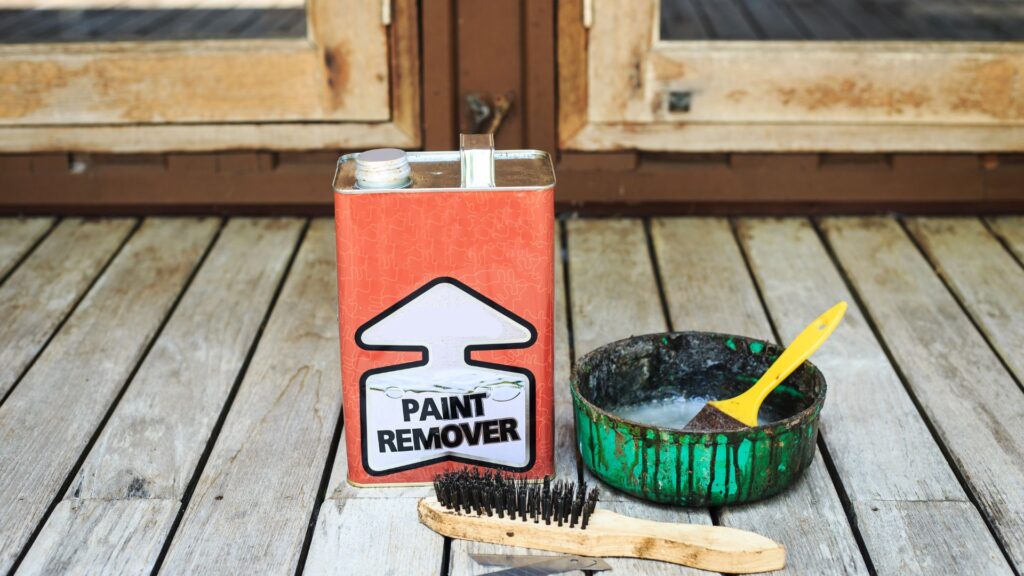
3. Paint Remover/Stripper
A paint remover or stripper is vital for removing stubborn paint that doesn’t easily scrape off. In New Zealand, several eco-friendly options are available that minimize harm to the environment and surrounding plants. Brands like Citristrip are popular choices, as they are biodegradable and effective without the strong fumes of traditional paint removers. Be sure to follow the manufacturer’s instructions carefully when applying paint stripper, and allow enough time for it to break down the paint before scraping it off.
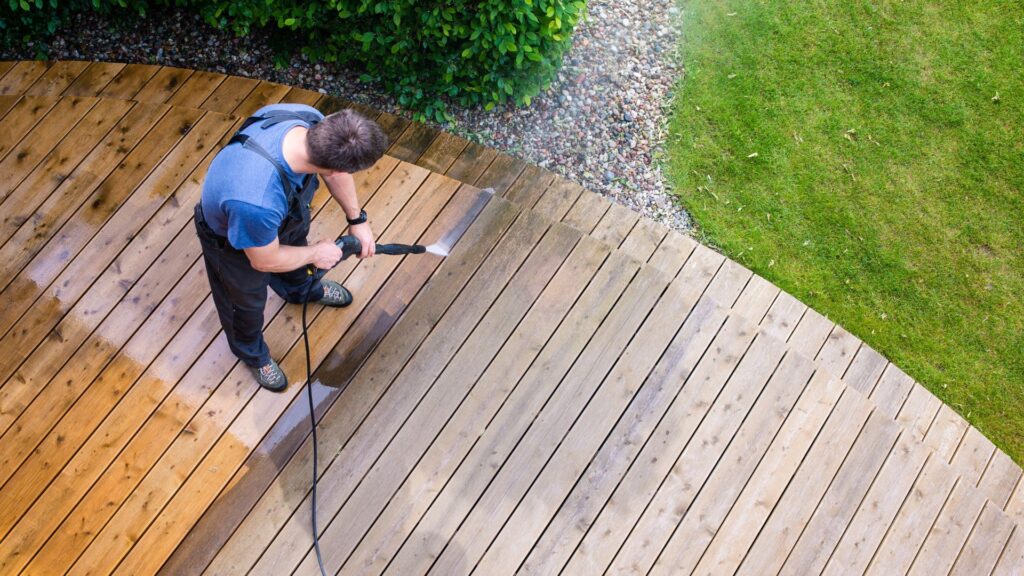
4. Pressure Washer or Hose
After applying a paint remover, you’ll need a way to wash away the residual paint and debris. A pressure washer is an excellent tool for this job, as it provides enough force to clean the deck thoroughly without damaging the wood if used correctly. If you don’t have access to a pressure washer, a high-powered garden hose can be used with a stiff-bristle brush to achieve a similar result. When using a pressure washer, keep the pressure settings moderate (around 1500-2000 psi) to avoid splintering or weakening the deck boards.
5. Safety Equipment (Goggles, Gloves, Mask)
Safety should be your top priority when working with paint strippers and other chemicals. Always wear goggles to protect your eyes from splashes, gloves to prevent skin contact with chemicals, and a mask to avoid inhaling dust and fumes. Even eco-friendly paint removers can be harmful if they come into contact with your skin or eyes, so it’s crucial to use proper protection. A dust mask or respirator is particularly important during sanding to protect your lungs from fine particles.
6. Drop Cloths and Protective Coverings
Don’t forget to protect your plants, furniture, and surrounding areas from potential spills or overspray. Drop cloths are an inexpensive but effective way to shield delicate plants, outdoor furniture, or walls from paint remover and debris. If your deck is near a garden or landscaping, consider using plastic sheeting to cover the soil and prevent any chemicals from seeping into the ground. Drop cloths can also protect the deck itself during the final sanding and cleaning stages.
Where to Find These Tools in New Zealand
All of the tools and materials listed above are readily available at most hardware stores across New Zealand, such as Mitre 10 or Bunnings Warehouse. These stores offer a wide range of paint scrapers, sanders, eco-friendly paint removers, and safety equipment. You can also find many of these products online through New Zealand-based retailers or on larger platforms like Trade Me. When shopping for your supplies, don’t hesitate to ask staff members for recommendations, especially if you’re looking for locally preferred brands or environmentally conscious products.
By gathering the right tools and materials before you begin, you’ll be well-prepared to tackle the paint removal process and achieve professional-looking results. Proper preparation ensures a smoother, safer job, making your deck look its best and ready for its next coat of paint or stain.
Step-By-Step Guide To Removing Paint From A Deck
If you’re ready to refresh your outdoor space and remove old paint from your deck, follow this detailed step-by-step guide. This process is not only crucial for aesthetic reasons but also helps extend the life of your deck by protecting the wood from further damage. Below is a comprehensive guide on how to tackle paint removal efficiently and safely.
1. Prepare the Area
Before diving into paint removal, preparation is key. Start by clearing the deck of all furniture, potted plants, grills, or any other objects that may obstruct the work. This ensures you have a clean, open space to move around and prevents any accidental damage to your belongings. If you have nearby plants or surfaces that could be exposed to paint stripper or debris, cover them with drop cloths or plastic sheeting. This precaution will protect them from harmful chemicals and paint chips.
It’s equally important to monitor the weather. Aim for a dry, mild day—conditions that are neither too hot nor cold. Extreme temperatures can interfere with the effectiveness of paint strippers and complicate the drying process. Safety should always come first, so don’t skip on protective gear. Wear gloves, a face mask, and safety goggles to protect yourself from potentially harmful chemicals and paint particles during the process.
2. Assess the Condition of the Paint
Before jumping straight into paint removal, take a moment to assess the condition of the paint on your deck. Is the paint peeling, flaking, or has it adhered strongly to the wood? Identifying the condition will help you determine how much effort and what method you’ll need for removal.
A great tip is to start with a small test patch on an inconspicuous area of the deck. This allows you to gauge how well the paint will come off using your chosen method, whether you’ll need a chemical paint stripper, or if simple scraping will do the trick. Testing first can save you a lot of hassle later on.
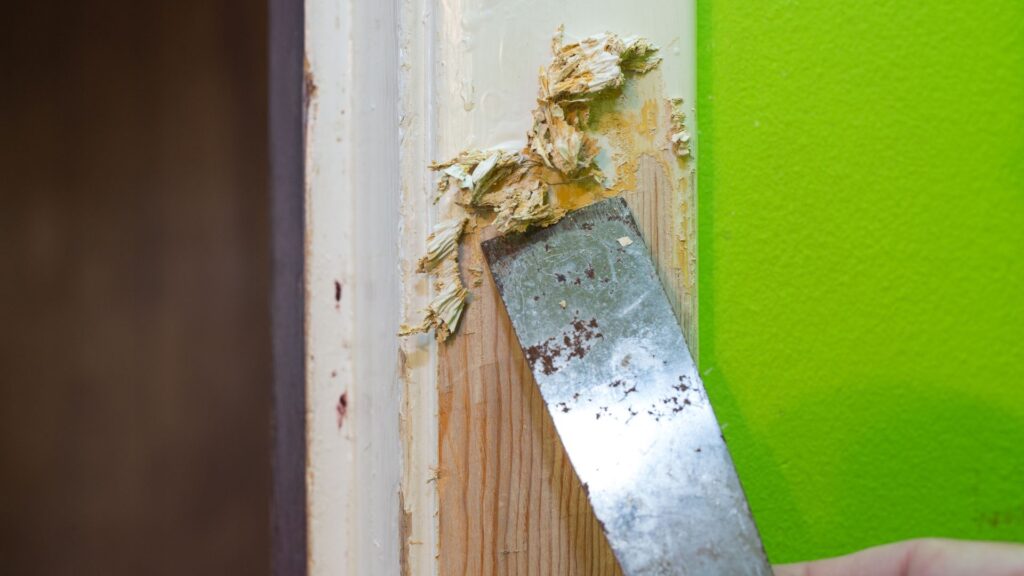
3. Scrape Off Loose Paint
Once you’ve assessed the condition of the paint, the next step is to manually remove any loose or flaking paint. Using a paint scraper, gently scrape off areas where the paint has already started to peel. This step is crucial because removing the loose bits before applying any chemicals will make the overall process smoother.
When scraping, it’s important to work carefully to avoid damaging the wood. Apply even pressure, and follow the grain of the wood to prevent gouging or splintering. For tricky areas or tight corners, a smaller scraper or putty knife can help. Be thorough but cautious—removing as much loose paint as possible here will save time in the later steps.
4. Use a Paint Stripper
In cases where the paint has adhered well, or when dealing with multiple layers of old paint, a paint stripper will be necessary. Select a paint stripper that’s suitable for outdoor use and, if possible, choose an eco-friendly product that’s safe for the New Zealand environment. Popular brands like Citristrip or products available at stores like Mitre 10 or Bunnings are excellent options.
When applying the paint stripper, use a brush or roller to evenly coat the surface. Follow the manufacturer’s instructions closely, paying attention to how long the stripper needs to sit before it starts breaking down the paint. In most cases, this will be anywhere from 15 minutes to a few hours. After the allotted time, the paint should start bubbling or softening, making it easier to remove. Use your scraper to gently lift the paint away. For thicker layers or stubborn spots, you may need to reapply the stripper or use a stronger product.
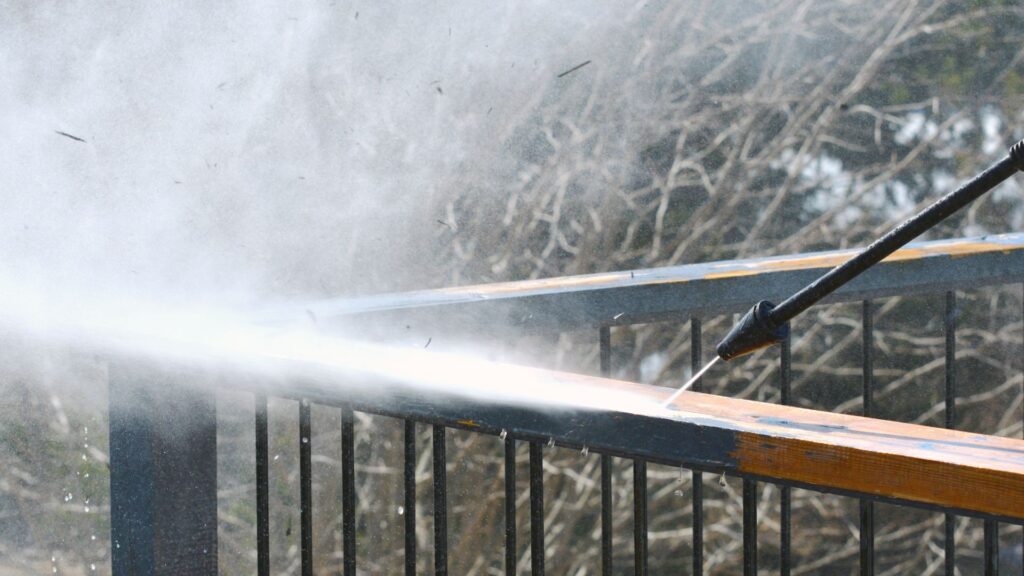
5. Power Wash the Deck
After stripping the paint, a power washer can be incredibly useful for rinsing away remaining paint residue and any chemicals left from the stripper. Use a pressure washer with a wide spray nozzle and set the pressure to a moderate level. High pressure can damage the wood, so it’s important to find the right balance—enough pressure to remove debris without harming the deck’s surface.
If you don’t have access to a power washer, a garden hose with a strong spray nozzle will also work, though it may require a bit more elbow grease. Combine this with a scrubbing brush to work off any remaining paint remnants.
6. Sand the Deck
Once most of the paint is removed, it’s time to sand the deck to smooth out the surface and remove any small patches of paint that might still be clinging on. Sanding is essential not just for aesthetics, but also to prepare the wood for its next finish, whether you’re repainting, staining, or sealing.
For this step, start with medium-grit sandpaper (around 80-grit) and work your way to finer grits for a smooth finish. If you’re working on a large deck, using a power sander will save time and effort. However, for smaller areas or delicate sections, hand sanding might give you better control. Sanding ensures the wood is even and ready for the next step.
7. Clean and Dry the Deck
After sanding, it’s important to thoroughly clean the deck to remove any dust, paint chips, or chemical residue. A simple sweep followed by a hose down should do the trick. If you used a paint stripper, make sure all chemical traces are washed off, as they could interfere with the new paint or stain.
Allow the deck to dry completely before proceeding with any further treatment. Depending on weather conditions, this could take 48 hours or longer. Rushing this step can trap moisture under a new finish, leading to bubbling, peeling, or wood damage down the line.
By following these steps carefully, you can remove paint from your deck effectively, leaving it clean and ready for a fresh new look. The key is taking the time to assess, prep, and execute each step thoroughly. With proper care, your deck will not only look great but will also be better protected against the elements for years to come.
After Paint Removal: What’s Next?
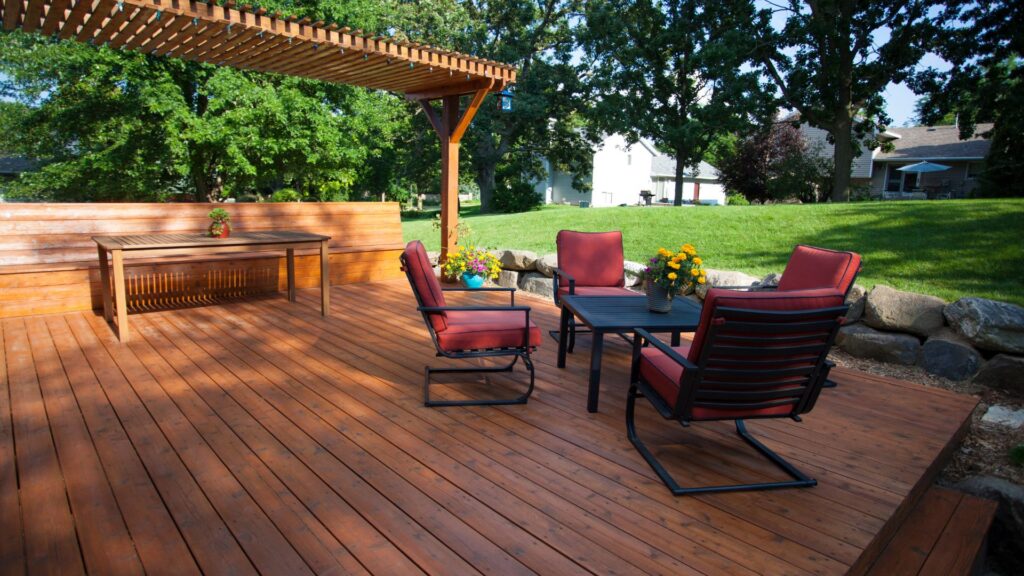
Once you’ve successfully removed the paint from your deck, the next step is deciding how you want to refinish it. There are several options depending on the look you’re going for and the long-term maintenance you’re willing to invest in. Whether you choose to stain, repaint, or leave the deck natural, it’s important to consider both aesthetics and practicality—especially with New Zealand’s unique climate, which can range from hot, sunny summers to rainy, damp winters.
Staining vs. Repainting vs. Leaving Natural
Staining the Deck
Staining is a popular choice for those who want to enhance the natural beauty of the wood. Stains come in a variety of shades, from clear to semi-transparent and even solid, allowing the wood grain to show through or providing a more uniform color. Staining your deck offers several benefits, including better penetration into the wood, which means it’s less likely to peel or chip over time compared to paint. This makes it a low-maintenance option, which is ideal in areas with fluctuating weather conditions like NZ.
However, stains don’t provide as many color options as paint, and you’ll need to reapply them every few years to maintain their protective properties. Still, if you prefer a more natural, rustic look with visible wood grain, staining is an excellent choice.
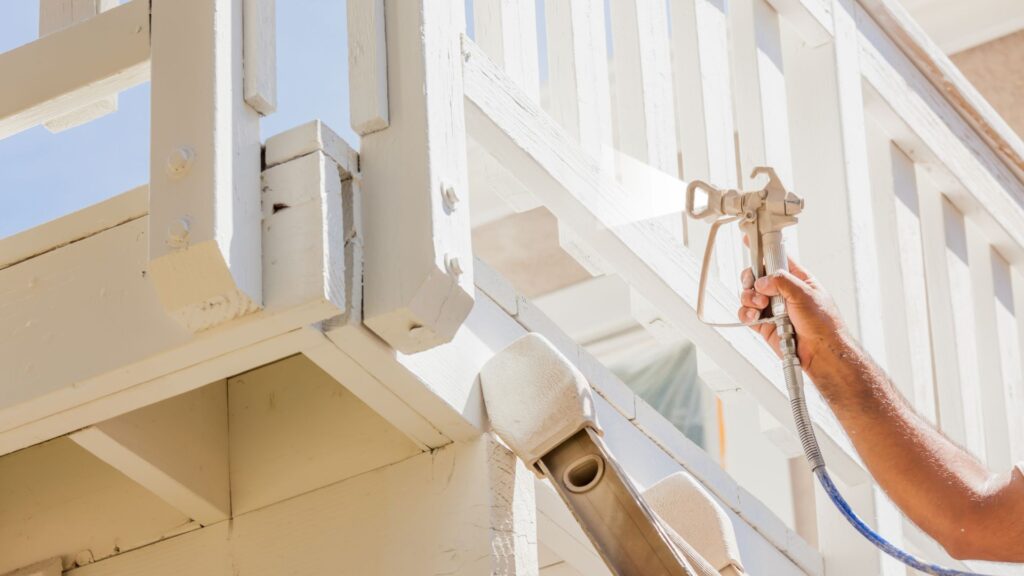
Repainting the Deck
If you prefer a more polished, vibrant look, repainting may be the way to go. Repainting offers the advantage of more color variety, so you can match your deck to your home’s exterior or garden aesthetic. A good quality outdoor paint can offer a durable, weather-resistant finish that can last several years if applied correctly.
However, painted surfaces tend to peel over time, especially in climates with high moisture, like parts of New Zealand. If you live in an area prone to heavy rain or damp winters, you may need to perform more frequent maintenance to keep the paint looking fresh. Be sure to use a paint designed specifically for outdoor use, and consider applying a primer first to ensure the paint adheres properly to the wood.
Leaving the Deck Natural
For those who love the raw, natural look of wood, leaving the deck unpainted or unstained is also an option. A natural wood deck can look beautiful, particularly if the wood itself has a lovely grain or texture. However, leaving the wood exposed to the elements requires regular maintenance to ensure it doesn’t suffer from moisture damage, warping, or UV fading.
If you choose to leave your deck natural, you’ll need to apply a clear protective sealant to protect the wood from rain, sun, and other environmental factors. While this option allows the deck’s natural beauty to shine, it may require the most frequent maintenance of the three choices.
How to Choose Between Staining and Repainting: Considering NZ’s Climate
When choosing between staining and repainting your deck, it’s essential to consider New Zealand’s climate. NZ’s weather varies depending on the region, but much of the country experiences high levels of UV radiation, particularly in summer, along with wet and damp conditions during winter. Therefore, the finish you choose needs to stand up to these conditions.
- For areas with high rainfall, such as parts of the West Coast or Auckland, a high-quality stain may be a better choice, as it penetrates the wood rather than sitting on top of it like paint. This reduces the likelihood of moisture getting trapped and causing peeling or cracking.
- In drier, sunnier regions like Central Otago or Hawke’s Bay, repainting with UV-resistant outdoor paint could provide better protection against the sun’s rays, helping to prevent fading or damage from prolonged sun exposure.
The decision comes down to your aesthetic preferences and the amount of maintenance you’re willing to undertake. Stains typically require less upkeep than paint in moisture-heavy areas, while paint may offer more color flexibility and protection in sunny environments.
Sealing and Protecting Your Deck After Paint Removal
Regardless of whether you stain, repaint, or leave the deck natural, applying a protective sealant is a critical step to ensuring the long-term durability of your deck. Deck sealants protect the wood from water damage, mildew, UV rays, and even insects, all of which can degrade the wood over time.
- For stained or natural decks, a clear wood sealant helps preserve the wood’s natural color while protecting it from moisture and sun damage. Look for products labeled as water-repellent and UV-resistant to get the best results. In New Zealand’s coastal areas, a sealant that offers extra protection against saltwater damage may be worth considering.
- For painted decks, using a high-quality outdoor paint with built-in UV and moisture protection can reduce the need for additional sealing. However, it’s still wise to inspect the deck regularly and touch up any areas where the paint may have chipped or worn away to prevent moisture from seeping into the wood.
After removing the paint from your deck, the key to long-lasting results is choosing the right finish and protecting it properly. Staining, repainting, or leaving the deck natural are all viable options, but your decision should take into account the deck’s exposure to New Zealand’s varied climate. Always follow up with a protective sealant or high-quality paint to safeguard your deck from the elements. Regular maintenance, including cleaning and reapplication of finishes as needed, will ensure your deck remains a beautiful and functional space for years to come.
Common Mistakes To Avoid When Removing Paint From A Deck
When tackling the task of removing paint from a deck, many DIYers make a few common mistakes that can end up damaging the deck or making the process harder than it needs to be. Knowing these pitfalls ahead of time will not only save you time and frustration but will also help you achieve a smoother, more professional-looking result. Here’s a breakdown of the most frequent mistakes and how to avoid them.
1. Using Too Much Pressure When Power Washing
One of the biggest mistakes people make is using excessive pressure when cleaning the deck with a power washer. While it may seem tempting to crank up the pressure to speed up the process, this can do more harm than good. High pressure can gouge or splinter the wood, especially if it’s softwood like pine or cedar. Even hardwoods can suffer from uneven surfaces if you’re not careful.
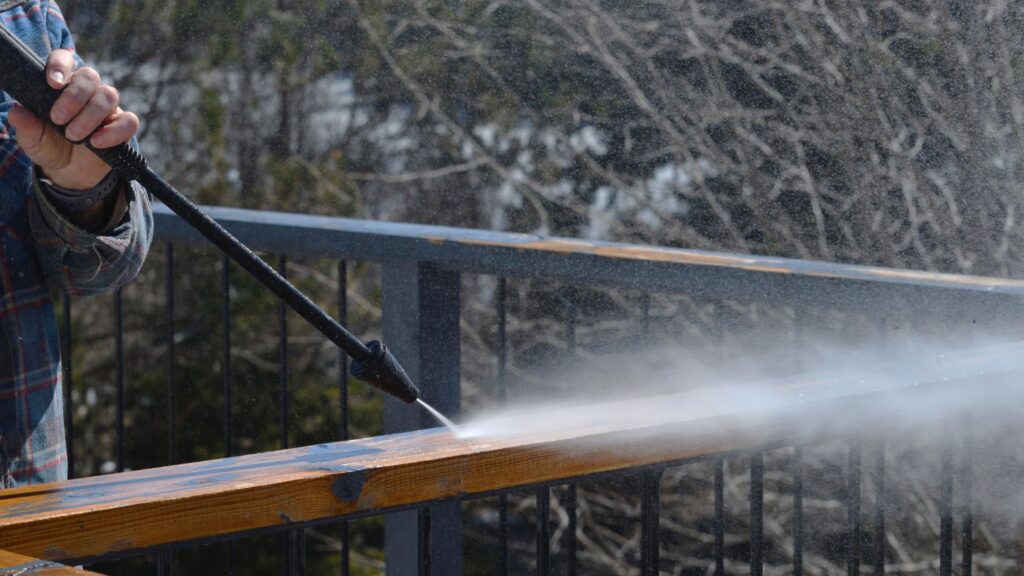
How to Avoid This Mistake
- Keep the pressure setting between 500 to 600 PSI for softer woods and 1,200 to 1,500 PSI for harder woods. This range is usually safe enough to remove paint without damaging the wood underneath.
- Hold the nozzle at least 8 to 12 inches away from the deck surface and move it in smooth, consistent strokes. Don’t linger in one spot for too long.
- Test the power washer on a small, inconspicuous area of the deck first to ensure you’re using the right pressure.
2. Choosing the Wrong Type of Paint Stripper
Another common error is selecting the wrong type of paint stripper for your deck. Not all paint removers are created equal, and using the wrong one can lead to a frustrating experience. Some paint strippers are too harsh for outdoor wooden surfaces, potentially damaging the wood fibers, while others may be ineffective, especially if you’re dealing with multiple layers of paint or weather-resistant coatings.
How to Avoid This Mistake
- Look for a paint stripper specifically formulated for exterior wood surfaces. These products are often labeled as “wood-safe” or “deck-safe” and are less likely to harm the natural grain of the wood.
- Consider the type of paint or stain you’re removing. For example, if the deck has oil-based paint, choose a paint stripper that targets oil-based products.
- If environmental impact is a concern, opt for an eco-friendly paint remover. These products are less harmful to your garden and surrounding areas while still effectively removing paint.
- Always follow the manufacturer’s instructions regarding application time and safety precautions to get the best results.
3. Rushing the Sanding Process
Many DIYers get impatient when it comes to sanding, especially after spending time scraping and washing the deck. However, rushing through this step can lead to an uneven surface that may not properly absorb new paint, stain, or sealant. Skipping spots or using the wrong grit of sandpaper can leave the deck looking rough and uneven.
How to Avoid This Mistake
- Take your time with sanding, ensuring the entire surface is smooth and free from any residual paint or rough patches.
- Use the correct grit of sandpaper—start with a coarse grit (around 60-80) to remove tough paint patches, then move to a finer grit (100-120) to smooth the surface before refinishing.
- If you’re working with a large deck, consider renting a power sander to ensure consistent results across the entire surface. This will not only save time but also give a more even finish.
- Sand in the direction of the wood grain to avoid creating scratches or uneven surfaces that can be difficult to correct later.
Final Tips for Success
By avoiding these common mistakes, you’ll ensure a smoother, safer paint removal process that protects the integrity of your deck. Take your time, use the right tools and products, and always prioritize the health of the wood over speed. This will leave you with a deck that looks great and is ready for a fresh coat of paint or stain.
Eco-Friendly Options For Paint Removal
When removing paint from your deck, it’s essential to consider the environmental impact, especially in New Zealand, where the natural landscape and unique ecosystems play such an important role in everyday life. Using eco-friendly paint removers not only helps protect your immediate surroundings but also ensures you’re contributing to a cleaner, greener environment. In this section, we’ll explore safe, effective paint removal options that align with New Zealand’s environmental consciousness and offer guidance on properly disposing of paint and chemical waste according to local regulations.
Choosing Environmentally-Friendly Paint Removers
In New Zealand, there are several eco-friendly paint removers available that are designed to minimize environmental harm. These products are often biodegradable, non-toxic, and free from harsh chemicals like methylene chloride, which can be harmful to both your health and the environment.
1. Citrus-Based Paint Removers: One popular eco-friendly option is citrus-based paint removers. These products, such as Citristrip, are made from natural citrus oils that effectively break down paint without releasing harmful fumes. They are biodegradable and safe to use around plants, pets, and humans, making them an excellent choice for decks located near native flora or sensitive water systems like rivers and coastal areas.
2. Soy-Based Paint Removers: Another green option is soy-based paint removers. These products use natural soybeans to soften and lift paint from wood surfaces. They are non-toxic, low in VOCs (volatile organic compounds), and work well on multiple layers of paint. Soy-based paint removers are ideal for decks in residential areas where you want to minimize chemical exposure to surrounding gardens or lawns.
3. Water-Based Gel Paint Removers: Water-based gels are also worth considering. They are formulated to reduce environmental impact, containing fewer hazardous chemicals while remaining effective for stripping paint. These gels cling to vertical surfaces and are less likely to drip, making them an excellent choice for decks with complex designs or railings. They’re especially useful in coastal regions, where protecting nearby marine life is crucial.
When selecting an eco-friendly paint remover, always look for certifications or labels indicating the product is biodegradable or environmentally safe. Many of these products are available in New Zealand at local hardware stores like Mitre 10 or Bunnings, as well as online retailers.
Safe Disposal of Paint and Chemical Waste in NZ
Once you’ve completed your paint removal project, proper disposal of the leftover paint and any chemical waste is crucial to avoid environmental contamination. In New Zealand, there are specific regulations governing the disposal of hazardous waste, including old paint and paint strippers, to protect the land, waterways, and wildlife.
1. Paint Disposal: Never pour leftover paint or paint stripper down drains or into the garden. These substances can leach into the soil and water systems, potentially harming aquatic life or native vegetation. Instead, allow leftover paint remover to dry completely in its container. Once solidified, it can often be safely disposed of in your regular household waste, though it’s always best to check with your local council.
2. Drop-Off Locations for Hazardous Waste: Many local councils in New Zealand have drop-off points for hazardous materials, including paint, solvents, and paint strippers. Contact your council for information on where to take these items. In larger cities like Auckland, Wellington, and Christchurch, there are designated recycling or hazardous waste facilities where you can safely dispose of chemical waste. This ensures that harmful substances are handled appropriately and don’t end up in landfills, where they can cause long-term damage to the environment.
3. Recycling Leftover Paint: If you have leftover paint that’s still usable, consider donating it to community projects, schools, or art initiatives. Some local organizations accept paint donations and repurpose them for public use, reducing waste and giving your leftover materials a second life.
4. Cleaning Up After Removal: When cleaning your brushes, scrapers, or other tools, use minimal water and avoid washing paint residue into storm drains. Instead, wipe off excess paint with a cloth or newspaper and allow it to dry before disposing of it. For tools that need washing, use a bucket and dispose of the water according to local hazardous waste guidelines.
By choosing eco-friendly paint removers and responsibly disposing of any leftover materials, you help protect New Zealand’s unique environment. Whether you’re near the coast, in the bush, or surrounded by local wildlife, being mindful of the products you use and how you dispose of waste ensures that your deck restoration project has minimal environmental impact.

When To Call A Professional
While many homeowners are perfectly capable of removing paint from their decks, there are certain situations where calling in a professional may be the wisest choice. Not every project will go as smoothly as expected, and sometimes the challenges that arise can be beyond what a typical DIYer is equipped to handle. Knowing when it’s best to bring in expert help can save you time, effort, and possibly money in the long run.
One key reason to consider hiring a professional is if you have a large deck. Removing paint from a small deck can be a manageable weekend project, but larger decks require significantly more time, effort, and tools to complete. With a bigger surface area, the workload increases substantially, from scraping and sanding to applying paint removers and pressure washing. Professionals have the equipment and manpower to handle large-scale jobs efficiently, ensuring a smooth finish without overburdening yourself. Additionally, they can complete the task in a fraction of the time it would take a solo DIY effort.
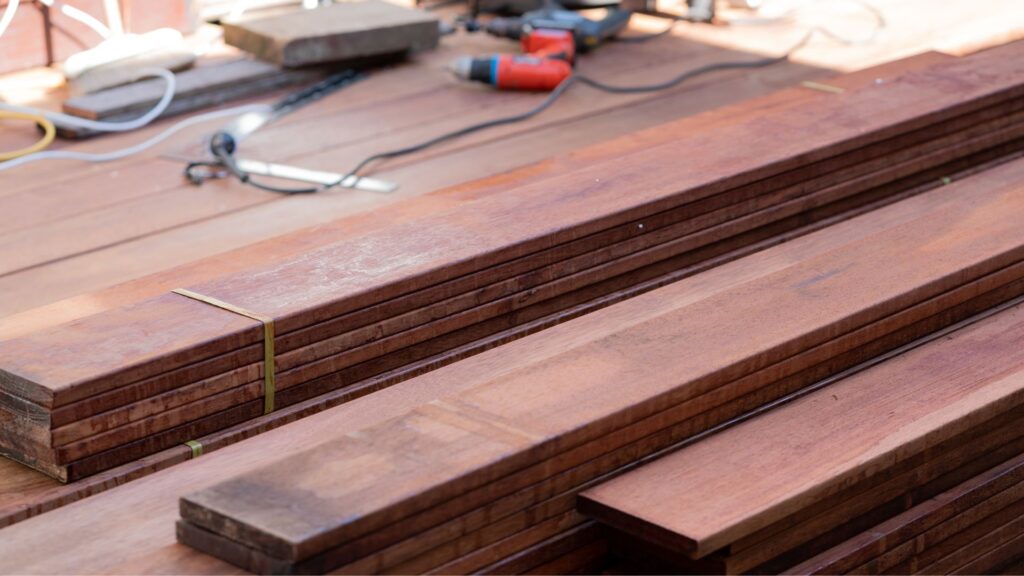
Another scenario where professional help might be necessary is if the paint on your deck is extremely stubborn or layered. Older decks, especially those that have been repainted multiple times, often have several layers of paint that can be difficult to remove. A regular scraper or even paint strippers designed for consumer use might not be enough to fully remove such layers. Professionals, on the other hand, have access to more powerful industrial-grade tools and chemical strippers that can break through thick or resistant paint. They can also ensure that the wood underneath is not damaged during the removal process, preserving the integrity of your deck.Environmental concerns are another important reason to call in a professional. If your deck is located near a sensitive ecosystem, such as a garden, water source, or native bush, using paint removers or other chemicals can pose a serious risk to plants and wildlife. Professionals are experienced in handling these situations and will use eco-friendly products that minimize environmental impact. They also know how to properly contain and dispose of chemical waste, ensuring that nothing harmful seeps into nearby soil or water. If you’re worried about accidentally causing damage to the environment while working on your deck, it’s best to let an expert take over.
Safety concerns should also be a top priority when deciding whether to tackle a deck paint removal project yourself. Using tools like power sanders, pressure washers, or even handling harsh chemicals can pose significant risks if you’re not familiar with them. Improper handling of these tools could lead to injuries, such as cuts, burns, or eye damage from chemical splashes. If you’re not confident in your ability to safely operate these tools or are dealing with physical limitations that might make the work more dangerous, it’s worth hiring a professional who is trained to handle these tasks safely. They will have the necessary safety gear and experience to manage the risks involved in paint removal.
Additionally, professionals can offer peace of mind by assessing the overall condition of your deck. Sometimes, what might seem like a simple paint removal job could reveal deeper issues like rotting wood, structural damage, or moisture problems that you may not have noticed. A professional contractor can identify and address these problems before they get worse, saving you from potentially expensive repairs down the road.
While DIY paint removal from a deck is possible for many homeowners, there are clear instances when it makes sense to hire a professional. If you’re dealing with a large deck, persistent paint, environmental risks, safety concerns, or potential structural damage, an expert can help you complete the job efficiently and safely. By recognizing when a project might be too challenging to tackle on your own, you’ll ensure a better result, protect your investment, and avoid unnecessary stress.
FAQs: About How To Remove Paint From Deck NZ
Conclusion
In conclusion, removing paint from a deck is a straightforward process when broken down into manageable steps. First, prepare the area by clearing the deck and protecting nearby surfaces. Then, scrape off loose paint, apply a paint stripper, and carefully wash off the residue using a pressure washer or hose. Once the surface is clean, sand the deck to smooth out any rough spots and prepare it for a new finish. Throughout the process, remember to take your time and prioritize safety by wearing the appropriate protective gear. After completing the job, take a moment to appreciate your deck’s refreshed appearance and enjoy the improved aesthetic of your outdoor space. To keep your deck looking great for years to come, be sure to maintain it regularly by cleaning, sealing, or repainting as necessary, ensuring it withstands New Zealand’s varying weather conditions and remains a beautiful part of your home.
Find A Professional Decking Company Near You!
- Balcony Construction Christchurch
- Deck Builders Alexandra
- Deck Builders Alexandra, Clyde & Cromwell
- Deck Builders Auckland
- Deck Builders Central Otago
- Deck Builders Christchurch
- Deck Builders Clyde
- Deck Builders Cromwell
- Deck Builders Hamilton
- Deck Builders Hawkes Bay
- Deck Builders Invercargill
- Deck Builders Kapiti Coast
- Deck Builders Kerikeri
- Deck Builders Lower Hutt
- Deck Builders Nelson
- Deck Builders New Plymouth
- Deck Builders Paihia
- Deck Builders Palmerston North
- Deck Builders Porirua
- Deck Builders Queenstown
- Deck Builders Taupo
- Deck Builders Tauranga
- Deck Builders Upper Hutt
- Deck Builders Wanaka
- Deck Builders Warkworth
- Deck Builders Wellington
- Deck Builders West Auckland
- Deck Staining Palmerston North
About the Author:
Mike Veail is a recognized digital marketing expert with over 6 years of experience in helping tradespeople and small businesses thrive online. A former quantity surveyor, Mike combines deep industry knowledge with hands-on expertise in SEO and Google Ads. His marketing strategies are tailored to the specific needs of the trades sector, helping businesses increase visibility and generate more leads through proven, ethical methods.
Mike has successfully partnered with numerous companies, establishing a track record of delivering measurable results. His work has been featured across various platforms that showcase his expertise in lead generation and online marketing for the trades sector.
Learn more about Mike's experience and services at https://theleadguy.online or follow him on social media: